
Hawaiian Roll Breakfast Sliders are, without exaggeration, an absolute game-changer for anyone looking to transform their morning meal from routine to remarkable. I’ve found that these delightful, bite-sized sandwiches offer the perfect solution for everything from leisurely weekend brunches to feeding a hungry crowd with minimal fuss. Imagine waking up to the aroma of sweet, golden-brown rolls baked to perfection with savory fillings – it’s an irresistible invitation to start the day right!
The magic truly begins with the iconic King’s Hawaiian rolls, whose subtly sweet and fluffy texture provides an unparalleled foundation for this dish. Originating from a bakery in Hilo, Hawaii, these rolls have captivated taste buds for decades, and their unique profile elevates a simple breakfast concept into something truly special. I particularly love how this sweetness beautifully complements savory ingredients like eggs, cheese, and a hint of smoky ham or bacon, creating a harmonious blend of flavors that appeals to everyone.
What makes people consistently fall in love with these sliders isn’t just their incredible taste and the comforting texture of the warm, melty cheese; it’s also their sheer convenience. They are incredibly easy to assemble, bake, and serve, making them ideal for busy mornings, holiday gatherings, or even a hearty snack. Trust me, once you experience the ease and deliciousness of these Hawaiian Roll Breakfast Sliders, you’ll understand why they quickly become a cherished family favorite.

Ingredients:
- For the Hawaiian Roll Breakfast Sliders:
- 1 (12-count) package King’s Hawaiian Sweet Rolls
- 12 large eggs, whisked
- 1/2 cup milk (whole or 2%)
- 1/4 teaspoon salt
- 1/8 teaspoon black pepper
- 1 pound breakfast sausage (pork, turkey, or plant-based), cooked and crumbled, or 12 slices cooked bacon
- 1 1/2 cups shredded sharp cheddar cheese, or your favorite cheese blend
- 1/4 cup chopped green onions (optional, for garnish and flavor)
- For the Savory Butter Topping:
- 1/2 cup (1 stick) unsalted butter, melted
- 1 tablespoon Dijon mustard
- 1 teaspoon Worcestershire sauce
- 1 teaspoon onion powder
- 1/2 teaspoon garlic powder
- 1/4 teaspoon dried parsley flakes
- Pinch of red pepper flakes (optional, for a little kick)
Preparing the Breakfast Components
- Preheat Your Oven and Prepare Your Baking Dish:
Before we dive into the fun stuff, let’s get our oven ready. I always set mine to 350°F (175°C). Then, grab a 9×13 inch baking dish. I like to lightly grease it with a little non-stick cooking spray or a pat of butter, just to ensure our delicious Hawaiian Roll Breakfast Sliders don’t stick. This small step makes for a much easier cleanup later on, trust me! It also helps ensure the bottom of the rolls gets a lovely, light crisp without adhering to the pan. A ceramic or glass baking dish works wonderfully here, as it retains heat evenly. - Cook the Breakfast Meat:
If you’re using breakfast sausage, go ahead and crumble it into a large skillet over medium-high heat. Cook it thoroughly, breaking it up with a spoon as it browns, until it’s no longer pink and is beautifully cooked through. Once cooked, drain off any excess grease. This is crucial for preventing soggy sliders, as too much oil can seep into the bread. I typically use a slotted spoon to transfer the sausage to a paper towel-lined plate to absorb any remaining fat. If you’re opting for bacon, cook your slices until they’re crispy in the same skillet or on a baking sheet. Once cooled slightly, either crumble them into smaller pieces or chop them. I often choose a lean turkey sausage to keep things a bit lighter, but a classic pork sausage provides that rich, traditional flavor that many people adore. For vegetarian options, plant-based sausage crumbles work perfectly here too. - Scramble the Eggs to Perfection:
In a large bowl, whisk together the 12 large eggs with 1/2 cup milk, 1/4 teaspoon salt, and 1/8 teaspoon black pepper. The milk isn’t just for volume; it helps make the eggs extra fluffy and tender by adding moisture and diluting the protein, preventing them from becoming rubbery. Heat a non-stick skillet over medium-low heat. Pour in the egg mixture and cook, stirring gently with a spatula, until the eggs are set but still soft and moist. You want them just cooked through, not overdone and rubbery, as they’ll get a second round of heat in the oven. Remove them from the heat immediately once they reach this perfect consistency. I find that cooking them slowly over lower heat helps achieve this ideal texture, creating small, delicate curds that melt in your mouth. Overcooked eggs can quickly dry out in the oven, so aiming for slightly underdone is key.
Assembling the Hawaiian Roll Breakfast Sliders
- Slice the Hawaiian Rolls:
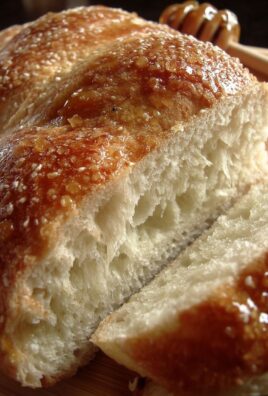
This is where the magic really begins to take shape for our Hawaiian Roll Breakfast Sliders. Carefully slice the entire package of King’s Hawaiian Sweet Rolls horizontally, keeping them connected. You’ll want to use a long, serrated knife for this to get a clean cut through all the rolls at once. The goal is to separate the tops from the bottoms, creating a large “slab” of bottoms and a large “slab” of tops. Don’t worry if it’s not absolutely perfect; the sweetness and softness of these rolls are incredibly forgiving. The beauty of keeping them connected is how easy it makes assembly and handling. - Layer the Bottom Rolls:
Place the bottom “slab” of rolls into your prepared 9×13 inch baking dish. Make sure they fit snugly, covering the entire bottom surface. These sweet, soft rolls are the foundation of our sliders, and their unique flavor profile is what makes these sliders truly stand out. They hold up beautifully to the fillings without becoming mushy, thanks to their slightly dense yet tender texture. Ensure they are placed cut-side up to fully expose the surface for layering. - Build the Layers – Cheese First:
Now, let’s start layering! Sprinkle about half of your shredded cheddar cheese evenly over the bottom layer of rolls. I always put cheese directly on the rolls first. Why? Because as the sliders bake, this cheese melts and creates a wonderful, gooey barrier that protects the rolls from absorbing too much moisture from the eggs and meat, helping to keep them perfectly soft but not soggy. Plus, who doesn’t love extra cheese directly on the bread? The cheddar provides a sharp, savory contrast to the sweet rolls, creating a complex flavor profile right from the base. - Add the Cooked Eggs:
Gently spoon and spread your perfectly scrambled eggs over the layer of cheese. Try to distribute them as evenly as possible across all the rolls. The soft texture of the eggs complements the other components beautifully. Remember, you want them slightly undercooked initially, as they will continue to set in the oven, ensuring they remain tender and not dry in the finished sliders. Don’t press them down too hard; a light, airy layer is what we’re aiming for. - Distribute the Breakfast Meat:
Next, scatter your cooked and drained breakfast sausage crumbles or bacon pieces over the eggs. Make sure every slider gets a good portion of meat. The savory notes of the sausage or the smoky crunch of bacon provide a fantastic contrast to the sweet rolls and fluffy eggs. This is where you can really customize the flavor profile of your Hawaiian Roll Breakfast Sliders to your liking! Ensure the meat is spread edge-to-edge to guarantee every bite is packed with flavor. - Top with More Cheese:
Finally, sprinkle the remaining half of the shredded cheese over the meat layer. This top layer of cheese will melt into a beautiful, golden-brown crust, holding everything together and adding another delightful layer of flavor and texture. It also helps to encapsulate all the delicious fillings, creating that ultimate gooey factor when you pull the sliders apart. This second layer of cheese acts like a delicious edible glue. - Place the Top Rolls:
Carefully place the top “slab” of Hawaiian rolls back over the layered ingredients, cut-side down. Press down very gently to ensure everything is nestled in nicely and compacted slightly without squashing the rolls. This completes the main assembly of your sliders, creating a neat, ready-to-bake block of breakfast goodness. Take a moment to admire your handiwork – these are already looking amazing!
Preparing the Savory Butter Topping and Baking the Sliders
- Whisk Together the Savory Butter Topping:
In a small bowl, combine the melted unsalted butter, Dijon mustard, Worcestershire sauce, onion powder, garlic powder, dried parsley flakes, and the optional pinch of red pepper flakes. Whisk everything together thoroughly until it’s well combined and emulsified. The Dijon mustard adds a subtle tang and sharp counterpoint to the sweetness of the rolls, the Worcestershire sauce provides a fantastic depth of umami and a savory backbone, and the onion and garlic powders infuse a wonderful aromatic flavor that will permeate the rolls as they bake. The dried parsley flakes add a touch of color and a fresh herb note. This topping is truly what elevates these Hawaiian Roll Breakfast Sliders from good to absolutely incredible, making them utterly irresistible! - Brush the Topping Over the Sliders:
Using a pastry brush, generously brush the butter mixture over the tops of the Hawaiian rolls. Make sure to get an even coating over every single roll, extending slightly down the sides where possible. Don’t be shy here; this butter mixture is key to achieving that golden, slightly crisp, and incredibly flavorful crust on the top of your sliders. The melted butter soaks into the sweet rolls, carrying all those savory spices, creating an irresistible aroma as they bake and ensuring a beautifully shiny, inviting finish. This step is critical for developing that signature slider crust. - Prepare for Baking:
Cover the baking dish tightly with aluminum foil. This initial covering is essential because it traps the steam and moisture within the dish, ensuring that the rolls remain wonderfully soft and pillowy, and that all the cheese melts beautifully without the top browning too quickly. It also allows the flavors to meld together perfectly in a warm, steamy environment, preventing any part of the sliders from drying out. Make sure the foil is crimped securely around the edges of the dish to seal in all that goodness. - Bake the Sliders:
Place the covered baking dish into your preheated 350°F (175°C) oven and bake for 20 minutes. This allows ample time for the rolls to warm through, the cheese to become gloriously gooey, and the internal components to fully heat up. After 20 minutes, carefully remove the foil. Be cautious of the hot steam escaping! The cheese should be wonderfully melted and bubbling by now. Return the uncovered dish to the oven and continue baking for another 5-10 minutes, or until the tops of the rolls are golden brown and slightly crisp. Keep a close eye on them during this last phase to prevent over-browning – ovens can vary! The edges might get a little extra crispy, which I personally love, as it adds another delightful textural dimension to each slider.
Resting and Serving Your Hawaiian Roll Breakfast Sliders
- Allow the Sliders to Rest:
Once baked to golden perfection, remove the baking dish from the oven. I know it’s incredibly tempting to dive right in, as the aroma will be intoxicating, but trust me, a short resting period is vital. Let the Hawaiian Roll Breakfast Sliders sit for about 5 minutes before slicing and serving. This allows the internal temperatures to equalize, the cheese to set slightly, and the flavors to fully meld together, intensifying their deliciousness. It also makes them much easier to slice neatly without the warm, gooey fillings spilling out, ensuring picture-perfect servings. - Slice and Garnish:
After resting, use a sharp knife to cut along the lines of the individual rolls, separating them into 12 perfect breakfast sliders. If you’ve opted for them, sprinkle the chopped green onions over the top for a fresh burst of color and a subtle, bright oniony bite. The green onions not only add a lovely visual appeal, making the dish look even more appetizing, but also provide a fresh counterpoint to the rich, savory flavors of the eggs, cheese, and meat. - Serve Immediately:
These Hawaiian Roll Breakfast Sliders are best enjoyed warm, fresh out of the oven, when the cheese is at its gooey peak and the rolls are perfectly soft with a slight crispness on top. They are incredibly versatile and make a fantastic centerpiece for any breakfast or brunch spread, a delightful addition to a holiday morning, or even a fun, easy weeknight “brinner” (breakfast for dinner). They’re perfect for feeding a crowd with minimal fuss and are always a huge hit, disappearing quickly from the serving platter!
Make-Ahead Tips for Stress-Free Mornings:
One of the best things about these sliders is how easily you can prepare them ahead of time, which is a lifesaver for busy mornings or when hosting guests. You can assemble the entire dish, including layering all the fillings, up to the point of brushing on the butter topping, the night before. Simply cover the baking dish tightly with plastic wrap and refrigerate overnight. In the morning, remove them from the fridge about 30 minutes before baking to allow them to come closer to room temperature – this helps with even baking. Then, brush on the butter topping and bake as directed, adding an extra 5-10 minutes to the initial covered baking time to account for the chilled starting temperature. This makes for an incredibly convenient and delicious breakfast, especially when you have guests or a bustling holiday morning ahead!
Serving Suggestions and Variations:
These Hawaiian Roll Breakfast Sliders are fantastic on their own, but you can elevate them even further and tailor them to your family’s preferences!
- Dipping Sauces: Offer a side of warm maple syrup for a delightful sweet and savory experience – the combination with the Hawaiian rolls is truly magical. Alternatively, provide a dash of your favorite hot sauce or sriracha for those who like a spicy kick. A simple sriracha mayo or even a dollop of classic ketchup can also be a popular choice, especially for younger diners.
- Add Vegetables: Feel free to sauté some finely diced bell peppers (red, yellow, or green for color!), onions, mushrooms, or fresh spinach and gently fold them into the egg mixture for extra nutrition and flavor. Just be sure to cook out any excess moisture from the vegetables before adding them to prevent a soggy slider interior.
- Cheese Variations: Don’t limit yourself to sharp cheddar! Provolone, Monterey Jack, Colby Jack, Swiss, or even a spicy pepper jack would be fantastic and add different flavor dimensions. A smoky gouda could also be a sophisticated choice.
- Different Meats: Instead of sausage or bacon, consider thinly sliced deli ham, leftover shredded chicken, or even thinly sliced smoked turkey for a unique twist. You could even use a combination of meats! Ensure any deli meats are gently warmed before layering.
No matter how you serve them or what delicious variations you try, these Hawaiian Roll Breakfast Sliders are a guaranteed crowd-pleaser and will quickly become a cherished and frequently requested favorite in your household!

Conclusion:
Well, my friends, we’ve reached the grand finale of our culinary journey today, and I truly hope you’re as excited as I am about what we’ve just explored. This isn’t just another recipe; it’s an experience waiting to happen in your kitchen. I’ve personally made these countless times, and every single time, they disappear faster than I can say “more, please!” The magic truly lies in their beautiful simplicity combined with an explosion of flavor. Imagine soft, slightly sweet Hawaiian rolls, perfectly cradling fluffy scrambled eggs, savory breakfast meat, and a generous layer of melted, gooey cheese. It’s a symphony of textures and tastes that hits all the right notes – sweet, salty, savory, and incredibly comforting. Whether you’re looking to impress guests at your next brunch gathering, seeking a fuss-free breakfast for a busy morning, or simply craving something utterly delicious and satisfying, these sliders are your answer. They’re a guaranteed crowd-pleaser, effortless to prepare, and a genuine delight to devour. Seriously, if there’s one recipe you add to your go-to rotation this year, I sincerely believe this should be it. They bring joy to any table and make mornings, or even afternoons, just a little bit brighter. They are the epitome of comfort food that also feels a little bit special.
Now, while these sliders are absolutely phenomenal on their own, a true culinary adventurer knows that even perfection can be complemented or creatively transformed. For serving, I love presenting them alongside a vibrant bowl of fresh fruit – think sliced berries, melon, or grapes – to add a refreshing contrast to the rich sliders. A tall glass of freshly squeezed orange juice or a steaming mug of your favorite coffee or tea makes for an ideal beverage pairing, turning any meal into a special occasion. And if you’re hosting brunch, consider a light green salad with a vinaigrette dressing to balance out the meal and add some freshness. Don’t forget the power of a simple garnish like a sprinkle of fresh parsley or chives to elevate their visual appeal.
But let’s talk variations because this is where the fun really begins! The beauty of these sliders is their incredible adaptability. Don’t hesitate to make them your own. Instead of sausage patties, try crispy bacon, thinly sliced ham, or even smoked turkey for a leaner option. For cheese lovers, experiment with different varieties: a sharp cheddar for a more robust flavor, Monterey Jack for extra meltiness, or even a spicy pepper jack if you like a little kick to wake up your taste buds. Vegetarian? No problem! Replace the meat with sautéed mushrooms, spinach, bell peppers, or even a flavorful scrambled tofu seasoned with turmeric and nutritional yeast for a cheesy, savory alternative. You could also add a touch of finely chopped chives or green onions to the egg mixture for an extra layer of fresh flavor. A drizzle of hot sauce after baking is fantastic for those who crave heat, or a light brushing of a maple-Dijon glaze on top of the rolls before baking can add an irresistible sweet and tangy finish. If you’re preparing for a larger group or want to save time, you can assemble the sliders the night before, cover them tightly, and store them in the refrigerator. Then, simply pop them into the oven the next morning for a stress-free breakfast. This versatility ensures that you can tailor these sliders to any preference or occasion, making them a truly indispensable recipe in your culinary arsenal. Consider adding a slice of tomato or avocado to each slider for an extra burst of freshness and texture.
So, there you have it, my friends. I’ve laid out all the reasons why I believe these sliders are more than just a recipe; they’re a game-changer for your breakfast and brunch repertoire. I wholeheartedly encourage you, with all my passion for good food, to roll up your sleeves, gather your ingredients, and give these a try. Don’t just read about them; experience the sheer delight of pulling apart a warm, golden-brown cluster of these incredible Hawaiian Roll Breakfast Sliders. You won’t regret it, I promise you that. And once you’ve experienced the magic, don’t keep it to yourself! I absolutely adore hearing from you. Please, take a moment to come back and share your creations. Did you try a unique cheese? Did you add a secret ingredient that blew your family away? Did you serve them at a special gathering and receive rave reviews? Snap a photo, tell us about your serving suggestions, or simply drop a line to let me know how much you loved them. Your feedback, your stories, and your personal twists inspire me and our entire community of food lovers. Let’s make our breakfast tables a little more exciting, one delicious slider at a time. Happy cooking, and I can’t wait to hear all about your slider adventures!

Hawaiian Roll Breakfast Sliders with Savory Beef
Transform your morning meal with these delightful Hawaiian Roll Breakfast Sliders. Sweet King’s Hawaiian rolls are baked to golden perfection with a savory filling of scrambled eggs, savory beef breakfast sausage, and melted cheddar cheese, topped with a flavorful garlic-Dijon butter. Perfect for brunches, busy mornings, or feeding a crowd.
Ingredients
-
1 (12-count) package King’s Hawaiian Sweet Rolls
-
12 large eggs
-
1/2 cup milk
-
1/4 tsp salt
-
1/8 tsp black pepper
-
1 lb beef breakfast sausage, cooked & crumbled, or 12 slices cooked bacon
-
1 1/2 cups shredded sharp cheddar cheese
-
1/4 cup chopped green onions (optional)
-
1/2 cup (1 stick) unsalted butter, melted
-
1 tbsp Dijon mustard
-
1 tsp Worcestershire sauce
-
1 tsp onion powder
-
1/2 tsp garlic powder
-
1/4 tsp dried parsley flakes
-
Pinch red pepper flakes (optional)
Instructions
-
Step 1
Preheat oven to 350°F (175°C). Lightly grease a 9×13 inch baking dish. -
Step 2
Cook beef breakfast sausage in a skillet until browned; drain excess grease. If using bacon, cook until crispy and crumble. -
Step 3
Whisk 12 eggs, 1/2 cup milk, 1/4 tsp salt, and 1/8 tsp pepper. Cook in a non-stick skillet over medium-low heat until set but still soft. -
Step 4
Carefully slice the entire package of Hawaiian rolls horizontally, separating tops from bottoms, keeping them connected. -
Step 5
Place the bottom slab of rolls in the prepared baking dish. Layer with 3/4 cup shredded cheddar cheese, then scrambled eggs, then cooked beef breakfast sausage or bacon. -
Step 6
Sprinkle the remaining 3/4 cup shredded cheddar cheese over the meat layer. -
Step 7
Carefully place the top slab of rolls over the layered ingredients; press gently. -
Step 8
In a small bowl, whisk together melted butter, Dijon mustard, Worcestershire sauce, onion powder, garlic powder, dried parsley flakes, and optional red pepper flakes. Generously brush this topping over the rolls. -
Step 9
Cover the dish tightly with aluminum foil and bake for 20 minutes at 350°F (175°C). Remove foil and bake uncovered for another 5-10 minutes, or until tops are golden brown. -
Step 10
Let sliders rest for 5 minutes. Slice along roll lines to separate. Garnish with green onions, if using, and serve warm.
Important Information
Nutrition Facts (Per Serving)
It is important to consider this information as approximate and not to use it as definitive health advice.
Allergy Information
Please check ingredients for potential allergens and consult a health professional if in doubt.


Leave a Comment