
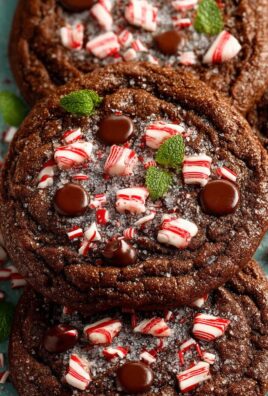
Valentines Day Kiss Cookies: the perfect sweet treat to share with your loved ones! Imagine biting into a soft, melt-in-your-mouth sugar cookie, topped with a decadent chocolate kiss. Is there a more delightful way to celebrate love? These adorable cookies are not only delicious but also incredibly fun to make, making them a fantastic activity for couples, families, or even a solo baking session filled with self-love.
While the exact origins of the Hershey’s Kiss are shrouded in a bit of mystery, its iconic shape and foil wrapping have been a symbol of sweetness and affection since 1907. Pairing it with a simple sugar cookie base elevates the humble cookie to a festive and charming dessert, especially popular around Valentine’s Day. The combination of the buttery cookie and the rich chocolate creates a symphony of flavors that’s simply irresistible.
People adore Valentines Day Kiss Cookies for their simplicity, both in ingredients and preparation. They are a relatively quick and easy bake, perfect for those who want to create something special without spending hours in the kitchen. The soft, slightly chewy texture of the cookie, combined with the smooth, melting chocolate, is a textural delight. Plus, their adorable appearance makes them a guaranteed crowd-pleaser, perfect for gifting, parties, or simply enjoying with a cup of coffee or tea. So, let’s get baking and spread some love with these delightful treats!
Ingredients:
- For the Peanut Butter Blossoms:
- 1 ½ cups all-purpose flour
- 1 teaspoon baking soda
- ½ teaspoon salt
- ½ cup (1 stick) unsalted butter, softened
- ½ cup creamy peanut butter
- ½ cup granulated sugar
- ½ cup packed light brown sugar
- 1 large egg
- 2 tablespoons milk
- 1 teaspoon vanilla extract
- Extra granulated sugar, for rolling
- Approximately 48 Hershey’s Kisses, unwrapped
- For the Chocolate Ganache (Optional):
- 4 ounces semi-sweet chocolate, finely chopped
- ¼ cup heavy cream
- For Decoration (Optional):
- Sprinkles (Valentine’s Day themed, if desired)
- Edible glitter
Preparing the Peanut Butter Cookie Dough
- Combine Dry Ingredients: In a medium bowl, whisk together the flour, baking soda, and salt. Make sure to whisk thoroughly to evenly distribute the baking soda and salt. This ensures the cookies rise properly and have a balanced flavor. Set this bowl aside for later.
- Cream Butter and Sugars: In a large bowl (or the bowl of a stand mixer), cream together the softened butter, peanut butter, granulated sugar, and brown sugar until light and fluffy. This usually takes about 3-5 minutes. Scrape down the sides of the bowl occasionally to ensure everything is evenly incorporated. The mixture should be pale and airy. This step is crucial for creating a tender cookie.
- Add Egg, Milk, and Vanilla: Beat in the egg until well combined. Then, add the milk and vanilla extract and mix until everything is smooth. Don’t overmix at this stage, just ensure the wet ingredients are fully incorporated.
- Gradually Add Dry Ingredients: Gradually add the dry ingredients to the wet ingredients, mixing on low speed until just combined. Be careful not to overmix the dough, as this can lead to tough cookies. Mix until the flour is just incorporated; a few streaks of flour are okay.
- Chill the Dough: Cover the bowl with plastic wrap and chill the dough in the refrigerator for at least 30 minutes. Chilling the dough prevents the cookies from spreading too much during baking and also allows the flavors to meld together. You can chill the dough for up to 2 hours if needed.
Baking the Peanut Butter Blossoms
- Preheat Oven and Prepare Baking Sheets: Preheat your oven to 375°F (190°C). Line baking sheets with parchment paper or silicone baking mats. This will prevent the cookies from sticking and make cleanup easier.
- Shape the Cookies: Remove the chilled dough from the refrigerator. Roll the dough into 1-inch balls. Roll each ball in the extra granulated sugar, coating it completely. The sugar coating adds a nice sparkle and a touch of sweetness to the cookies.
- Arrange on Baking Sheets: Place the sugared dough balls onto the prepared baking sheets, spacing them about 2 inches apart. This allows for proper air circulation and prevents the cookies from baking together.
- Bake the Cookies: Bake for 8-10 minutes, or until the edges are lightly golden brown. The centers of the cookies will still look slightly soft, but they will firm up as they cool. Keep a close eye on them, as baking times can vary depending on your oven.
- Add the Hershey’s Kisses: Remove the baking sheets from the oven. Immediately press a Hershey’s Kiss into the center of each cookie. Press firmly but gently, so the cookie doesn’t crack. The heat from the cookies will slightly melt the chocolate, helping it adhere.
- Cool the Cookies: Let the cookies cool on the baking sheets for a few minutes before transferring them to a wire rack to cool completely. This prevents them from breaking while they are still warm and soft.
Making the Chocolate Ganache (Optional)
- Heat the Cream: Place the heavy cream in a small saucepan and heat over medium heat until it just begins to simmer. Do not boil the cream.
- Pour Over Chocolate: Place the finely chopped chocolate in a heatproof bowl. Pour the hot cream over the chocolate and let it sit for 1 minute to soften the chocolate.
- Stir Until Smooth: Gently stir the chocolate and cream together until the chocolate is completely melted and the ganache is smooth and glossy. If there are any stubborn pieces of chocolate, you can microwave the mixture in 10-second intervals, stirring in between, until smooth.
Decorating the Kiss Cookies (Optional)
- Dip or Drizzle: Once the cookies are completely cool, you can dip the bottoms of the cookies into the chocolate ganache or drizzle the ganache over the tops of the cookies.
- Add Sprinkles or Glitter: Immediately sprinkle with Valentine’s Day themed sprinkles or edible glitter while the ganache is still wet. This will ensure the decorations adhere properly.
- Let Set: Allow the ganache to set completely before serving or storing the cookies. This usually takes about 30 minutes at room temperature or 15 minutes in the refrigerator.
Tips for Perfect Peanut Butter Blossoms
- Don’t Overbake: Overbaked cookies will be dry and crumbly. Bake until the edges are lightly golden brown and the centers are still slightly soft.
- Use Softened Butter: Softened butter is essential for creating a light and fluffy cookie dough. Make sure the butter is at room temperature but not melted.
- Chill the Dough: Chilling the dough prevents the cookies from spreading too much during baking.
- Unwrap Kisses Ahead of Time: Save yourself time and frustration by unwrapping all the Hershey’s Kisses before you start baking.
- Press Kisses Immediately: Press the Hershey’s Kisses into the cookies as soon as they come out of the oven. The heat will help the chocolate adhere to the cookie.
- Variations: Experiment with different types of Hershey’s Kisses, such as milk chocolate, dark chocolate, or caramel-filled. You can also add chopped nuts or chocolate chips to the cookie dough.
- Storage: Store the cookies in an airtight container at room temperature for up to 3 days.
- Freezing: You can freeze the baked cookies for up to 2 months. Thaw them at room temperature before serving. You can also freeze the unbaked cookie dough balls. Place them on a baking sheet and freeze until solid, then transfer them to a freezer bag. Bake from frozen, adding a few extra minutes to the baking time.
Troubleshooting
- Cookies are spreading too much: Make sure you are using the correct amount of flour and that your oven temperature is accurate. Chilling the dough for a longer period of time can also help.
- Cookies are dry: Don’t overbake the cookies. Also, make sure you are using softened butter and not melted butter.
- Hershey’s Kisses are falling off: Make sure you are pressing the Kisses into the cookies immediately after they come out of the oven. The heat will help them adhere.
Enjoy your delicious Valentine’s Day Kiss Cookies!

Conclusion:
This Valentine’s Day, skip the generic chocolates and bake something truly special! These Valentine’s Day Kiss Cookies are more than just a sweet treat; they’re a delightful expression of love and affection, perfect for sharing with your sweetheart, family, or friends. The combination of the soft, buttery cookie base and the rich, melty chocolate kiss creates a symphony of flavors and textures that will leave everyone wanting more. Trust me, the smiles you’ll get when you present these beauties will be worth every minute spent in the kitchen.
But what makes these cookies a must-try? It’s the simplicity combined with the impact. The recipe is straightforward and easy to follow, even for novice bakers. You don’t need any fancy equipment or hard-to-find ingredients. Plus, the visual appeal is undeniable. The vibrant colors and the iconic Hershey’s Kiss nestled in the center make them instantly recognizable and irresistibly tempting. They are the perfect edible embodiment of Valentine’s Day!
Beyond their inherent deliciousness, these cookies offer endless possibilities for customization. Feel free to experiment with different flavors and toppings to create your own signature version. For a nutty twist, add chopped pecans or walnuts to the cookie dough. If you’re a fan of citrus, a touch of lemon or orange zest will brighten the flavor profile. You could even use different flavors of Hershey’s Kisses, like caramel-filled or dark chocolate, to add another layer of complexity.
Serving Suggestions and Variations:
* Classic Presentation: Arrange the cookies on a pretty platter and serve them with a glass of cold milk or a cup of hot cocoa.
* Gift Giving: Package them in cellophane bags tied with ribbon for a thoughtful and homemade Valentine’s Day gift.
* Cookie Sandwiches: Use two cookies to sandwich a layer of frosting or Nutella for an extra indulgent treat.
* Gluten-Free Option: Substitute the all-purpose flour with a gluten-free blend for those with dietary restrictions.
* Vegan Variation: Replace the butter with a vegan butter alternative and the egg with a flax egg for a plant-based version.
I truly believe that these Valentine’s Day Kiss Cookies will become a cherished tradition in your home. They’re not just cookies; they’re memories in the making. The aroma of freshly baked cookies filling the air, the laughter shared while decorating them, and the joy of seeing loved ones savoring each bite these are the moments that make life truly special.
So, what are you waiting for? Preheat your oven, gather your ingredients, and get ready to create some magic in the kitchen. I’m confident that you’ll love this recipe as much as I do. And more importantly, I’m excited to hear about your experience! Please, don’t hesitate to share your photos, tips, and variations in the comments below. Let’s spread the love and inspire others to bake these delightful Valentine’s Day Kiss Cookies this year. Happy baking, and Happy Valentine’s Day! I can’t wait to see your creations!
Valentines Day Kiss Cookies: A Sweet Treat for Your Loved Ones
Classic peanut butter blossoms with a Hershey's Kiss, perfect for Valentine's Day or any occasion! Optional chocolate ganache and sprinkles add a touch of elegance.
Ingredients
- 1 ½ cups all-purpose flour
- 1 teaspoon baking soda
- ½ teaspoon salt
- ½ cup (1 stick) unsalted butter, softened
- ½ cup creamy peanut butter
- ½ cup granulated sugar
- ½ cup packed light brown sugar
- 1 large egg
- 2 tablespoons milk
- 1 teaspoon vanilla extract
- Extra granulated sugar, for rolling
- Approximately 48 Hershey’s Kisses, unwrapped
- 4 ounces semi-sweet chocolate, finely chopped
- ¼ cup heavy cream
- Sprinkles (Valentine’s Day themed, if desired)
- Edible glitter
Instructions
- In a medium bowl, whisk together the flour, baking soda, and salt. Set aside.
- In a large bowl (or the bowl of a stand mixer), cream together the softened butter, peanut butter, granulated sugar, and brown sugar until light and fluffy (3-5 minutes). Scrape down the sides of the bowl occasionally.
- Beat in the egg until well combined. Then, add the milk and vanilla extract and mix until smooth.
- Gradually add the dry ingredients to the wet ingredients, mixing on low speed until just combined. Be careful not to overmix the dough.
- Cover the bowl with plastic wrap and chill the dough in the refrigerator for at least 30 minutes (up to 2 hours).
- Preheat your oven to 375°F (190°C). Line baking sheets with parchment paper or silicone baking mats.
- Remove the chilled dough from the refrigerator. Roll the dough into 1-inch balls. Roll each ball in the extra granulated sugar, coating it completely.
- Place the sugared dough balls onto the prepared baking sheets, spacing them about 2 inches apart.
- Bake for 8-10 minutes, or until the edges are lightly golden brown. The centers of the cookies will still look slightly soft.
- Remove the baking sheets from the oven. Immediately press a Hershey’s Kiss into the center of each cookie.
- Let the cookies cool on the baking sheets for a few minutes before transferring them to a wire rack to cool completely.
- Place the heavy cream in a small saucepan and heat over medium heat until it just begins to simmer. Do not boil the cream.
- Place the finely chopped chocolate in a heatproof bowl. Pour the hot cream over the chocolate and let it sit for 1 minute to soften the chocolate.
- Gently stir the chocolate and cream together until the chocolate is completely melted and the ganache is smooth and glossy. If there are any stubborn pieces of chocolate, you can microwave the mixture in 10-second intervals, stirring in between, until smooth.
- Once the cookies are completely cool, you can dip the bottoms of the cookies into the chocolate ganache or drizzle the ganache over the tops of the cookies.
- Immediately sprinkle with Valentine’s Day themed sprinkles or edible glitter while the ganache is still wet.
- Allow the ganache to set completely before serving or storing the cookies. This usually takes about 30 minutes at room temperature or 15 minutes in the refrigerator.
Notes
- Don’t Overbake: Overbaked cookies will be dry and crumbly. Bake until the edges are lightly golden brown and the centers are still slightly soft.
- Use Softened Butter: Softened butter is essential for creating a light and fluffy cookie dough. Make sure the butter is at room temperature but not melted.
- Chill the Dough: Chilling the dough prevents the cookies from spreading too much during baking.
- Unwrap Kisses Ahead of Time: Save yourself time and frustration by unwrapping all the Hershey’s Kisses before you start baking.
- Press Kisses Immediately: Press the Hershey’s Kisses into the cookies as soon as they come out of the oven. The heat will help the chocolate adhere to the cookie.
- Variations: Experiment with different types of Hershey’s Kisses, such as milk chocolate, dark chocolate, or caramel-filled. You can also add chopped nuts or chocolate chips to the cookie dough.
- Storage: Store the cookies in an airtight container at room temperature for up to 3 days.
- Freezing: You can freeze the baked cookies for up to 2 months. Thaw them at room temperature before serving. You can also freeze the unbaked cookie dough balls. Place them on a baking sheet and freeze until solid, then transfer them to a freezer bag. Bake from frozen, adding a few extra minutes to the baking time.

Leave a Comment