
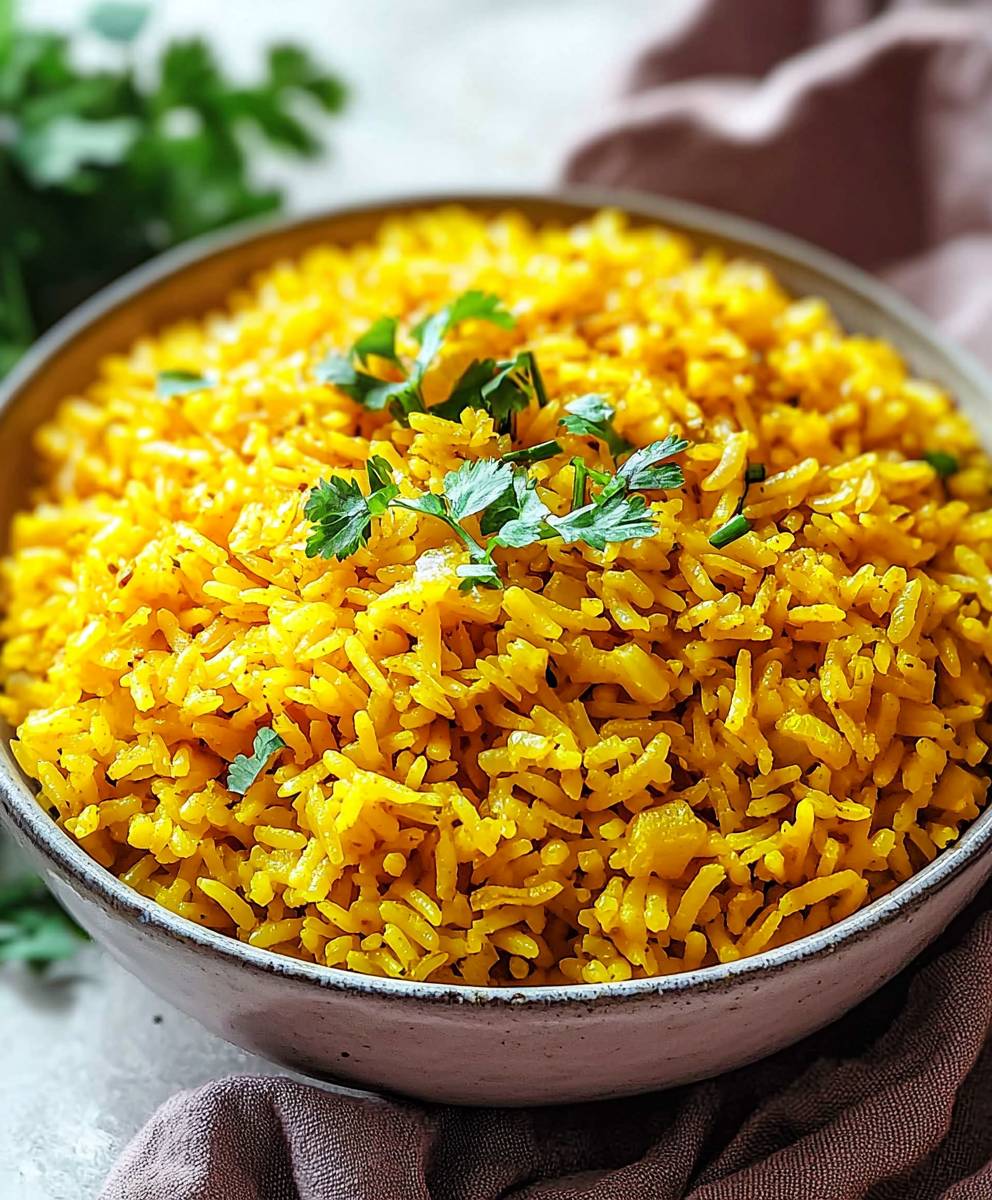
Turmeric rice, a vibrant and fragrant dish, is more than just a simple side; it’s a culinary experience that will brighten your plate and tantalize your taste buds. Have you ever wondered how to transform ordinary rice into a golden, flavorful masterpiece? I’m here to show you how! This recipe is so easy, even a beginner cook can master it.
The history of turmeric rice stretches back centuries, deeply rooted in the culinary traditions of South and Southeast Asia. Turmeric, revered for its medicinal properties and vibrant color, has been used in cooking and traditional medicine for thousands of years. In many cultures, this dish is associated with celebrations and auspicious occasions, symbolizing prosperity and good health. It’s a dish that carries a rich heritage in every grain.
What makes turmeric rice so universally loved? It’s a delightful combination of subtle earthy flavors, a hint of warmth from the turmeric, and the comforting texture of perfectly cooked rice. It’s incredibly versatile, pairing beautifully with grilled meats, roasted vegetables, or even as a base for flavorful curries. Plus, it’s a fantastic way to add a boost of antioxidants to your diet! Get ready to elevate your rice game with this simple yet stunning recipe.

Ingredients:
- 2 cups long-grain rice, such as basmati
- 4 cups water
- 1 tablespoon olive oil or coconut oil
- 1 medium yellow onion, finely chopped
- 2 cloves garlic, minced
- 1 inch ginger, peeled and grated
- 1 teaspoon ground turmeric
- ½ teaspoon cumin powder
- ½ teaspoon coriander powder
- ¼ teaspoon red pepper flakes (optional, for a little heat)
- 1 teaspoon salt, or to taste
- ½ teaspoon black pepper, or to taste
- 1 bay leaf
- Juice of ½ lemon or lime
- ¼ cup chopped fresh cilantro or parsley, for garnish
- ¼ cup toasted slivered almonds or cashews, for garnish (optional)
- ¼ cup raisins or dried cranberries, for garnish (optional)
Preparing the Rice:
- Rinse the rice: Place the rice in a fine-mesh sieve and rinse under cold running water until the water runs clear. This removes excess starch and helps prevent the rice from becoming sticky. I usually rinse it for about 2-3 minutes.
- Soak the rice (optional): For even better results, soak the rinsed rice in cold water for 30 minutes. This allows the rice to absorb some water, which helps it cook more evenly and become fluffier. If you’re short on time, you can skip this step, but I highly recommend it if you have the time. Drain the rice thoroughly after soaking.
Sautéing the Aromatics:
- Heat the oil: In a medium-sized pot or Dutch oven, heat the olive oil (or coconut oil) over medium heat. Make sure the pot is large enough to hold all the rice and water comfortably.
- Sauté the onion: Add the finely chopped onion to the pot and sauté until softened and translucent, about 5-7 minutes. Stir occasionally to prevent burning. You want the onion to be nice and fragrant.
- Add garlic and ginger: Add the minced garlic and grated ginger to the pot and sauté for another minute, until fragrant. Be careful not to burn the garlic, as it can become bitter. The aroma at this stage is just wonderful!
- Bloom the spices: Add the ground turmeric, cumin powder, coriander powder, and red pepper flakes (if using) to the pot. Sauté for about 30 seconds, stirring constantly, until the spices are fragrant. This process, called “blooming,” helps to release the essential oils in the spices and enhances their flavor.
Cooking the Rice:
- Add the rice: Add the rinsed (and soaked, if you chose to soak it) rice to the pot and stir to coat it evenly with the spiced oil mixture. Make sure every grain is coated!
- Add water and seasonings: Pour in the water, add the salt, black pepper, and bay leaf. Stir well to combine all the ingredients.
- Bring to a boil: Bring the mixture to a rolling boil over medium-high heat. Once it’s boiling, reduce the heat to low, cover the pot tightly with a lid, and simmer for 18-20 minutes, or until all the water has been absorbed and the rice is cooked through. It’s crucial to keep the lid on during this process to trap the steam and ensure even cooking.
- Check for doneness: After 18-20 minutes, check the rice to see if it’s cooked. The water should be completely absorbed, and the rice grains should be tender and fluffy. If there’s still water in the pot, continue to simmer for a few more minutes, checking periodically. If the rice seems dry but is still not fully cooked, add a tablespoon or two of water and continue simmering.
- Rest the rice: Once the rice is cooked, remove the pot from the heat and let it sit, covered, for 10 minutes. This allows the steam to redistribute and the rice to finish cooking, resulting in a fluffier texture. This is a very important step, so don’t skip it!
- Fluff the rice: After resting, remove the lid and fluff the rice gently with a fork. This separates the grains and prevents them from sticking together. Be careful not to over-mix, as this can make the rice mushy.
Finishing Touches:
- Add lemon/lime juice: Stir in the lemon or lime juice. This adds a bright, fresh flavor that complements the turmeric and spices beautifully.
- Garnish: Garnish the turmeric rice with chopped fresh cilantro or parsley, toasted slivered almonds or cashews, and raisins or dried cranberries (if using). These garnishes add visual appeal, texture, and flavor.
- Serve: Serve the turmeric rice hot as a side dish with your favorite curry, grilled chicken, fish, or vegetables. It’s also delicious on its own!
Tips and Variations:
- Use broth instead of water: For even more flavor, you can use chicken broth or vegetable broth instead of water to cook the rice.
- Add vegetables: Feel free to add other vegetables to the rice, such as peas, carrots, or bell peppers. Add them along with the rice and water.
- Make it spicy: If you like your rice spicy, add more red pepper flakes or a pinch of cayenne pepper.
- Coconut milk: Substitute half of the water with coconut milk for a richer, creamier flavor.
- Fresh turmeric: If you have fresh turmeric root, you can use it instead of ground turmeric. Grate about 1 tablespoon of fresh turmeric and add it to the pot along with the garlic and ginger.
- Bay leaf removal: Don’t forget to remove the bay leaf before serving!
- Storage: Leftover turmeric rice can be stored in an airtight container in the refrigerator for up to 3 days. Reheat it in the microwave or on the stovetop. You might need to add a splash of water to prevent it from drying out.
- Freezing: You can also freeze turmeric rice for longer storage. Let it cool completely before transferring it to a freezer-safe container. It can be frozen for up to 2 months. Thaw it in the refrigerator overnight before reheating.
Serving Suggestions:
- Serve with Indian curries like butter chicken, chicken tikka masala, or vegetable korma.
- Pair it with grilled or roasted chicken, fish, or lamb.
- Use it as a base for grain bowls with roasted vegetables, chickpeas, and a tahini dressing.
- Serve it alongside a simple salad for a light and healthy meal.
- Add it to burritos or tacos for a flavorful twist.
Nutritional Information (approximate, per serving):
Please note that the nutritional information is an estimate and may vary depending on the specific ingredients and portion sizes used.
- Calories: 250-300
- Protein: 5-7g
- Fat: 5-7g
- Carbohydrates: 45-50g
- Fiber: 1-2g
Why I Love This Recipe:
This turmeric rice recipe is one of my go-to side dishes because it’s so easy to make and incredibly flavorful. The turmeric gives it a beautiful golden color and a subtle earthy flavor, while the other spices add warmth and complexity. It’s also a very versatile dish that can be paired with a variety of different cuisines. Plus, it’s a great way to add some extra nutrients to your diet, as turmeric is known for its anti-inflammatory properties. I hope you enjoy this recipe as much as I do!
Conclusion:
This isn’t just another rice dish; it’s a vibrant, flavorful experience that will elevate any meal. The subtle earthiness of the turmeric, combined with the aromatic spices, creates a truly unforgettable side dish. I genuinely believe this turmeric rice recipe is a must-try for anyone looking to add a touch of sunshine and health to their plate. It’s incredibly easy to make, requiring minimal effort for maximum flavor payoff.
Think of it as a blank canvas for your culinary creativity! Serve it alongside grilled chicken or fish for a complete and satisfying meal. It’s also fantastic with roasted vegetables, adding a warm and comforting element to a vegetarian feast. For a spicier kick, try adding a pinch of red pepper flakes or a finely chopped chili pepper to the cooking water. A squeeze of fresh lemon or lime juice just before serving brightens the flavors even further.
But the possibilities don’t stop there! Consider these variations to truly make it your own:
Serving Suggestions and Variations:
* Coconut Turmeric Rice: Replace half of the water with coconut milk for a richer, creamier texture and a subtle sweetness. This is especially delicious with Thai-inspired dishes.
* Turmeric Rice with Roasted Vegetables: Roast your favorite vegetables (broccoli, cauliflower, carrots, bell peppers) with a drizzle of olive oil and your favorite spices. Toss them with the cooked turmeric rice for a complete and healthy meal.
* Turmeric Rice Bowl: Build a vibrant rice bowl with the turmeric rice as a base. Add grilled chicken or tofu, black beans, corn, salsa, avocado, and a dollop of sour cream or Greek yogurt.
* Turmeric Fried Rice: Use leftover turmeric rice to make a flavorful fried rice. Add scrambled eggs, diced vegetables (peas, carrots, onions), and soy sauce for a quick and easy weeknight meal.
* Herbed Turmeric Rice: Stir in fresh herbs like cilantro, parsley, or mint after the rice is cooked for a burst of freshness.
I’ve personally found that this recipe is incredibly versatile and adaptable to different tastes and dietary needs. It’s naturally gluten-free and can easily be made vegan by using vegetable broth instead of chicken broth. The vibrant color and aromatic fragrance alone make it a winner, but the delicious flavor is what will truly win you over.
I’m so excited for you to try this recipe and experience the magic of turmeric rice for yourself! Don’t be afraid to experiment with different spices and variations to find your perfect combination. Once you’ve made it, I would absolutely love to hear about your experience. Did you try any of the variations? What did you serve it with? What did your family think?
Please, share your photos and comments in the comments section below! Your feedback is invaluable and helps me continue to create recipes that you’ll love. I can’t wait to see what culinary creations you come up with! Happy cooking!
Turmeric Rice: The Ultimate Guide to Flavorful and Healthy Recipes
Fragrant turmeric rice infused with ginger, garlic, cumin, and coriander. A vibrant side dish for curries, grilled meats, or grain bowls.
Ingredients
- 2 cups long-grain rice, such as basmati
- 4 cups water
- 1 tablespoon olive oil or coconut oil
- 1 medium yellow onion, finely chopped
- 2 cloves garlic, minced
- 1 inch ginger, peeled and grated
- 1 teaspoon ground turmeric
- ½ teaspoon cumin powder
- ½ teaspoon coriander powder
- ¼ teaspoon red pepper flakes (optional, for a little heat)
- 1 teaspoon salt, or to taste
- ½ teaspoon black pepper, or to taste
- 1 bay leaf
- Juice of ½ lemon or lime
- ¼ cup chopped fresh cilantro or parsley, for garnish
- ¼ cup toasted slivered almonds or cashews, for garnish (optional)
- ¼ cup raisins or dried cranberries, for garnish (optional)
Instructions
- Rinse the rice: Place the rice in a fine-mesh sieve and rinse under cold running water until the water runs clear (about 2-3 minutes).
- Soak the rice (optional): Soak the rinsed rice in cold water for 30 minutes. Drain thoroughly.
- Heat the oil: In a medium-sized pot or Dutch oven, heat the olive oil (or coconut oil) over medium heat.
- Sauté the onion: Add the finely chopped onion and sauté until softened and translucent, about 5-7 minutes.
- Add garlic and ginger: Add the minced garlic and grated ginger and sauté for another minute, until fragrant.
- Bloom the spices: Add the ground turmeric, cumin powder, coriander powder, and red pepper flakes (if using). Sauté for about 30 seconds, stirring constantly, until fragrant.
- Add the rice: Add the rinsed (and soaked, if you chose to soak it) rice to the pot and stir to coat it evenly with the spiced oil mixture.
- Add water and seasonings: Pour in the water, add the salt, black pepper, and bay leaf. Stir well to combine all the ingredients.
- Bring to a boil: Bring the mixture to a rolling boil over medium-high heat.
- Simmer: Reduce the heat to low, cover the pot tightly with a lid, and simmer for 18-20 minutes, or until all the water has been absorbed and the rice is cooked through.
- Check for doneness: Check the rice to see if it’s cooked. If there’s still water in the pot, continue to simmer for a few more minutes, checking periodically. If the rice seems dry but is still not fully cooked, add a tablespoon or two of water and continue simmering.
- Rest the rice: Remove the pot from the heat and let it sit, covered, for 10 minutes.
- Fluff the rice: Remove the lid and fluff the rice gently with a fork.
- Add lemon/lime juice: Stir in the lemon or lime juice.
- Garnish: Garnish with chopped fresh cilantro or parsley, toasted slivered almonds or cashews, and raisins or dried cranberries (if using).
- Serve: Serve hot as a side dish.
Notes
- Rinsing the rice removes excess starch and prevents stickiness.
- Soaking the rice (optional) makes it even fluffier.
- Blooming the spices enhances their flavor.
- Keep the lid on tightly during simmering to trap steam and ensure even cooking.
- Resting the rice after cooking is crucial for a fluffy texture.
- Remove the bay leaf before serving.
- Use broth instead of water for more flavor.
- Add vegetables like peas, carrots, or bell peppers.
- Adjust red pepper flakes for desired spiciness.
- Substitute half the water with coconut milk for a richer flavor.
- Use 1 tablespoon of grated fresh turmeric instead of ground turmeric.
- Leftovers can be stored in the refrigerator for up to 3 days or frozen for up to 2 months.


Leave a Comment