
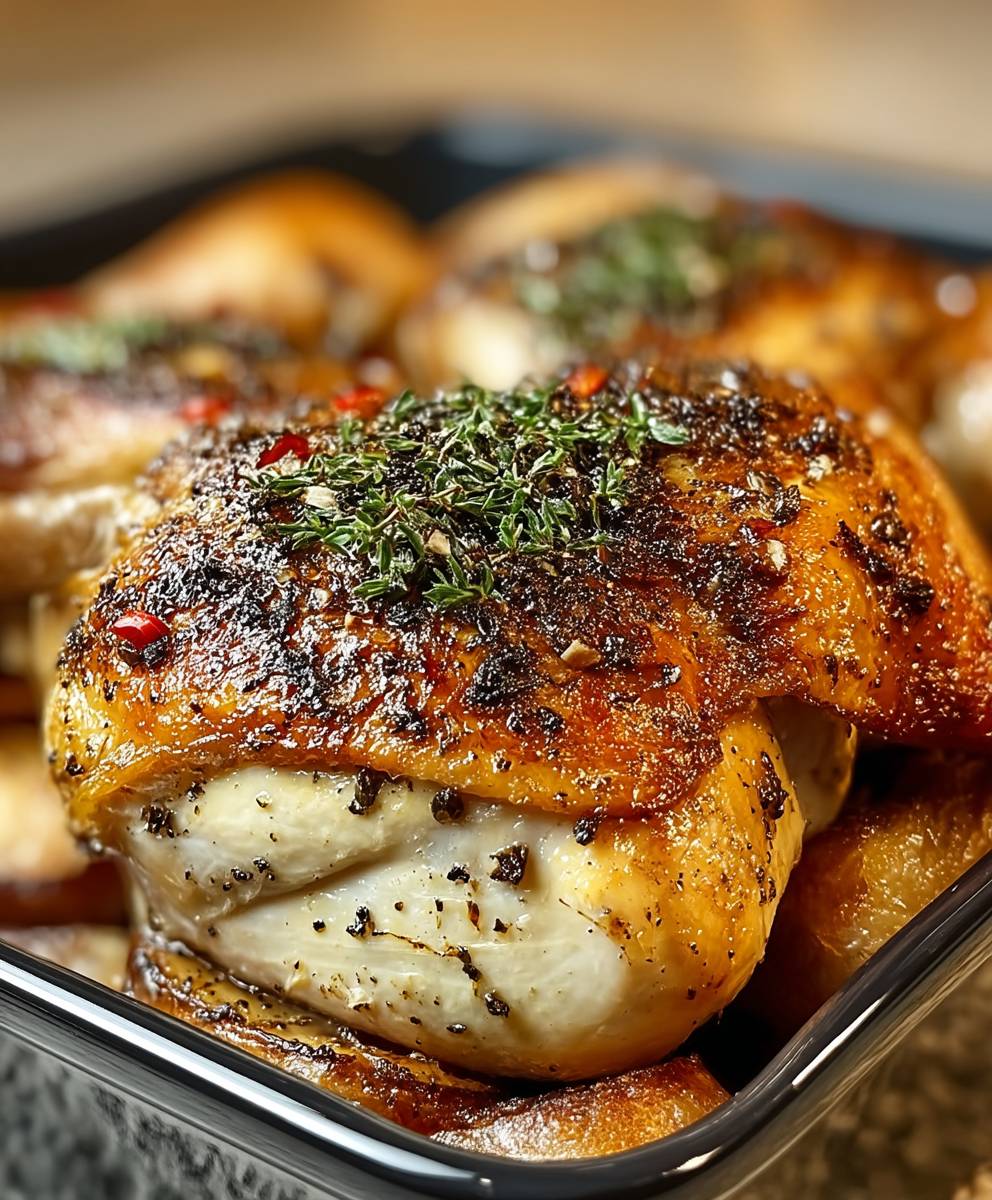
Spatchcock Chicken: Prepare to revolutionize your roast chicken game! Have you ever dreamt of a perfectly cooked bird, boasting incredibly crispy skin and juicy, tender meat throughout? Well, dream no more! This method, also known as butterflying a chicken, is the secret weapon you need for achieving poultry perfection every single time.
While the exact origins of spatchcocking are debated, the technique has been around for centuries, particularly popular in Irish and Scottish cooking. The term itself is believed to be a shortened version of “dispatchcock,” hinting at the speed and efficiency this method brings to the cooking process. Traditionally, it was a way to quickly cook a chicken over an open fire, ensuring even cooking and maximum flavor.
So, why is spatchcock chicken such a beloved dish? The answer is simple: it delivers on all fronts. By removing the backbone and flattening the chicken, you create a more even surface area, allowing it to cook faster and more uniformly. This results in incredibly crispy skin that everyone craves, while the meat remains succulent and moist. Plus, it’s surprisingly easy to do! Whether you’re a seasoned chef or a beginner in the kitchen, this technique will elevate your roast chicken to a whole new level. Get ready to impress your family and friends with this flavorful and foolproof method!

Ingredients:
- 1 whole chicken (3-4 lbs), preferably air-chilled
- 2 tablespoons olive oil
- 1 tablespoon smoked paprika
- 1 tablespoon garlic powder
- 1 tablespoon onion powder
- 1 teaspoon dried thyme
- 1 teaspoon dried rosemary
- 1/2 teaspoon cayenne pepper (optional, for heat)
- 2 teaspoons kosher salt
- 1 teaspoon black pepper
- 1 lemon, halved
- 2 sprigs fresh rosemary (optional, for aromatics)
- 2 sprigs fresh thyme (optional, for aromatics)
- 1 head of garlic, halved horizontally (optional, for aromatics)
- 1 large onion, quartered (optional, for aromatics)
- 2 carrots, roughly chopped (optional, for aromatics)
- 2 celery stalks, roughly chopped (optional, for aromatics)
Preparing the Chicken: Spatchcocking
Okay, let’s get started! The key to a perfectly cooked spatchcock chicken is, well, the spatchcocking! Don’t be intimidated; it’s easier than it sounds. We’re basically removing the backbone so the chicken can lay flat, which helps it cook evenly and quickly.
- Prepare your workspace: First, make sure you have a clean and sturdy cutting board. I like to use a large wooden one. Have some paper towels handy, too, because things can get a little messy.
- Position the chicken: Place the chicken breast-side down on the cutting board. The legs should be facing towards you.
- Locate the backbone: You’ll see the backbone running down the center of the chicken. It’s a slightly raised area.
- Cut along one side of the backbone: Using a sharp pair of kitchen shears (these are essential!), start cutting along one side of the backbone. Apply firm, steady pressure. You might need to use your other hand to help guide the shears. Try to stay as close to the backbone as possible to remove it cleanly.
- Cut along the other side of the backbone: Once you’ve cut along one side, repeat the process on the other side of the backbone. Again, stay close to the bone.
- Remove the backbone: You should now be able to remove the backbone completely. You can save this to make chicken stock later don’t throw it away!
- Flip the chicken over: Now, flip the chicken over so it’s breast-side up.
- Press down on the breastbone: Place your hands on either side of the breastbone and press down firmly. You should hear a crack. This will flatten the chicken even further, ensuring even cooking.
- Tuck the wing tips (optional): Sometimes, the wing tips can burn during cooking. To prevent this, you can tuck them under the chicken’s body.
Preparing the Rub
Now that our chicken is spatchcocked, it’s time to create a flavorful rub that will make it absolutely delicious. This is where we get to customize the flavors to our liking!
- Combine the dry ingredients: In a small bowl, combine the smoked paprika, garlic powder, onion powder, dried thyme, dried rosemary, cayenne pepper (if using), kosher salt, and black pepper. Mix well to ensure everything is evenly distributed.
- Add the olive oil: Pour the olive oil into the bowl with the dry ingredients.
- Mix into a paste: Use a fork or spoon to mix the olive oil and dry ingredients together until you form a thick paste. This paste will be our flavorful rub.
Seasoning the Chicken
This is where we bring it all together! We’re going to generously coat the chicken with our delicious rub, making sure every nook and cranny is covered.
- Pat the chicken dry: Use paper towels to pat the chicken dry. This will help the rub adhere better to the skin.
- Apply the rub: Using your hands, generously apply the rub all over the chicken, including under the skin of the breast and thighs. Make sure to get into every crevice! Really massage the rub into the chicken.
- Don’t forget the underside: Flip the chicken over and apply the rub to the underside as well.
- Lemon and Aromatics (optional): Place the lemon halves, rosemary sprigs, thyme sprigs, halved garlic head, quartered onion, chopped carrots, and chopped celery in the center of the baking sheet. This will add extra flavor and aromatics to the chicken as it roasts.
- Rest (optional): For the best flavor, let the chicken rest in the refrigerator for at least 30 minutes, or even overnight. This allows the flavors to penetrate the meat. If you’re short on time, you can skip this step, but I highly recommend it if you can.
Roasting the Chicken
Now for the main event: roasting the chicken to golden-brown perfection! We’ll use a two-temperature method to ensure crispy skin and juicy meat.
- Preheat the oven: Preheat your oven to 450°F (232°C).
- Prepare the roasting pan: Place the seasoned chicken on a roasting pan fitted with a wire rack. The rack allows air to circulate around the chicken, promoting even cooking and crispy skin. If you don’t have a rack, you can use a bed of vegetables (like the ones mentioned above) to elevate the chicken slightly.
- Roast at high temperature: Roast the chicken at 450°F (232°C) for 15 minutes. This high heat will help to crisp up the skin.
- Reduce the temperature: After 15 minutes, reduce the oven temperature to 375°F (190°C).
- Continue roasting: Continue roasting the chicken for another 40-50 minutes, or until a meat thermometer inserted into the thickest part of the thigh registers 165°F (74°C).
- Check for doneness: Use a meat thermometer to check the internal temperature of the chicken. Insert the thermometer into the thickest part of the thigh, being careful not to touch the bone. The chicken is done when the thermometer registers 165°F (74°C).
- Rest the chicken: Once the chicken is cooked through, remove it from the oven and let it rest for at least 10-15 minutes before carving. This allows the juices to redistribute, resulting in a more tender and flavorful chicken. Tent it loosely with foil to keep it warm.
Carving and Serving
Finally, it’s time to carve and enjoy our beautifully roasted spatchcock chicken! Carving a spatchcock chicken is easier than carving a whole roasted chicken because it’s already flattened.
- Remove the legs: Using a sharp carving knife, cut between the leg and the body to remove the legs.
- Separate the thigh and drumstick: Cut between the thigh and drumstick to separate them.
- Remove the wings: Cut between the wing and the body to remove the wings.
- Slice the breast: Slice the breast meat, starting from the breastbone and working your way outwards.
- Serve and enjoy: Arrange the carved chicken on a platter and serve immediately. I love to serve it with roasted vegetables, mashed potatoes, or a simple salad.
Tips for Success
- Use a sharp pair of kitchen shears: This will make spatchcocking the chicken much easier.
- Don’t be afraid to get your hands dirty: Massaging the rub into the chicken is the best way to ensure even flavor.
- Use a meat thermometer: This is the most accurate way to determine if the chicken is cooked through.
- Let the chicken rest: This is crucial for juicy and tender meat.
- Experiment with different seasonings: Feel free to customize the rub
Conclusion:
So there you have it! This spatchcock chicken recipe is truly a game-changer, and I wholeheartedly believe it deserves a spot in your regular cooking rotation. Why? Because it delivers consistently juicy, flavorful chicken with unbelievably crispy skin in a fraction of the time compared to traditional roasting methods. We’re talking about a weeknight-friendly roast chicken that doesn’t compromise on taste or texture. What’s not to love?
But the benefits don’t stop there. Beyond the speed and superior results, spatchcocking also allows for more even cooking. No more dry breast meat and undercooked thighs! The flattened bird cooks uniformly, ensuring every bite is a delight. And let’s be honest, the presentation is pretty impressive too. Plating a beautifully browned, flattened chicken is sure to wow your family and friends.
Now, let’s talk about serving suggestions and variations. This spatchcock chicken is incredibly versatile and pairs well with just about anything. For a classic pairing, consider serving it alongside roasted root vegetables like carrots, potatoes, and parsnips. A simple green salad with a vinaigrette dressing provides a refreshing contrast to the richness of the chicken. Or, for a heartier meal, try serving it with creamy mashed potatoes and gravy.
If you’re feeling adventurous, you can easily customize the flavors of this recipe. Experiment with different spice rubs and marinades to create your own signature spatchcock chicken. For a Mediterranean twist, try a blend of oregano, thyme, rosemary, and lemon zest. For a spicy kick, add some chili powder, paprika, and cayenne pepper. And for a sweet and savory flavor profile, consider using a honey-mustard glaze.
Another fun variation is to grill your spatchcock chicken instead of roasting it. Grilling adds a smoky char that complements the crispy skin beautifully. Just be sure to use indirect heat to prevent the chicken from burning before it’s cooked through.
Serving Suggestions:
- Roasted Root Vegetables
- Green Salad with Vinaigrette
- Creamy Mashed Potatoes and Gravy
- Grilled Asparagus
- Quinoa Salad
Flavor Variations:
- Mediterranean Herbs and Lemon
- Spicy Chili Powder and Paprika
- Honey-Mustard Glaze
- Garlic and Herb Butter
- Lemon Pepper
I’m so confident that you’ll love this recipe, and I can’t wait to hear about your experience. Don’t be intimidated by the spatchcocking process it’s easier than it looks, and the results are well worth the effort. Grab your kitchen shears, preheat your oven (or fire up your grill!), and get ready to enjoy the best roast chicken you’ve ever had.
So, go ahead and give this spatchcock chicken recipe a try. I promise you won’t be disappointed. And when you do, please share your photos and feedback with me! I’d love to see your creations and hear about your favorite flavor combinations. Happy cooking! Let me know what you think!
Spatchcock Chicken: The Ultimate Guide to Flat-Out Deliciousness
Perfectly roasted spatchcock chicken with crispy skin and juicy meat, seasoned with a flavorful blend of smoked paprika, garlic, and herbs. Easy to carve and perfect for a weeknight dinner or special occasion.
Ingredients
- 1 whole chicken (3-4 lbs), preferably air-chilled
- 2 tablespoons olive oil
- 1 tablespoon smoked paprika
- 1 tablespoon garlic powder
- 1 tablespoon onion powder
- 1 teaspoon dried thyme
- 1 teaspoon dried rosemary
- 1/2 teaspoon cayenne pepper (optional, for heat)
- 2 teaspoons kosher salt
- 1 teaspoon black pepper
- 1 lemon, halved
- 2 sprigs fresh rosemary (optional, for aromatics)
- 2 sprigs fresh thyme (optional, for aromatics)
- 1 head of garlic, halved horizontally (optional, for aromatics)
- 1 large onion, quartered (optional, for aromatics)
- 2 carrots, roughly chopped (optional, for aromatics)
- 2 celery stalks, roughly chopped (optional, for aromatics)
Instructions
- Place the chicken breast-side down on a cutting board.
- Using kitchen shears, cut along both sides of the backbone to remove it. Save the backbone for stock.
- Flip the chicken breast-side up and press down firmly on the breastbone to flatten it.
- Tuck wing tips under the chicken if desired.
- In a small bowl, combine smoked paprika, garlic powder, onion powder, dried thyme, dried rosemary, cayenne pepper (if using), kosher salt, and black pepper.
- Add olive oil and mix into a thick paste.
- Pat the chicken dry with paper towels.
- Generously apply the rub all over the chicken, including under the skin of the breast and thighs.
- Apply rub to the underside of the chicken as well.
- Place lemon halves, rosemary sprigs, thyme sprigs, halved garlic head, quartered onion, chopped carrots, and chopped celery on the bottom of a roasting pan.
- (Optional) Let the chicken rest in the refrigerator for at least 30 minutes or overnight for enhanced flavor.
- Preheat oven to 450°F (232°C).
- Place the seasoned chicken on a roasting pan fitted with a wire rack.
- Roast at 450°F (232°C) for 15 minutes.
- Reduce oven temperature to 375°F (190°C) and continue roasting for 40-50 minutes, or until a meat thermometer inserted into the thickest part of the thigh registers 165°F (74°C).
- Let the chicken rest for 10-15 minutes before carving. Tent loosely with foil.
- Remove the legs by cutting between the leg and the body.
- Separate the thigh and drumstick.
- Remove the wings.
- Slice the breast meat.
- Serve immediately with your favorite sides.
Notes
- Use a sharp pair of kitchen shears for easy spatchcocking.
- Don’t be afraid to get your hands dirty when applying the rub.
- A meat thermometer is essential for ensuring the chicken is cooked through.
- Resting the chicken is crucial for juicy and tender meat.
- Experiment with different seasonings to customize the rub to your liking.
- Saving the backbone to make chicken stock is a great way to reduce waste.

Leave a Comment