
Sous Vide Chicken Breast: Prepare to unlock the secret to perfectly cooked, incredibly juicy chicken every single time! Forget dry, bland chicken this method guarantees a tender and flavorful result that will revolutionize your weeknight dinners. Have you ever wondered how restaurants achieve that consistently perfect chicken? The answer often lies in the magic of sous vide.
While the term “sous vide” might sound intimidating, it’s simply a French technique meaning “under vacuum.” It involves cooking food in a precisely temperature-controlled water bath. This method has been used in professional kitchens for years, ensuring even cooking and unparalleled moisture retention. But don’t worry, you don’t need to be a professional chef to master it! With the right equipment and a little guidance, you can easily create restaurant-quality sous vide chicken breast at home.
People adore sous vide chicken because it eliminates the guesswork of traditional cooking methods. No more worrying about overcooking or undercooking! The consistent temperature ensures that the chicken is cooked evenly throughout, resulting in a texture that is unbelievably tender and juicy. Plus, the sealed bag locks in all the natural flavors and moisture, creating a truly delicious and satisfying meal. Whether you’re looking for a healthy and convenient weeknight dinner or want to impress your guests with a perfectly cooked dish, sous vide chicken breast is the answer. Let’s dive in and discover how easy it is to achieve chicken perfection!

Ingredients:
- 4 boneless, skinless chicken breasts (about 6-8 ounces each)
- 2 tablespoons olive oil
- 1 teaspoon salt
- 1/2 teaspoon black pepper
- 1 teaspoon garlic powder
- 1/2 teaspoon onion powder
- 1/4 teaspoon paprika
- 1 sprig fresh rosemary
- 1 sprig fresh thyme
- 2 cloves garlic, smashed
- Optional: 1 tablespoon butter per chicken breast for searing
Preparing the Chicken:
Okay, let’s get started! First things first, we need to prep our chicken breasts. This is super easy and makes a huge difference in the final flavor.
- Pat the chicken dry: This is crucial! Use paper towels to thoroughly dry each chicken breast. This helps the seasoning adhere better and allows for a better sear later on. Trust me, don’t skip this step.
- Season generously: In a small bowl, combine the salt, pepper, garlic powder, onion powder, and paprika. Mix well. Now, sprinkle this mixture evenly over both sides of each chicken breast. Make sure you get every nook and cranny! Don’t be shy with the seasoning; it’s what gives the chicken its flavor.
- Add aromatics: Place each seasoned chicken breast in a separate vacuum-seal bag or a heavy-duty zip-top bag. Add a sprig of fresh rosemary, a sprig of fresh thyme, and a smashed clove of garlic to each bag. The aromatics infuse the chicken with a wonderful flavor during the sous vide process.
- Seal the bags: If using a vacuum sealer, follow the manufacturer’s instructions to seal the bags. If using zip-top bags, use the water displacement method. To do this, slowly lower the bag into a pot of water, allowing the water pressure to push the air out. Once most of the air is out, seal the bag, leaving just a tiny opening to let the last bit of air escape.
Sous Vide Cooking:
Now for the magic! The sous vide process is what makes this chicken so incredibly tender and juicy. It’s all about precise temperature control.
- Preheat the water bath: Fill a large pot or container with water and attach your sous vide immersion circulator. Set the temperature to 145°F (63°C) for juicy and tender chicken. If you prefer a slightly firmer texture, you can go up to 150°F (66°C). Let the water bath come to temperature; this usually takes about 15-20 minutes.
- Submerge the chicken: Once the water bath is at the correct temperature, carefully submerge the sealed bags of chicken into the water. Make sure the bags are fully submerged to ensure even cooking. You can use a clip or weight to keep them from floating.
- Cook for 1-4 hours: This is the beauty of sous vide! You can cook the chicken for anywhere from 1 to 4 hours, and it will still be perfectly cooked. I usually go for 1.5-2 hours for convenience, but longer cooking times (up to 4 hours) will result in even more tender chicken.
Searing the Chicken:
Searing is what gives the chicken that beautiful golden-brown crust and adds another layer of flavor. Don’t skip this step!
- Remove the chicken from the bags: Once the chicken is done cooking, carefully remove the bags from the water bath. Take the chicken breasts out of the bags and pat them completely dry with paper towels. Again, this is crucial for getting a good sear.
- Heat the oil (and butter): Heat the olive oil (and butter, if using) in a large skillet over medium-high heat. You want the pan to be nice and hot before adding the chicken. The butter adds richness and helps with browning, but it’s optional.
- Sear the chicken: Carefully place the chicken breasts in the hot skillet, making sure not to overcrowd the pan. Sear for 1-2 minutes per side, or until golden brown and crispy. You want a nice, even sear on both sides.
- Optional: Baste with butter: If you’re using butter, tilt the pan and use a spoon to baste the chicken with the melted butter as it sears. This adds even more flavor and helps with browning.
Resting and Serving:
Almost there! Resting the chicken allows the juices to redistribute, resulting in a more tender and flavorful final product.
- Rest the chicken: Transfer the seared chicken breasts to a cutting board and let them rest for 5-10 minutes before slicing. This is important! Don’t skip this step.
- Slice and serve: After resting, slice the chicken breasts against the grain. This makes them even more tender and easier to eat.
- Enjoy! Serve immediately and enjoy your perfectly cooked sous vide chicken! It’s delicious on its own or with your favorite sides.
Serving Suggestions:
This sous vide chicken is incredibly versatile and pairs well with a variety of sides. Here are a few of my favorites:
- Roasted vegetables (broccoli, asparagus, carrots)
- Mashed potatoes or sweet potatoes
- Quinoa or rice
- Salad
- Pasta
Tips and Tricks:
Here are a few extra tips to help you achieve sous vide chicken perfection:
- Don’t overcook: The beauty of sous vide is that it’s very difficult to overcook the chicken. However, if you cook it for too long at a higher temperature, it can become slightly dry. Stick to the recommended temperature and cooking time for best results.
- Use high-quality chicken: The better the quality of the chicken, the better the final product will be. Look for chicken that is labeled “air-chilled” or “organic” for the best flavor and texture.
- Experiment with different seasonings: Feel free to experiment with different seasonings to customize the flavor of your chicken. Try adding lemon pepper, Italian seasoning, or chili powder.
- Make a pan sauce: After searing the chicken, you can use the pan drippings to make a delicious pan sauce. Simply deglaze the pan with some white wine or chicken broth, and then add some butter, herbs, and spices.
- Store leftovers properly: Leftover sous vide chicken can be stored in the refrigerator for up to 3-4 days. Make sure to store it in an airtight container.
- Reheat gently: To reheat leftover sous vide chicken, you can either microwave it, bake it in the oven, or sear it in a pan. Be careful not to overcook it when reheating.
Troubleshooting:
Here are some common problems you might encounter when making sous vide chicken and how to fix them:
- Chicken is dry: This is usually caused by overcooking or not searing the chicken properly. Make sure to stick to the recommended temperature and cooking time, and sear the chicken quickly over high heat.
- Chicken is rubbery: This can be caused by cooking the chicken at too low of a temperature. Make sure your sous vide immersion circulator is set to the correct temperature.
- Chicken is bland: This is usually caused by not seasoning the chicken enough. Don’t be shy with the seasoning!
- Bag is leaking: This can be caused by a faulty vacuum sealer or a hole in the bag. Make sure to use high-quality bags and seal them properly. If you’re using zip-top bags, make sure to remove as much air as possible.
Enjoy your perfectly cooked sous vide chicken breast!
Conclusion:
So, there you have it! I truly believe this sous vide chicken breast recipe is a game-changer. It’s not just about cooking chicken; it’s about unlocking its full potential, achieving a level of tenderness and juiciness you simply can’t get with traditional methods. Forget dry, bland chicken forever! This method guarantees perfectly cooked chicken every single time, making it a must-try for anyone who loves chicken or is simply looking for a foolproof way to prepare it.
But the best part? It’s incredibly versatile! Think of this perfectly cooked chicken breast as a blank canvas for your culinary creativity.
Serving Suggestions and Variations:
* Salad Superstar: Slice it thinly and toss it into your favorite salad. A classic Caesar, a vibrant Mediterranean salad, or even a simple green salad with a lemon vinaigrette the possibilities are endless. The tender chicken will elevate any salad to a restaurant-quality dish.
* Sandwich Sensation: Layer it onto a crusty baguette with your favorite toppings. Pesto, roasted red peppers, mozzarella, and a drizzle of balsamic glaze? Yes, please! Or how about a classic chicken salad sandwich with a twist, using this incredibly tender chicken as the base?
* Pasta Perfection: Dice it up and add it to your favorite pasta dish. Creamy Alfredo, spicy arrabiata, or a simple pesto pasta the perfectly cooked chicken will complement any sauce beautifully. It’s a quick and easy way to add protein and flavor to your pasta night.
* Taco Time: Shred it and use it as a filling for tacos or burritos. Add your favorite salsa, guacamole, and sour cream for a delicious and satisfying meal. The tenderness of the chicken will make your tacos extra special.
* Flavor Infusions: Experiment with different herbs and spices in the sous vide bag. Try adding rosemary and thyme for a classic flavor, or go bold with chili flakes and garlic for a spicy kick. You can also add a knob of butter or a drizzle of olive oil for extra richness.
* Sauce it Up: While the chicken is delicious on its own, don’t be afraid to experiment with different sauces. A simple pan sauce made with butter, garlic, and white wine is always a winner. Or try a creamy mushroom sauce, a tangy barbecue sauce, or a vibrant chimichurri.
I’m confident that once you try this sous vide chicken breast recipe, it will become a staple in your kitchen. It’s so easy, so reliable, and so delicious! The consistent results and the incredible tenderness are truly unmatched. It’s perfect for meal prepping, weeknight dinners, or even a special occasion.
So, what are you waiting for? Grab your sous vide machine, gather your ingredients, and get ready to experience chicken like never before. I’m so excited for you to try this recipe and discover the magic of sous vide cooking.
And most importantly, I want to hear about your experience! Did you try any variations? What were your favorite serving suggestions? Share your photos and comments below. Let’s create a community of sous vide enthusiasts and inspire each other with our culinary creations. Happy cooking! I can’t wait to see what you come up with!
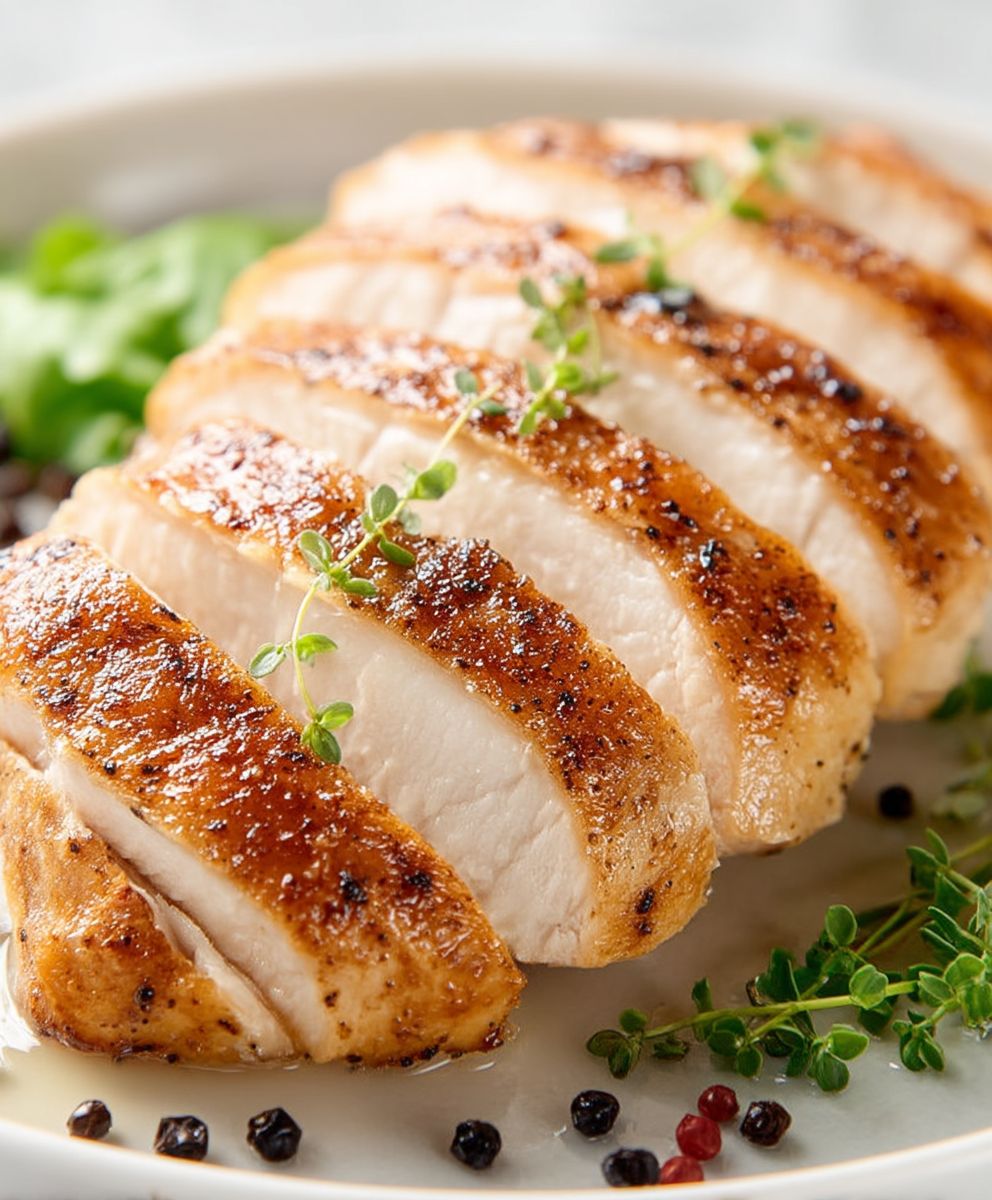
Sous Vide Chicken Breast: The Ultimate Guide to Perfectly Cooked Chicken
Juicy, tender chicken breasts cooked sous vide, then seared to golden-brown perfection.
Ingredients
- 4 boneless, skinless chicken breasts (about 6-8 ounces each)
- 2 tablespoons olive oil
- 1 teaspoon salt
- 1/2 teaspoon black pepper
- 1 teaspoon garlic powder
- 1/2 teaspoon onion powder
- 1/4 teaspoon paprika
- 1 sprig fresh rosemary
- 1 sprig fresh thyme
- 2 cloves garlic, smashed
- Optional: 1 tablespoon butter per chicken breast for searing
Instructions
- Prep the Chicken: Pat the chicken breasts dry with paper towels. Combine salt, pepper, garlic powder, onion powder, and paprika in a small bowl. Season the chicken breasts generously on both sides with the spice mixture. Place each seasoned chicken breast in a vacuum-seal bag or zip-top bag. Add a sprig of rosemary, a sprig of thyme, and a smashed clove of garlic to each bag. Seal the bags using a vacuum sealer or the water displacement method.
- Sous Vide Cooking: Preheat a water bath to 145°F (63°C) for juicy chicken or 150°F (66°C) for a firmer texture. Submerge the sealed bags of chicken in the water bath, ensuring they are fully submerged. Cook for 1-4 hours (1.5-2 hours is recommended).
- Searing the Chicken: Remove the chicken from the bags and pat dry with paper towels. Heat olive oil (and butter, if using) in a large skillet over medium-high heat. Sear the chicken breasts for 1-2 minutes per side, until golden brown and crispy. Baste with melted butter, if desired.
- Resting and Serving: Transfer the seared chicken to a cutting board and let rest for 5-10 minutes before slicing against the grain. Serve immediately.
Notes
- Patting the chicken dry before seasoning and searing is crucial for optimal results.
- Adjust the sous vide temperature based on your preferred texture.
- Searing the chicken gives it a beautiful color and added flavor.
- Resting the chicken allows the juices to redistribute, resulting in a more tender product.
- Experiment with different seasonings to customize the flavor.
- Leftover chicken can be stored in the refrigerator for up to 3-4 days.


Leave a Comment