
Smores Pizza – What if I told you that you could capture the undeniable magic of a crackling campfire, the gooey embrace of perfectly toasted marshmallows, and the rich, melt-in-your-mouth chocolate, all on a convenient, shareable crust? I’m thrilled to share with you a recipe that transforms a beloved outdoor classic into an indoor dessert sensation.
A Campfire Classic, Reimagined for Your Kitchen
The classic s’more, a cherished American campfire tradition dating back to at least the 1920s—with its recipe first appearing in a Girl Scout handbook—evokes nostalgic memories for countless individuals. It’s more than just a sweet treat; it’s an experience, a symbol of togetherness and simpler times. This innovative Smores Pizza takes that iconic flavor profile and elevates it into a modern, effortlessly made dessert that’s absolutely perfect for any gathering, from casual family nights to festive parties.
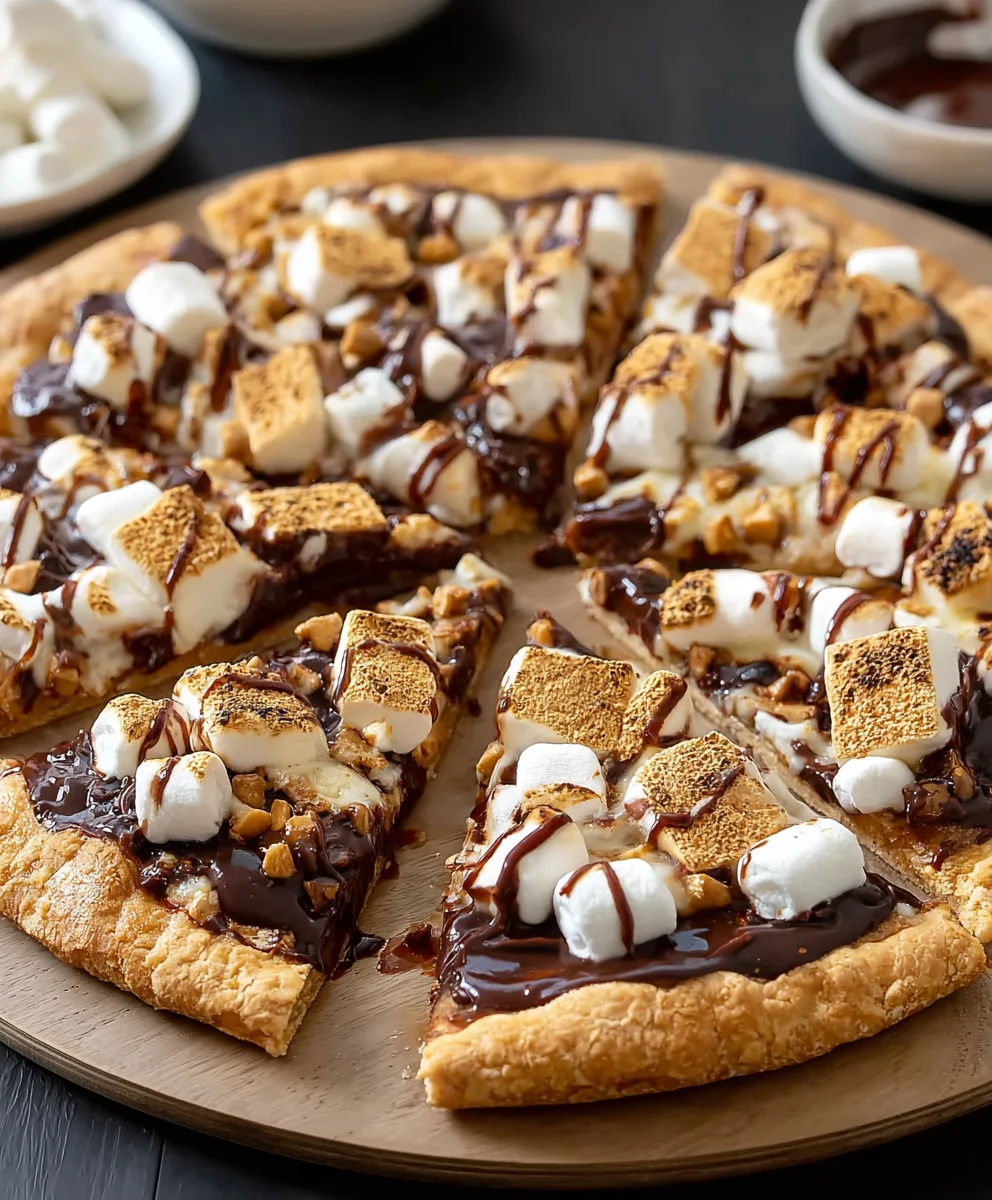
People absolutely adore this dish not just for its incredible taste, but for its delightful textures and sheer convenience. Imagine the satisfying crunch of a golden graham cracker crust, yielding to layers of warm, flowing chocolate, and topped with those perfectly browned, airy marshmallows. It’s a symphony of textures and tastes that appeals to every palate, offering the comforting familiarity of s’mores without the need for an open flame. This makes our Smores Pizza incredibly accessible, utterly irresistible, and destined to become a new favorite in your dessert repertoire.

Ingredients:
- For the Pizza Base:
- 1 (13-16 ounce) ball of store-bought pizza dough, fresh or frozen (thawed), or your favorite homemade pizza dough recipe. (I find a good quality, plain pizza dough works best as a canvas for our sweet creation. If you’re using frozen, ensure it’s fully thawed to room temperature before you begin, which usually takes a few hours on the counter or overnight in the fridge.)
- 1 tablespoon unsalted butter, melted, plus extra for greasing the pan if not using parchment. (This melted butter is crucial for achieving that golden, slightly crispy crust that truly elevates our Smores Pizza.)
- 1-2 tablespoons all-purpose flour or cornmeal, for dusting the work surface and pizza pan. (Cornmeal adds a wonderful, subtle crunch to the bottom of the crust, mimicking classic pizza texture, while flour is perfect for preventing sticking.)
- For the Chocolate Layer:
- 6-8 ounces good quality milk chocolate bars, semi-sweet chocolate chips, or a combination. (I personally love using a mix of milk chocolate and semi-sweet chips. Chopped chocolate bars melt more smoothly and provide a richer layer, but chips are undeniably convenient. Aim for about 1 to 1.5 cups if using chips.)
- For the Marshmallow Topping:
- 3-4 cups mini marshmallows, or 10-12 large regular marshmallows, cut into halves or quarters. (Mini marshmallows are fantastic for even coverage and quick toasting. If you’re using large marshmallows, cutting them ensures they melt down nicely and don’t create too much of a thick, gooey layer, which can be a bit much.)
- For the Graham Cracker Crumble:
- 6-8 full sheets of graham crackers, crushed into fine crumbs. (This is where the signature “Smores” flavor truly shines! You’ll want about 1 to 1.5 cups of crumbs. The finer the crumbs, the better they adhere and provide a consistent texture.)
- Optional Embellishments:
- A pinch of flaky sea salt (highly recommended to balance the sweetness!). (Trust me on this one; a tiny sprinkle of sea salt can really elevate the flavors, cutting through the richness of the chocolate and marshmallow.)
- Extra chocolate syrup or melted chocolate for drizzling. (For an even more decadent finish, especially if you love that extra chocolatey goodness!)
- A sprinkle of cinnamon sugar (for the crust or over the finished pizza). (If you’re feeling adventurous and want an extra layer of cozy flavor, cinnamon sugar can be a lovely addition.)
Preparation: Setting the Stage for Sweet Success
- Preheat Your Oven: My first step, always, is to get the oven ready. We want a really hot oven for this Smores Pizza to ensure the crust gets delightfully crispy and the toppings melt beautifully. So, preheat your oven to 400°F (200°C). While the oven is heating, make sure your baking rack is in the middle position. This will give us even heat distribution, ensuring our pizza cooks perfectly without burning the bottom or leaving the top uncooked.
-
Prepare Your Pizza Pan: Now, let’s get our pizza pan ready. You have a few options here. I usually grab a 12-inch round pizza pan or a large baking sheet.
- Option A (My Favorite): Line your pan with a sheet of parchment paper. This makes transferring the dough much easier and, more importantly, prevents any sticky marshmallow mishaps later on, making cleanup an absolute breeze.
- Option B: If you don’t have parchment paper, simply lightly grease your pan with a little bit of the melted butter or a neutral cooking spray. Then, sprinkle about 1 tablespoon of flour or cornmeal evenly over the greased surface. This provides a non-stick layer and helps give the crust a nice, crispy bottom. I lean towards cornmeal for that authentic pizza parlor feel!
Once your pan is prepped, set it aside.
-
Crush Your Graham Crackers: This is a fun and somewhat therapeutic step! We need those graham crackers to be finely crushed.
- Method 1 (Food Processor): If you have a food processor, this is the quickest and easiest way. Break your graham cracker sheets into smaller pieces and pulse them until they form fine, even crumbs. You’re looking for a texture similar to coarse sand.
- Method 2 (Manual): Place the graham cracker sheets into a large, sturdy resealable plastic bag. Seal it, pressing out as much air as possible. Then, use a rolling pin, the bottom of a heavy pan, or even your fists to crush the crackers into fine crumbs. Just be gentle at first to avoid tearing the bag, then you can get more aggressive. The goal is consistent, fine crumbs, as this helps them stick to the chocolate layer without being too chunky. Set these delicious crumbs aside for later.
- Prepare Your Chocolate: If you’re using chocolate bars instead of chips, now is the time to chop them up. A good quality sharp knife will be your best friend here. Aim for small, even pieces – roughly the size of chocolate chips. This ensures they melt evenly and spread nicely across our pizza base. If you’re using chocolate chips, you’re good to go!
- Prepare Your Marshmallows: If you’re using large marshmallows, it’s best to cut them down. I usually cut each large marshmallow into halves or quarters using kitchen shears or a lightly oiled knife. This allows for more even distribution and quicker, more uniform toasting when they go into the oven. If you’re using mini marshmallows, you’re all set!
-
Get Your Dough Ready: Now for the star of our show, the pizza dough! If your dough has been chilling in the fridge, make sure it’s come up to room temperature. This makes it much more pliable and easier to work with. Lightly flour your work surface – a clean kitchen counter or a large cutting board works perfectly.
- Place the dough ball onto the floured surface.
- Using your hands, gently stretch and press the dough outwards from the center. I like to call this the “pizza whisperer” stage – be gentle but firm! You can also use a rolling pin if you prefer, but often, hand-stretching gives a better, more rustic texture.
- Aim for a roughly 12-inch circle, or whatever shape fits your prepared pan. Don’t worry if it’s not a perfect circle; the rustic look adds to its charm!
- Carefully transfer the stretched dough onto your prepared pizza pan. Gently press it into place, making sure it reaches the edges. If you like a thicker, chewier crust, you can leave the edges slightly raised.
- Brush the Crust: With the dough on the pan, it’s time to give it a little love. Take your melted unsalted butter and, using a pastry brush, gently brush it all over the exposed edges of the pizza crust. This butter isn’t just for flavor; it helps the crust achieve that beautiful golden-brown color and a satisfying crispness. It also acts as a subtle barrier, keeping the edges from getting too soggy from the toppings.
Assembling the Smores Pizza Layers: The Art of Sweet Construction
- First Layer – The Chocolate Foundation: Now for the delicious part! Evenly spread your prepared chocolate (either chopped bars or chips) over the entire surface of the pizza dough, leaving a small border (about 1/2 to 1 inch) around the edge for the crust. You don’t want to go right up to the very edge, as the chocolate will spread a bit as it melts. Ensure a good, even layer so every bite gets that chocolatey goodness.
- Second Layer – Graham Cracker Love: Next, take your crushed graham cracker crumbs and sprinkle them generously over the chocolate layer. Try to get an even distribution here as well. The crumbs will slightly embed into the melting chocolate during the first bake, creating that iconic Smores base flavor and texture. If you’re opting for a little cinnamon sugar, this is a great time to sprinkle a tiny bit over the graham cracker layer for an extra hint of warmth.
Baking Phase One: Melting and Crisping
-
Initial Bake: Carefully transfer your assembled Smores Pizza to the preheated 400°F (200°C) oven. We’re going to bake it for 8-12 minutes during this first phase.
- What to Look For: During this time, the pizza dough should start to cook through and become lightly golden around the edges. More importantly, the chocolate layer should be beautifully melted and slightly bubbly. The graham cracker crumbs will become fragrant and slightly toasted.
- Important Tip: Keep a close eye on it. Ovens can vary, and we want to ensure the crust isn’t getting too dark before the marshmallows go on. The goal here is to cook the dough and melt the chocolate, not to fully brown the crust yet.
- Quick Marshmallow Application: Once the chocolate is melted and the crust is starting to look light golden, carefully remove the pizza from the oven. Be very gentle, as everything will be hot and gooey. Now, quickly but evenly, arrange your prepared marshmallows (mini or cut-up regular) all over the melted chocolate and graham cracker base. Try to cover as much of the surface as possible without overlapping them too much, as they will expand as they toast. Work relatively quickly here so the pizza doesn’t cool down too much.
Baking Phase Two: The Golden Toast
-
Final Bake for Toasted Marshmallows: With the marshmallows in place, return the Smores Pizza to the oven. This second bake is usually much shorter, typically 3-7 minutes.
- The Key to Perfection: This is where the magic happens, so don’t walk away! You are looking for the marshmallows to puff up, become gloriously golden brown, and get that characteristic toasted Smores char in spots. Keep a very close watch, as marshmallows can go from perfectly golden to burnt in a matter of seconds. If you have a broiler setting on your oven and feel confident, you can use it for the last 30-60 seconds to achieve a deeper char, but watch it like a hawk! A slightly open oven door can help you monitor.
- Visual Cues: Look for that beautiful contrast – some marshmallows will be lightly golden, others a deeper caramel brown, and a few might even have that delightful almost-burnt crispness. This variety in toastiness adds to the authentic Smores experience.
Finishing Touches and Serving: The Grand Finale
-
Cooling Down (Patience is a Virtue!): Once your Smores Pizza has reached marshmallow perfection, carefully remove it from the oven and transfer the pan to a wire rack to cool.
- Why Cool? I know, I know, it’s tempting to dive right in! But a crucial step for the best experience is to let it cool for at least 10-15 minutes. This cooling period allows the melted chocolate to set up slightly, making the pizza much easier to slice and preventing a molten mess. The marshmallows will also firm up just enough to hold their shape while still remaining wonderfully gooey.
- Optional Flaky Sea Salt: If you’re using flaky sea salt, now is the ideal time to sprinkle a tiny pinch over the warm, gooey marshmallows and chocolate. The salt will adhere beautifully and its crystals will provide a delightful textural and flavor contrast.
-
Optional Drizzle and Extra Garnish: If you’re going for extra decadence, this is the moment for it!
- Chocolate Drizzle: You can melt a bit more chocolate (either in the microwave in 30-second bursts, stirring in between, or over a double boiler) and drizzle it artfully over the cooled Smores Pizza.
- Extra Graham Cracker Crumbs: A final light sprinkle of any remaining graham cracker crumbs can add an appealing visual and textural touch.
-
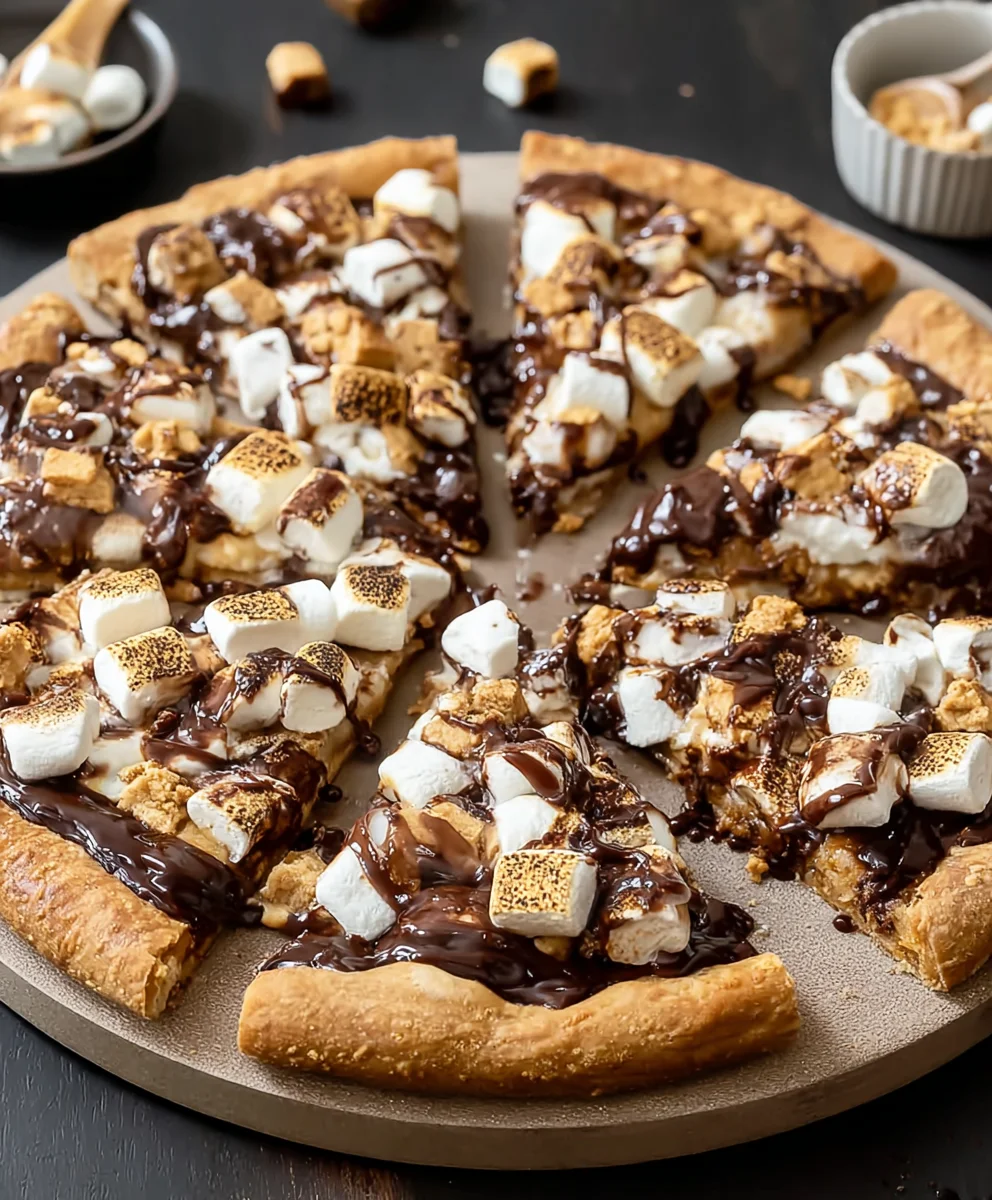
Slicing and Serving: Once sufficiently cooled, carefully slide the Smores Pizza off the parchment paper (if used) onto a cutting board. Using a sturdy pizza cutter or a large, sharp knife, cut it into wedges, just like a regular pizza.
- Best Served Warm: While it’s best to let it cool a bit, Smores Pizza is definitely at its peak when served warm, with the chocolate still soft and the marshmallows delightfully gooey.
- Get Creative with Serving: You can serve it as a standalone dessert, or for an extra special treat, a small scoop of vanilla bean ice cream on the side can be an absolute game-changer, creating a hot-and-cold dessert experience that is simply divine.
Enjoy your homemade Smores Pizza! I promise, the effort is well worth it for this nostalgic, utterly delicious treat that perfectly captures the essence of a campfire favorite in a fun, shareable format. It’s truly a crowd-pleaser and always brings smiles!
<h2>Conclusion:</h2>
<p>So there you have it – my absolute favorite way to bring that classic campfire magic right into your kitchen! This isn’t just another dessert; it’s an experience, a delightful twist on a beloved treat that promises smiles and sticky fingers. I truly believe this recipe for our incredible <strong>Smores Pizza</strong> is something everyone needs to try at least once. It takes the familiar joy of gooey marshmallows, melted chocolate, and crunchy graham crackers and elevates it to a whole new level of easy-to-share deliciousness. Forget the fuss of an open flame; with this recipe, you’re just minutes away from dessert heaven, ready to indulge in a treat that’s both nostalgic and excitingly new. It’s the perfect solution for those moments when you crave something sweet, comforting, and utterly satisfying, without needing to plan an elaborate outdoor adventure.</p>
<p>What makes this recipe stand out, you ask? It’s the sheer simplicity combined with the unforgettable taste. You’re getting all those wonderful, nostalgic flavors without any of the usual hassle, making it perfect for a spontaneous dessert craving or a last-minute gathering. The way the golden-brown marshmallows puff up and caramelize, mingling with generous pools of rich, melted chocolate, all sitting atop a perfectly crisp, graham cracker-infused base – it’s a symphony of textures and temperatures that truly excites the palate. Every bite is a journey back to those cherished childhood memories of bonfires and good company, but with the added convenience and elegance of a pizza. It’s a guaranteed crowd-pleaser, an edible centerpiece that sparks conversation and pure enjoyment, leaving everyone reaching for another slice.</p>
<p>Imagine the intoxicating aroma filling your kitchen – that sweet, comforting scent of roasting marshmallows and warm chocolate. It’s an experience in itself even before you take that first bite! This particular <strong>Smores Pizza</strong> recipe is designed for maximum impact with minimal effort, making it accessible even for novice bakers. The ease with which you can whip this up means you’re never far from satisfying that sweet tooth, and the visual appeal alone makes it a showstopper. It’s the kind of dessert that feels incredibly special, yet requires no complicated techniques or extensive preparation time. I promise you, once you take that first warm, gooey slice, you’ll understand exactly why I’m so enthusiastic about it and why it quickly becomes a regular in many households.</p>
<p>Now, let’s talk about how to truly make this dessert shine. While our <strong>Smores Pizza</strong> is absolutely divine straight out of the oven, warm and gooey, there are ways to elevate the experience even further. I love serving it slightly cooled but still warm enough for the chocolate to be perfectly melted and the marshmallows delightfully soft. A generous dollop of premium vanilla bean ice cream on the side, or even a scoop of rich chocolate ice cream, creates a delightful hot-and-cold contrast that is simply irresistible. The melting ice cream mingling with the warm chocolate and marshmallow is a sensory dream that you won’t soon forget. For an extra touch of decadence, consider a light dusting of high-quality cocoa powder or a decadent drizzle of homemade caramel sauce right before serving. These small additions can transform an already amazing dessert into something truly extraordinary, making it suitable for even the most discerning palates.</p>
<p>But don’t stop there! One of the things I adore about this <strong>Smores Pizza</strong> is its incredible versatility. While the classic combination is always a winning formula, feel free to get creative and make it entirely your own. Want to dial up the chocolate factor? Try using a mix of milk chocolate and dark chocolate chips, or even chopped chocolate bars like Snickers or Rolos for an added twist of caramel and crunch. You could also experiment with different types of marshmallows – perhaps some gourmet flavored ones if you can find them, like strawberry or chocolate-filled. For a delightful fruity touch, I sometimes like to add thinly sliced bananas or fresh raspberries before baking, creating a wonderful counterpoint to the sweetness. Or, if you’re a nut lover, a sprinkle of toasted pecans or almonds on top adds a fantastic crunch and depth of flavor. You could even swap out the traditional graham crackers for crushed shortbread cookies in the crust for a slightly different texture and a rich, buttery note. The possibilities are truly endless, limited only by your imagination and what delicious ingredients you have readily available in your pantry!</p>
<p>Think about special occasions too! For a birthday treat, you could add colorful sprinkles, or for a festive holiday gathering, incorporate seasonal candies like peppermint shards during winter. You can even make individual mini <strong>Smores Pizzas</strong> using smaller crusts or even large cookies as a base, which are perfect for parties and allow everyone to customize their own personal dessert. The beauty is that the core method remains reliably the same, ensuring that delightful gooey, melty, crunchy experience every single time. Don’t be afraid to experiment with different types of chocolate like white chocolate chips for a creamier, milder flavor profile, or even peanut butter chips for a nutty, salty-sweet dimension that complements the other elements beautifully. Each variation brings its own unique charm, allowing you to tailor this classic treat to suit any taste or preference. The robust base and the interplay of textures make it incredibly forgiving and adaptable, meaning your culinary adventures are almost guaranteed to succeed, bringing smiles all around.</p>
<h4>Time to Get Baking!</h4>
<p>So, now that you’ve got all the secrets to crafting this incredible dessert, what are you waiting for? I wholeheartedly encourage you to roll up your sleeves, gather your ingredients, and give this <strong>Smores Pizza</strong> recipe a try. It’s more than just baking; it’s about creating moments of joy, sharing something delicious with loved ones, and maybe even reliving a few cherished memories from around the campfire. The ease of preparation combined with the utterly delightful results makes this a no-brainer for your next dessert creation. <strong>You won’t regret experiencing the magic of this easy and delicious treat that truly brings smiles to every face.</strong> It’s a simple pleasure that delivers big on flavor and fun!</p>
<h4>Share Your Smores Pizza Story!</h4>
<p>I’m genuinely excited for you to experience this first-hand! Once you’ve made and savored your own <strong>Smores Pizza</strong>, I would absolutely love to hear about it. What variations did you try? Who did you share it with? Did it bring a smile to everyone’s face, or perhaps spark a fun memory? Please, share your experience in the comments below. Your feedback, creative twists, and joyful stories truly inspire me and the entire community! Snap a photo, tell us your baking journey – let’s celebrate the joy of home baking together and create a vibrant space for sharing culinary triumphs. <strong>Don’t keep this delicious secret to yourself; spread the Smores Pizza love far and wide!</strong> Happy baking, my friends, and enjoy every single gooey, chocolatey, graham cracker-y bite!</p>
Smores Pizza: Easy & Delicious Dessert Recipe!
Capture the undeniable magic of a crackling campfire, the gooey embrace of perfectly toasted marshmallows, and rich, melt-in-mouth chocolate, all on a convenient, shareable crust with this Smores Pizza recipe! This beloved outdoor classic is transformed into an indoor dessert sensation. A sprinkle of flaky sea salt over the finished pizza takes the flavor to the next level, making the chocolate taste even richer. Consider adding a dash of cinnamon to the cookie base in fall and winter months for cozy warmth.
Ingredients
-
1 (13-16 ounce) ball store-bought pizza dough (fresh or thawed)
-
1 tablespoon unsalted butter, melted
-
1-2 tablespoons all-purpose flour or cornmeal (for dusting)
-
6-8 ounces good quality milk chocolate bars or semi-sweet chocolate chips (approx. 1-1.5 cups)
-
3-4 cups mini marshmallows OR 10-12 large regular marshmallows, cut in halves/quarters
-
6-8 full sheets graham crackers, crushed into fine crumbs (approx. 1-1.5 cups)
-
Optional: Pinch flaky sea salt
-
Optional: Extra chocolate syrup or melted chocolate (for drizzling)
-
Optional: Sprinkle of cinnamon sugar
Instructions
-
Step 1
Preheat oven to 400°F (200°C). Line a 12-inch round pizza pan or baking sheet with parchment paper, or lightly grease and dust with flour/cornmeal. Set aside. -
Step 2
Crush graham cracker sheets into fine crumbs (approx. 1-1.5 cups). Chop chocolate bars if using them instead of chips. If using large marshmallows, cut them into halves or quarters for even melting. -
Step 3
On a lightly floured surface, stretch the room-temperature pizza dough to a 12-inch circle. Carefully transfer it to your prepared pan. Brush the exposed edges of the dough with the melted unsalted butter for a golden, crispy crust. -
Step 4
Evenly spread the prepared chocolate over the pizza dough, leaving a 1/2 to 1-inch border for the crust. Generously sprinkle the crushed graham cracker crumbs over the chocolate layer. (Optionally, sprinkle a tiny bit of cinnamon sugar over the graham crackers if desired). -
Step 5
Carefully transfer the assembled pizza to the preheated oven. Bake for 8-12 minutes, or until the pizza dough edges are lightly golden and the chocolate layer is beautifully melted and slightly bubbly. Monitor closely to prevent the crust from getting too dark. -
Step 6
Remove the pizza from the oven. Quickly and evenly arrange the prepared marshmallows (mini or cut-up regular) over the melted chocolate and graham cracker base. Return to the oven and bake for another 3-7 minutes, watching constantly. The marshmallows should puff up, become gloriously golden brown, and achieve characteristic toasted Smores char in spots. If desired, use a broiler for the last 30-60 seconds for a deeper char, but watch very carefully as marshmallows can burn quickly. -
Step 7
Once marshmallows are perfectly toasted, carefully remove the pizza from the oven and transfer the pan to a wire rack to cool for at least 10-15 minutes. This allows the chocolate to set slightly, making slicing easier. (Highly recommended: Sprinkle a tiny pinch of flaky sea salt over the warm, gooey marshmallows and chocolate. Optionally, drizzle with extra melted chocolate or remaining graham crumbs). Slice into wedges and serve warm for the best gooey experience, perhaps with a scoop of vanilla ice cream.
Important Information
Nutrition Facts (Per Serving)
It is important to consider this information as approximate and not to use it as definitive health advice.
Allergy Information
Please check ingredients for potential allergens and consult a health professional if in doubt.


Leave a Comment