
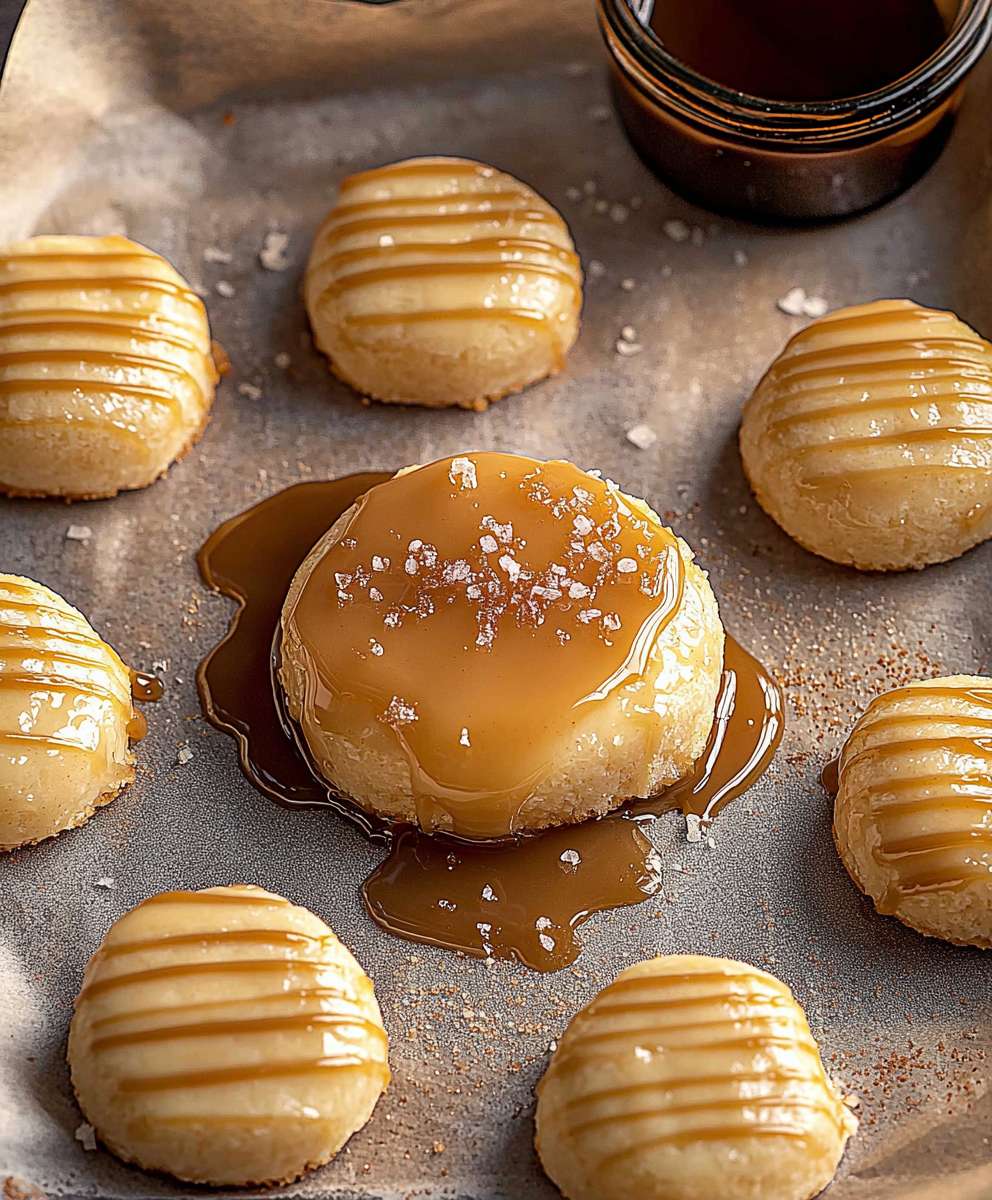
Salted Caramel, oh, where do I even begin? This isn’t just a flavor; it’s an experience, a symphony of sweet and savory that dances on your tongue. Have you ever tasted something so decadent, so utterly irresistible, that it stops you in your tracks? That’s the magic of salted caramel. It’s the culinary equivalent of a warm hug on a chilly day, a comforting indulgence that elevates any dessert to gourmet status.
While the exact origins are debated, the rise of salted caramel is often attributed to French pastry chef Henri Le Roux, who is said to have created a salted butter caramel in the late 1970s. Since then, it has exploded in popularity, becoming a beloved flavor worldwide. Its appeal lies in the perfect balance it strikes. The sweetness of the caramel, with its rich, buttery notes, is beautifully contrasted by the subtle saltiness, creating a complex and addictive flavor profile.
People adore salted caramel for its versatility. It’s fantastic drizzled over ice cream, swirled into brownies, or even enjoyed straight from the spoon (guilty as charged!). The combination of textures the smooth, creamy caramel and the occasional burst of salt adds another layer of enjoyment. Plus, let’s be honest, it just feels a little bit fancy, doesn’t it? Whether you’re a seasoned baker or a kitchen novice, this recipe is sure to impress. Get ready to embark on a delicious adventure!

Ingredients:
- 1 cup (200g) granulated sugar
- 6 tablespoons (90ml) water
- ½ cup (120ml) heavy cream, warmed
- 6 tablespoons (85g) unsalted butter, cut into cubes and slightly softened
- 1 teaspoon sea salt, or to taste
Making the Caramel:
- Combine Sugar and Water: In a medium-sized, heavy-bottomed saucepan, combine the granulated sugar and water. Stir gently to moisten all the sugar. It’s important to use a heavy-bottomed saucepan to prevent the sugar from burning unevenly.
- Cook the Sugar Mixture: Place the saucepan over medium heat. Once the sugar dissolves, stop stirring! This is crucial. Stirring after the sugar has dissolved can cause it to crystallize. Let the mixture cook undisturbed, watching carefully. The sugar will bubble and eventually turn a light amber color. This process can take anywhere from 8 to 12 minutes, depending on your stove.
- Monitor the Color: Keep a close eye on the color of the sugar. You want it to reach a deep amber color, but be careful not to let it burn. Burnt caramel tastes bitter and unpleasant. A good way to judge the color is to compare it to the color of a copper penny.
- Add the Warm Cream: Once the sugar has reached the desired amber color, carefully remove the saucepan from the heat. Immediately pour in the warm heavy cream. Be very careful, as the mixture will bubble vigorously and steam will be released. It’s best to stand back a bit to avoid getting burned.
- Stir to Combine: Whisk the cream into the caramel until it is smooth and fully incorporated. The mixture might seize up a bit at first, but keep whisking and it will eventually come together.
- Add the Butter: Add the softened butter cubes to the caramel mixture. Whisk until the butter is completely melted and incorporated, creating a smooth and glossy caramel.
- Add the Salt: Stir in the sea salt. Start with 1 teaspoon and then taste the caramel. Add more salt to taste, depending on your preference. I personally like a good amount of salt to balance the sweetness.
- Cool and Store: Pour the salted caramel into a heat-proof jar or container. Let it cool completely at room temperature. As it cools, it will thicken. Once cooled, you can store the salted caramel in the refrigerator for up to 2 weeks. It will thicken further in the refrigerator, but you can easily warm it up in the microwave for a few seconds to loosen it up before using.
Tips and Tricks for Perfect Salted Caramel:
- Use a Heavy-Bottomed Saucepan: As mentioned earlier, a heavy-bottomed saucepan is essential for even heat distribution and prevents the sugar from burning.
- Don’t Stir After Dissolving: Resist the urge to stir the sugar mixture after it has dissolved. Stirring can cause crystallization.
- Warm the Cream: Warming the heavy cream before adding it to the caramel helps to prevent the mixture from seizing up.
- Use Softened Butter: Softened butter will incorporate more easily into the caramel.
- Adjust the Salt to Your Taste: The amount of salt you use is a matter of personal preference. Start with 1 teaspoon and then add more to taste.
- Be Careful of Burns: Caramel is extremely hot and can cause severe burns. Be careful when working with it.
- Clean Up Quickly: Cleaning up caramel can be tricky. Soak the saucepan in hot, soapy water for a few hours to dissolve the hardened caramel.
Troubleshooting:
- Caramel Crystallized: If your caramel crystallizes, it means that sugar crystals have formed. This can happen if you stirred the mixture after the sugar dissolved or if there were impurities in the sugar. You can try adding a small amount of lemon juice or corn syrup to the sugar mixture to prevent crystallization.
- Caramel Seized Up: If your caramel seizes up when you add the cream, it means that the temperature difference between the caramel and the cream was too great. Warming the cream beforehand can help to prevent this. You can also try adding a tablespoon of water to the mixture and whisking vigorously to help it come back together.
- Caramel is Too Thick: If your caramel is too thick, you can add a tablespoon or two of water or cream to thin it out.
- Caramel is Too Thin: If your caramel is too thin, you can cook it for a few more minutes to evaporate some of the liquid. Be careful not to burn it.
Ways to Use Salted Caramel:
Salted caramel is incredibly versatile and can be used in a variety of ways. Here are just a few ideas:
- Drizzle over ice cream: This is a classic and simple way to enjoy salted caramel.
- Dip apples in it: Salted caramel apples are a delicious treat.
- Add it to your coffee: A spoonful of salted caramel can transform your coffee into a decadent treat.
- Use it as a filling for cakes and cupcakes: Salted caramel filling adds a delicious and unexpected flavor to baked goods.
- Make salted caramel brownies: Swirl salted caramel into your brownie batter for a rich and flavorful treat.
- Top pancakes or waffles with it: Salted caramel is a delicious alternative to syrup.
- Use it as a dip for pretzels: The salty and sweet combination is irresistible.
- Make salted caramel popcorn: A sweet and salty snack that’s perfect for movie night.
- Add it to milkshakes: Salted caramel milkshakes are a decadent and refreshing treat.
- Give it as a gift: Homemade salted caramel is a thoughtful and delicious gift.
Variations:
- Bourbon Salted Caramel: Add a tablespoon or two of bourbon to the caramel after you’ve added the salt for a boozy twist.
- Vanilla Salted Caramel: Add a teaspoon of vanilla extract to the caramel after you’ve added the salt for a classic flavor.
- Spiced Salted Caramel: Add a pinch of cinnamon, nutmeg, or cardamom to the caramel after you’ve added the salt for a warm and cozy flavor.
- Chocolate Salted Caramel: Add a tablespoon or two of cocoa powder to the sugar mixture before you start cooking it for a chocolatey caramel.
Salted Caramel Sauce vs. Salted Caramel Candy:
This recipe makes a salted caramel sauce, which is pourable and spreadable. If you want to make salted caramel candy, you’ll need to cook the sugar mixture to a higher temperature. The higher temperature will cause the sugar to harden into a candy consistency. Be very careful when making caramel candy, as it is extremely hot and can cause severe burns.
Choosing the Right Salt:
I recommend using sea salt for this recipe. Sea salt has a more complex flavor than table salt and it also has a coarser texture, which adds a nice crunch to the caramel. You can use any type of sea salt you like, such as fleur de sel, Maldon sea salt, or Himalayan pink salt. If you don’t have sea salt, you can use table salt, but be sure to use a smaller amount, as table salt is more concentrated.
Making Ahead:
Salted caramel can be made ahead of time and stored in the refrigerator for up to 2 weeks. It will thicken as it cools, so you may need to warm it up slightly before using. To warm it up, simply microwave it for a few seconds or heat it gently in a saucepan over low heat.
Scaling the Recipe:
This recipe can be easily scaled up or down, depending on your needs. Just be sure to adjust the cooking time accordingly. If you’re making a larger batch, it may take longer for the sugar to caramelize. If you’re making a smaller batch, it may caramelize more quickly.
Why Salted Caramel is So Popular:
Salted caramel has become incredibly popular in recent years, and for good reason. The combination of sweet and salty flavors is irresistible. The salt enhances the sweetness of the caramel, creating a more complex and satisfying flavor. Salted caramel is also incredibly versatile and can be used in a variety of ways, from drizzling over ice cream to filling cakes and cupcakes. It’s a delicious and decadent treat that’s sure to please everyone.
Enjoy Your Homemade Salted Caramel!
I hope you enjoy making this salted caramel recipe. It’s a simple and delicious treat that’s perfect for any occasion. Don’t be afraid to experiment with different flavors and variations to create your own signature salted caramel. Happy cooking!
Conclusion:
And there you have it! This Salted Caramel recipe is truly a game-changer. It’s not just another caramel sauce; it’s an experience. The perfect balance of sweet and salty, the luxurious, smooth texture, and the sheer versatility make it an absolute must-try for any home cook, whether you’re a seasoned pro or just starting your culinary journey. I promise, once you taste this, you’ll never go back to store-bought caramel again.
But why is this recipe so special? It’s the depth of flavor. The salt doesn’t just sit on top; it’s woven throughout, enhancing the sweetness and creating a complex, addictive taste. It’s also surprisingly easy to make. Don’t let the word “caramel” intimidate you. With a little patience and attention, you’ll be whipping up batches of this liquid gold in no time.
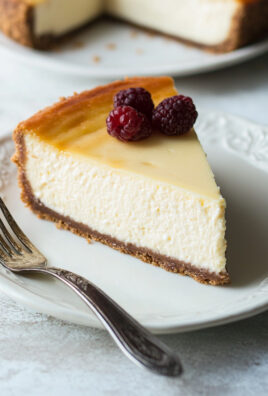
Now, let’s talk about how to enjoy this delectable creation. The possibilities are truly endless! Drizzle it over your favorite ice cream for an instant upgrade. Imagine a scoop of vanilla bean ice cream, generously coated in warm, gooey Salted Caramel. Pure bliss! Or, use it as a dip for crisp apple slices for a simple yet elegant dessert. It’s also fantastic swirled into brownies or blondies for an extra layer of indulgence.
But the fun doesn’t stop there! Get creative with your serving suggestions. How about using it as a filling for homemade chocolates? Or drizzling it over pancakes or waffles for a decadent breakfast treat? You could even use it as a glaze for roasted nuts or popcorn for a sweet and salty snack that’s perfect for movie night.
And for those of you who like to experiment, here are a few variations to try. Add a splash of bourbon or rum for a boozy caramel that’s perfect for grown-up desserts. Or, infuse it with spices like cinnamon or cardamom for a warm and comforting flavor. You could even add a pinch of cayenne pepper for a spicy kick. The only limit is your imagination!
Serving Suggestions:
* Drizzle over ice cream
* Dip for apple slices
* Swirl into brownies or blondies
* Filling for homemade chocolates
* Glaze for roasted nuts or popcorn
* Topping for pancakes or waffles
Variations:
* Bourbon or rum infused
* Cinnamon or cardamom spiced
* Cayenne pepper for a spicy kick
I’m so excited for you to try this recipe and experience the magic of homemade Salted Caramel for yourself. It’s a recipe that’s sure to impress your friends and family, and it’s a great way to add a touch of luxury to your everyday life.
So, what are you waiting for? Gather your ingredients, put on your apron, and get ready to create something truly special. And when you do, I’d love to hear about your experience! Share your photos and stories on social media using [Your Hashtag] so I can see all the delicious creations you come up with. I can’t wait to see what you make! Happy caramelizing!
Salted Caramel: The Ultimate Guide to Sweet and Salty Perfection
Rich, decadent homemade salted caramel sauce. Perfect for drizzling, dipping, or adding sweetness to your favorite treats.
Ingredients
- 1 cup (200g) granulated sugar
- 6 tablespoons (90ml) water
- ½ cup (120ml) heavy cream, warmed
- 6 tablespoons (85g) unsalted butter, cut into cubes and slightly softened
- 1 teaspoon sea salt, or to taste
Instructions
- Combine Sugar and Water: In a medium-sized, heavy-bottomed saucepan, combine the granulated sugar and water. Stir gently to moisten all the sugar.
- Cook the Sugar Mixture: Place the saucepan over medium heat. Once the sugar dissolves, stop stirring! Let the mixture cook undisturbed, watching carefully. The sugar will bubble and eventually turn a light amber color (8-12 minutes).
- Monitor the Color: Keep a close eye on the color of the sugar. You want it to reach a deep amber color, but be careful not to let it burn.
- Add the Warm Cream: Once the sugar has reached the desired amber color, carefully remove the saucepan from the heat. Immediately pour in the warm heavy cream. Be very careful, as the mixture will bubble vigorously and steam will be released.
- Stir to Combine: Whisk the cream into the caramel until it is smooth and fully incorporated.
- Add the Butter: Add the softened butter cubes to the caramel mixture. Whisk until the butter is completely melted and incorporated, creating a smooth and glossy caramel.
- Add the Salt: Stir in the sea salt. Start with 1 teaspoon and then taste the caramel. Add more salt to taste, depending on your preference.
- Cool and Store: Pour the salted caramel into a heat-proof jar or container. Let it cool completely at room temperature. As it cools, it will thicken. Once cooled, you can store the salted caramel in the refrigerator for up to 2 weeks. Warm slightly before using if needed.
Notes
- Use a heavy-bottomed saucepan for even heat distribution.
- Do not stir the sugar mixture after it has dissolved to prevent crystallization.
- Warming the heavy cream helps prevent seizing.
- Adjust the salt to your taste.
- Be careful of burns, caramel is very hot.
- If caramel crystallizes, try adding a small amount of lemon juice or corn syrup to the sugar mixture to prevent crystallization.
- If your caramel seizes up when you add the cream, it means that the temperature difference between the caramel and the cream was too great. Warming the cream beforehand can help to prevent this. You can also try adding a tablespoon of water to the mixture and whisking vigorously to help it come back together.
- If your caramel is too thick, you can add a tablespoon or two of water or cream to thin it out.
- If your caramel is too thin, you can cook it for a few more minutes to evaporate some of the liquid. Be careful not to burn it.


Leave a Comment