
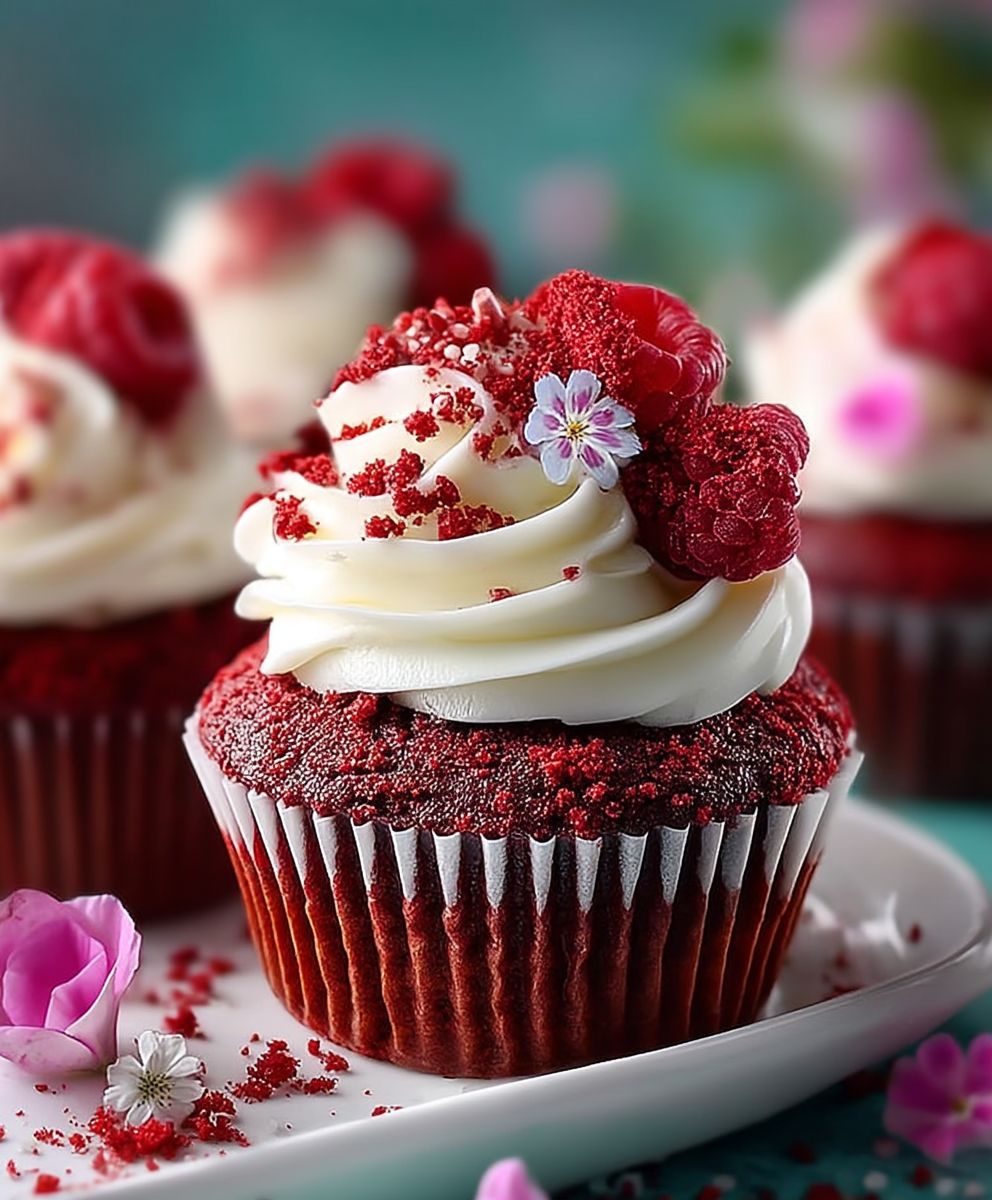
Red Velvet Cupcakes: Prepare to fall in love with a dessert that’s as visually stunning as it is delicious! Imagine sinking your teeth into a moist, tender cupcake, its crimson hue hinting at the rich, subtly tangy flavor within, all crowned with a swirl of creamy, decadent frosting. These aren’t just cupcakes; they’re a miniature celebration in every bite.
The history of Red Velvet Cupcakes is shrouded in a bit of mystery, with some tracing its origins back to the Victorian era when bakers used cocoa powder to soften the flour and create a finer crumb. Others believe it gained popularity during the Great Depression as a way to make cakes more appealing with the addition of beet juice for color and moisture. Regardless of its exact beginnings, this iconic treat has cemented its place in our hearts and on our dessert tables.
What makes these cupcakes so irresistible? It’s the perfect balance of flavors and textures. The slight tang from the buttermilk and vinegar beautifully complements the subtle chocolate notes, while the cream cheese frosting adds a luxurious richness that’s simply divine. Plus, let’s be honest, the vibrant red color makes them incredibly eye-catching and perfect for any occasion, from birthdays to holidays to a simple Tuesday treat. I find that the convenience of individual cupcakes makes them a perfect treat to share with friends and family, or to enjoy all by yourself!

Ingredients:
- For the Cupcakes:
- 2 ½ cups (300g) all-purpose flour
- 1 teaspoon baking soda
- 1 teaspoon baking powder
- 1 teaspoon salt
- 2 tablespoons unsweetened cocoa powder
- 1 ½ cups (300g) granulated sugar
- 1 cup (240ml) vegetable oil
- 1 cup (240ml) buttermilk, room temperature
- 2 large eggs, room temperature
- 2 teaspoons vanilla extract
- 1 ounce (28g) red food coloring (liquid or gel)
- 1 teaspoon white vinegar
- For the Cream Cheese Frosting:
- 8 ounces (226g) cream cheese, softened
- ½ cup (113g) unsalted butter, softened
- 4 cups (480g) powdered sugar, sifted
- 2 teaspoons vanilla extract
- 2-4 tablespoons milk or heavy cream (optional, for consistency)
Preparing the Red Velvet Cupcakes
Alright, let’s get started with making these gorgeous red velvet cupcakes! First things first, preheat your oven and get those cupcake liners ready. Trust me, you don’t want to skip this step!
- Preheat and Prep: Preheat your oven to 350°F (175°C). Line a 12-cup muffin tin with cupcake liners. This will prevent the cupcakes from sticking and make cleanup a breeze.
- Combine Dry Ingredients: In a large bowl, whisk together the flour, baking soda, baking powder, salt, and cocoa powder. Make sure everything is well combined. This ensures that the baking powder and soda are evenly distributed, which is crucial for a good rise.
- Cream Wet Ingredients: In a separate large bowl, or in the bowl of your stand mixer, combine the sugar and vegetable oil. Beat on medium speed until well combined. The mixture should be light and fluffy.
- Add Eggs and Vanilla: Add the eggs one at a time, beating well after each addition. Then, stir in the vanilla extract.
- Incorporate Buttermilk and Food Coloring: In a small bowl, whisk together the buttermilk and red food coloring. Add this mixture to the wet ingredients, alternating with the dry ingredients. Begin and end with the dry ingredients. Mix until just combined. Be careful not to overmix! Overmixing can lead to tough cupcakes.
- Add Vinegar: In a small bowl, combine the white vinegar and baking soda. It will fizz! Quickly add this mixture to the batter and stir gently to combine. This reaction helps to create a light and airy texture.
Baking the Cupcakes
Now that our batter is ready, it’s time to bake these beauties! Make sure you don’t open the oven door too often, or they might sink.
- Fill Cupcake Liners: Fill each cupcake liner about 2/3 full. This will give the cupcakes enough room to rise without overflowing. I like to use an ice cream scoop for even distribution.
- Bake: Bake for 18-20 minutes, or until a toothpick inserted into the center comes out clean. Keep a close eye on them, as baking times can vary depending on your oven.
- Cool: Let the cupcakes cool in the muffin tin for a few minutes before transferring them to a wire rack to cool completely. It’s important to let them cool completely before frosting, or the frosting will melt.
Making the Cream Cheese Frosting
The cream cheese frosting is what really makes these cupcakes special. It’s tangy, sweet, and oh-so-creamy! Make sure your cream cheese and butter are softened for the best results.
- Cream Cheese and Butter: In a large bowl, or in the bowl of your stand mixer, beat the softened cream cheese and butter together until smooth and creamy. This is the foundation of your frosting, so make sure it’s perfectly smooth.
- Add Powdered Sugar: Gradually add the sifted powdered sugar, beating on low speed until combined. Sifting the powdered sugar helps to prevent lumps in your frosting.
- Add Vanilla: Stir in the vanilla extract.
- Adjust Consistency: If the frosting is too thick, add milk or heavy cream, one tablespoon at a time, until you reach your desired consistency. You want it to be smooth and spreadable.
Frosting and Decorating
This is the fun part! Get creative with your frosting and decorations. I love using a piping bag for a professional look, but you can also just use a knife or spatula.
- Frost the Cupcakes: Once the cupcakes are completely cool, frost them with the cream cheese frosting. You can use a piping bag fitted with your favorite tip, or simply spread the frosting on with a knife or spatula.
- Decorate (Optional): Decorate the cupcakes with sprinkles, chocolate shavings, or any other toppings you like. Get creative and have fun!
Tips and Tricks for Perfect Red Velvet Cupcakes
Here are a few extra tips to ensure your red velvet cupcakes turn out perfectly every time:
- Room Temperature Ingredients: Using room temperature ingredients, especially the buttermilk, eggs, cream cheese, and butter, is crucial for a smooth and well-emulsified batter and frosting. This helps to create a tender and evenly baked cupcake.
- Don’t Overmix: Overmixing the batter can develop the gluten in the flour, resulting in tough cupcakes. Mix until just combined.
- Measure Accurately: Accurate measurements are essential for baking. Use measuring cups and spoons specifically designed for baking.
- Cool Completely: Make sure the cupcakes are completely cool before frosting. Otherwise, the frosting will melt and slide off.
- Sift Powdered Sugar: Sifting the powdered sugar helps to prevent lumps in your frosting, resulting in a smooth and creamy texture.
- Adjust Food Coloring: The amount of red food coloring can be adjusted to your preference. For a deeper red color, use gel food coloring.
- Storage: Store the frosted cupcakes in an airtight container in the refrigerator for up to 3 days. Let them come to room temperature before serving for the best flavor and texture.
- Buttermilk Substitute: If you don’t have buttermilk, you can make a substitute by adding 1 tablespoon of white vinegar or lemon juice to 1 cup of milk. Let it sit for 5 minutes before using.
- Cocoa Powder Type: Using Dutch-processed cocoa powder will give a richer, smoother flavor and darker color to the cupcakes. However, regular unsweetened cocoa powder will also work.
Troubleshooting
- Cupcakes are dry: Overbaking is the most common cause of dry cupcakes. Make sure to check for doneness with a toothpick and remove them from the oven as soon as it comes out clean. Also, ensure you’re using the correct amount of oil and buttermilk.
- Cupcakes are sinking: This can be caused by opening the oven door too often during baking, or by using too much leavening agent (baking soda or baking powder). Make sure to follow the recipe carefully and avoid opening the oven door until the cupcakes are nearly done.
- Frosting is too thin: Add more sifted powdered sugar, a tablespoon at a time, until you reach your desired consistency.
- Frosting is too thick: Add milk or heavy cream, a tablespoon at a time, until you reach your desired consistency.
Variations
- Chocolate Chips: Add ½ cup of chocolate chips to the batter for a chocolatey twist.
- Nuts: Add ½ cup of chopped nuts, such as pecans or walnuts, to the batter for added texture and flavor.
- Different Frosting: Try using a different type of frosting, such as vanilla buttercream or chocolate ganache.
- Red Velvet Cake: You can use this same recipe to make a red velvet cake. Simply bake the batter in a 9×13 inch pan for about 25-30 minutes.
Conclusion:
And there you have it! These aren’t just any cupcakes; these Red Velvet Cupcakes are a symphony of flavors and textures, a delightful treat that’s guaranteed to impress. From the vibrant, almost jewel-toned crumb to the tangy, creamy frosting, every bite is an experience. I truly believe this recipe is a must-try for anyone who loves baking, or simply appreciates a good dessert.
Why is it a must-try, you ask? Well, beyond the obvious deliciousness, this recipe is surprisingly straightforward. I’ve broken down each step to ensure even beginner bakers can achieve perfect results. Plus, the moistness of these cupcakes is unparalleled. They stay incredibly soft and tender for days, making them ideal for parties, potlucks, or simply enjoying throughout the week (if they last that long!). The subtle cocoa flavor, combined with the buttermilk and vinegar, creates a unique tang that perfectly complements the sweetness of the frosting. It’s a flavor profile that’s both familiar and exciting, a classic with a modern twist.
But the best part? The versatility! While I’ve shared my go-to cream cheese frosting recipe, feel free to experiment. A simple vanilla buttercream would also be divine, or even a chocolate ganache for an extra decadent treat. For serving suggestions, these cupcakes are perfect on their own, of course. But you could also dress them up with a sprinkle of red velvet crumbs, a dusting of cocoa powder, or even a fresh raspberry on top. Imagine serving these at your next holiday gathering they’re festive, delicious, and sure to be a crowd-pleaser.
Looking for variations? Consider adding a swirl of raspberry jam to the batter before baking for a fruity twist. Or, for a more intense chocolate flavor, add a tablespoon of cocoa powder to the batter. You could even try making mini cupcakes for a bite-sized treat. And for those who are gluten-free, this recipe can easily be adapted with a gluten-free flour blend. Just be sure to use a blend that’s designed for baking and contains xanthan gum for binding.
I’ve poured my heart into perfecting this Red Velvet Cupcakes recipe, and I’m so excited for you to try it. I truly believe you’ll love the results. The combination of the moist, flavorful cake and the tangy, creamy frosting is simply irresistible. It’s a recipe that’s perfect for any occasion, from birthdays to holidays to a simple weeknight treat.
So, what are you waiting for? Gather your ingredients, preheat your oven, and get ready to bake some magic! I’m confident that these cupcakes will become a new favorite in your household. And most importantly, don’t be afraid to get creative and put your own spin on the recipe. Baking is all about experimentation and having fun!
Once you’ve tried this recipe, I would absolutely love to hear about your experience. Did you make any variations? What did you think of the frosting? Share your photos and comments in the section below. I can’t wait to see your creations and hear your feedback! Happy baking! Let me know if you have any questions, I am here to help. I hope you enjoy these as much as I do!
Red Velvet Cupcakes: The Ultimate Recipe & Baking Guide
Classic red velvet cupcakes topped with tangy cream cheese frosting. Moist, flavorful, and perfect for any occasion!
Ingredients
- 2 ½ cups (300g) all-purpose flour
- 1 teaspoon baking soda
- 1 teaspoon baking powder
- 1 teaspoon salt
- 2 tablespoons unsweetened cocoa powder
- 1 ½ cups (300g) granulated sugar
- 1 cup (240ml) vegetable oil
- 1 cup (240ml) buttermilk, room temperature
- 2 large eggs, room temperature
- 2 teaspoons vanilla extract
- 1 ounce (28g) red food coloring (liquid or gel)
- 1 teaspoon white vinegar
- 8 ounces (226g) cream cheese, softened
- ½ cup (113g) unsalted butter, softened
- 4 cups (480g) powdered sugar, sifted
- 2 teaspoons vanilla extract
- 2-4 tablespoons milk or heavy cream (optional, for consistency)
Instructions
- Preheat your oven to 350°F (175°C). Line a 12-cup muffin tin with cupcake liners.
- In a large bowl, whisk together the flour, baking soda, baking powder, salt, and cocoa powder.
- In a separate large bowl, or in the bowl of your stand mixer, combine the sugar and vegetable oil. Beat on medium speed until well combined.
- Add the eggs one at a time, beating well after each addition. Then, stir in the vanilla extract.
- In a small bowl, whisk together the buttermilk and red food coloring. Add this mixture to the wet ingredients, alternating with the dry ingredients. Begin and end with the dry ingredients. Mix until just combined.
- In a small bowl, combine the white vinegar and baking soda. It will fizz! Quickly add this mixture to the batter and stir gently to combine.
- Fill each cupcake liner about 2/3 full.
- Bake for 18-20 minutes, or until a toothpick inserted into the center comes out clean.
- Let the cupcakes cool in the muffin tin for a few minutes before transferring them to a wire rack to cool completely.
- In a large bowl, or in the bowl of your stand mixer, beat the softened cream cheese and butter together until smooth and creamy.
- Gradually add the sifted powdered sugar, beating on low speed until combined.
- Stir in the vanilla extract.
- If the frosting is too thick, add milk or heavy cream, one tablespoon at a time, until you reach your desired consistency.
- Once the cupcakes are completely cool, frost them with the cream cheese frosting. You can use a piping bag fitted with your favorite tip, or simply spread the frosting on with a knife or spatula.
- Decorate the cupcakes with sprinkles, chocolate shavings, or any other toppings you like.
Notes
- Using room temperature ingredients, especially the buttermilk, eggs, cream cheese, and butter, is crucial for a smooth and well-emulsified batter and frosting.
- Overmixing the batter can develop the gluten in the flour, resulting in tough cupcakes. Mix until just combined.
- Accurate measurements are essential for baking. Use measuring cups and spoons specifically designed for baking.
- Make sure the cupcakes are completely cool before frosting. Otherwise, the frosting will melt and slide off.
- Sifting the powdered sugar helps to prevent lumps in your frosting.
- The amount of red food coloring can be adjusted to your preference. For a deeper red color, use gel food coloring.
- Store the frosted cupcakes in an airtight container in the refrigerator for up to 3 days. Let them come to room temperature before serving for the best flavor and texture.
- If you don’t have buttermilk, you can make a substitute by adding 1 tablespoon of white vinegar or lemon juice to 1 cup of milk. Let it sit for 5 minutes before using.
- Using Dutch-processed cocoa powder will give a richer, smoother flavor and darker color to the cupcakes. However, regular unsweetened cocoa powder will also work.

Leave a Comment