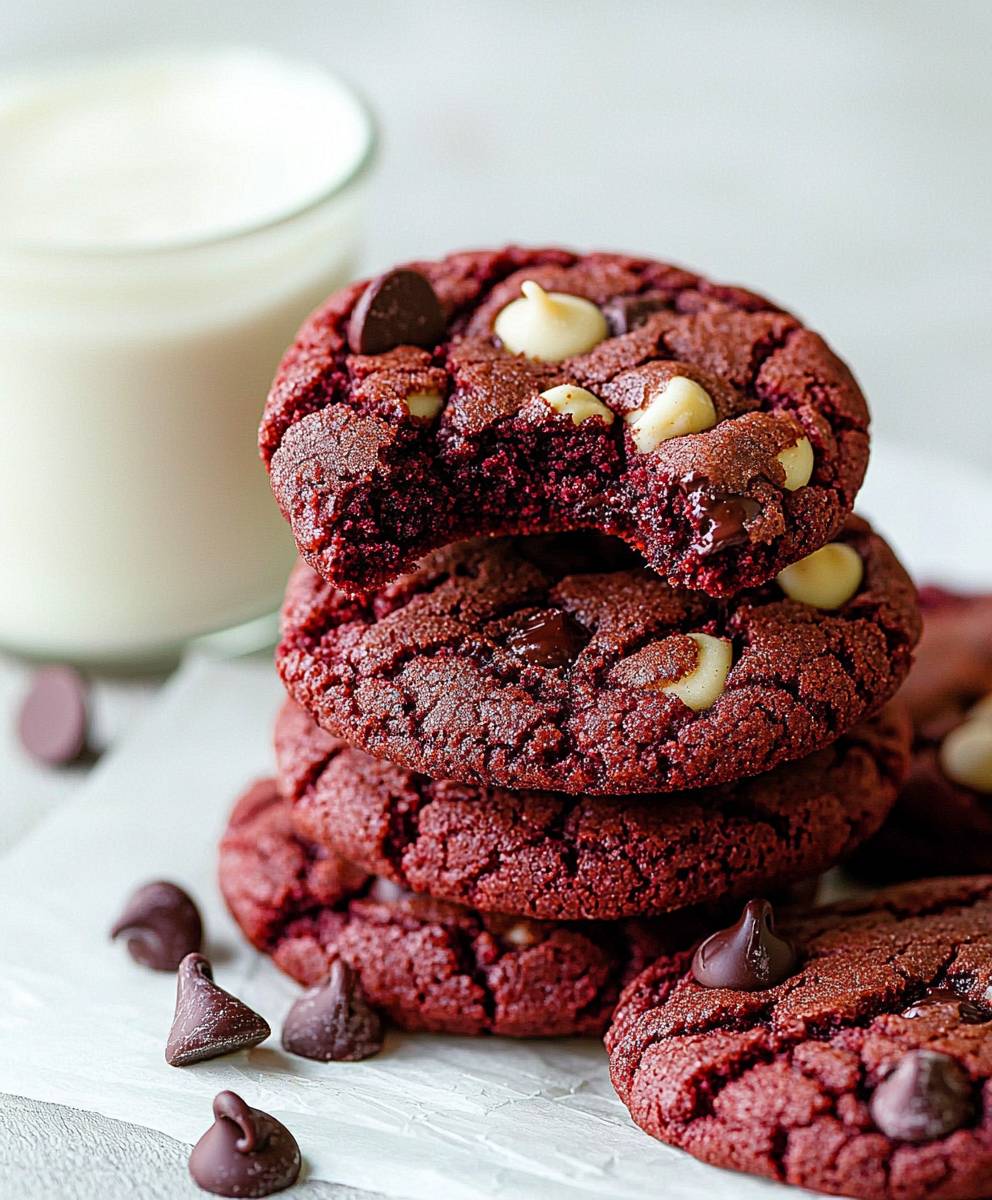
Red Velvet Chocolate Chip Cookies are a delightful twist on the classic cookie that combines the rich, velvety flavor of red velvet cake with the irresistible sweetness of chocolate chips. As a passionate baker, I cant help but be enchanted by the vibrant color and unique taste of these cookies. Originating from the Southern United States, red velvet desserts have a long-standing history, often associated with special occasions and celebrations. The combination of cocoa powder and buttermilk gives red velvet its signature flavor, while the addition of chocolate chips elevates these cookies to a whole new level of indulgence.
People love Red Velvet Chocolate Chip Cookies not just for their stunning appearance, but also for their soft, chewy texture and the perfect balance of sweetness. They are incredibly convenient to make, making them a favorite for both novice and experienced bakers alike. Whether youre hosting a gathering or simply treating yourself, these cookies are sure to impress. Join me as we dive into this delicious recipe that will surely become a staple in your baking repertoire!
Ingredients:
- 2 ½ cups all-purpose flour
- 1 tablespoon unsweetened cocoa powder
- 1 teaspoon baking soda
- ½ teaspoon salt
- 1 cup unsalted butter, softened
- 1 cup granulated sugar
- ½ cup brown sugar, packed
- 2 large eggs
- 1 tablespoon red food coloring
- 1 teaspoon vanilla extract
- 1 cup semi-sweet chocolate chips
- ½ cup white chocolate chips (optional)
Preparing the Dough
- First, I preheat my oven to 350°F (175°C). This ensures that the cookies will bake evenly and come out perfectly chewy.
- In a medium bowl, I whisk together the flour, cocoa powder, baking soda, and salt. This step is crucial as it helps to evenly distribute the leavening agents and cocoa powder throughout the flour.
- In a large mixing bowl, I cream together the softened butter, granulated sugar, and brown sugar using an electric mixer on medium speed. I mix until the mixture is light and fluffy, which usually takes about 2-3 minutes. This process incorporates air into the butter, making the cookies tender.
- Next, I add the eggs one at a time, mixing well after each addition. I also add the red food coloring and vanilla extract at this stage. The red food coloring is what gives these cookies their signature red velvet hue, and the vanilla adds a lovely flavor.
- Once everything is well combined, I gradually add the dry ingredients to the wet mixture. I do this in three parts, mixing on low speed until just combined after each addition. I want to be careful not to overmix, as this can lead to tough cookies.
- Finally, I fold in the semi-sweet chocolate chips and, if Im feeling adventurous, the white chocolate chips. The combination of chocolate chips adds a delightful richness to the cookies.
Chilling the Dough
- After the dough is mixed, I cover the bowl with plastic wrap and place it in the refrigerator for at least 30 minutes. Chilling the dough helps to solidify the butter, which results in thicker cookies that dont spread too much while baking.
Baking the Cookies
- Once the dough has chilled, I line a baking sheet with parchment paper. This prevents the cookies from sticking and makes for easy cleanup.
- Using a cookie scoop or a tablespoon, I drop rounded balls of dough onto the prepared baking sheet, spacing them about 2 inches apart. This allows room for the cookies to spread as they bake.
- I pop the baking sheet into the preheated oven and bake the cookies for 10-12 minutes. I keep an eye on them, as I want the edges to be set while the centers remain soft. They will continue to cook slightly after being removed from the oven.
- Once they are done, I take the baking sheet out of the oven and let the cookies cool on the sheet for about 5 minutes before transferring them to a wire rack to cool completely. This step is important as it allows the cookies to firm up a bit before moving them.
Assembling and Serving
- After the cookies have cooled completely, I like to serve them with a glass of cold milk or a cup of coffee. The rich chocolate flavor combined with the subtle tang of the red velvet is simply irresistible!
- If I want to get a little fancy, I sometimes drizzle melted white chocolate over the cooled cookies for an extra touch of sweetness and decoration. Its a simple step that makes a big difference in presentation.
- These cookies can be stored in an airtight container at room temperature for up to a week, but I can guarantee they wont last that long! They also freeze well, so I can make a double batch and save some for later.
Tips for Perfect Cookies
- Make sure your butter is softened but not melted. This helps achieve the right texture.
- Use gel food coloring for a more vibrant red color, as it doesnt add

Conclusion:
In summary, these Red Velvet Chocolate Chip Cookies are an absolute must-try for anyone looking to elevate their dessert game. The rich, velvety flavor combined with the delightful crunch of chocolate chips creates a perfect balance that will leave your taste buds dancing with joy. Not only are they visually stunning with their vibrant red hue, but they also bring a unique twist to the classic cookie that everyone knows and loves. For serving suggestions, I recommend pairing these cookies with a tall glass of cold milk or a scoop of vanilla ice cream for an indulgent treat. You can also experiment with variations by adding nuts, such as pecans or walnuts, or even a sprinkle of sea salt on top to enhance the flavor profile. If you’re feeling adventurous, try incorporating a cream cheese frosting drizzle for an extra layer of decadence. I encourage you to give this recipe a try and share your experience with friends and family. Whether you’re baking for a special occasion or just to satisfy your sweet tooth, these Red Velvet Chocolate Chip Cookies are sure to impress. Don’t forget to snap a picture and tag me when you do; I can’t wait to see how your cookies turn out! Happy baking! Print
Red Velvet Chocolate Chip Cookies: The Ultimate Recipe for a Delicious Treat
- Total Time: 40-42 minutes
- Yield: 24 cookies 1x
Description
Indulge in these delightful Red Velvet Chocolate Chip Cookies, featuring a rich chocolate flavor and a vibrant red hue. Soft, chewy, and irresistibly delicious, they are perfect for any occasion!
Ingredients
- 2 ½ cups all-purpose flour
- 1 tablespoon unsweetened cocoa powder
- 1 teaspoon baking soda
- ½ teaspoon salt
- 1 cup unsalted butter, softened
- 1 cup granulated sugar
- ½ cup brown sugar, packed
- 2 large eggs
- 1 tablespoon red food coloring
- 1 teaspoon vanilla extract
- 1 cup semi-sweet chocolate chips
- ½ cup white chocolate chips (optional)
Instructions
- Preheat your oven to 350°F (175°C).
- In a medium bowl, whisk together the flour, cocoa powder, baking soda, and salt.
- In a large mixing bowl, cream together the softened butter, granulated sugar, and brown sugar using an electric mixer on medium speed until light and fluffy (about 2-3 minutes).
- Add the eggs one at a time, mixing well after each addition. Then, add the red food coloring and vanilla extract.
- Gradually add the dry ingredients to the wet mixture in three parts, mixing on low speed until just combined.
- Fold in the semi-sweet chocolate chips and optional white chocolate chips.
- Cover the bowl with plastic wrap and refrigerate the dough for at least 30 minutes.
- Line a baking sheet with parchment paper.
- Using a cookie scoop or tablespoon, drop rounded balls of dough onto the prepared baking sheet, spacing them about 2 inches apart.
- Bake in the preheated oven for 10-12 minutes, until the edges are set and the centers remain soft.
- Let the cookies cool on the baking sheet for about 5 minutes before transferring them to a wire rack to cool completely.
- Serve the cooled cookies with a glass of cold milk or a cup of coffee.
- For an extra touch, drizzle melted white chocolate over the cooled cookies.
- Store in an airtight container at room temperature for up to a week or freeze for later enjoyment.
Notes
- Ensure your butter is softened but not melted for the right texture.
- For a more vibrant red color, consider using gel food coloring.
- Prep Time: 30 minutes
- Cook Time: 10-12 minutes


Leave a Comment