
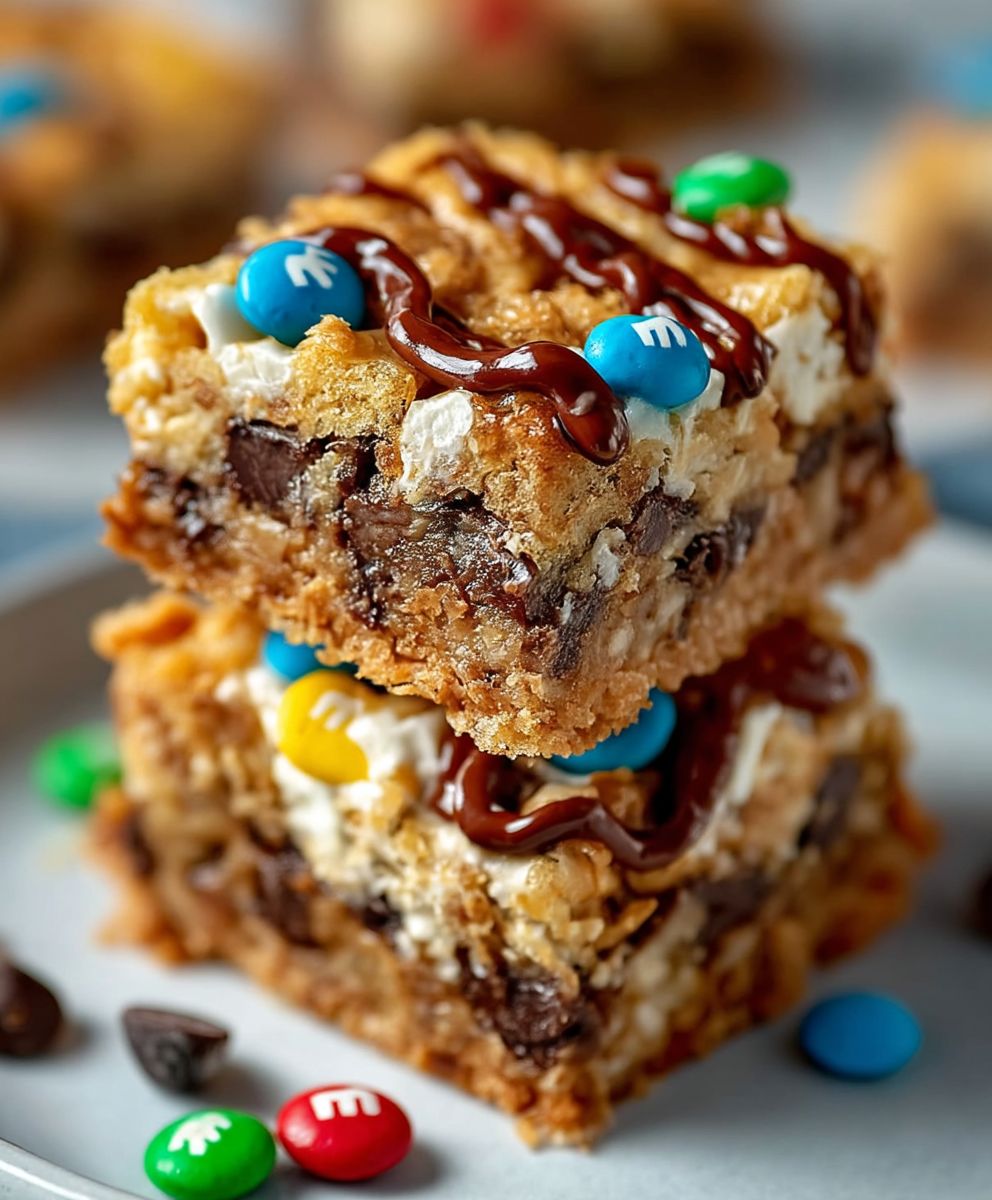
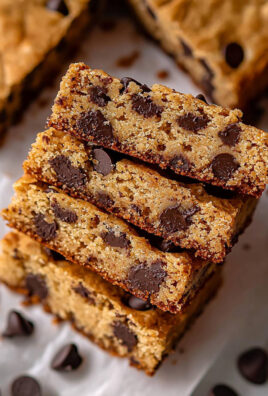
Monster cookie bars: Prepare to unleash your inner cookie monster with this irresistible treat! Imagine sinking your teeth into a chewy, colorful explosion of oats, peanut butter, chocolate chips, and candy-coated chocolates all baked into one glorious bar. This isn’t just a dessert; it’s a celebration of fun and flavor that will have everyone begging for more.
While the exact origins of monster cookie bars are shrouded in a bit of mystery, their spirit is undeniably American. They embody the “everything but the kitchen sink” approach to baking, a playful rebellion against overly fussy desserts. Think of them as the ultimate customizable cookie, a blank canvas for your favorite sweet additions.
What makes these bars so universally loved? It’s the delightful combination of textures and tastes. The hearty oats provide a satisfying chewiness, while the peanut butter adds a rich, nutty depth. The chocolate chips and candy-coated chocolates deliver bursts of sweetness and a playful pop of color. Plus, they are incredibly easy to make! Forget rolling individual cookies; simply press the dough into a pan and bake. Whether you’re looking for a crowd-pleasing dessert for a party or a simple treat to satisfy your sweet tooth, these monster cookie bars are guaranteed to be a hit.

Ingredients:
- 1 cup (2 sticks) unsalted butter, softened
- 1 ½ cups packed brown sugar
- ½ cup granulated sugar
- 3 large eggs
- 1 tablespoon vanilla extract
- 4 ½ cups all-purpose flour
- 1 teaspoon baking soda
- 1 teaspoon baking powder
- ½ teaspoon salt
- 1 cup rolled oats
- 1 cup peanut butter chips
- 1 cup chocolate chips
- 1 cup M&M’s (or other colorful candies)
Preparing the Dough:
- Cream the Butter and Sugars: In a large bowl (or the bowl of your stand mixer), cream together the softened butter, brown sugar, and granulated sugar until light and fluffy. This usually takes about 3-5 minutes. Make sure to scrape down the sides of the bowl occasionally to ensure everything is evenly mixed. We want a smooth, consistent base for our cookie bars.
- Incorporate the Eggs and Vanilla: Add the eggs one at a time, mixing well after each addition. Then, stir in the vanilla extract. The vanilla really enhances the flavors of all the other ingredients, so don’t skip it!
- Combine Dry Ingredients: In a separate medium bowl, whisk together the flour, baking soda, baking powder, and salt. Whisking ensures that the baking soda and baking powder are evenly distributed throughout the flour, which is crucial for a good rise and texture.
- Gradually Add Dry Ingredients to Wet Ingredients: Gradually add the dry ingredients to the wet ingredients, mixing on low speed until just combined. Be careful not to overmix! Overmixing can lead to tough cookie bars. We want them to be soft and chewy.
- Stir in Oats and Chips: Stir in the rolled oats, peanut butter chips, chocolate chips, and M&M’s (or other candies). Make sure everything is evenly distributed throughout the dough. This is where the “monster” in monster cookie bars comes from all those delicious mix-ins!
Baking the Cookie Bars:
- Preheat Oven and Prepare Pan: Preheat your oven to 350°F (175°C). Grease a 9×13 inch baking pan. You can also line the pan with parchment paper, leaving an overhang on the sides, for easy removal. This is my preferred method because it makes cleanup a breeze!
- Press Dough into Pan: Press the cookie dough evenly into the prepared baking pan. You might find it helpful to use your hands or the back of a spoon to spread the dough evenly.
- Bake: Bake for 25-30 minutes, or until the edges are golden brown and a toothpick inserted into the center comes out with just a few moist crumbs attached. Keep a close eye on them, as baking times can vary depending on your oven.
- Cool Completely: Let the cookie bars cool completely in the pan before cutting into squares. This is important because they will continue to set as they cool. If you try to cut them while they’re still warm, they might crumble. If you used parchment paper, lift the bars out of the pan using the overhang and place them on a cutting board.
Tips and Variations:
- Nut Butter: Feel free to substitute the peanut butter chips with other nut butter chips, like almond butter or cashew butter. You can also swirl a tablespoon or two of your favorite nut butter into the batter before baking for an extra nutty flavor.
- Different Candies: Get creative with the candies! Use different colors of M&M’s, add chopped Reese’s Peanut Butter Cups, or even throw in some sprinkles for a festive touch.
- Nuts: Add chopped nuts, such as walnuts, pecans, or almonds, for extra crunch and flavor. About ½ to 1 cup of chopped nuts would be a good amount.
- Chocolate Chunks: Instead of chocolate chips, use chocolate chunks for a more decadent experience.
- Gluten-Free Option: To make these cookie bars gluten-free, use a gluten-free all-purpose flour blend. Make sure the blend contains xanthan gum for proper binding.
- Storage: Store the cookie bars in an airtight container at room temperature for up to 3 days. They can also be frozen for longer storage. Wrap them individually in plastic wrap and then place them in a freezer bag. They will keep in the freezer for up to 2 months.
- Softening Butter Quickly: If you forgot to take the butter out of the refrigerator ahead of time, you can soften it quickly by cutting it into small cubes and letting it sit at room temperature for about 15-20 minutes. You can also microwave it in 5-second intervals, being careful not to melt it.
- Measuring Flour Accurately: To ensure you’re not using too much flour, spoon the flour into your measuring cup and then level it off with a knife. Avoid scooping the flour directly from the bag, as this can pack the flour down and result in drier cookie bars.
- Don’t Overbake: Overbaking will result in dry, crumbly cookie bars. It’s better to slightly underbake them, as they will continue to set as they cool.
- Adding a Glaze: For an extra touch of sweetness, you can drizzle a simple glaze over the cooled cookie bars. To make the glaze, whisk together 1 cup of powdered sugar with 2-3 tablespoons of milk until smooth.
Troubleshooting:
- Cookie bars are too dry: This could be due to overbaking or using too much flour. Make sure to measure the flour accurately and avoid overbaking.
- Cookie bars are too crumbly: This could be due to not enough butter or overmixing the dough. Make sure to use softened butter and avoid overmixing.
- Cookie bars are too hard: This could be due to overbaking or using too much sugar. Make sure to bake them for the recommended time and use the correct amount of sugar.
- Cookie bars are too soft: This could be due to underbaking or using too much butter. Make sure to bake them for the recommended time and use the correct amount of butter.
- Cookie bars are not spreading: This could be due to using cold butter or too much flour. Make sure to use softened butter and measure the flour accurately.
Serving Suggestions:
- Serve the cookie bars warm or at room temperature.
- Pair them with a glass of cold milk or a scoop of vanilla ice cream.
- Cut them into squares or triangles for serving.
- Wrap them individually for easy snacking on the go.
- Bring them to potlucks, parties, or bake sales.
Why This Recipe Works:
This recipe is a guaranteed crowd-pleaser because it combines the best of both worlds: the satisfying chewiness of oatmeal cookies and the fun, colorful appeal of candy-studded treats. The combination of brown sugar and granulated sugar creates a perfect balance of sweetness and moisture, while the butter adds richness and flavor. The oats provide a delightful texture, and the mix-ins add pops of flavor and visual appeal. Plus, the recipe is easy to customize with your favorite ingredients, making it a versatile option for any occasion.
Detailed Explanation of Key Ingredients:
- Butter: Unsalted butter is preferred because it allows you to control the amount of salt in the recipe. Softened butter is crucial for creaming with the sugars, which creates air pockets that contribute to the light and fluffy texture of the cookie bars.
- Brown Sugar: Brown sugar adds moisture and a caramel-like flavor to the cookie bars. The molasses in brown sugar also helps to keep them soft and chewy.
- Granulated Sugar: Granulated sugar adds sweetness and helps to create a crisp edge on the cookie bars.
- Eggs: Eggs bind the ingredients together and add richness and moisture. They also help to create a tender crumb.
- Vanilla Extract: Vanilla extract enhances the flavors of all the other ingredients and adds a warm, comforting aroma.
- All-Purpose Flour: All-purpose flour provides structure to the cookie bars.
- Baking Soda and Baking Powder: Baking soda and baking powder are leavening agents that help the cookie bars rise. Baking soda reacts with the acids in the brown sugar to create carbon dioxide, which helps to leaven the dough. Baking powder contains both an acid and a base, so it can leaven the dough even without the presence of an acid.
- Salt: Salt enhances the flavors of all the other ingredients and balances the sweetness.
- Rolled Oats: Rolled oats add texture and
Conclusion:
And there you have it! These Monster Cookie Bars are truly something special, and I wholeheartedly believe they deserve a spot in your regular baking rotation. Why? Because they’re ridiculously easy to make, bursting with flavor, and offer that perfect chewy-crisp texture that everyone craves. Forget complicated recipes with finicky steps this one is straightforward and satisfying, guaranteeing delicious results every single time. Plus, who can resist a cookie bar packed with oats, peanut butter, chocolate chips, and colorful candies? It’s a party in every bite!
But the real magic lies in the versatility of these bars. While the classic recipe is a winner, don’t be afraid to experiment and make them your own. Feeling adventurous? Try swapping out the chocolate chips for white chocolate or butterscotch chips. Add a handful of chopped walnuts or pecans for extra crunch. For a truly decadent treat, drizzle melted chocolate over the cooled bars and sprinkle with sea salt. The possibilities are endless!
Serving Suggestions: These Monster Cookie Bars are fantastic on their own, perfect for an afternoon snack or a sweet ending to any meal. But they also shine when paired with other treats. Imagine serving them warm with a scoop of vanilla ice cream pure bliss! Or, cut them into smaller squares and include them in a dessert platter for your next gathering. They’re also incredibly portable, making them ideal for picnics, potlucks, or lunchboxes. And let’s not forget the holidays! These bars are a festive addition to any cookie exchange or holiday dessert table.
Beyond the classic serving suggestions, consider these fun variations:
* Monster Cookie Bar Sundaes: Crumble a bar over ice cream, add your favorite toppings like whipped cream, sprinkles, and hot fudge, and enjoy a decadent sundae.
* Monster Cookie Bar Milkshakes: Blend a bar with milk and ice cream for a super-charged milkshake that’s bursting with flavor.
* Monster Cookie Bar Crumble Topping: Crumble the bars and use them as a topping for yogurt, oatmeal, or even fruit crisps.I’ve poured my heart into perfecting this recipe, and I’m confident that you’ll love it as much as I do. The combination of textures and flavors is simply irresistible, and the ease of preparation makes it a go-to recipe for any occasion.
So, what are you waiting for? Gather your ingredients, preheat your oven, and get ready to bake up a batch of these incredible Monster Cookie Bars. I promise you won’t regret it!
And most importantly, I want to hear about your experience! Did you try any variations? Did you add any special ingredients? What did your family and friends think? Share your photos and stories in the comments below. I can’t wait to see your creations and hear all about your baking adventures. Happy baking! I am sure you will love this recipe.
Monster Cookie Bars: The Ultimate Guide to Baking Perfection
Chewy and delicious Monster Cookie Bars packed with oats, peanut butter chips, chocolate chips, and M&M's! An easy and customizable treat perfect for any occasion.
Ingredients
- 1 cup (2 sticks) unsalted butter, softened
- 1 ½ cups packed brown sugar
- ½ cup granulated sugar
- 3 large eggs
- 1 tablespoon vanilla extract
- 4 ½ cups all-purpose flour
- 1 teaspoon baking soda
- 1 teaspoon baking powder
- ½ teaspoon salt
- 1 cup rolled oats
- 1 cup peanut butter chips
- 1 cup chocolate chips
- 1 cup M&M’s (or other colorful candies)
Instructions
- Cream the Butter and Sugars: In a large bowl (or the bowl of your stand mixer), cream together the softened butter, brown sugar, and granulated sugar until light and fluffy. This usually takes about 3-5 minutes. Scrape down the sides of the bowl occasionally to ensure everything is evenly mixed.
- Incorporate the Eggs and Vanilla: Add the eggs one at a time, mixing well after each addition. Then, stir in the vanilla extract.
- Combine Dry Ingredients: In a separate medium bowl, whisk together the flour, baking soda, baking powder, and salt.
- Gradually Add Dry Ingredients to Wet Ingredients: Gradually add the dry ingredients to the wet ingredients, mixing on low speed until just combined. Be careful not to overmix!
- Stir in Oats and Chips: Stir in the rolled oats, peanut butter chips, chocolate chips, and M&M’s (or other candies). Make sure everything is evenly distributed throughout the dough.
- Preheat Oven and Prepare Pan: Preheat your oven to 350°F (175°C). Grease a 9×13 inch baking pan. You can also line the pan with parchment paper, leaving an overhang on the sides, for easy removal.
- Press Dough into Pan: Press the cookie dough evenly into the prepared baking pan. You might find it helpful to use your hands or the back of a spoon to spread the dough evenly.
- Bake: Bake for 25-30 minutes, or until the edges are golden brown and a toothpick inserted into the center comes out with just a few moist crumbs attached.
- Cool Completely: Let the cookie bars cool completely in the pan before cutting into squares. If you used parchment paper, lift the bars out of the pan using the overhang and place them on a cutting board.
Notes
- Nut Butter: Feel free to substitute the peanut butter chips with other nut butter chips, like almond butter or cashew butter. You can also swirl a tablespoon or two of your favorite nut butter into the batter before baking for an extra nutty flavor.
- Different Candies: Get creative with the candies! Use different colors of M&M’s, add chopped Reese’s Peanut Butter Cups, or even throw in some sprinkles for a festive touch.
- Nuts: Add chopped nuts, such as walnuts, pecans, or almonds, for extra crunch and flavor. About ½ to 1 cup of chopped nuts would be a good amount.
- Chocolate Chunks: Instead of chocolate chips, use chocolate chunks for a more decadent experience.
- Gluten-Free Option: To make these cookie bars gluten-free, use a gluten-free all-purpose flour blend. Make sure the blend contains xanthan gum for proper binding.
- Storage: Store the cookie bars in an airtight container at room temperature for up to 3 days. They can also be frozen for longer storage. Wrap them individually in plastic wrap and then place them in a freezer bag. They will keep in the freezer for up to 2 months.
- Softening Butter Quickly: If you forgot to take the butter out of the refrigerator ahead of time, you can soften it quickly by cutting it into small cubes and letting it sit at room temperature for about 15-20 minutes. You can also microwave it in 5-second intervals, being careful not to melt it.
- Measuring Flour Accurately: To ensure you’re not using too much flour, spoon the flour into your measuring cup and then level it off with a knife. Avoid scooping the flour directly from the bag, as this can pack the flour down and result in drier cookie bars.
- Don’t Overbake: Overbaking will result in dry, crumbly cookie bars. It’s better to slightly underbake them, as they will continue to set as they cool.
- Adding a Glaze: For an extra touch of sweetness, you can drizzle a simple glaze over the cooled cookie bars. To make the glaze, whisk together 1 cup of powdered sugar with 2-3 tablespoons of milk until smooth.


Leave a Comment