
Mm Chocolate Brownie Pizza! I am absolutely thrilled to present a recipe that promises to transform your dessert experience and become an instant favorite for any gathering. Imagine the rich, fudgy embrace of a classic brownie, but reimagined as a festive, shareable pizza. This delightful fusion bridges the comforting familiarity of a brownie, a beloved American invention dating back to the late 19th century, with the playful, communal spirit of a pizza. While traditional pizza hails from Italy, its dessert counterpart is a modern culinary innovation, a testament to our ongoing quest for exciting new sweet treats. I believe this recipe perfectly captures that innovative spirit.
People adore this dish for countless reasons. Its irresistible combination of a moist, dense chocolate base, often crowned with a vibrant array of sweet toppings like melted chocolate, sprinkles, candies, or fresh fruit, offers a multi-sensory delight. It’s not just a dessert; it’s an experience – customizable, visually stunning, and incredibly fun to eat. The sheer joy of slicing into a decadent Mm Chocolate Brownie Pizza and sharing a piece of pure bliss with friends and family is unparalleled. Get ready to bake a masterpiece that tastes as amazing as it looks!

Ingredients:
- For the Rich Chocolate Brownie Base:
- 1 cup (2 sticks or 226g) unsalted butter, melted
- 2 cups (400g) granulated sugar
- 4 large eggs, at room temperature
- 1 teaspoon pure vanilla extract
- 1 cup (125g) all-purpose flour
- ¾ cup (75g) unsweetened cocoa powder (Dutch-processed for a darker, richer flavor is highly recommended)
- ½ teaspoon baking powder (optional, for a slightly less fudgy, more cake-like brownie)
- ½ teaspoon salt
- 1 cup (170g) semisweet chocolate chips, plus extra for sprinkling
- For the Velvety Chocolate Buttercream Frosting:
- ½ cup (1 stick or 113g) unsalted butter, softened to room temperature
- 4 ounces (113g) cream cheese, softened to room temperature (full-fat for best results)
- 3-4 cups (360-480g) powdered sugar, sifted
- ½ cup (50g) unsweetened cocoa powder, sifted (again, Dutch-processed is great here)
- 2-4 tablespoons heavy cream or milk
- 1 teaspoon pure vanilla extract
- Pinch of salt
- For the Signature “Mm” Toppings:
- 1½ – 2 cups mini M&M’s (the star of our show for the “Mm Chocolate Brownie Pizza”!)
- ½ cup white chocolate chips or chopped white chocolate bar, melted for drizzling (optional)
- Assorted chopped candies or chocolates (e.g., chopped peanut butter cups, additional chocolate chips, sprinkles)
- Fresh berries (strawberries, raspberries) for a pop of color and freshness, if desired
Preparing the Decadent Brownie Base
- Preheat and Prepare Your Pan: First things first, let’s get that oven ready. Preheat your oven to a cozy 350°F (175°C). Then, grab a 12-inch round pizza pan or a 9×13 inch baking pan if you prefer a rectangular pizza (we’re going for round for that classic pizza look!). Line it with parchment paper, allowing an overhang on the sides. This isn’t just for easy removal; it also helps prevent sticking and makes cleanup a breeze. Lightly grease the parchment paper as well for absolute non-stick assurance.
- Melt the Butter: In a large, microwave-safe bowl or a saucepan over low heat, melt your 1 cup of unsalted butter. We want it fully liquid, but not boiling. Once melted, set it aside for just a moment to cool slightly. It doesn’t need to be cold, but we don’t want it scorching hot when we add the sugar.
- Combine Wet Ingredients (Part 1): Pour the slightly cooled melted butter into a very large mixing bowl. Add the 2 cups of granulated sugar. Now, using a whisk, mix these two ingredients together really well until they’re fully incorporated and look smooth. This initial mix helps dissolve some of the sugar, contributing to that signature shiny brownie crust.
- Incorporate Eggs and Vanilla: One by one, crack your four large eggs into the butter and sugar mixture, whisking vigorously after each addition. It’s important to add them individually to ensure they emulsify properly with the fats, creating a beautifully cohesive batter. After the last egg is thoroughly mixed in, stir in the 1 teaspoon of pure vanilla extract. At this stage, your mixture should be glossy, thick, and a light caramel color. We’re building the foundation for our amazing “Mm Chocolate Brownie Pizza” here!
- Sift Dry Ingredients: In a separate medium-sized bowl, whisk together the 1 cup of all-purpose flour, ¾ cup of unsweetened cocoa powder, ½ teaspoon of baking powder (if using), and ½ teaspoon of salt. Sifting is a step I always recommend because it removes any lumps from the cocoa powder and flour, ensuring a smooth, lump-free brownie batter, and it also aerates the dry ingredients, which can contribute to a tender crumb.
- Gently Combine Wet and Dry: Gradually add the dry ingredients to the wet ingredients. With a rubber spatula, gently fold them together until just combined. This is a crucial step: do not overmix! Overmixing develops the gluten in the flour, which can lead to a tough, dry brownie. We’re aiming for a fudgy, chewy brownie, so stop mixing as soon as you see no more streaks of flour. A few small lumps are perfectly fine and will disappear during baking.
- Fold in Chocolate Chips: Finally, gently fold in the 1 cup of semisweet chocolate chips. These little pockets of melted chocolate will elevate the brownie’s richness and texture, making every bite even more delightful.
Baking the Brownie Pizza Crust
- Spread the Batter: Pour the brownie batter into your prepared round pizza pan or 9×13 inch baking pan. Use your rubber spatula to spread the batter evenly to the edges. You want a uniform thickness so it bakes evenly. Give the pan a gentle tap or two on the counter to release any trapped air bubbles.
-
Bake to Perfection: Transfer the pan to your preheated 350°F (175°C) oven. Bake for approximately 25-35 minutes. Baking times can vary depending on your oven, so keep an eye on it.
How to Know When Your Brownie is Done:
A good way to check for doneness is to insert a wooden skewer or toothpick into the center of the brownie.
- If it comes out with moist crumbs attached, it’s perfect – this indicates a fudgy brownie.
- If it comes out completely clean, it might be slightly overbaked, leading to a cakier texture.
- If it comes out with wet batter, it needs more time.
For a truly fudgy “Mm Chocolate Brownie Pizza” base, err on the side of slightly underbaked rather than overbaked. The residual heat in the pan will continue to cook it as it cools.
- Cool Completely: Once baked, carefully remove the pan from the oven and place it on a wire rack. Allow the brownie to cool completely in the pan before attempting to remove it or frost it. This is incredibly important! A warm brownie is too delicate to handle and will melt your beautiful frosting. Cooling can take at least 1-2 hours, or even longer. You can even pop it in the fridge for 30-45 minutes once it’s cool enough not to crack the pan, just to speed things up a bit. Patience is a virtue, especially when it comes to perfect brownies!
- Remove from Pan: Once fully cooled, use the parchment paper overhangs to carefully lift the brownie “pizza crust” out of the pan and transfer it to a serving platter or a large cutting board.
Crafting the Velvety Chocolate Buttercream Frosting
- Cream Butter and Cream Cheese: In a large mixing bowl, using an electric mixer (either a stand mixer with a paddle attachment or a hand mixer), beat the ½ cup of softened unsalted butter and 4 ounces of softened cream cheese together on medium speed until the mixture is light, fluffy, and completely smooth. This should take about 2-3 minutes. Make sure there are no lumps of butter or cream cheese left. The combination of butter and cream cheese gives this frosting an incredible richness and stability, perfect for our “Mm Chocolate Brownie Pizza.”
- Add Dry Ingredients Gradually: With the mixer on low speed, gradually add the sifted powdered sugar, one cup at a time, allowing each addition to incorporate before adding more. Do the same with the sifted cocoa powder. Start with 3 cups of powdered sugar and ½ cup of cocoa powder. Once combined, increase the speed to medium and beat for another 1-2 minutes until light and fluffy.
- Adjust Consistency and Flavor: Add the 1 teaspoon of pure vanilla extract and a pinch of salt. Now, slowly add the heavy cream or milk, one tablespoon at a time, until your frosting reaches your desired consistency. You want it smooth, spreadable, and easy to work with – not too stiff, and not too runny. If it’s too thick, add more cream; if it’s too thin, add more sifted powdered sugar. Taste and adjust for sweetness or chocolate intensity if needed. Beat on medium-high for a final minute to ensure it’s extra fluffy and ready to be spread.
Assembling the Mm Chocolate Brownie Pizza
- Frost the Brownie Base: Using an offset spatula or the back of a spoon, evenly spread a generous layer of your velvety chocolate buttercream frosting over the completely cooled brownie base. Spread it right to the edges, just like you would with tomato sauce on a traditional pizza. This layer not only adds amazing flavor but also acts as the delicious glue for our toppings.
- The Star Topping – M&M’s: Now for the fun part that truly makes this an “Mm Chocolate Brownie Pizza”! Liberally sprinkle the mini M&M’s all over the frosted surface. You can arrange them in a pattern, or just scatter them randomly for a vibrant, colorful explosion. Don’t be shy here; the more M&M’s, the better!
-
Add Additional Toppings (Optional but Recommended!): This is where you can get creative and personalize your brownie pizza.
- Melted White Chocolate Drizzle: If you’re using white chocolate, melt it gently in a microwave-safe bowl in 30-second intervals, stirring between each, until smooth. Transfer the melted white chocolate to a small piping bag (or a Ziploc bag with a tiny corner snipped off) and drizzle it artfully over the M&M’s. The contrast of white chocolate on the dark brownie and colorful M&M’s is visually stunning.
- Extra Chocolate Chips/Candies: Sprinkle additional semisweet chocolate chips, white chocolate chips, or any other chopped candies you desire. Think chopped peanut butter cups, mini chocolate bars, or even some fun sprinkles for extra texture and visual appeal.
- Fresh Fruit for Contrast: For a delightful pop of freshness and a beautiful color contrast, arrange some sliced fresh strawberries or whole raspberries around the edges or in the center. The tartness of the fruit can be a wonderful counterpoint to the rich chocolate.
- Chill (Optional, but Recommended for Setting): While you can certainly dig into your “Mm Chocolate Brownie Pizza” right away, I highly recommend chilling it in the refrigerator for at least 30 minutes to an hour. This allows the frosting to firm up slightly and the flavors to meld beautifully, making for cleaner slices and an even more satisfying experience.
- Slice and Serve: Once chilled to your liking, use a large, sharp knife (you might want to warm it slightly under hot water and wipe it clean between cuts for perfectly neat slices) to cut your “Mm Chocolate Brownie Pizza” into wedges, just like a traditional pizza. Serve immediately and watch the smiles erupt! This dessert is not just a treat; it’s a celebration in every single bite. Enjoy sharing this incredibly fun and utterly delicious creation with your family and friends! It’s sure to be a showstopper.
Conclusion:
So, there you have it! We’ve journeyed through the creation of what I truly believe is not just a dessert, but an experience – a delightful, customizable, and utterly delicious masterpiece that promises to be a showstopper at any gathering. This isn’t just another brownie recipe; it’s an invitation to unleash your inner dessert artist, to create something truly spectacular that looks as impressive as it tastes. The rich, fudgy base, with its perfectly crisp edges and gooey center, provides the ideal canvas for a symphony of toppings, transforming a simple baked good into an extraordinary treat. It’s the kind of dessert that elicits gasps of delight and immediate requests for the recipe, making you the undisputed hero of any potluck or celebration.
I know you’re probably already imagining that first decadent bite, the way the deep chocolate melts in your mouth, perhaps mingling with the tang of fresh berries or the crunch of toasted nuts. This particular recipe is a must-try because it takes the beloved brownie and elevates it to a whole new level of fun and presentation. It’s inherently shareable, making it perfect for family movie nights, birthday parties, or even just a cozy evening in with friends. Forget the fuss of individual cupcakes or elaborate layer cakes; this dessert delivers maximum impact with surprisingly minimal effort. It allows for endless creativity, ensuring that each time you make it, it can be a unique reflection of your mood or the occasion. The sheer joy of decorating your own brownie pizza, whether solo or with little helpers, is an experience in itself, culminating in a dessert that truly feels special and made with love.
Serving Suggestions and Creative Variations: Unleash Your Inner Dessert Architect!
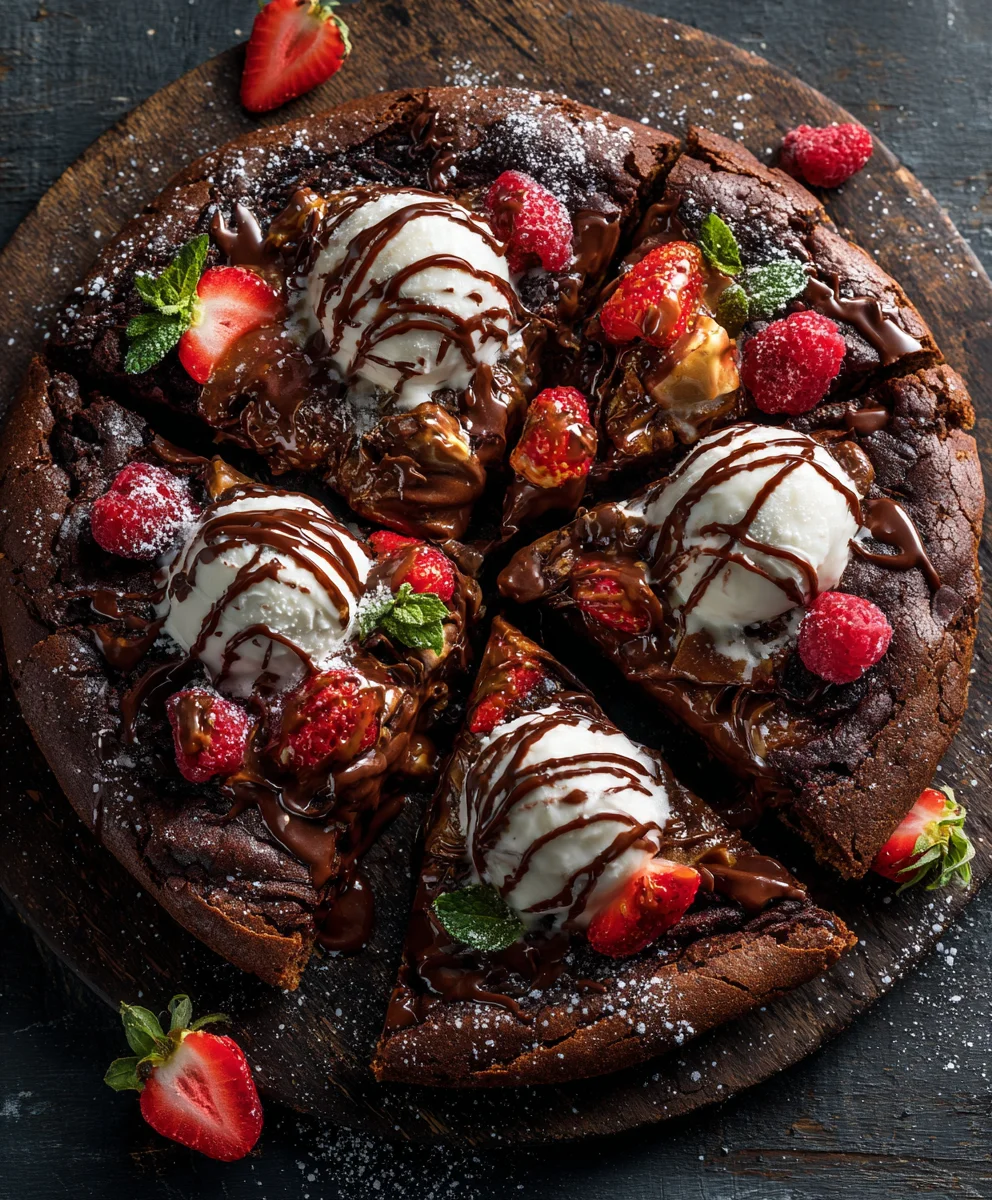
While this recipe is phenomenal straight out of the oven, simply cut into generous wedges, the real magic happens when you consider the endless serving possibilities and variations. For a truly indulgent experience, I highly recommend serving a warm slice alongside a scoop of premium vanilla bean ice cream, allowing the cold creaminess to perfectly contrast the warm, fudgy brownie. A drizzle of homemade caramel or a generous dollop of freshly whipped cream can also elevate each bite. Don’t forget the power of fresh fruit! Bright red strawberries, juicy raspberries, or even a scattering of blueberries can add a welcome freshness and a pop of color, making your dessert look even more appealing. For an extra touch of sophistication, a sprinkle of flaky sea salt over the chocolate base before adding toppings can truly enhance the cocoa notes, adding an unexpected but delightful complexity.
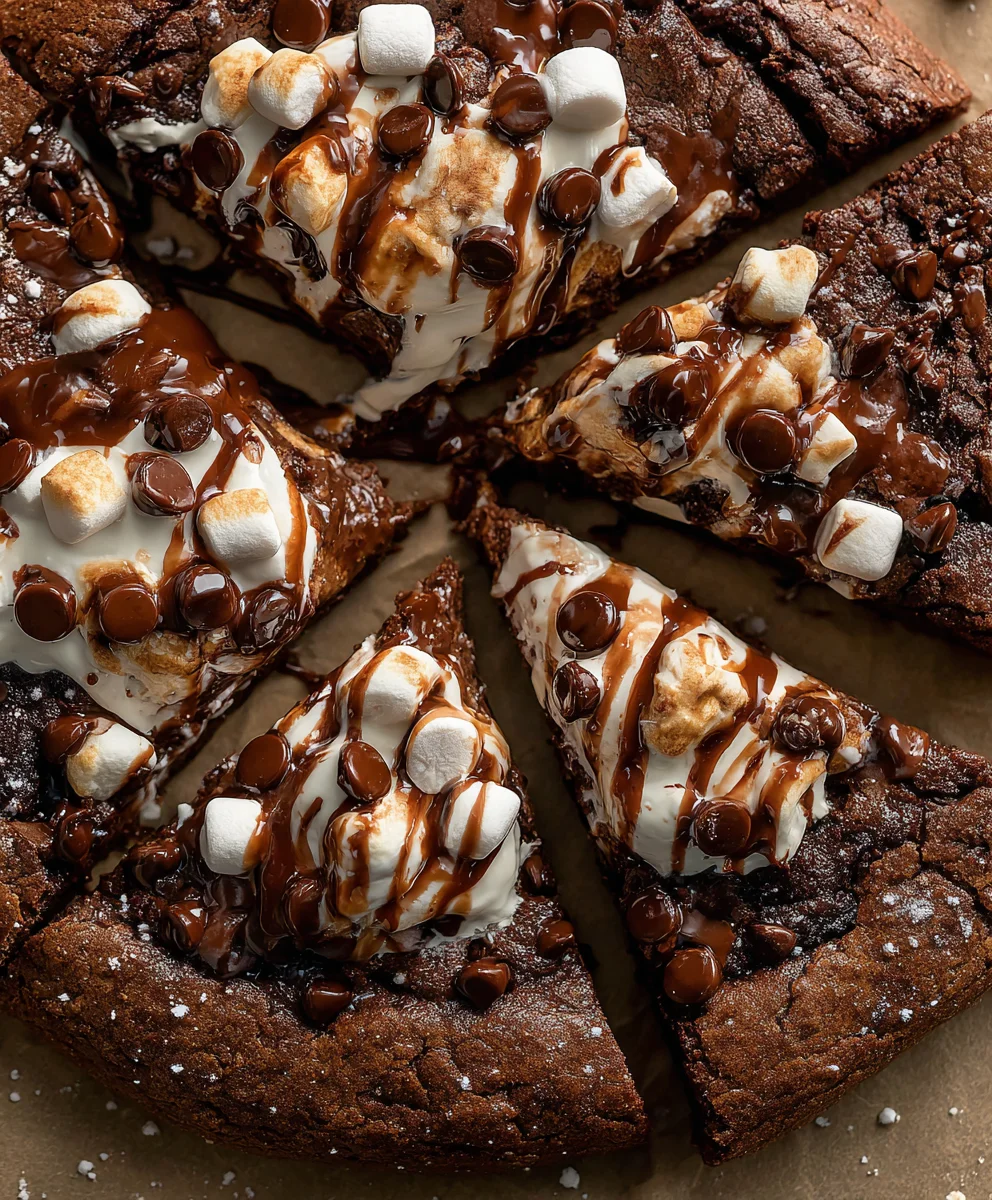
When it comes to variations, the sky’s the limit! Think beyond the classic chocolate chips. You could swirl a generous amount of peanut butter or cream cheese frosting onto the still-warm brownie before cooling, creating beautiful marbled patterns. Imagine a “s’mores” version, topped with mini marshmallows and graham cracker crumbs, then briefly broiled for a toasted, gooey finish. For a nutty twist, sprinkle toasted walnuts, pecans, or almonds over the top. Candy lovers can go wild with crushed candy bars, mini M&Ms, or colorful sprinkles. A layer of coconut flakes, toasted until golden brown, could transport your taste buds to a tropical paradise. And for those who love a hint of spice, a tiny pinch of cayenne pepper mixed into the brownie batter can add a subtle, warming kick that perfectly complements the rich chocolate, creating a delightful Mexican hot chocolate vibe. The beauty of the Mm Chocolate Brownie Pizza lies in its adaptability; it’s a recipe that encourages experimentation and personal flair, ensuring it never gets boring.
Your Turn: Bake, Share, and Inspire!
Now that you’re armed with this incredible recipe and a wealth of ideas, there’s only one thing left to do: get into that kitchen and make this spectacular dessert! I promise you, the aroma alone as it bakes will be enough to get everyone excited. There’s something so satisfying about pulling a perfectly baked, beautifully adorned dessert out of the oven, knowing you created something truly memorable. Don’t be afraid to make it your own; embrace the joy of customization and let your creativity shine. Once you’ve tasted the pure joy of this treat, I would absolutely love to hear about your experience. What toppings did you choose? Who did you share it with? Did it become an instant hit? Share your culinary adventures and tag us in your photos! Your stories and variations inspire me and other bakers in our community. So, go forth, bake with passion, and prepare to delight everyone with your incredible creation. Happy baking!
Mm Chocolate Brownie Pizza
Decadent & easy dessert! A rich, fudgy brownie base reimagined as a shareable pizza, topped with chocolate buttercream frosting, M&M’s, and optional drizzles or fresh fruit. Perfect for any gathering.
Ingredients
-
1 cup (226g) butter, melted
-
2 cups (400g) granulated sugar
-
4 eggs
-
1 tsp vanilla extract
-
1 cup (125g) all-purpose flour
-
¾ cup (75g) cocoa powder (Dutch-processed recommended)
-
½ tsp baking powder (optional)
-
½ tsp salt
-
1 cup (170g) semisweet chocolate chips, plus extra
-
½ cup (113g) butter, softened
-
4 oz (113g) cream cheese, softened
-
3-4 cups (360-480g) powdered sugar, sifted
-
½ cup (50g) cocoa powder, sifted (Dutch-processed recommended)
-
2-4 tbsp heavy cream or milk
-
1 tsp vanilla extract
-
Pinch of salt
-
1½ – 2 cups mini M&M’s
-
½ cup white chocolate chips or chopped white chocolate, melted (optional)
-
Chopped candies or chocolates (optional)
-
Fresh berries (strawberries, raspberries) (optional)
Instructions
-
Step 1
Preheat oven to 350°F (175°C). Line a 12-inch round pizza pan (or 9×13 inch) with greased parchment paper. -
Step 2
Melt 1 cup butter, let cool slightly. In a large bowl, whisk melted butter and 2 cups sugar. Whisk in eggs one by one, then 1 tsp vanilla extract. -
Step 3
In a separate bowl, whisk 1 cup all-purpose flour, ¾ cup cocoa powder, ½ tsp baking powder (if using), and ½ tsp salt. -
Step 4
Gently fold dry ingredients into wet until just combined; do not overmix. Fold in 1 cup semisweet chocolate chips. -
Step 5
Spread batter evenly in the prepared pan. Bake 25-35 minutes until a toothpick inserted in the center comes out with moist crumbs. -
Step 6
Cool completely on a wire rack (1-2 hours or longer), then transfer to a serving platter. -
Step 7
Beat ½ cup softened butter and 4 oz softened cream cheese until smooth. Gradually add sifted powdered sugar (start with 3 cups) and sifted cocoa powder; beat until fluffy. Add 1 tsp vanilla and a pinch of salt. Add heavy cream/milk 1 tbsp at a time until desired spreadable consistency. -
Step 8
Spread frosting generously over the cooled brownie base. Liberally sprinkle 1½ – 2 cups mini M&M’s. Add optional toppings like melted white chocolate drizzle, chopped candies, or fresh berries. -
Step 9
Chill for 30-60 minutes for the frosting to set. Slice into wedges and serve immediately.
Important Information
Nutrition Facts (Per Serving)
It is important to consider this information as approximate and not to use it as definitive health advice.
Allergy Information
Please check ingredients for potential allergens and consult a health professional if in doubt.

Leave a Comment