
Mackinac Island Fudge, a name synonymous with creamy, decadent sweetness, conjures up images of charming horse-drawn carriages and the delightful aroma of freshly made confections wafting through the air. Have you ever wondered how this iconic treat became so deeply intertwined with a small island nestled in the Great Lakes? Prepare to embark on a delicious journey as we uncover the secrets to making this melt-in-your-mouth fudge right in your own kitchen!
While fudge itself has a history dating back to the late 19th century, Mackinac Island Fudge gained its unique identity thanks to the island’s thriving tourism industry. Legend has it that early confectioners, eager to entice visitors, perfected their fudge recipes, creating a product so exceptional that it became a must-have souvenir. The island’s cool climate and readily available ingredients contributed to the fudge’s unparalleled texture and flavor, solidifying its place in culinary history.
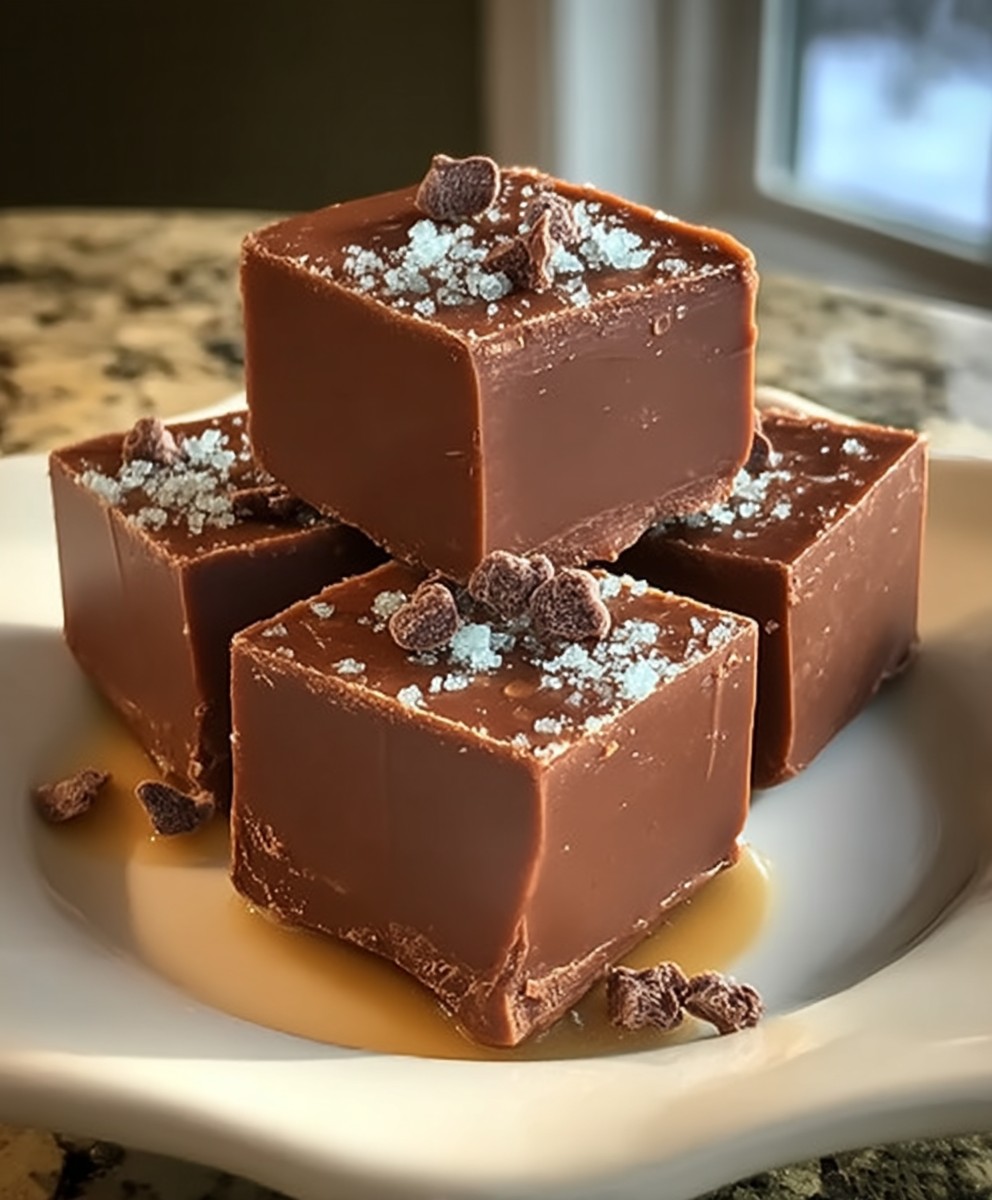
What is it about this particular fudge that makes it so irresistible? It’s the perfect balance of rich chocolate, smooth creaminess, and a satisfyingly dense texture. People adore it because it’s a simple pleasure, a sweet escape that evokes feelings of nostalgia and indulgence. Whether you’re a seasoned baker or a novice in the kitchen, our recipe will guide you through each step, ensuring that you create a batch of Mackinac Island Fudge that will impress your friends and family. Get ready to experience a taste of pure bliss!

Ingredients:
- For the Fudge:
- 3 cups granulated sugar
- 1 cup (2 sticks) unsalted butter, cut into cubes
- 2/3 cup evaporated milk
- 1/8 teaspoon salt
- 12 ounces semi-sweet chocolate chips
- 7 ounces marshmallow creme
- 1 teaspoon vanilla extract
- 1 cup chopped walnuts or pecans (optional)
- Equipment:
- Heavy-bottomed 3-quart saucepan
- Candy thermometer
- 8×8 inch square baking pan
- Parchment paper
- Wooden spoon or heat-resistant spatula
Preparing the Fudge Base:
- Prepare the Pan: First, let’s get our baking pan ready. Line an 8×8 inch square baking pan with parchment paper, leaving an overhang on two sides. This will make it super easy to lift the fudge out later. Trust me, you’ll thank me for this tip!
- Combine Sugar, Butter, and Milk: In a heavy-bottomed 3-quart saucepan, combine the granulated sugar, cubed butter, evaporated milk, and salt. Using a heavy-bottomed pan is crucial to prevent scorching.
- Cook to Soft-Ball Stage: Place the saucepan over medium heat and stir constantly with a wooden spoon or heat-resistant spatula. It’s important to stir continuously to prevent the sugar from sticking to the bottom and burning. Bring the mixture to a boil, stirring constantly. Once boiling, insert a candy thermometer into the mixture, making sure it doesn’t touch the bottom of the pan. Continue to cook, stirring occasionally, until the thermometer reaches 235-240°F (113-116°C), which is the soft-ball stage. This process can take anywhere from 10 to 15 minutes, so be patient!
- Remove from Heat: Once the mixture reaches the soft-ball stage, immediately remove the saucepan from the heat. It’s important to take it off the heat right away to prevent it from overcooking.
Adding the Chocolate and Finishing Touches:
- Add Chocolate Chips: Add the semi-sweet chocolate chips to the hot sugar mixture. Let them sit for a minute or two to soften slightly. This will make them easier to melt.
- Stir Until Smooth: Gently stir the mixture until the chocolate chips are completely melted and the fudge is smooth and glossy. Be careful not to overmix, as this can cause the fudge to become grainy.
- Incorporate Marshmallow Creme and Vanilla: Add the marshmallow creme and vanilla extract to the melted chocolate mixture. Stir until everything is fully incorporated and the mixture is smooth and creamy. The marshmallow creme adds a wonderful texture and sweetness to the fudge.
- Add Nuts (Optional): If you’re using nuts, now is the time to add them. Gently fold in the chopped walnuts or pecans until they are evenly distributed throughout the fudge.
Setting and Cutting the Fudge:
- Pour into Prepared Pan: Pour the fudge mixture into the prepared 8×8 inch baking pan. Use a spatula to spread the fudge evenly into the pan.
- Let it Set: Let the fudge set at room temperature for at least 2-3 hours, or preferably overnight. This allows the fudge to firm up properly. If you’re in a hurry, you can place it in the refrigerator to speed up the setting process, but be aware that it may affect the texture slightly.
- Cut into Squares: Once the fudge is completely set, lift it out of the pan using the parchment paper overhang. Place the fudge on a cutting board and use a sharp knife to cut it into squares. The size of the squares is up to you, but I usually cut them into 1-inch or 1.5-inch squares.
Tips and Tricks for Perfect Fudge:
- Use a Heavy-Bottomed Pan: This is crucial to prevent the sugar from scorching and burning. A heavy-bottomed pan distributes heat more evenly.
- Stir Constantly: While the mixture is coming to a boil, stir constantly to prevent the sugar from sticking to the bottom of the pan.
- Use a Candy Thermometer: A candy thermometer is essential for ensuring that the fudge reaches the correct temperature. This is key to achieving the perfect texture.
- Don’t Overcook: Overcooking the fudge can result in a dry, crumbly texture. Be sure to remove the saucepan from the heat as soon as the mixture reaches the soft-ball stage.
- Don’t Overmix: Overmixing the fudge after adding the chocolate can cause it to become grainy. Stir gently until the chocolate is just melted and the mixture is smooth.
- Use High-Quality Ingredients: Using high-quality chocolate and butter will result in a richer, more flavorful fudge.
- Add a Pinch of Salt: A pinch of salt helps to balance the sweetness of the fudge and enhance the other flavors.
- Experiment with Flavors: Feel free to experiment with different flavors and add-ins. You can try using different types of chocolate, adding extracts like peppermint or almond, or incorporating other nuts or dried fruits.
- Storage: Store the fudge in an airtight container at room temperature for up to a week, or in the refrigerator for up to two weeks. You can also freeze the fudge for longer storage.
Troubleshooting:
- Fudge is Grainy: This can be caused by overcooking the sugar mixture or overmixing the fudge after adding the chocolate. Be sure to use a candy thermometer and avoid overmixing.
- Fudge is Too Soft: This can be caused by not cooking the sugar mixture to the correct temperature. Make sure the thermometer reaches 235-240°F (113-116°C).
- Fudge is Too Hard: This can be caused by overcooking the sugar mixture. Be sure to remove the saucepan from the heat as soon as the mixture reaches the soft-ball stage.
- Fudge is Not Setting: This can be caused by not cooking the sugar mixture long enough or by using too much liquid. Make sure the thermometer reaches 235-240°F (113-116°C) and use the correct amount of evaporated milk.
Variations:
- Peanut Butter Fudge: Add 1 cup of peanut butter to the mixture along with the chocolate chips.
- Chocolate Walnut Fudge: Use dark chocolate chips and add 1 cup of chopped walnuts.
- Peppermint Fudge: Add 1/2 teaspoon of peppermint extract to the mixture along with the vanilla extract. You can also crush some peppermint candies and sprinkle them on top of the fudge before it sets.
- Cookies and Cream Fudge: Crush 1 cup of Oreo cookies and fold them into the mixture along with the marshmallow creme.
- Maple Walnut Fudge: Use brown sugar instead of granulated sugar and add 1 teaspoon of maple extract to the mixture along with the vanilla extract. Add 1 cup of chopped walnuts.
Enjoy your homemade Mackinac Island Fudge!
Conclusion:
And there you have it! This Mackinac Island Fudge recipe is more than just a dessert; it’s a journey to a charming island, a taste of tradition, and a guaranteed crowd-pleaser. I truly believe this is a must-try recipe for anyone who loves rich, decadent fudge. The creamy texture, the intense chocolate flavor, and the satisfying melt-in-your-mouth experience are simply unparalleled. Forget store-bought fudge that’s often dry and crumbly; this homemade version is in a league of its own.
Why is it a must-try? Because it’s surprisingly simple to make, even for beginner bakers. The ingredients are readily available, and the steps are straightforward. Plus, the reward is immense a batch of fudge that rivals anything you’d find on Mackinac Island itself! It’s the perfect treat to share with friends and family, a thoughtful homemade gift, or simply a delightful indulgence for yourself.
But the fun doesn’t stop there! Feel free to get creative with variations. For a nutty twist, add a cup of chopped walnuts, pecans, or macadamia nuts to the mixture before it sets. If you’re a fan of peanut butter, swirl in a half-cup of creamy peanut butter after pouring the fudge into the pan. For a festive touch, sprinkle crushed peppermint candies on top during the holidays. Or, if you’re feeling adventurous, try adding a dash of espresso powder for an extra boost of flavor.
Serving suggestions? The possibilities are endless! Of course, a simple square of fudge is always a classic. But you can also crumble it over ice cream, use it as a topping for brownies, or even melt it down to create a decadent chocolate sauce. For a truly indulgent experience, pair it with a scoop of vanilla bean ice cream and a drizzle of caramel sauce. And don’t forget to enjoy it with a cup of hot coffee or tea the perfect complement to the rich chocolate flavor.
I’m so excited for you to try this recipe and experience the magic of Mackinac Island Fudge for yourself. I’ve poured my heart into perfecting this recipe, and I’m confident that you’ll love it as much as I do. It’s a recipe that’s been passed down through generations, and I’m thrilled to share it with you.
So, gather your ingredients, put on your apron, and get ready to create a batch of fudge that will impress everyone who tries it. Don’t be intimidated by the idea of making fudge from scratch; this recipe is foolproof, and I’m here to guide you every step of the way.
Once you’ve made your own batch of this amazing fudge, I’d absolutely love to hear about your experience! Did you try any variations? What did your friends and family think? Share your photos and stories in the comments below. I can’t wait to see your creations and hear about your fudge-making adventures. Happy baking! And remember, life is too short to skip dessert, especially when it’s homemade Mackinac Island Fudge!
Mackinac Island Fudge: The Ultimate Guide to This Sweet Treat
Rich, creamy, and decadent homemade fudge, just like you'd find on Mackinac Island! This classic recipe is easy to make and perfect for gifting or enjoying yourself.
Ingredients
- 3 cups granulated sugar
- 1 cup (2 sticks) unsalted butter, cut into cubes
- 2/3 cup evaporated milk
- 1/8 teaspoon salt
- 12 ounces semi-sweet chocolate chips
- 7 ounces marshmallow creme
- 1 teaspoon vanilla extract
- 1 cup chopped walnuts or pecans (optional)
Instructions
- Prepare the Pan: Line an 8×8 inch square baking pan with parchment paper, leaving an overhang on two sides.
- Combine Sugar, Butter, and Milk: In a heavy-bottomed 3-quart saucepan, combine the granulated sugar, cubed butter, evaporated milk, and salt.
- Cook to Soft-Ball Stage: Place the saucepan over medium heat and stir constantly with a wooden spoon or heat-resistant spatula. Bring the mixture to a boil, stirring constantly. Once boiling, insert a candy thermometer into the mixture, making sure it doesn’t touch the bottom of the pan. Continue to cook, stirring occasionally, until the thermometer reaches 235-240°F (113-116°C), which is the soft-ball stage.
- Remove from Heat: Once the mixture reaches the soft-ball stage, immediately remove the saucepan from the heat.
- Add Chocolate Chips: Add the semi-sweet chocolate chips to the hot sugar mixture. Let them sit for a minute or two to soften slightly.
- Stir Until Smooth: Gently stir the mixture until the chocolate chips are completely melted and the fudge is smooth and glossy. Be careful not to overmix.
- Incorporate Marshmallow Creme and Vanilla: Add the marshmallow creme and vanilla extract to the melted chocolate mixture. Stir until everything is fully incorporated and the mixture is smooth and creamy.
- Add Nuts (Optional): If you’re using nuts, now is the time to add them. Gently fold in the chopped walnuts or pecans until they are evenly distributed throughout the fudge.
- Pour into Prepared Pan: Pour the fudge mixture into the prepared 8×8 inch baking pan. Use a spatula to spread the fudge evenly into the pan.
- Let it Set: Let the fudge set at room temperature for at least 2-3 hours, or preferably overnight.
- Cut into Squares: Once the fudge is completely set, lift it out of the pan using the parchment paper overhang. Place the fudge on a cutting board and use a sharp knife to cut it into squares.
Notes
- Use a heavy-bottomed pan to prevent scorching.
- Stir constantly while the mixture is coming to a boil.
- A candy thermometer is essential for achieving the perfect texture.
- Don’t overcook the fudge, as it can result in a dry, crumbly texture.
- Don’t overmix the fudge after adding the chocolate, as it can become grainy.
- Use high-quality ingredients for a richer, more flavorful fudge.
- Store the fudge in an airtight container at room temperature for up to a week, or in the refrigerator for up to two weeks. You can also freeze the fudge for longer storage.


Leave a Comment