
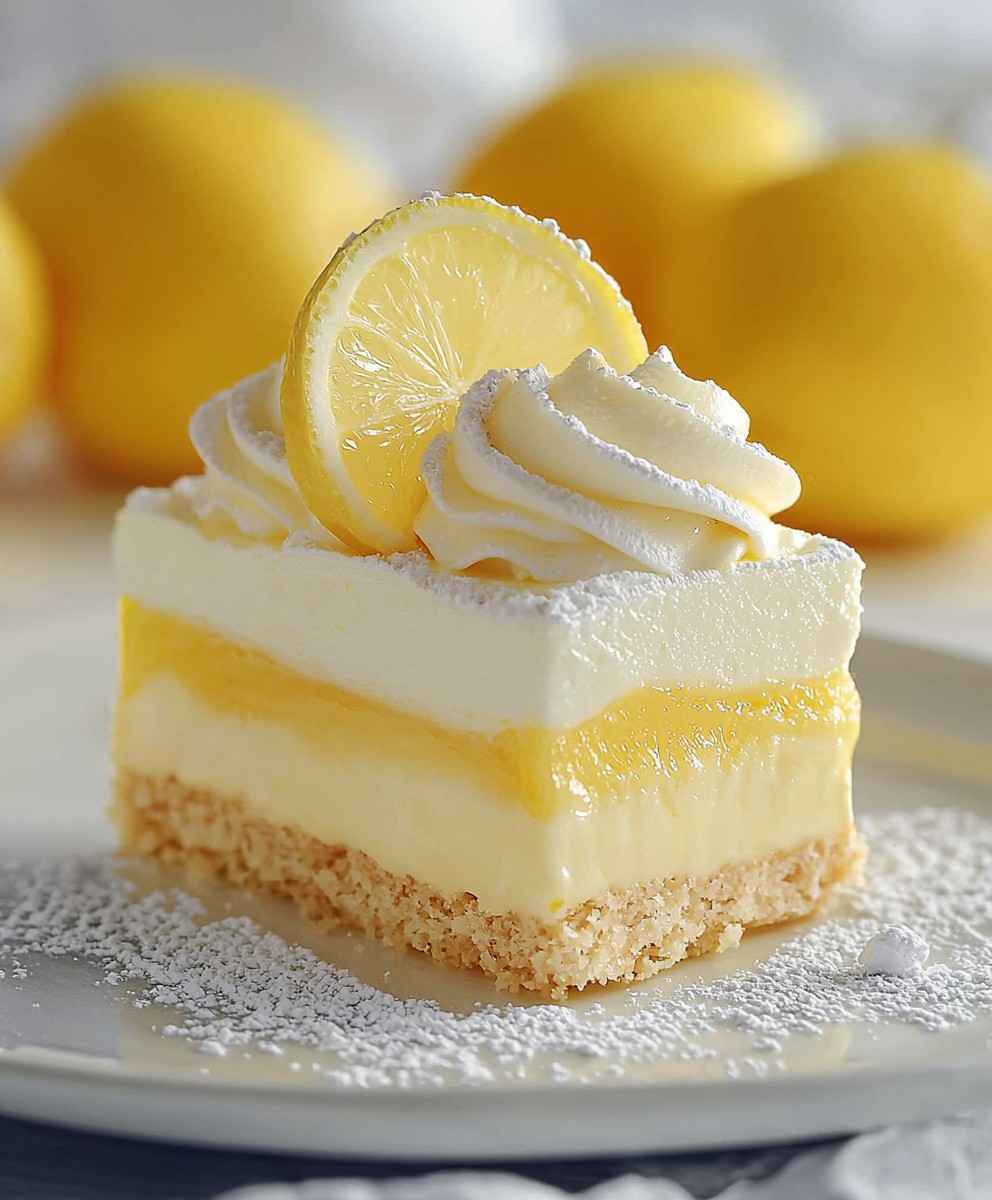
Lemon Lush, a dessert that whispers of sunshine and sweet cream, is about to become your new favorite indulgence. Imagine layers of buttery, crumbly crust, a tangy cream cheese filling, a luscious lemon pudding, and a cloud of whipped topping, all melding together in perfect harmony. This isn’t just a dessert; it’s an experience!
While the exact origins of Lemon Lush are shrouded in a bit of mystery, similar layered desserts have been gracing tables across America for decades, often appearing at potlucks, family gatherings, and holiday celebrations. These types of desserts gained popularity for their ease of assembly and crowd-pleasing flavors. They represent a tradition of sharing and simple pleasures.
But what makes this particular lemon dessert so irresistible? It’s the delightful contrast of textures the crisp crust against the smooth fillings and the perfect balance of sweet and tart. The creamy, cool layers are incredibly refreshing, making it an ideal treat for warm weather. Plus, let’s be honest, it’s incredibly easy to make! With minimal baking and simple assembly, you can whip up a show-stopping dessert that will have everyone asking for seconds. Get ready to experience the magic of Lemon Lush!

Ingredients:
- For the Crust:
- 1 package (14.3 ounces) golden Oreo cookies, finely crushed
- 6 tablespoons (3 ounces) unsalted butter, melted
- For the First Layer (Cream Cheese Layer):
- 8 ounces cream cheese, softened
- 1 cup powdered sugar
- 1 teaspoon vanilla extract
- 8 ounces frozen whipped topping, thawed (like Cool Whip)
- For the Second Layer (Lemon Pudding Layer):
- 2 packages (3.4 ounces each) instant lemon pudding mix
- 3 cups cold milk
- For the Third Layer (Whipped Topping Layer):
- 8 ounces frozen whipped topping, thawed (like Cool Whip)
- For the Garnish (Optional):
- Lemon slices
- Lemon zest
- Toasted coconut flakes
Preparing the Crust
- Crush the Golden Oreos: The first thing we need to do is get those Golden Oreos crushed into fine crumbs. You can use a food processor for this just pulse them until they’re finely ground. If you don’t have a food processor, no worries! You can put the cookies in a large zip-top bag and use a rolling pin to crush them. Just make sure to get all the big chunks out.
- Melt the Butter: Next, melt the butter in a microwave-safe bowl or in a saucepan over low heat. You want it completely melted but not browned.
- Combine the Crumbs and Butter: In a medium bowl, combine the crushed Oreo crumbs and the melted butter. Mix them together really well until the crumbs are evenly moistened. This mixture will form the base of our Lemon Lush, so we want it to hold together nicely.
- Press into the Pan: Now, press the crumb mixture into the bottom of a 9×13 inch baking dish. Use the bottom of a measuring cup or your fingers to press it firmly and evenly. This will create a solid crust that won’t crumble apart when we add the layers.
- Chill the Crust: Place the baking dish with the crust in the refrigerator to chill for at least 30 minutes. This will help the crust set and become firm. You can even chill it for longer if you have the time.
Making the Cream Cheese Layer
- Soften the Cream Cheese: Make sure your cream cheese is softened to room temperature before you start. This is crucial for a smooth and creamy layer. If it’s not soft enough, you’ll end up with lumps in your cream cheese mixture.
- Cream the Cream Cheese and Sugar: In a large bowl, beat the softened cream cheese with an electric mixer until it’s smooth and creamy. Gradually add the powdered sugar, beating until it’s fully incorporated and the mixture is light and fluffy.
- Add Vanilla Extract: Stir in the vanilla extract. This will add a lovely flavor to the cream cheese layer.
- Fold in the Whipped Topping: Gently fold in the thawed whipped topping until it’s evenly distributed. Be careful not to overmix, as this can deflate the whipped topping. We want to keep it light and airy.
- Spread over the Crust: Remove the chilled crust from the refrigerator and spread the cream cheese mixture evenly over the crust. Make sure to cover the entire surface.
- Chill Again: Return the baking dish to the refrigerator and chill for at least 30 minutes. This will allow the cream cheese layer to set before we add the next layer.
Preparing the Lemon Pudding Layer
- Whisk Pudding and Milk: In a medium bowl, whisk together the instant lemon pudding mix and the cold milk until the pudding starts to thicken. This usually takes about 2-3 minutes. Make sure there are no lumps in the pudding mixture.
- Let it Set Slightly: Let the pudding mixture sit for a few minutes to thicken slightly. This will help it spread more easily over the cream cheese layer.
- Spread over Cream Cheese Layer: Remove the baking dish from the refrigerator and carefully spread the lemon pudding mixture evenly over the cream cheese layer. Try not to disturb the cream cheese layer too much.
- Chill Again: Return the baking dish to the refrigerator and chill for at least 1 hour, or until the pudding layer is set. This is important to ensure that the layers don’t mix together.
Adding the Final Whipped Topping Layer and Garnishing
- Spread Whipped Topping: Remove the baking dish from the refrigerator and spread the remaining thawed whipped topping evenly over the lemon pudding layer. This will be the final layer of our Lemon Lush.
- Garnish (Optional): If you want to add a little extra flair, garnish the Lemon Lush with lemon slices, lemon zest, and/or toasted coconut flakes. These garnishes will add a pop of color and flavor.
- Chill Before Serving: Chill the Lemon Lush for at least 30 minutes before serving. This will allow the flavors to meld together and the layers to set completely.
- Cut and Serve: When you’re ready to serve, cut the Lemon Lush into squares and enjoy! This dessert is best served cold.
Tips for Success
- Use Full-Fat Cream Cheese: For the best flavor and texture, use full-fat cream cheese. Reduced-fat cream cheese can sometimes be a bit watery.
- Don’t Overmix: Be careful not to overmix the whipped topping into the cream cheese layer, as this can deflate it.
- Chill Time is Key: Make sure to chill the Lemon Lush for the recommended amount of time between each layer. This will help the layers set properly and prevent them from mixing together.
- Make Ahead: Lemon Lush is a great make-ahead dessert. You can prepare it up to 24 hours in advance and store it in the refrigerator.
- Variations: Feel free to experiment with different flavors. You could use vanilla pudding instead of lemon, or add a layer of fresh berries.
Storage Instructions
Store any leftover Lemon Lush in the refrigerator, covered, for up to 3 days. The whipped topping may start to soften after a couple of days, but the dessert will still taste delicious.
Serving Suggestions
Lemon Lush is perfect for potlucks, parties, or any occasion where you want a light and refreshing dessert. It’s also a great dessert to bring to a summer barbecue.
Why This Recipe Works
This Lemon Lush recipe is a classic for a reason. The combination of the crunchy Oreo crust, the creamy cream cheese layer, the tangy lemon pudding layer, and the light whipped topping is simply irresistible. It’s easy to make, requires no baking, and is always a crowd-pleaser. The layers create a beautiful presentation, and the flavors are perfectly balanced. The chilling time between each layer is crucial for the best texture and presentation, ensuring that each layer remains distinct and doesn’t blend into the others. The use of instant pudding mix makes this recipe quick and easy, while still delivering a delicious lemon flavor. The optional garnishes add a touch of elegance and allow you to customize the dessert to your liking.
Conclusion:
And there you have it! This Lemon Lush recipe is truly a must-try for so many reasons. First and foremost, the flavor profile is simply divine. The tangy lemon curd perfectly complements the creamy, dreamy filling, all resting on a buttery, crumbly crust. It’s a symphony of textures and tastes that will leave you wanting more. But beyond the incredible flavor, this dessert is surprisingly easy to make. It requires no fancy techniques or hard-to-find ingredients, making it accessible to bakers of all skill levels. Plus, it’s a fantastic make-ahead dessert, perfect for potlucks, parties, or simply satisfying your sweet tooth throughout the week. But the best part? It’s incredibly versatile! While the classic recipe is a winner, feel free to experiment and put your own spin on it. For a richer, more decadent experience, try using a shortbread crust instead of the traditional graham cracker crust. Or, if you’re feeling adventurous, add a layer of fresh berries, like raspberries or blueberries, between the lemon curd and the whipped topping. The possibilities are endless!Serving Suggestions and Variations:
* Classic Serving: Serve chilled, straight from the refrigerator. A dollop of extra whipped cream and a sprinkle of lemon zest add a touch of elegance. * Berry Bliss: As mentioned, layering fresh berries is a fantastic way to enhance the flavor and add a pop of color. * Chocolate Twist: For a truly indulgent treat, add a thin layer of melted dark chocolate to the crust before adding the filling. The bitterness of the chocolate will beautifully balance the sweetness of the lemon. * Individual Servings: Prepare the Lemon Lush in individual ramekins or small glasses for a sophisticated presentation. * Frozen Delight: For a refreshing summer treat, freeze the Lemon Lush for a few hours before serving. It transforms into a delightful frozen dessert. * Nutty Crunch: Sprinkle chopped pecans or almonds on top for added texture and flavor. I truly believe that this Lemon Lush recipe will become a staple in your dessert repertoire. It’s a crowd-pleaser that’s guaranteed to impress, and it’s so easy to make that you’ll find yourself whipping it up for any occasion. I’ve made this recipe countless times, and it’s always a hit. The bright, citrusy flavor is especially welcome after a heavy meal, and it’s the perfect dessert to bring to a summer barbecue. So, what are you waiting for? Gather your ingredients, preheat your oven, and get ready to create a dessert masterpiece. I’m confident that you’ll love this recipe as much as I do. And most importantly, don’t be afraid to get creative and make it your own! I’m so excited for you to try this recipe! Once you’ve made your own Lemon Lush, I would absolutely love to hear about your experience. Did you make any variations? What did your friends and family think? Share your photos and stories in the comments below! I can’t wait to see your creations and hear all about your Lemon Lush adventures. Happy baking! Print
Lemon Lush: The Ultimate Guide to This Refreshing Dessert
- Total Time: 180 minutes
- Yield: 12–16 servings 1x
Description
No-bake Lemon Lush with golden Oreo crust, creamy cream cheese, tangy lemon pudding, and whipped topping. Easy, refreshing dessert!
Ingredients
- 1 package (14.3 ounces) golden Oreo cookies, finely crushed
- 6 tablespoons (3 ounces) unsalted butter, melted
- 8 ounces cream cheese, softened
- 1 cup powdered sugar
- 1 teaspoon vanilla extract
- 8 ounces frozen whipped topping, thawed (like Cool Whip)
- 2 packages (3.4 ounces each) instant lemon pudding mix
- 3 cups cold milk
- 8 ounces frozen whipped topping, thawed (like Cool Whip)
- Lemon slices
- Lemon zest
- Toasted coconut flakes
Instructions
- Crush the Golden Oreos: Crush the Golden Oreos into fine crumbs using a food processor or by placing them in a zip-top bag and crushing with a rolling pin.
- Melt the Butter: Melt the butter in a microwave-safe bowl or in a saucepan over low heat.
- Combine Crumbs and Butter: In a medium bowl, combine the crushed Oreo crumbs and the melted butter. Mix well until evenly moistened.
- Press into Pan: Press the crumb mixture into the bottom of a 9×13 inch baking dish. Use the bottom of a measuring cup or your fingers to press it firmly and evenly.
- Chill the Crust: Place the baking dish with the crust in the refrigerator to chill for at least 30 minutes.
- Soften the Cream Cheese: Make sure your cream cheese is softened to room temperature before you start.
- Cream the Cream Cheese and Sugar: In a large bowl, beat the softened cream cheese with an electric mixer until it’s smooth and creamy. Gradually add the powdered sugar, beating until it’s fully incorporated and the mixture is light and fluffy.
- Add Vanilla Extract: Stir in the vanilla extract.
- Fold in the Whipped Topping: Gently fold in the thawed whipped topping until it’s evenly distributed. Be careful not to overmix.
- Spread over the Crust: Remove the chilled crust from the refrigerator and spread the cream cheese mixture evenly over the crust.
- Chill Again: Return the baking dish to the refrigerator and chill for at least 30 minutes.
- Whisk Pudding and Milk: In a medium bowl, whisk together the instant lemon pudding mix and the cold milk until the pudding starts to thicken (about 2-3 minutes).
- Let it Set Slightly: Let the pudding mixture sit for a few minutes to thicken slightly.
- Spread over Cream Cheese Layer: Remove the baking dish from the refrigerator and carefully spread the lemon pudding mixture evenly over the cream cheese layer.
- Chill Again: Return the baking dish to the refrigerator and chill for at least 1 hour, or until the pudding layer is set.
- Spread Whipped Topping: Remove the baking dish from the refrigerator and spread the remaining thawed whipped topping evenly over the lemon pudding layer.
- Garnish (Optional): Garnish with lemon slices, lemon zest, and/or toasted coconut flakes.
- Chill Before Serving: Chill for at least 30 minutes before serving.
- Cut and Serve: Cut into squares and serve cold.
Notes
- Use full-fat cream cheese for the best flavor and texture.
- Don’t overmix the whipped topping into the cream cheese layer.
- Chill time is key between each layer.
- This dessert can be made up to 24 hours in advance.
- Feel free to experiment with different flavors (e.g., vanilla pudding, fresh berries).
- Store leftovers in the refrigerator, covered, for up to 3 days.
- Prep Time: 30 minutes
- Cook Time: 0 minutes


Leave a Comment