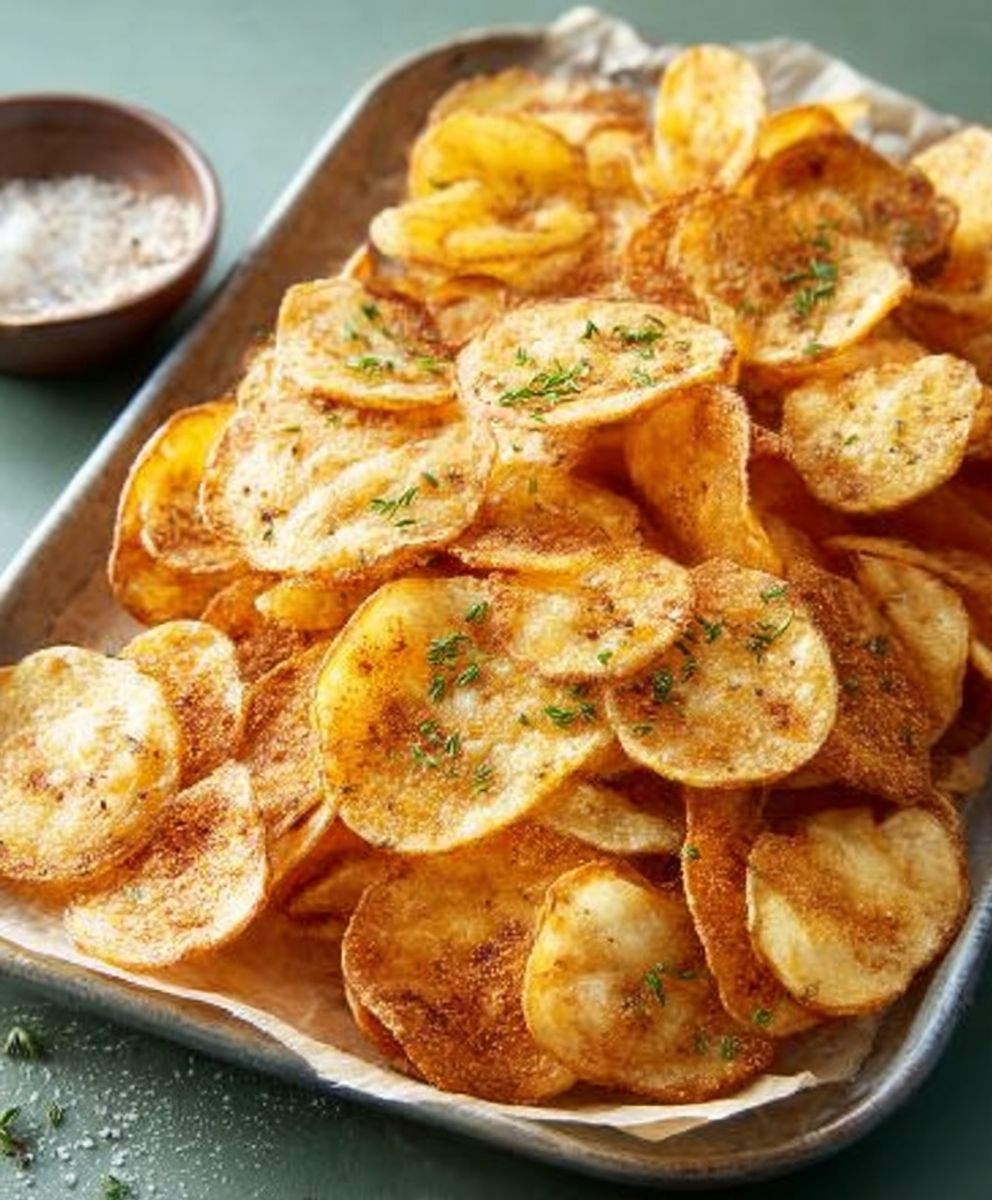
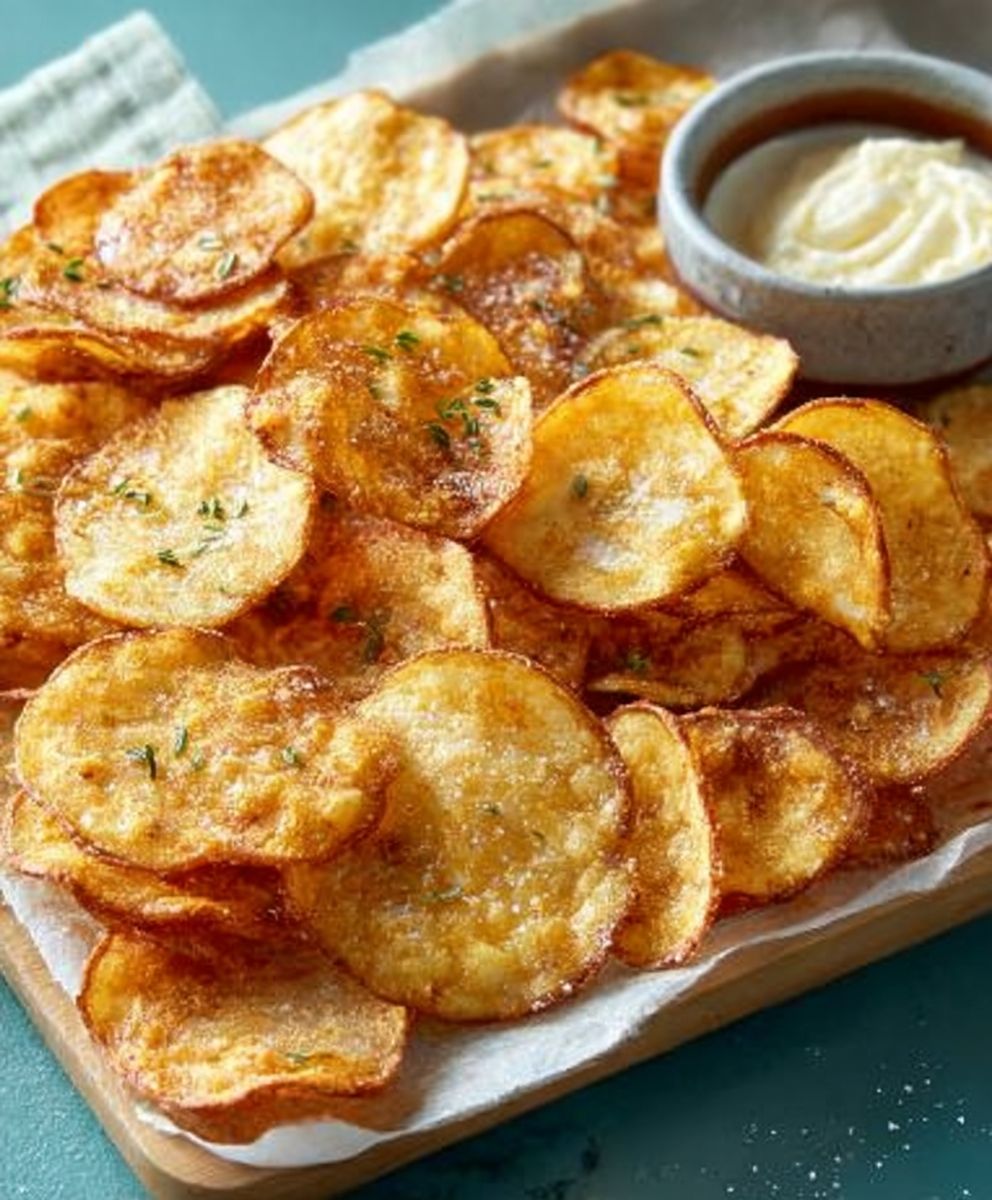
Homemade Potato Chips: the crispy, salty, utterly addictive snack that’s surprisingly easy to make in your own kitchen! Forget the store-bought bags filled with preservatives and artificial flavors. We’re talking about golden-brown perfection, crafted with your own two hands, and seasoned exactly to your liking. Are you ready to ditch the processed stuff and experience the pure, unadulterated joy of a truly exceptional chip?
The humble potato chip has a fascinating history, reportedly born out of a culinary tiff in 1853 when a disgruntled chef, George Crum, retaliated against a demanding customer by slicing potatoes paper-thin and frying them to a crisp. Little did he know, he was creating a snack that would conquer the world! While mass production has changed the landscape, the simple pleasure of a perfectly crisp potato chip remains a timeless favorite.
What is it about homemade potato chips that makes them so irresistible? It’s the satisfying crunch, the burst of salty flavor, and the sheer simplicity of the ingredients. Plus, there’s something incredibly rewarding about creating something so delicious from scratch. They’re perfect for snacking, dipping, or serving alongside your favorite sandwich. So, let’s get started and unlock the secrets to making the best homemade potato chips you’ve ever tasted!
Ingredients:
- 5 large russet potatoes, peeled
- Vegetable oil (or peanut oil) for frying
- Salt, to taste (sea salt or kosher salt recommended)
- Optional seasonings: paprika, garlic powder, onion powder, cayenne pepper, black pepper, rosemary, thyme, or your favorite spice blend
Preparing the Potatoes:
- Wash and Peel: Start by thoroughly washing your russet potatoes. Even though we’re peeling them, it’s good practice to remove any dirt or debris. Peel the potatoes completely, ensuring no skin remains. Potato skins can burn easily during frying and affect the chip’s texture.
- Slicing the Potatoes: This is arguably the most crucial step for achieving perfectly crispy homemade potato chips. You want uniformly thin slices. A mandoline slicer is highly recommended for this. If you don’t have one, a very sharp knife and a steady hand are essential. Aim for slices that are about 1/16 inch thick think paper-thin. Thicker slices will take longer to cook and may not get as crispy.
- Soaking the Slices (Important!): Place the potato slices in a large bowl filled with cold water. This is a critical step to remove excess starch from the potatoes. The starch is what causes the chips to stick together and become soggy during frying. Let the slices soak for at least 30 minutes, or even up to 2 hours, changing the water every 30 minutes. You’ll notice the water becoming cloudy as the starch is released. Keep rinsing until the water remains relatively clear.
- Drying the Slices: After soaking, drain the potato slices thoroughly. Spread them out in a single layer on clean kitchen towels or paper towels. Pat them dry very well. The drier the potatoes are before frying, the crispier your chips will be. You can even let them air dry for a bit after patting them dry to ensure maximum dryness.
Frying the Potato Chips:
- Heating the Oil: Pour about 3-4 inches of vegetable oil (or peanut oil, which has a higher smoke point) into a large, heavy-bottomed pot or Dutch oven. Attach a deep-fry thermometer to the side of the pot. Heat the oil over medium-high heat to 325°F (160°C). Maintaining a consistent oil temperature is vital for even cooking and crispy chips. If the oil is too hot, the chips will burn on the outside before they cook through. If it’s too cold, they’ll absorb too much oil and become greasy.
- Frying in Batches: Once the oil reaches the correct temperature, carefully add a handful of potato slices to the hot oil. Do not overcrowd the pot! Overcrowding will lower the oil temperature and result in soggy chips. Fry the chips in batches, ensuring they have enough room to move around freely.
- Monitoring and Stirring: As the chips fry, stir them occasionally with a slotted spoon or heat-resistant spatula to prevent them from sticking together and to ensure even cooking. The chips will initially be translucent and then gradually turn golden brown.
- Removing the Chips: Fry the chips for about 3-5 minutes per batch, or until they are golden brown and crispy. Keep a close eye on them, as they can burn quickly. Once they’re ready, carefully remove the chips from the oil with a slotted spoon and transfer them to a wire rack lined with paper towels to drain excess oil.
- Maintaining Oil Temperature: Between batches, check the oil temperature and adjust the heat as needed to maintain 325°F (160°C). Allow the oil to return to the correct temperature before adding the next batch of potato slices.
- Repeat: Continue frying the remaining potato slices in batches until all the chips are cooked.
Seasoning and Serving:
- Seasoning Immediately: While the chips are still hot, immediately sprinkle them with salt and any other desired seasonings. The heat helps the seasonings adhere to the chips. I like to use sea salt for a nice, clean flavor, but kosher salt works well too.
- Optional Seasonings: Get creative with your seasonings! Paprika adds a smoky sweetness, garlic powder and onion powder provide savory notes, cayenne pepper brings a touch of heat, and rosemary or thyme offer an earthy aroma. Experiment with different combinations to find your favorite flavor profile. You can even use pre-made spice blends.
- Cooling and Storing: Allow the chips to cool completely on the wire rack before serving. This will help them crisp up even further. Store the cooled chips in an airtight container at room temperature. They’re best enjoyed within a few days, as they will gradually lose their crispness.
- Serving Suggestions: Homemade potato chips are delicious on their own as a snack, but they also pair well with sandwiches, burgers, dips, and other appetizers. They’re a guaranteed crowd-pleaser!
Troubleshooting Tips:
- Soggy Chips: If your chips are coming out soggy, it’s likely due to one of these reasons:
- Not soaking the potatoes long enough to remove excess starch.
- Not drying the potatoes thoroughly before frying.
- Overcrowding the pot, which lowers the oil temperature.
- Frying at too low of an oil temperature.
- Burnt Chips: If your chips are burning too quickly, the oil temperature is too high. Reduce the heat and monitor the chips closely.
- Unevenly Cooked Chips: This can be caused by unevenly sliced potatoes or inconsistent oil temperature. Use a mandoline for uniform slices and maintain a steady oil temperature throughout the frying process.
- Chips Sticking Together: This is usually due to insufficient starch removal. Make sure to soak the potatoes for at least 30 minutes and rinse them thoroughly.
Variations:
- Sweet Potato Chips: Substitute russet potatoes with sweet potatoes for a sweeter and slightly softer chip. The frying time may need to be adjusted slightly.
- Kettle Chips: For a thicker, crunchier chip, slice the potatoes slightly thicker (about 1/8 inch) and fry them at a slightly lower temperature (around 300°F or 150°C) for a longer period of time. This allows the chips to develop a more intense flavor and a characteristic “kettle-cooked” texture.
- Flavored Oils: Infuse the frying oil with herbs or spices for a subtle flavor enhancement. For example, add a few sprigs of rosemary or thyme to the oil while it’s heating up. Be careful not to burn the herbs.
- Vinegar Chips: After frying, toss the chips with a splash of malt vinegar or white vinegar for a tangy flavor.
- Spicy Chips: Add a pinch of cayenne pepper or chili powder to the salt mixture for a spicy kick.
Safety First:
- Hot Oil: Working with hot oil can be dangerous. Always exercise caution and keep a close eye on the oil temperature. Never leave hot oil unattended.
- Water and Oil: Water and hot oil don’t mix! Make sure the potatoes are completely dry before adding them to the oil to prevent splattering.
- Fire Safety: Keep a fire extinguisher or a lid nearby in case the oil catches fire. Never pour water on a grease fire.
- Children and Pets: Keep children and pets away from the hot oil.
Equipment Recommendations:
- Mandoline Slicer: A mandoline slicer is highly recommended for achieving uniformly thin potato slices. Look for one with adjustable thickness settings and safety features.
- Deep-Fry Thermometer: A deep-fry thermometer is essential for monitoring the oil temperature and ensuring consistent cooking.
- Slotted Spoon or Spider: A slotted spoon or spider is used to remove the chips from the hot oil.
- Wire Rack: A wire rack is used to drain excess oil from the chips and allow them to cool evenly.
- Heavy-Bottomed Pot or Dutch Oven: A heavy-bottomed pot or Dutch oven is ideal for frying because it distributes heat evenly and helps maintain a consistent oil temperature.
Why Homemade?
While store-bought potato chips are convenient, making them at home allows you to control the ingredients, the thickness, the seasonings, and the overall quality. You can avoid artificial flavors, preservatives, and excessive salt. Plus, there’s nothing quite like the taste of freshly made, crispy potato chips!
Enjoy your homemade potato chips!

Conclusion:
So there you have it! Crispy, golden, and utterly addictive Homemade Potato Chips, straight from your kitchen. I truly believe that once you taste the difference between these and the store-bought variety, you’ll never go back. The freshness, the control over the salt and oil, and the sheer satisfaction of making them yourself it’s an experience worth having.
Why is this recipe a must-try? Because it’s surprisingly simple, incredibly rewarding, and allows you to customize your chips to your exact liking. Forget those bags filled with broken pieces and artificial flavors. With this recipe, you’re in charge of creating the perfect chip, every single time. Plus, it’s a fantastic way to impress your friends and family at your next gathering. Imagine serving a bowl of these beauties, warm and freshly made they’ll be gone in minutes!
But the fun doesn’t stop there! Let’s talk serving suggestions and variations. These Homemade Potato Chips are, of course, amazing on their own, but they also pair perfectly with so many things. Think about dipping them in homemade French onion dip, a spicy sriracha mayo, or even a creamy avocado dip. For a more sophisticated touch, try serving them alongside a cheese board with artisanal cheeses and cured meats. They also make a fantastic addition to sandwiches and burgers, adding a satisfying crunch and salty flavor.
And when it comes to variations, the possibilities are endless! Want to add a little heat? Sprinkle some chili powder or cayenne pepper on the chips before baking. Craving something savory? Try adding garlic powder, onion powder, or even smoked paprika. For a sweeter twist, a light dusting of cinnamon sugar can be surprisingly delicious. You can also experiment with different types of potatoes. Russet potatoes are classic, but Yukon Gold potatoes will give you a slightly creamier chip, while sweet potatoes will add a touch of sweetness and vibrant color. Don’t be afraid to get creative and experiment with different seasonings and potato varieties to find your perfect chip combination.
Another fun variation is to try different oils. While vegetable oil works perfectly well, you can also use olive oil for a slightly healthier option and a more distinct flavor. Coconut oil will add a subtle sweetness, while avocado oil is a great choice for its high smoke point and neutral flavor. Just remember to adjust the baking time accordingly, as different oils may affect the cooking process.
I’m so excited for you to try this recipe and experience the joy of making your own Homemade Potato Chips. It’s a fun and easy project that will definitely impress your taste buds. So, gather your ingredients, preheat your oven, and get ready to create some seriously delicious chips.
And now, for the most important part: I want to hear about your experience! Did you try any of the variations I suggested? Did you come up with your own unique flavor combinations? What did your friends and family think? Please, share your photos, tips, and stories in the comments below. I can’t wait to see what you create! Happy chipping! I am confident that you will love this recipe as much as I do. Let me know what you think!
Homemade Potato Chips: The Ultimate Guide to Crispy Perfection
Crispy, golden homemade potato chips made from scratch. Control the ingredients and enjoy a fresh, flavorful snack!
Ingredients
- 5 large russet potatoes, peeled
- Vegetable oil (or peanut oil) for frying
- Salt, to taste (sea salt or kosher salt recommended)
- Optional seasonings: paprika, garlic powder, onion powder, cayenne pepper, black pepper, rosemary, thyme, or your favorite spice blend
Instructions
- Wash and Peel: Wash and peel the russet potatoes thoroughly.
- Slicing the Potatoes: Slice the potatoes into paper-thin slices (about 1/16 inch thick) using a mandoline or a very sharp knife.
- Soaking the Slices: Place the potato slices in a large bowl filled with cold water. Soak for at least 30 minutes, or up to 2 hours, changing the water every 30 minutes until the water remains relatively clear.
- Drying the Slices: Drain the potato slices thoroughly. Spread them out in a single layer on clean kitchen towels or paper towels. Pat them dry very well.
- Heating the Oil: Pour about 3-4 inches of vegetable oil (or peanut oil) into a large, heavy-bottomed pot or Dutch oven. Attach a deep-fry thermometer to the side of the pot. Heat the oil over medium-high heat to 325°F (160°C).
- Frying in Batches: Carefully add a handful of potato slices to the hot oil. Do not overcrowd the pot! Fry the chips in batches, ensuring they have enough room to move around freely.
- Monitoring and Stirring: As the chips fry, stir them occasionally with a slotted spoon or heat-resistant spatula to prevent them from sticking together and to ensure even cooking.
- Removing the Chips: Fry the chips for about 3-5 minutes per batch, or until they are golden brown and crispy. Carefully remove the chips from the oil with a slotted spoon and transfer them to a wire rack lined with paper towels to drain excess oil.
- Maintaining Oil Temperature: Between batches, check the oil temperature and adjust the heat as needed to maintain 325°F (160°C). Allow the oil to return to the correct temperature before adding the next batch of potato slices.
- Repeat: Continue frying the remaining potato slices in batches until all the chips are cooked.
- Seasoning Immediately: While the chips are still hot, immediately sprinkle them with salt and any other desired seasonings.
- Cooling and Storing: Allow the chips to cool completely on the wire rack before serving. Store the cooled chips in an airtight container at room temperature. They’re best enjoyed within a few days.
- Serving Suggestions: Serve as a snack or side dish.
Notes
- Soaking is Key: Soaking the potatoes removes excess starch, preventing soggy chips.
- Dry Thoroughly: The drier the potatoes, the crispier the chips.
- Oil Temperature: Maintain a consistent oil temperature of 325°F (160°C) for even cooking.
- Don’t Overcrowd: Fry in batches to prevent the oil temperature from dropping.
- Season Immediately: Season while the chips are hot for better adhesion.
- Troubleshooting:
- Soggy Chips: Soak longer, dry more thoroughly, don’t overcrowd, or increase oil temperature.
- Burnt Chips: Reduce oil temperature.
- Unevenly Cooked Chips: Use a mandoline for uniform slices and maintain a steady oil temperature.
- Chips Sticking Together: Soak the potatoes for at least 30 minutes and rinse them thoroughly.
- Variations:
- Sweet Potato Chips: Substitute russet potatoes with sweet potatoes.
- Kettle Chips: Slice the potatoes slightly thicker (about 1/8 inch) and fry them at a slightly lower temperature (around 300°F or 150°C) for a longer period of time.
- Flavored Oils: Infuse the frying oil with herbs or spices.
- Vinegar Chips: Toss the chips with malt vinegar or white vinegar after frying.
- Spicy Chips: Add cayenne pepper or chili powder to the salt mixture.
- Safety First:
- Hot Oil: Exercise caution and keep a close eye on the oil temperature. Never leave hot oil unattended.
- Water and Oil: Make sure the potatoes are completely dry before adding them to the oil to prevent splattering.
- Fire Safety: Keep a fire extinguisher or a lid nearby in case the oil catches fire. Never pour water on a grease fire.
- Children and Pets: Keep children and pets away from the hot oil.
- Equipment Recommendations:
- Mandoline Slicer: A mandoline slicer is highly recommended for achieving uniformly thin potato slices. Look for one with adjustable thickness settings and safety features.
- Deep-Fry Thermometer: A deep-fry thermometer is essential for monitoring the oil temperature and ensuring consistent cooking.
- Slotted Spoon or Spider: A slotted spoon or spider is used to remove the chips from the hot oil.
- Wire Rack: A wire rack is used to drain excess oil from the chips and allow them to cool evenly.
- Heavy-Bottomed Pot or Dutch Oven: A heavy-bottomed pot or Dutch oven is ideal for frying because it distributes heat evenly and helps maintain a consistent oil temperature.


Leave a Comment