
Homemade Nutella, oh, where do I even begin? Imagine waking up to the rich, hazelnutty aroma wafting through your kitchen, promising a day filled with pure, unadulterated deliciousness. Forget the store-bought version we’re talking about a velvety smooth, intensely flavorful spread that you crafted with your own two hands. This isn’t just breakfast; it’s an experience!
While the commercially produced Nutella has its roots in post-World War II Italy, born out of a cocoa shortage and a surplus of hazelnuts, the idea of combining chocolate and hazelnuts is centuries old. Italians have long celebrated this pairing, and now, you can too, with a version that’s even better than the original.
What makes homemade Nutella so irresistible? It’s the perfect balance of sweet and nutty, the luxurious texture that melts in your mouth, and the sheer satisfaction of knowing exactly what ingredients went into it. Plus, it’s incredibly versatile! Spread it on toast, swirl it into your morning oatmeal, use it as a decadent dip for fruit, or simply enjoy it straight from the spoon (we won’t judge!). Get ready to elevate your breakfast game and impress your friends and family with this surprisingly easy and utterly divine treat.

Ingredients:
- 1 cup (150g) hazelnuts, roasted and skinned
- 1/2 cup (100g) granulated sugar
- 1/4 cup (25g) unsweetened cocoa powder
- 2 tablespoons (30ml) hazelnut oil (or vegetable oil)
- 1 teaspoon vanilla extract
- 1/4 teaspoon salt
- 2-4 tablespoons milk (dairy or non-dairy), as needed for consistency
Roasting and Skinning the Hazelnuts
Okay, let’s start with the most crucial part: the hazelnuts! Trust me, properly roasting and skinning them makes a HUGE difference in the final flavor and texture of your homemade Nutella. Nobody wants gritty Nutella, right?
- Preheat your oven to 350°F (175°C). This temperature is perfect for gently roasting the hazelnuts without burning them.
- Spread the hazelnuts in a single layer on a baking sheet. Make sure they’re not overcrowded, so they roast evenly.
- Roast for 12-15 minutes. Keep a close eye on them! You’ll know they’re ready when the skins start to crack and the nuts become fragrant. The timing can vary slightly depending on your oven.
- Let the hazelnuts cool slightly. This makes them easier to handle.
- Wrap the hazelnuts in a clean kitchen towel. Gather the edges of the towel and rub the hazelnuts vigorously against each other. This will help to remove the skins.
- Separate the skinned hazelnuts from the skins. It’s okay if some skins remain don’t stress about getting every single piece off. A little bit of skin won’t ruin your Nutella.
Making the Hazelnut Butter
Now for the magic! Turning those roasted hazelnuts into a smooth, creamy butter is the key to that authentic Nutella texture. You’ll need a food processor for this step. A high-powered blender *might* work, but a food processor is definitely the way to go.
- Place the roasted and skinned hazelnuts in the food processor.
- Process for several minutes, stopping occasionally to scrape down the sides of the bowl. At first, the hazelnuts will turn into a coarse meal. Then, they’ll start to clump together. Be patient! Eventually, the oils will release, and you’ll have a smooth, creamy hazelnut butter. This process can take anywhere from 5 to 10 minutes, or even longer depending on your food processor. Don’t give up!
- Continue processing until the hazelnut butter is as smooth as possible. The smoother the hazelnut butter, the smoother your Nutella will be.
Combining the Ingredients
Alright, we’ve got our hazelnut butter! Now it’s time to bring in the other ingredients and transform it into delicious, homemade Nutella.
- Add the sugar, cocoa powder, hazelnut oil (or vegetable oil), vanilla extract, and salt to the food processor.
- Process until everything is well combined. The mixture will likely be quite thick at this point.
- With the food processor running, slowly add the milk, one tablespoon at a time, until the Nutella reaches your desired consistency. You might need more or less milk depending on the consistency of your hazelnut butter and your personal preference. I usually use about 3 tablespoons.
- Taste and adjust the sweetness or saltiness as needed. If you want it sweeter, add a little more sugar. If you want a richer chocolate flavor, add a little more cocoa powder.
- Process for another minute or two to ensure everything is perfectly smooth and combined.
Storing Your Homemade Nutella
Congratulations! You’ve made your own homemade Nutella! Now, let’s talk about how to store it so you can enjoy it for as long as possible (though I doubt it will last very long!).
- Transfer the Nutella to an airtight container. A glass jar is ideal.
- Store at room temperature for up to 2 weeks. You don’t need to refrigerate it! Refrigeration can make it too hard to spread.
- If the Nutella separates, simply stir it before using. This is perfectly normal and doesn’t affect the taste or quality.
Tips and Variations
Want to take your homemade Nutella to the next level? Here are a few tips and variations to try:
- Use high-quality cocoa powder. The better the cocoa powder, the richer the chocolate flavor. I recommend using Dutch-processed cocoa powder for a smoother, less bitter taste.
- Add a pinch of espresso powder. This will enhance the chocolate flavor and add a subtle coffee note.
- Substitute some of the sugar with powdered sugar. This will create a smoother, creamier texture.
- Add a tablespoon of chocolate chips (melted). For an extra decadent treat, melt some chocolate chips and stir them into the Nutella.
- Make it vegan. Use non-dairy milk and make sure your sugar is vegan-friendly (some granulated sugar is processed with bone char).
- Experiment with different nuts. While hazelnuts are traditional, you could try making Nutella with almonds, cashews, or even peanuts (though then it wouldn’t technically be Nutella!).
- For a smoother texture, use a high-speed blender after processing in the food processor. This will ensure an ultra-smooth and creamy final product.
- If your hazelnuts are already roasted, you can skip the roasting step. Just make sure they are fresh and haven’t gone rancid.
- Don’t over-process the hazelnuts. Over-processing can cause the hazelnut butter to become oily and separate.
- Be patient! Making homemade Nutella takes a little time and effort, but the results are well worth it.
Troubleshooting
Sometimes things don’t go exactly as planned. Here are a few common problems you might encounter and how to fix them:
- My Nutella is too thick. Add more milk, one tablespoon at a time, until it reaches your desired consistency.
- My Nutella is too thin. Add a little more cocoa powder or hazelnut butter.
- My Nutella is gritty. This usually means the hazelnuts weren’t processed enough. Try processing it for a longer period of time, or use a high-speed blender to smooth it out.
- My Nutella is oily. This can happen if the hazelnuts are over-processed. Unfortunately, there’s not much you can do to fix this. Just stir it well before using.
- My Nutella doesn’t taste like Nutella. Make sure you’re using high-quality ingredients and that you’re adding enough sugar and cocoa powder. You can also try adding a pinch of espresso powder to enhance the chocolate flavor.
Serving Suggestions
Now that you’ve got your homemade Nutella, how are you going to enjoy it? Here are a few ideas:
- Spread it on toast, bagels, or croissants. This is the classic way to enjoy Nutella.
- Use it as a dip for fruit or pretzels.
- Add it to your oatmeal or yogurt.
- Use it as a filling for crepes or pancakes.
- Make Nutella sandwiches.
- Bake it into cookies, brownies, or cakes.
- Eat it straight from the jar with a spoon (we won’t judge!).
Enjoy your delicious, homemade Nutella!
Conclusion:
And there you have it! This Homemade Nutella recipe is more than just a spread; it’s an experience. It’s the satisfaction of knowing exactly what goes into your food, the joy of creating something delicious from scratch, and the pure, unadulterated pleasure of that first taste. Forget the store-bought stuff once you’ve tried this, you’ll never go back.
Why is this a must-try? Because it’s incredibly easy, surprisingly quick, and tastes infinitely better than anything you can buy. The rich, nutty flavor, the smooth, creamy texture, and the subtle hint of chocolate all combine to create a symphony of deliciousness that will tantalize your taste buds. Plus, you can customize it to your liking! Want it sweeter? Add a touch more sugar. Prefer a darker chocolate flavor? Use dark chocolate instead of milk chocolate. The possibilities are endless!
But the best part? You control the ingredients. No artificial flavors, no preservatives, just pure, wholesome goodness. This is a treat you can feel good about indulging in, and sharing with your loved ones.
Now, let’s talk serving suggestions. Of course, the classic way to enjoy Homemade Nutella is spread on toast, croissants, or bagels. But don’t stop there! Get creative!
* Drizzle it over pancakes or waffles for a decadent breakfast.
* Use it as a filling for crepes or pastries.
* Stir it into your morning oatmeal or yogurt for a boost of flavor.
* Dip fresh fruit, like strawberries or bananas, into it for a healthy and delicious snack.
* Make Nutella-filled cookies or brownies for an extra special treat.
* Swirl it into your favorite ice cream recipe for a Nutella-infused dessert.
* Add a spoonful to your coffee for a mocha-inspired beverage.
* Use it as a frosting for cakes or cupcakes.
And for those of you who like to experiment, here are a few variations to try:
* Spicy Nutella: Add a pinch of cayenne pepper for a subtle kick.
* Coffee Nutella: Stir in a teaspoon of instant coffee for a mocha flavor.
* Sea Salt Nutella: Sprinkle a pinch of sea salt on top for a sweet and salty combination.
* Hazelnut Crunch Nutella: Add chopped, toasted hazelnuts for extra texture.
* White Chocolate Nutella: Use white chocolate instead of milk chocolate for a sweeter, creamier version.
I truly believe that this Homemade Nutella recipe will become a staple in your kitchen. It’s a versatile, delicious, and satisfying treat that you can enjoy in so many different ways.
So, what are you waiting for? Gather your ingredients, fire up your food processor, and get ready to experience the magic of homemade Nutella. I promise you won’t be disappointed.
And most importantly, I want to hear about your experience! Did you try the recipe? Did you make any variations? What did you think? Share your photos, comments, and suggestions in the comments section below. I can’t wait to see what you create! Happy spreading!
Homemade Nutella: The Ultimate Guide to Making Your Own
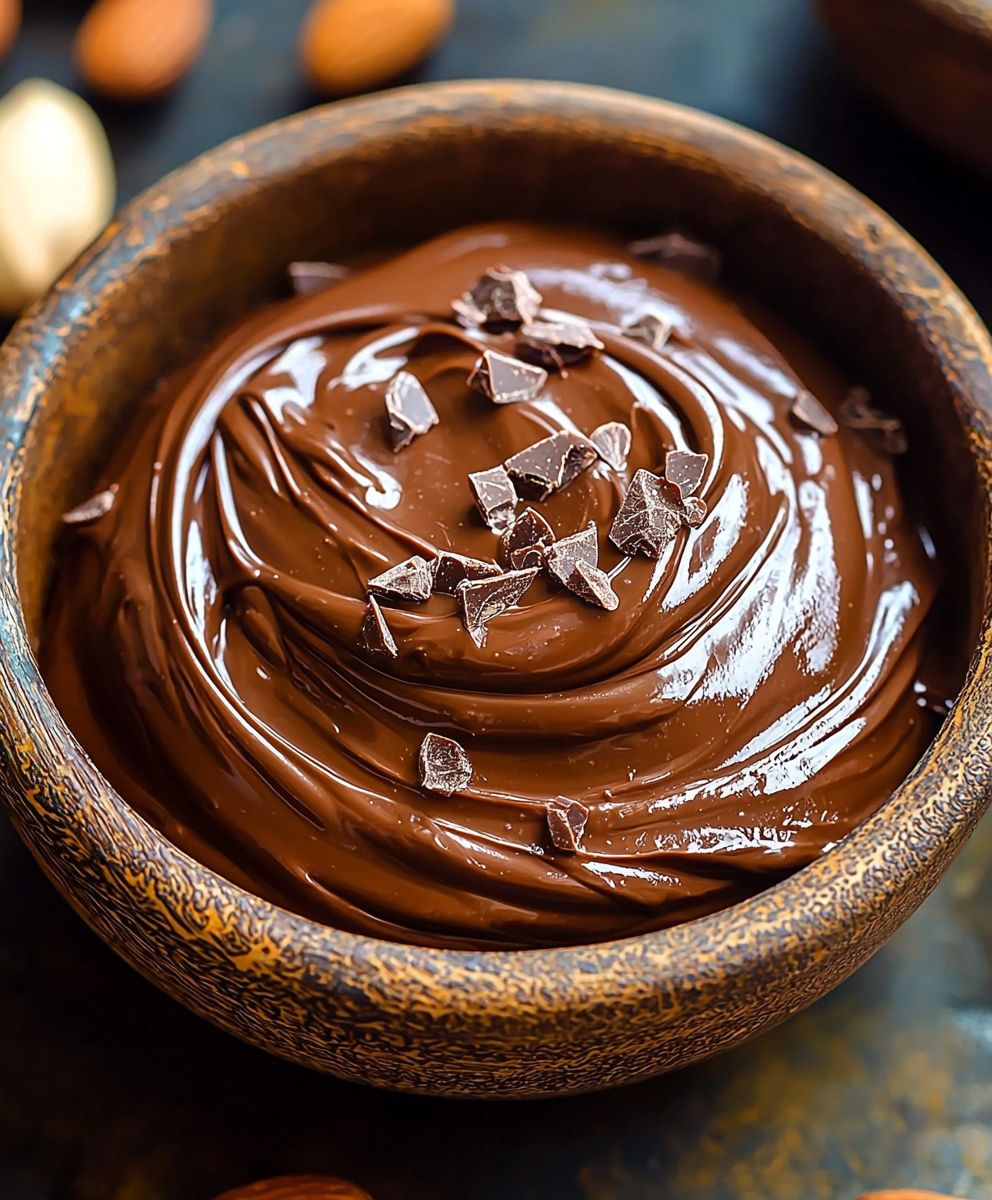
A rich and creamy chocolate-hazelnut spread made from scratch. Roasting the hazelnuts is key to the best flavor!
Ingredients
- 1 cup (150g) hazelnuts, roasted and skinned
- 1/2 cup (100g) granulated sugar
- 1/4 cup (25g) unsweetened cocoa powder
- 2 tablespoons (30ml) hazelnut oil (or vegetable oil)
- 1 teaspoon vanilla extract
- 1/4 teaspoon salt
- 2-4 tablespoons milk (dairy or non-dairy), as needed for consistency
Instructions
- Roast and Skin Hazelnuts: Preheat oven to 350°F (175°C). Spread hazelnuts in a single layer on a baking sheet. Roast for 12-15 minutes, until skins crack and nuts are fragrant. Let cool slightly. Wrap in a clean kitchen towel and rub vigorously to remove skins. Separate skinned hazelnuts from skins.
- Make Hazelnut Butter: Place roasted and skinned hazelnuts in a food processor. Process for several minutes, scraping down the sides occasionally. Continue processing until a smooth, creamy hazelnut butter forms (5-10 minutes or longer).
- Combine Ingredients: Add sugar, cocoa powder, hazelnut oil (or vegetable oil), vanilla extract, and salt to the food processor. Process until well combined.
- Adjust Consistency: With the food processor running, slowly add milk, one tablespoon at a time, until the Nutella reaches your desired consistency (usually about 3 tablespoons).
- Taste and Adjust: Taste and adjust sweetness or saltiness as needed. Process for another minute or two to ensure everything is perfectly smooth and combined.
- Store: Transfer the Nutella to an airtight container (glass jar is ideal). Store at room temperature for up to 2 weeks. If it separates, simply stir before using.
Notes
- Use high-quality cocoa powder for the best flavor (Dutch-processed recommended).
- Add a pinch of espresso powder to enhance the chocolate flavor.
- Substitute some sugar with powdered sugar for a smoother texture.
- Melted chocolate chips can be added for extra decadence.
- Make it vegan by using non-dairy milk and vegan-friendly sugar.
- Experiment with different nuts like almonds or cashews.
- For an ultra-smooth texture, use a high-speed blender after processing in the food processor.
- Be patient during the hazelnut butter making process.
- Don’t over-process the hazelnuts, as it can cause the butter to become oily.


Leave a Comment