
Mini Apple Pies Recipe – the very mention of it evokes the comforting aroma of cinnamon, baked apples, and flaky pastry wafting through a cozy kitchen. Imagine biting into a perfectly portioned, golden-brown pie, where each delightful mouthful offers a symphony of sweet, tart apples and warm spices, all encased in a buttery, tender crust. It’s a culinary experience that captures the essence of classic American comfort food, reimagined for modern convenience and individual enjoyment, promising a moment of pure bliss with every bite.
While the full-sized apple pie holds a cherished place in our hearts and culinary history, symbolizing home, holidays, and warmth, this miniature version elevates that tradition to new heights. People adore these mini treats not just for their undeniably delicious taste and satisfying texture, but also for their sheer practicality. They eliminate the need for messy slicing, making them the ultimate dessert for gatherings, potlucks, school lunches, or simply as a charming personal indulgence. I find immense joy in baking these, knowing that each adorable pie delivers a concentrated burst of nostalgic flavor. This particular Mini Apple Pies Recipe is designed to be straightforward yet yield impressively delicious results, ensuring that every bite is as delightful as it looks.

Ingredients:
- For the Pie Crust:
- 2 sheets (approximately 14.1 ounces each) of store-bought pie crust, thawed according to package directions. Using pre-made dough is a fantastic shortcut for these delicious mini apple pies!
- Alternatively, your favorite homemade pie dough recipe (enough for a double-crust 9-inch pie).
- For the Apple Filling:
- 6 medium-sized baking apples (about 2-2.5 pounds total), such as Granny Smith, Honeycrisp, Fuji, or a mix for complex flavor. A blend of sweet and tart apples creates the best balance in our mini apple pies.
- 1/2 cup granulated sugar (adjust to taste depending on the sweetness of your apples).
- 1/4 cup light brown sugar, packed.
- 2 tablespoons all-purpose flour or cornstarch (for thickening the filling). This ensures a beautifully set filling, not a watery one.
- 1 teaspoon ground cinnamon.
- 1/4 teaspoon ground nutmeg.
- 1/8 teaspoon ground allspice or a tiny pinch of ground cloves (optional, for extra warmth).
- 1 tablespoon fresh lemon juice. This brightens the apple flavor and prevents browning.
- 2 tablespoons unsalted butter, cut into small pieces.
- For the Egg Wash:
- 1 large egg.
- 1 tablespoon water or milk.
- Optional Topping:
- 1-2 tablespoons coarse turbinado sugar (for a sparkly, crunchy finish).
Preparing the Apple Filling: The Heart of Your Mini Apple Pies
Crafting the perfect apple filling is paramount to the success of your Mini Apple Pies Recipe. This step is where all the wonderful flavors truly come alive, creating that quintessential apple pie experience in a smaller, more delightful package.
- Prepare Your Apples: Begin by washing your apples thoroughly. Then, using a sturdy vegetable peeler, carefully remove all the skin from each apple. Once peeled, core each apple, ensuring all seeds and the tough core are removed. You can use an apple corer for efficiency or a sharp paring knife.
- Slice with Precision: The way you slice your apples significantly impacts the texture of your filling. For mini pies, I find that a combination of thin slices and small dice works beautifully. Aim for slices that are about 1/4-inch thick, then cut these slices into smaller, bite-sized pieces. Alternatively, you can simply dice the apples into 1/2-inch cubes. The goal is to have pieces that will cook down to tender, yet still have a bit of substance, without being too large for the mini pie shells. Place all your prepared apples into a large mixing bowl.
- Add the Flavor Foundation: To the bowl with the apples, add the granulated sugar and the packed light brown sugar. The blend of these two sugars provides a deeper, more complex sweetness.
- Introduce the Thickeners and Spices: Sprinkle the all-purpose flour (or cornstarch) evenly over the apples. The flour will help absorb the natural juices released by the apples during baking, preventing a soggy bottom crust and ensuring a nicely set filling. Next, add the ground cinnamon, ground nutmeg, and the optional pinch of allspice. These warming spices are the classic companions to apples and are absolutely essential for a truly inviting aroma and taste in your Mini Apple Pies Recipe.
- A Splash of Brightness: Pour the fresh lemon juice over the mixture. Lemon juice is not just for preventing browning; it also brightens the overall flavor profile of the apples, adding a zesty counterpoint to the sweetness.
- Thoroughly Combine: Using a large spoon or your clean hands (my preferred method!), gently toss all the ingredients together until the apples are evenly coated with the sugars, flour, and spices. Make sure every apple piece gets its share of the delicious coating. Set this bowl aside for at least 10-15 minutes. This brief resting period allows the sugars to start drawing out some of the liquid from the apples, creating a beautiful syrupy mixture.
Preparing and Shaping the Pie Crust: Building the Foundation
The crust is just as important as the filling in any good pie, and for our Mini Apple Pies Recipe, we want a tender, flaky foundation. Using pre-made dough makes this step incredibly straightforward, allowing you to focus on the fun of assembly.
- Preheat Your Oven: Before you begin working with the dough, preheat your oven to 400°F (200°C). This ensures the oven is at the perfect temperature for baking your mini apple pies evenly from the moment they go in.
- Prepare Your Work Surface: Lightly flour a clean, dry work surface. This prevents the dough from sticking and makes it easier to handle. Have your thawed pie crust sheets ready.
- Cut the Base Crusts: Carefully unroll one sheet of pie crust onto your floured surface. Using a round cookie cutter (or even the rim of a glass) that is approximately 3 to 3.5 inches in diameter, cut out circles from the dough. This size is ideal for standard muffin tins or mini tart pans. Depending on the size of your cutter and the dough sheet, you should get about 6-8 circles from each sheet. Gently gather the dough scraps, press them together without overworking, and re-roll once to cut out additional circles.
- Line Your Muffin Tin: Lightly grease a 12-cup muffin tin or line it with paper liners. Carefully press one dough circle into each cup, gently easing it down so it fits snugly against the bottom and sides without tearing. Ensure the dough extends slightly above the rim of the muffin cup – this will help you seal the top crust later.
- Prepare the Top Crusts: Now, unroll your second sheet of pie crust. For the top crusts, you have a few creative options for your Mini Apple Pies Recipe:
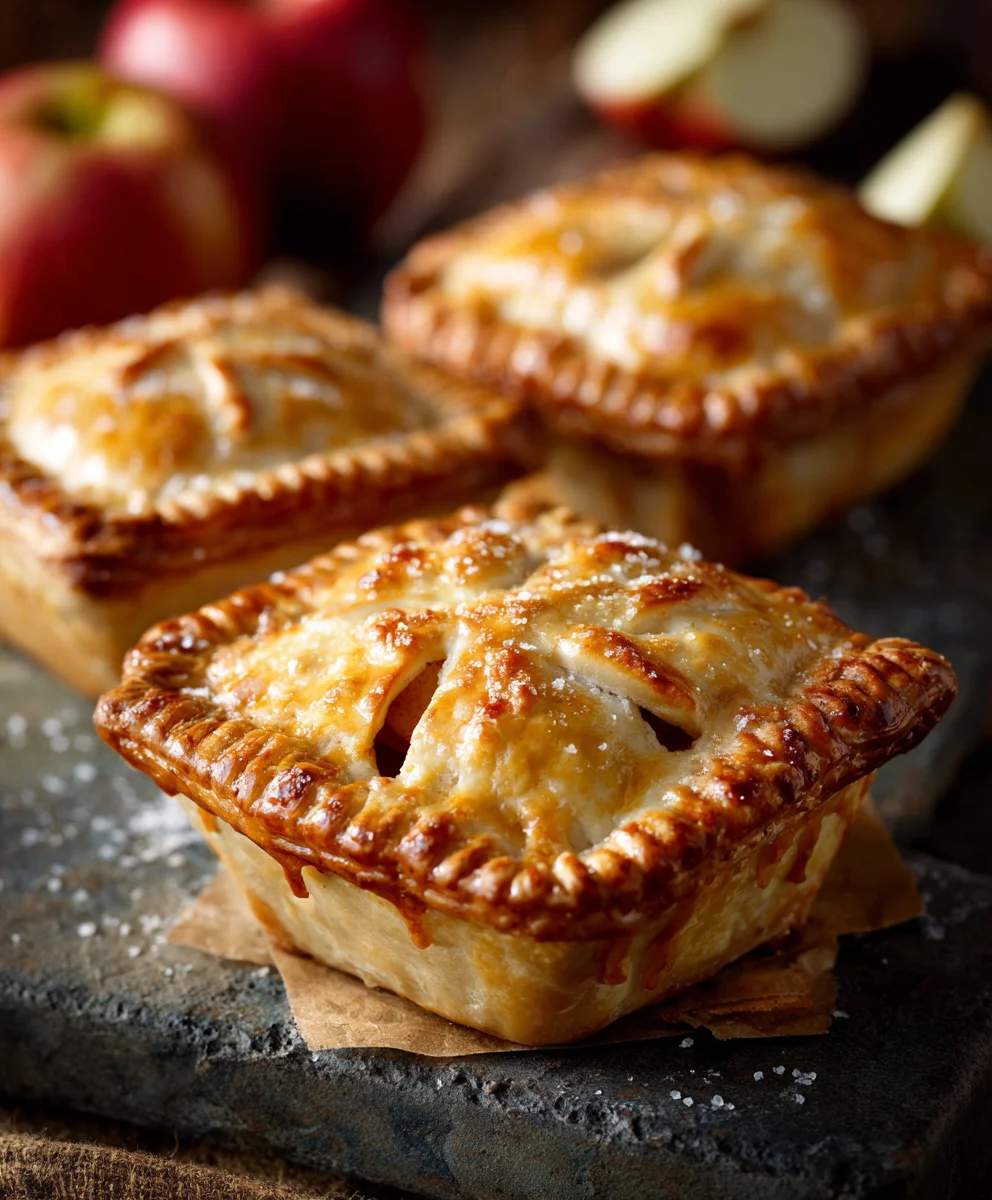
- Full Top Crust: Using a slightly smaller round cutter (about 2.5-3 inches), cut out circles for the tops. This creates a classic, fully enclosed mini pie.
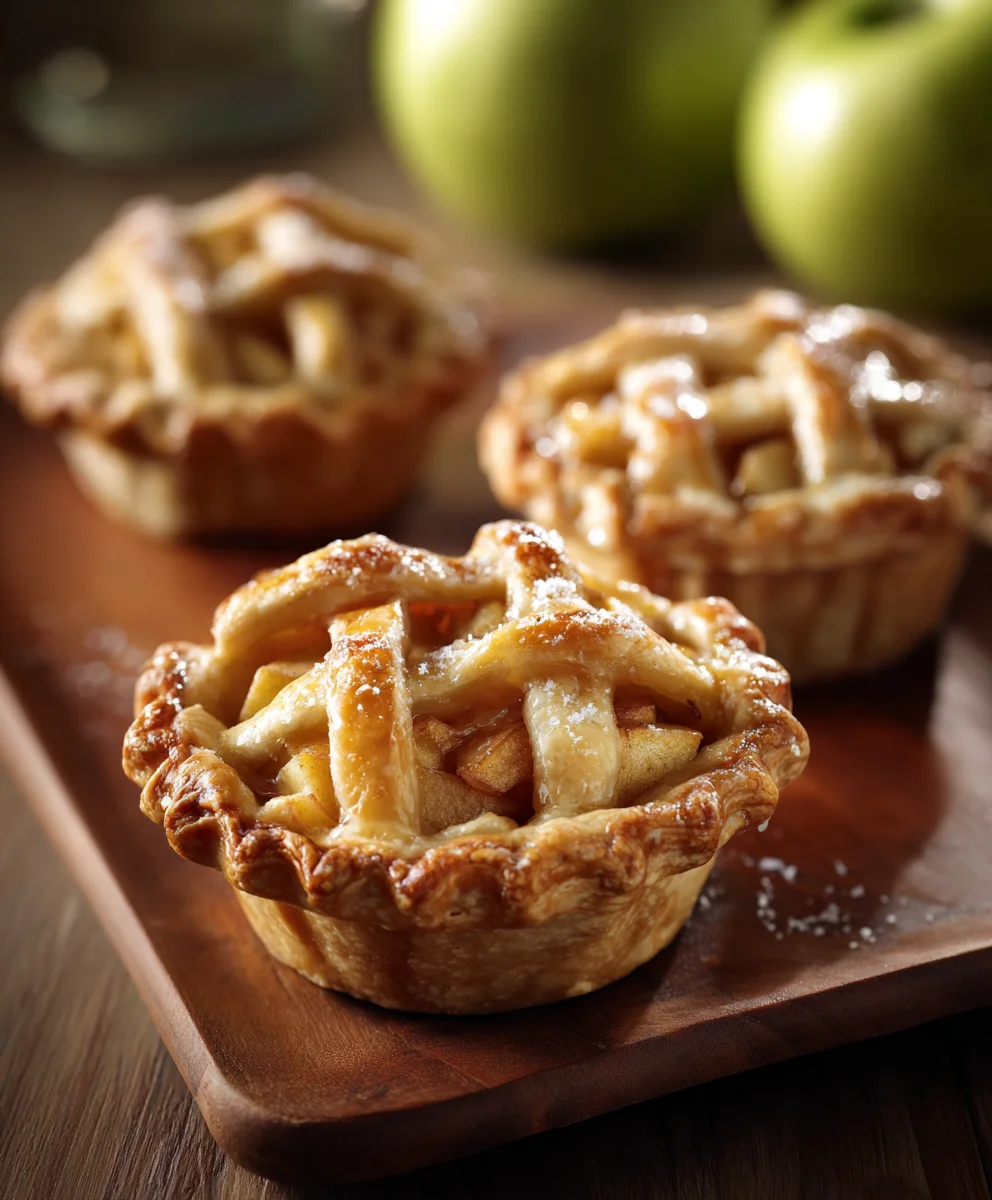
- Lattice Top: For an elegant touch, use a pastry wheel or a sharp knife to cut the dough into thin strips (about 1/4 to 1/2 inch wide). You’ll weave these strips over the filling.
- Decorative Cut-Outs: Use small cookie cutters (like a leaf, star, or heart) to create charming vents or decorative elements for the top of the pie.
Just like with the base crusts, gather and re-roll any scraps to get as many top crusts or strips as possible. Keep the prepared top crusts on a separate floured surface or a parchment-lined baking sheet until ready to use.
Assembling Your Delicious Mini Apple Pies
This is where all your hard work comes together! Assembling the mini pies is a delightful process, and each step brings you closer to enjoying your homemade treats.
- Fill the Crusts: Spoon the apple filling into each of the dough-lined muffin cups. Don’t be shy, but don’t overfill either. You want a generous mound of apples, but leave enough space at the top to comfortably place your chosen top crust. A good rule of thumb is to fill them about two-thirds to three-quarters full.
- Add the Butter Dots: Remember those small pieces of unsalted butter you cut earlier? Dot about 1/4 to 1/2 teaspoon of butter over the top of the apple filling in each mini pie. These tiny pats of butter will melt into the filling as the pies bake, adding richness and a wonderful, glossy sheen.
- Top Your Mini Pies:
- For Full Top Crusts: Carefully place one of the smaller dough circles over the apple filling in each cup. Gently press the edges of the top crust down onto the edges of the bottom crust, sealing them together. You can use your fingers to crimp the edges, or use the tines of a fork to create a decorative, sealed edge.
- For Lattice Tops: Arrange two or three dough strips crisscross over the filling. Trim any excess dough from the edges. You can then gently press the ends of the strips into the bottom crust to seal.
- Vent the Pies (Crucial Step for Perfect Mini Apple Pies): If you’ve opted for a full top crust, it is absolutely essential to cut a few small slits or a decorative shape into the top of each pie. These vents allow steam to escape during baking, preventing the crust from puffing up excessively and ensuring an even bake. Without vents, you risk a burst crust and a messy overflow!
- Prepare the Egg Wash: In a small bowl, whisk together the large egg with 1 tablespoon of water or milk until well combined. This egg wash is magic – it gives your mini apple pies that beautiful golden-brown, shiny finish we all adore.
- Brush with Egg Wash and Sugar: Using a pastry brush, lightly and evenly brush the tops of all your assembled mini pies with the egg wash. Be careful not to let too much egg wash pool around the edges. If desired, sprinkle a pinch of coarse turbinado sugar over the egg-washed tops for an extra sparkly, crunchy texture. This adds a lovely professional touch to your homemade Mini Apple Pies Recipe.
Baking and Cooling: The Grand Finale for Your Mini Apple Pies
The moment of truth! Baking these mini pies to perfection ensures a flaky crust and a tender, bubbling filling. Patience during cooling is also key for the best texture and flavor.
- Bake to Golden Perfection: Carefully transfer the muffin tin with your mini apple pies to the preheated 400°F (200°C) oven.
- Initial High Heat Bake: Bake for 15 minutes at 400°F (200°C). This initial blast of high heat helps the crust set quickly and become flaky.
- Reduce Heat and Continue Baking: After 15 minutes, reduce the oven temperature to 375°F (190°C) without opening the oven door too much. Continue to bake for another 20-25 minutes, or until the crusts are deeply golden brown and the filling is bubbling thickly through the vents.
- Check for Doneness: The visual cues are important: a beautiful golden crust and visible, thick, bubbly apple filling are your best indicators. If you notice the crust browning too quickly, you can loosely tent the muffin tin with aluminum foil for the remaining baking time.
- Cooling is Crucial: Once baked, carefully remove the muffin tin from the oven. Allow the mini apple pies to cool in the muffin tin on a wire rack for at least 15-20 minutes. This step is vital! The filling needs time to set as it cools, preventing it from being too runny when you remove the pies.
- Release and Final Cool: After the initial cooling period in the tin, use a small offset spatula or a butter knife to gently loosen the edges of each mini pie and carefully lift them out of the muffin cups. Transfer them directly to the wire rack to cool completely. This full cooling process is essential for the crust to become crisp and the filling to fully set, making for the perfect eating experience with your Mini Apple Pies Recipe.
Tips for the Best Mini Apple Pies and Variations:
To truly master your Mini Apple Pies Recipe, consider these additional insights and creative twists.
- Apple Variety Matters: While Granny Smith offers a lovely tartness, a blend with sweeter, firmer apples like Honeycrisp, Fuji, or Braeburn creates a more complex flavor and texture. Avoid overly soft or mealy apples as they will turn to mush.
- Don’t Overwork the Dough: Whether store-bought or homemade, handle pie dough as little as possible. Overworking develops gluten, leading to a tough, rather than flaky, crust.
- Freezing for Future Enjoyment: You can bake these mini apple pies, let them cool completely, then freeze them in a single layer on a baking sheet before transferring them to an airtight container or freezer bag. They can be reheated from frozen at 350°F (175°C) until warm through, usually about 15-20 minutes.
- Spice Adjustments: Feel free to experiment with your spice blend. A touch of ginger or a small amount of cardamom can add an interesting twist to the classic apple pie flavors.
- Serving Suggestions: These mini apple pies are absolutely divine served warm with a scoop of vanilla bean ice cream, a dollop of freshly whipped cream, or a drizzle of caramel sauce. They also make an excellent addition to any dessert platter or a thoughtful treat for a picnic.
- Preventing Soggy Bottoms: Ensure your oven is fully preheated. The initial high temperature helps to set the bottom crust quickly. Additionally, don’t skimp on the flour or cornstarch in the filling, as this helps absorb excess moisture from the apples.
- Storage: Store leftover mini apple pies at room temperature for up to 2 days, or in the refrigerator for up to 4 days, covered loosely. Reheat gently in a microwave or a low oven for a fresh-baked experience.
Enjoy the process of baking and savoring your perfectly crafted Mini Apple Pies Recipe! They are truly a bite of comfort and joy.
Conclusion:
So there you have it, my dear fellow baking enthusiasts! We’ve journeyed through the delightful process of creating these individual bundles of joy, and I truly believe this particular Mini Apple Pies Recipe stands head and shoulders above the rest. What makes them so utterly irresistible and a definite must-try, you ask? Well, for starters, there’s the sheer genius of their size. No more wrestling with a giant pie, trying to cut a perfect slice, or feeling guilty about a second helping. These mini marvels offer that perfect, personal portion, ensuring every single bite delivers a harmonious blend of flaky, buttery crust and warmly spiced, tender apple filling. They’re not just a dessert; they’re an experience, a little moment of comfort you can hold in your hand. The aroma alone, as they bake to golden perfection, is enough to transport you straight back to grandma’s kitchen or a cozy autumn afternoon. It’s the kind of treat that doesn’t just satisfy a sweet tooth but warms the soul, making any ordinary day feel a little more special. Plus, let’s be honest, they’re incredibly charming and effortlessly elegant, making them ideal for gatherings, gifting, or simply indulging yourself after a long day.
Now, while these mini apple pies are absolutely divine straight out of the oven, perhaps with a slight cooling period to let the filling set and the flavors meld beautifully, the serving possibilities are endless and truly where you can let your creativity shine! For a classic and undeniably decadent pairing, I highly recommend serving them warm alongside a generous scoop of good quality vanilla bean ice cream. The contrast between the warm, spiced apples and the cold, creamy ice cream is simply out of this world. You could also drizzle a little caramel sauce over the top, or even a light dusting of powdered sugar for an extra touch of sweetness and visual appeal. If you’re feeling a bit fancy, a dollop of freshly whipped cream, perhaps infused with a hint of cinnamon or maple syrup, would elevate them beautifully. For those who prefer a less sweet accompaniment, a small bowl of plain Greek yogurt can offer a lovely tang that cuts through the richness of the pie. Don’t be afraid to experiment with the filling variations too! While apples are king here, a sprinkle of dried cranberries or chopped walnuts can add texture and a different layer of flavor. You could even try a mix of apples and pears for a unique twist, or swap out some of the cinnamon for a touch of cardamom or allspice for a more complex spice profile. For a holiday flair, consider adding a pinch of freshly grated nutmeg and a splash of brandy to the apple mixture before baking. And hey, if you’re a cheese and apple pie fan, a thin slice of sharp cheddar cheese melted over the top of a warm mini pie is a surprisingly delightful combination!
My ultimate hope is that this recipe inspires you to tie on your apron, gather your ingredients, and experience the pure joy of baking these charming treats for yourself and your loved ones. There’s a profound satisfaction that comes from creating something so delicious from scratch, especially when the results are as universally loved as these.
Don’t hesitate to dive in; I promise you won’t regret it!
Once you’ve pulled your own batch of golden, bubbling mini apple pies from the oven, I would absolutely love to hear about your experience. Did you add any unique twists? What did your family think? Did they disappear as quickly as they did in my kitchen? Share your photos, your tips, and your triumph with me! Your feedback and shared moments are what truly bring recipes like this to life, creating a wonderful community of fellow food lovers. So go on, give this Mini Apple Pies Recipe a try, make it your own, and let’s celebrate the simple, sweet pleasures of home baking together. Happy baking, everyone!
Mini Apple Pies Recipe
These mini apple pies are a delightful fall treat, featuring a flaky, buttery crust filled with cinnamon-spiced apples. Simple yet delicious, they can be made in a muffin tin for individual servings. The dough is easy to make, and you can customize the sweetness to your preference. The lattice top adds a beautiful touch to these pies, which are perfect for serving at gatherings or enjoying with a cup of tea on a cozy afternoon. They bake in just 20-25 minutes and are sure to become a favorite autumn dessert.
Ingredients
-
2 sheets (14.1 oz each) store-bought pie crust (or homemade dough for a double-crust 9-inch pie)
-
6 medium baking apples (2-2.5 lbs), e.g., Granny Smith, Honeycrisp, Fuji
-
1/2 cup granulated sugar
-
1/4 cup packed light brown sugar
-
2 tbsp all-purpose flour or cornstarch
-
1 tsp ground cinnamon
-
1/4 tsp ground nutmeg
-
1/8 tsp ground allspice (optional)
-
1 tbsp fresh lemon juice
-
2 tbsp unsalted butter, diced
-
1 large egg
-
1 tbsp water or milk
-
1-2 tbsp coarse turbinado sugar (optional)
Instructions
-
Step 1
Peel, core, and slice 6 medium apples into 1/4-inch pieces or 1/2-inch cubes. In a large bowl, toss apples with 1/2 cup granulated sugar, 1/4 cup packed light brown sugar, 2 tbsp all-purpose flour/cornstarch, 1 tsp ground cinnamon, 1/4 tsp ground nutmeg, 1/8 tsp ground allspice (optional), and 1 tbsp fresh lemon juice. Let rest 10-15 minutes. -
Step 2
Preheat oven to 400°F (200°C). Lightly flour a surface. Unroll one pie crust sheet and cut 3-3.5 inch circles. Press circles into a greased 12-cup muffin tin, extending slightly above the rim. Unroll the second crust sheet and cut smaller 2.5-3 inch circles for full tops, or thin strips for lattice, or decorative cut-outs for tops. Set aside. -
Step 3
Fill each dough-lined cup with the apple mixture (about 2/3 to 3/4 full). Dot each with 1/4-1/2 tsp diced unsalted butter. Top with chosen crust style (full circle, lattice, or decorative cut-outs), sealing edges. If using full tops, cut vents. In a small bowl, whisk 1 large egg with 1 tbsp water/milk. Brush egg wash over pies and sprinkle with turbinado sugar (optional). -
Step 4
Bake at 400°F (200°C) for 15 minutes. Reduce oven to 375°F (190°C) and bake for another 20-25 minutes, or until deeply golden brown and filling is bubbly. Cool in the muffin tin on a wire rack for 15-20 minutes, then carefully remove and transfer to the wire rack to cool completely.
Important Information
Nutrition Facts (Per Serving)
It is important to consider this information as approximate and not to use it as definitive health advice.
Allergy Information
Please check ingredients for potential allergens and consult a health professional if in doubt.


Leave a Comment