
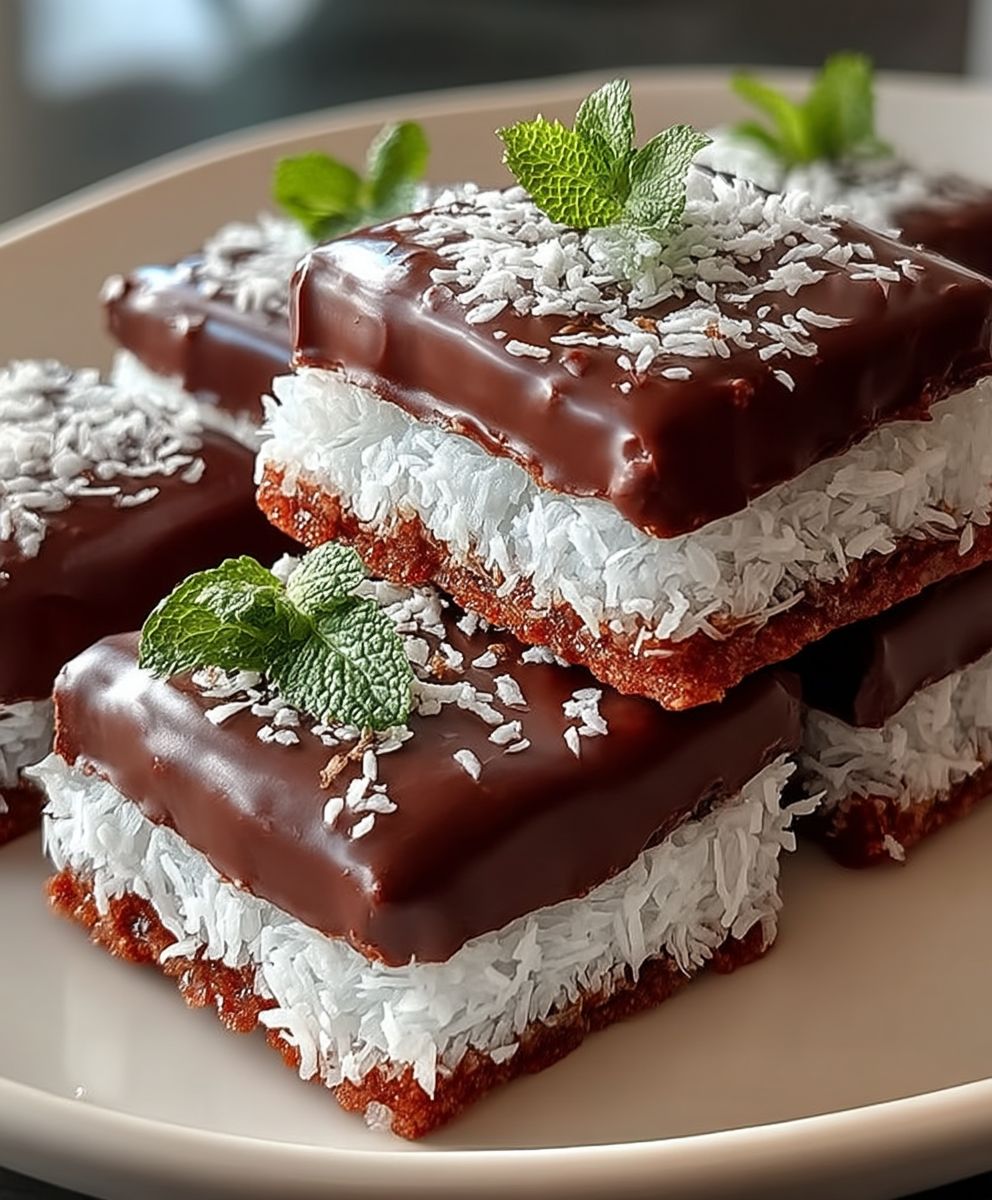
Homemade Bounty Bar: who knew recreating this iconic candy bar at home could be so incredibly easy and utterly delicious? Forget trekking to the store; with just a handful of simple ingredients, you can whip up these coconutty delights in your own kitchen. Prepare to be amazed by the taste and texture of this homemade treat!
While the original Bounty bar, with its distinctive blue wrapper, might not have a long and storied history like some classic candies, it quickly captured hearts worldwide with its tropical flavor profile. Introduced in 1951 by Mars, Inc., it offered a taste of paradise in every bite. The combination of moist coconut and smooth milk chocolate (or dark chocolate, depending on your preference) proved irresistible.
What is it about the Homemade Bounty Bar that makes it so appealing? For many, it’s the perfect balance of textures: the satisfying chewiness of the coconut filling contrasted with the snap of the chocolate shell. The flavor combination is equally enticing, offering a sweet and slightly exotic escape. Plus, making them at home allows you to control the ingredients, ensuring a fresher, more wholesome treat. And let’s be honest, there’s a certain satisfaction in recreating a beloved classic from scratch. So, are you ready to embark on this delicious adventure? Let’s get started!

Ingredients:
- For the Coconut Filling:
- 3 cups (about 240g) shredded unsweetened coconut
- 1 can (14 ounces, about 400ml) sweetened condensed milk
- 1/4 cup (about 60ml) coconut cream (the thick part from a refrigerated can of coconut milk)
- 1 teaspoon vanilla extract
- 1/4 teaspoon salt
- For the Chocolate Coating:
- 12 ounces (about 340g) semi-sweet chocolate chips (or dark chocolate, if preferred)
- 1 tablespoon coconut oil (or vegetable oil)
Preparing the Coconut Filling:
Alright, let’s get started with the heart of our Bounty bars the coconut filling! This is where the magic happens, and it’s surprisingly easy to whip up.
- Combine the Ingredients: In a large bowl, add the shredded unsweetened coconut, sweetened condensed milk, coconut cream, vanilla extract, and salt.
- Mix Thoroughly: Use a sturdy spoon or spatula to mix everything together really well. You want to make sure the coconut is evenly coated with the condensed milk and coconut cream. Don’t be afraid to get your hands in there if needed! The mixture should be quite thick and sticky.
- Check the Consistency: The mixture should hold its shape when you press it together. If it seems too wet, add a little more shredded coconut, a tablespoon at a time, until you reach the desired consistency. If it’s too dry, add a tiny splash of coconut cream or sweetened condensed milk.
- Chill the Mixture: Cover the bowl with plastic wrap and refrigerate for at least 30 minutes, or even better, an hour. This chilling time is crucial because it allows the coconut mixture to firm up, making it much easier to shape into bars. Trust me, you’ll thank me later!
Shaping the Bounty Bars:
Now that our coconut filling is nice and firm, we can move on to shaping the bars. This is where you get to be a bit creative and decide on the size and shape of your homemade Bounty bars.
- Prepare Your Workspace: Line a baking sheet with parchment paper or a silicone baking mat. This will prevent the bars from sticking and make cleanup a breeze.
- Scoop and Shape: Take a spoonful of the chilled coconut mixture (about 2-3 tablespoons, depending on how big you want your bars). Use your hands to shape it into an oblong or rectangular bar shape, similar to a store-bought Bounty bar. You can also make them round if you prefer!
- Place on Baking Sheet: Place the shaped bar onto the prepared baking sheet.
- Repeat: Continue scooping and shaping the coconut mixture until you’ve used it all up. Try to keep the bars relatively uniform in size for a more professional look.
- Freeze the Bars: Once all the bars are shaped, place the baking sheet in the freezer for at least 30 minutes. This step is essential because it will firm up the bars completely, making them much easier to dip in the chocolate without falling apart.
Melting the Chocolate:
With our coconut bars chilling in the freezer, it’s time to prepare the chocolate coating. Melting chocolate can be a bit tricky, but I’ll walk you through it to ensure a smooth and glossy finish.
- Choose Your Method: You can melt the chocolate using either a double boiler or the microwave. I personally prefer the double boiler method for more control, but the microwave is faster.
- Double Boiler Method: Fill a saucepan with about an inch of water and bring it to a simmer over medium heat. Place a heatproof bowl (glass or stainless steel) on top of the saucepan, making sure the bottom of the bowl doesn’t touch the water. Add the chocolate chips and coconut oil to the bowl.
- Microwave Method: Place the chocolate chips and coconut oil in a microwave-safe bowl. Microwave in 30-second intervals, stirring well after each interval, until the chocolate is completely melted and smooth. Be careful not to overheat the chocolate, as it can burn easily.
- Stir Frequently: Whether you’re using a double boiler or the microwave, stir the chocolate frequently as it melts to ensure even heating and prevent burning.
- Achieve a Smooth Consistency: The coconut oil helps to thin the chocolate slightly, giving it a smoother and more glossy finish. If the chocolate seems too thick, you can add a tiny bit more coconut oil, a teaspoon at a time.
Dipping and Coating:
Now for the fun part dipping our frozen coconut bars in the melted chocolate! This is where our homemade Bounty bars really start to look like the real deal.
- Prepare Your Dipping Station: Have your melted chocolate ready in a bowl, and your frozen coconut bars on the baking sheet. You’ll also need a fork or dipping tools to help you coat the bars.
- Dip the Bars: Take one frozen coconut bar at a time and carefully dip it into the melted chocolate. Use the fork or dipping tools to completely coat the bar with chocolate.
- Remove Excess Chocolate: Lift the dipped bar out of the chocolate and gently tap the fork against the side of the bowl to remove any excess chocolate. You can also use a clean fork to scrape off any excess chocolate from the bottom of the bar.
- Place on Baking Sheet: Place the chocolate-covered bar back onto the parchment-lined baking sheet.
- Repeat: Continue dipping and coating the remaining coconut bars until they’re all covered in chocolate.
- Optional: Drizzle with Extra Chocolate: If you want to get fancy, you can drizzle some extra melted chocolate over the top of the bars for a decorative touch.
- Set the Chocolate: Place the baking sheet with the chocolate-covered bars back in the refrigerator for about 15-20 minutes, or until the chocolate is completely set. This will help the chocolate harden and prevent it from melting when you handle the bars.
Storing Your Homemade Bounty Bars:
Congratulations! You’ve successfully made your own homemade Bounty bars. Now, let’s talk about how to store them so they stay fresh and delicious.
- Store in an Airtight Container: Once the chocolate is completely set, transfer the Bounty bars to an airtight container.
- Refrigerate for Best Results: Store the container in the refrigerator. This will help the chocolate stay firm and prevent the coconut filling from becoming too soft.
- Enjoy Within a Week: Homemade Bounty bars are best enjoyed within a week of making them. While they might still be good after a week, the texture and flavor may start to deteriorate slightly.
- Freezing for Longer Storage: If you want to store the bars for longer, you can freeze them. Wrap each bar individually in plastic wrap and then place them in a freezer-safe bag or container. They can be stored in the freezer for up to 2-3 months. Thaw them in the refrigerator before enjoying.
Tips and Tricks for Perfect Bounty Bars:
- Use High-Quality Chocolate: The quality of the chocolate will greatly impact the taste of your Bounty bars. Opt for a good-quality semi-sweet or dark chocolate for the best flavor.
- Don’t Overheat the Chocolate: Overheating the chocolate can cause it to seize up and become grainy. Be patient and melt it slowly, stirring frequently.
- Freeze the Bars Well: Freezing the coconut bars before dipping them in chocolate is crucial for preventing them from falling apart. Make sure they’re completely frozen solid before you start dipping.
- Get Creative with Toppings: Feel free to experiment with different toppings, such as chopped nuts, sprinkles, or a drizzle of white chocolate.
- Adjust Sweetness to Your Liking: If you prefer a less sweet Bounty bar, you can reduce the amount of sweetened condensed milk in the coconut filling.
Troubleshooting:
- Coconut Filling Too Wet: If your coconut filling is too wet, add more shredded coconut, a tablespoon at a time, until it reaches the desired consistency.
- Coconut Filling Too Dry: If your coconut filling is too dry, add a tiny splash of coconut cream or sweetened condensed milk.
- Chocolate Seized Up: If your chocolate seizes up, try adding a tablespoon of vegetable shortening or coconut oil and stirring vigorously. Sometimes, a little bit of fat can help to bring it back together.
-
Conclusion:
Okay, friends, let’s be honest you’ve scrolled this far because you’re intrigued, right? And you should be! These Homemade Bounty Bars are seriously a game-changer. They’re not just a healthier alternative to the store-bought version; they’re arguably even more delicious. The creamy, melt-in-your-mouth coconut filling, enrobed in that rich, dark chocolate shell it’s pure bliss. Forget those overly processed, sugar-laden candy bars this is real food, made with love, and bursting with flavor.
But why is this recipe a must-try? Because it’s surprisingly easy! Seriously, don’t let the “homemade” tag intimidate you. The steps are straightforward, the ingredients are readily available, and the satisfaction you’ll get from creating these treats from scratch is unparalleled. Plus, you have complete control over the ingredients, so you can tailor them to your dietary needs and preferences. Want to use a different type of chocolate? Go for it! Prefer a sweeter filling? Add a touch more maple syrup. The possibilities are endless!
And speaking of possibilities, let’s talk serving suggestions and variations. These Homemade Bounty Bars are perfect as an afternoon pick-me-up, a post-dinner dessert, or even a thoughtful homemade gift. Imagine wrapping a few of these in a pretty ribbon and giving them to a friend instant brownie points (pun intended!).
For serving, I love to chill them in the fridge for a few minutes before enjoying. The coldness enhances the chocolate’s snap and makes the coconut filling even more refreshing. You could also crumble them over ice cream for an extra decadent treat.
Now, for variations! If you’re feeling adventurous, try adding a pinch of sea salt to the coconut filling for a salted caramel vibe. Or, incorporate some chopped nuts, like almonds or pecans, for added texture and flavor. For a vegan version, simply use vegan chocolate and ensure your coconut milk is full-fat and creamy. You can also experiment with different extracts, like vanilla, almond, or even a hint of peppermint for a festive twist.
Another fun idea is to make mini Homemade Bounty Bars using a smaller mold. These are perfect for parties or for portion control (although, let’s be real, portion control might be a challenge with these!).
But honestly, the best part about this recipe is the sheer joy of creating something delicious and wholesome from scratch. It’s a therapeutic process, and the end result is something you can be truly proud of.
So, what are you waiting for? Gather your ingredients, put on some music, and get ready to embark on a culinary adventure. I promise you won’t regret it. These Homemade Bounty Bars are destined to become a new family favorite.
I’m so excited for you to try this recipe! And more importantly, I want to hear about your experience. Did you make any variations? What did your family think? Share your photos and stories in the comments below! Let’s create a community of homemade candy bar enthusiasts! I can’t wait to see what you create. Happy baking (or rather, candy-making)! Let me know if you have any questions, and I’ll do my best to help. Enjoy!
Homemade Bounty Bar: Delicious Recipe & Easy Instructions
Delicious homemade coconut bars coated in rich chocolate. Easy to make and perfect for a sweet treat.
Ingredients
- 3 cups (about 240g) shredded unsweetened coconut
- 1 can (14 ounces, about 400ml) sweetened condensed milk
- 1/4 cup (about 60ml) coconut cream (the thick part from a refrigerated can of coconut milk)
- 1 teaspoon vanilla extract
- 1/4 teaspoon salt
- 12 ounces (about 340g) semi-sweet chocolate chips (or dark chocolate, if preferred)
- 1 tablespoon coconut oil (or vegetable oil)
Instructions
- Prepare the Coconut Filling: In a large bowl, combine shredded coconut, sweetened condensed milk, coconut cream, vanilla extract, and salt. Mix thoroughly until the coconut is evenly coated. The mixture should be thick and sticky. If too wet, add more coconut; if too dry, add a splash of coconut cream or condensed milk.
- Chill the Mixture: Cover the bowl with plastic wrap and refrigerate for at least 30 minutes (or up to an hour) to firm up.
- Shape the Bounty Bars: Line a baking sheet with parchment paper. Scoop 2-3 tablespoons of the chilled coconut mixture and shape into oblong or rectangular bars. Place on the baking sheet.
- Freeze the Bars: Place the baking sheet in the freezer for at least 30 minutes to firm up the bars completely.
- Melt the Chocolate: Melt the chocolate chips and coconut oil using a double boiler or microwave. If using a double boiler, fill a saucepan with about an inch of water and bring it to a simmer over medium heat. Place a heatproof bowl (glass or stainless steel) on top of the saucepan, making sure the bottom of the bowl doesn’t touch the water. Add the chocolate chips and coconut oil to the bowl. If using a microwave, microwave in 30-second intervals, stirring well after each interval, until smooth.
- Dip and Coat: Dip each frozen coconut bar into the melted chocolate, ensuring it’s fully coated. Remove excess chocolate by tapping the fork against the bowl.
- Place on Baking Sheet: Place the chocolate-covered bar back onto the parchment-lined baking sheet.
- Repeat: Continue dipping and coating the remaining coconut bars until they’re all covered in chocolate.
- (Optional) Drizzle with Extra Chocolate: If you want to get fancy, you can drizzle some extra melted chocolate over the top of the bars for a decorative touch.
- Set the Chocolate: Place the baking sheet with the chocolate-covered bars back in the refrigerator for about 15-20 minutes, or until the chocolate is completely set.
- Store: Store in an airtight container in the refrigerator for up to a week. For longer storage, freeze individually wrapped bars for up to 2-3 months. Thaw in the refrigerator before enjoying.
Notes
- Use high-quality chocolate for the best flavor.
- Don’t overheat the chocolate. Melt it slowly, stirring frequently.
- Freezing the coconut bars before dipping is crucial.
- Adjust sweetness by reducing the amount of sweetened condensed milk.
- If the coconut filling is too wet, add more shredded coconut. If too dry, add a splash of coconut cream or condensed milk.
- If the chocolate seizes up, try adding a tablespoon of vegetable shortening or coconut oil and stirring vigorously.


Leave a Comment