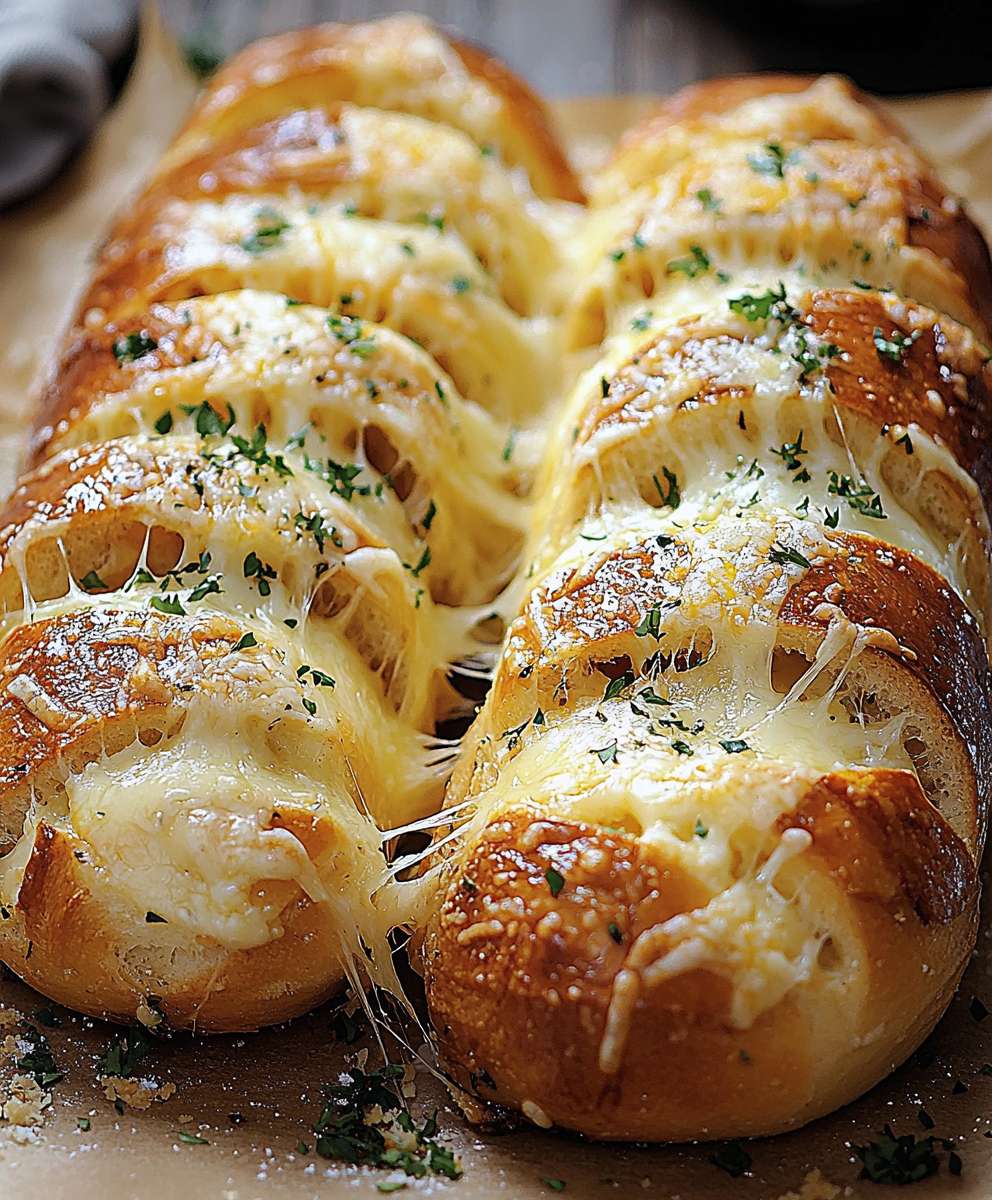
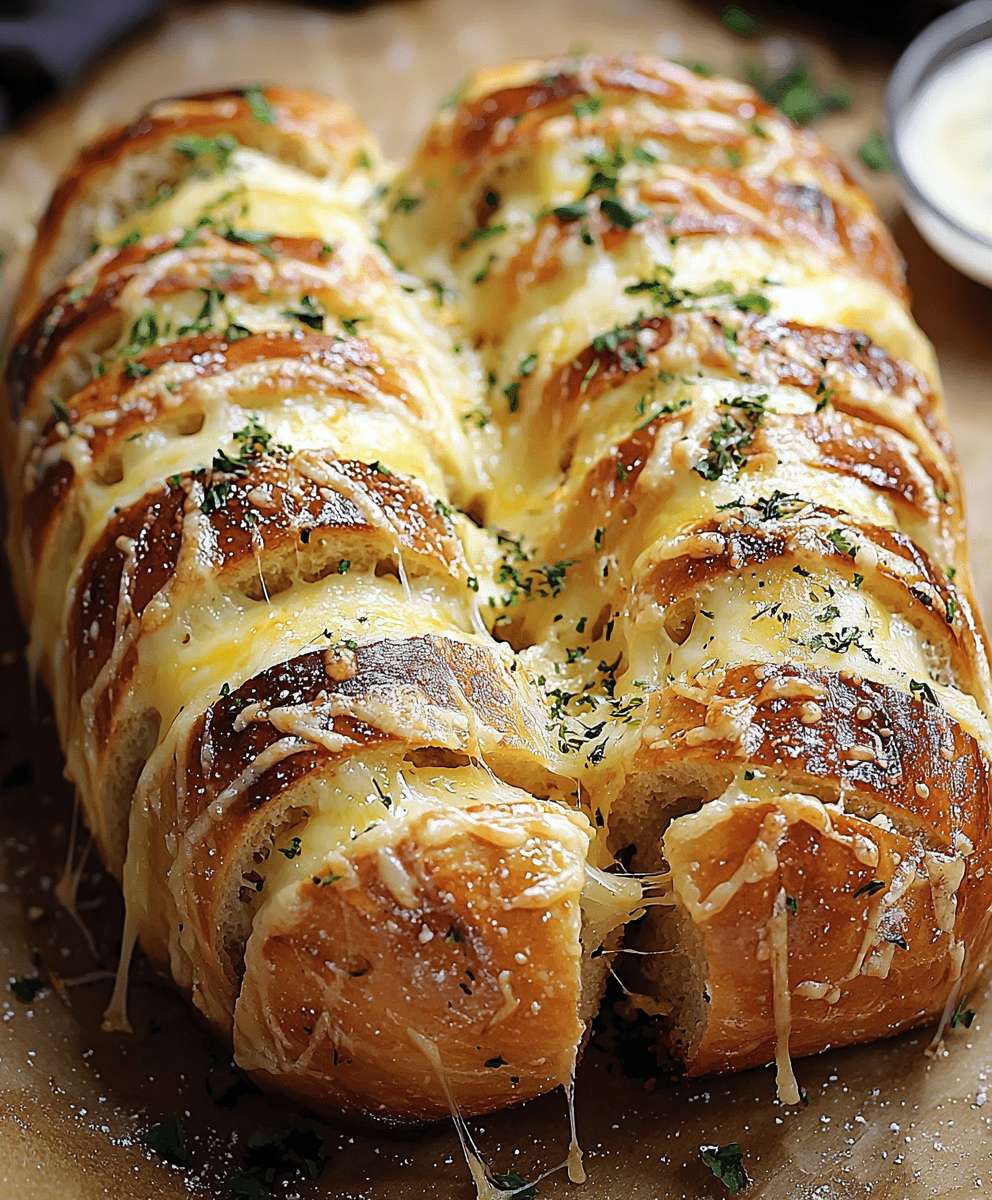
Hasselback Cheesy Bread: Prepare to meet your new favorite appetizer! Imagine warm, crusty bread, intricately sliced and oozing with melted cheese and savory garlic butter. Its not just bread; its an experience, a delightful combination of textures and flavors that will have everyone reaching for more. This isn’t your average loaf; it’s a showstopper that’s surprisingly simple to make.
While the exact origins of the Hasselback technique are debated, it’s widely believed to have originated in a Stockholm restaurant called Hasselbacken. The method, traditionally used for potatoes, involves partially slicing the ingredient to create a fan-like effect, allowing for even cooking and maximum flavor infusion. We’ve taken this brilliant technique and applied it to bread, creating a cheesy, garlicky masterpiece that’s perfect for sharing.
What makes Hasselback Cheesy Bread so irresistible? It’s the perfect balance of textures the crispy, golden-brown crust, the soft, pillowy interior, and the gooey, melted cheese in every bite. The garlic butter seeps into every crevice, ensuring a burst of flavor with each pull-apart piece. Plus, it’s incredibly versatile! You can customize the cheese, add herbs, or even sprinkle on some bacon for an extra layer of deliciousness. Whether you’re hosting a party, looking for a crowd-pleasing snack, or simply craving a comforting treat, this recipe is guaranteed to be a hit. I promise you, once you try this, you’ll be making it again and again!
Ingredients:
- 1 loaf of Italian bread, preferably day-old
- 1/2 cup (1 stick) unsalted butter, melted
- 4 cloves garlic, minced
- 1/4 cup fresh parsley, chopped
- 1/4 cup fresh chives, chopped
- 1 teaspoon dried oregano
- 1/2 teaspoon salt
- 1/4 teaspoon black pepper
- 8 ounces mozzarella cheese, shredded
- 4 ounces provolone cheese, shredded
- 2 ounces Parmesan cheese, grated
- Optional: Red pepper flakes, for a touch of heat
Preparing the Hasselback Bread:
Okay, let’s get started! The key to a good Hasselback bread is making those beautiful, even slices without cutting all the way through. Don’t worry, it’s easier than it looks!
- Preheat your oven to 375°F (190°C). This ensures the bread will bake evenly and the cheese will melt perfectly.
- Prepare the bread. Place the loaf of Italian bread on a cutting board. The day-old bread is ideal because it’s a little firmer and easier to slice. If your bread is very soft, you can pop it in the freezer for about 15-20 minutes to firm it up slightly.
- Make the Hasselback cuts. This is the most important step! Place chopsticks or wooden skewers on either side of the bread. These will act as guides to prevent you from cutting all the way through the loaf. Using a serrated knife, make slices about 1 inch apart, cutting down until the knife hits the chopsticks. You want to cut almost all the way through, but leave the bottom crust intact. Repeat this process along the entire length of the loaf.
- Check your cuts. Gently fan out the slices to make sure they are evenly spaced and that you haven’t accidentally cut all the way through in any spots. If you have, don’t panic! Just try to keep the loaf together as best you can.
Making the Garlic Herb Butter:
Now for the flavor bomb! This garlic herb butter is what takes this bread from good to absolutely irresistible. The aroma alone will have everyone drooling.
- Melt the butter. In a small saucepan or microwave-safe bowl, melt the butter completely. You can do this on the stovetop over low heat or in the microwave in 30-second intervals, stirring in between, until melted.
- Add the garlic and herbs. Stir in the minced garlic, chopped parsley, chopped chives, dried oregano, salt, and pepper to the melted butter. If you’re using red pepper flakes, add them now as well.
- Infuse the flavors. Let the garlic herb butter sit for a few minutes to allow the flavors to meld together. This will make the butter even more flavorful.
Stuffing the Bread with Cheese and Butter:
This is where the magic happens! We’re going to stuff all that cheesy, buttery goodness into those Hasselback slices. Get ready for some serious deliciousness.
- Brush with garlic herb butter. Using a pastry brush, generously brush the garlic herb butter all over the top and sides of the bread, making sure to get it down into each of the slices. Don’t be shy! The more butter, the better.
- Stuff with cheese. In a bowl, combine the shredded mozzarella, provolone, and grated Parmesan cheese. Mix well to ensure an even distribution of cheeses.
- Fill the slices. Carefully lift each slice of the bread and stuff it with the cheese mixture. Try to get as much cheese as possible into each slice, but don’t overstuff it to the point where the bread is falling apart. You can use your fingers to gently push the cheese down into the slices.
- Top with remaining cheese. Once all the slices are filled, sprinkle any remaining cheese over the top of the bread. This will create a beautiful, cheesy crust.
Baking the Hasselback Cheesy Bread:
Almost there! Now it’s time to bake the bread until it’s golden brown and bubbly. The anticipation is killing me!
- Prepare for baking. Place the stuffed bread on a baking sheet lined with parchment paper. This will prevent the cheese from sticking to the pan and make cleanup a breeze.
- Bake the bread. Bake in the preheated oven for 20-25 minutes, or until the cheese is melted, bubbly, and golden brown. Keep an eye on it towards the end of the baking time to make sure the cheese doesn’t burn.
- Let it rest (slightly). Remove the bread from the oven and let it cool for a few minutes before slicing and serving. This will allow the cheese to set slightly and prevent it from being too messy.
Serving and Enjoying:
The moment we’ve all been waiting for! Time to slice, serve, and devour this amazing Hasselback cheesy bread. Get ready for some serious compliments!
- Slice and serve. Using a serrated knife, carefully slice the bread between the slices you already made. This will make it easy to pull apart individual portions.
- Garnish (optional). If you want to get fancy, you can garnish the bread with a sprinkle of fresh parsley or chives.
- Serve immediately. This bread is best served warm, when the cheese is melted and gooey.
- Enjoy! Serve as an appetizer, side dish, or even a light meal. It’s perfect for parties, gatherings, or just a cozy night in.
Tips and Variations:
Want to customize your Hasselback cheesy bread? Here are a few ideas:
- Different cheeses: Experiment with different types of cheese, such as Gruyere, fontina, or pepper jack.
- Add meat: Add cooked bacon, pepperoni, or ham to the cheese mixture for a heartier bread.
- Vegetarian options: Add roasted vegetables, such as bell peppers, onions, or mushrooms, to the cheese mixture.
- Spicy kick: Add a pinch of red pepper flakes or a drizzle of hot sauce to the garlic herb butter for a spicy kick.
- Italian seasoning: Substitute the dried oregano with Italian seasoning for a slightly different flavor profile.
- Garlic powder: If you don’t have fresh garlic, you can use garlic powder instead. Start with 1/2 teaspoon and adjust to taste.
- Make it ahead: You can assemble the bread ahead of time and store it in the refrigerator until you’re ready to bake it. Just add a few minutes to the baking time.
Troubleshooting:
Having trouble with your Hasselback cheesy bread? Here are a few common issues and how to fix them:
- Bread is too hard to slice: If your bread is too hard to slice, try using a sharper serrated knife or slightly freezing the bread for 15-20 minutes before slicing.
- Cheese is burning: If the cheese is browning too quickly, tent the bread with aluminum foil during the last few minutes of baking.
- Bread is not cooking through: If the bread is not cooking through, increase the baking time by a few minutes.
- Cheese is not melting: If the cheese is not melting, make sure your oven is properly preheated and that you are using a good quality cheese that melts well.
Storage:
If you have any leftover Hasselback cheesy bread (which is unlikely!), you can store it in an airtight container in the refrigerator for up to 2 days. Reheat in the oven or microwave before serving.

Conclusion:
This Hasselback cheesy bread isn’t just another bread recipe; it’s an experience. It’s the perfect blend of crispy edges, soft, pillowy insides, and that irresistible cheesy goodness that will have everyone reaching for seconds (and thirds!). Seriously, if you’re looking for a crowd-pleaser that’s surprisingly easy to make, look no further. The visual appeal alone makes it a winner, transforming a simple loaf of bread into a stunning centerpiece for any table. But beyond the aesthetics, it’s the flavor and texture that truly make this recipe a must-try. Think about it: the garlic butter seeps into every crevice, infusing the bread with a rich, savory flavor. The cheese melts into gooey perfection, creating pockets of cheesy delight in every bite. And the Hasselback cut ensures that each slice is perfectly portioned and easy to pull apart. It’s a symphony of flavors and textures that will tantalize your taste buds and leave you wanting more. But the best part? This recipe is incredibly versatile! While I’ve shared my favorite combination of garlic butter and mozzarella, the possibilities are endless. Feel free to experiment with different cheeses sharp cheddar, provolone, or even a sprinkle of parmesan would be fantastic. You could also add some finely chopped herbs like rosemary, thyme, or oregano to the garlic butter for an extra layer of flavor. For serving suggestions, this Hasselback cheesy bread is amazing on its own as an appetizer or snack. It’s also a fantastic accompaniment to soups, salads, or pasta dishes. Imagine dipping a warm, cheesy slice into a bowl of creamy tomato soup pure comfort food heaven! Or, serve it alongside a grilled chicken salad for a satisfying and flavorful meal. If you’re hosting a party, this bread is guaranteed to be a hit. It’s easy to serve, visually appealing, and incredibly delicious. And don’t forget about variations! For a spicier kick, add a pinch of red pepper flakes to the garlic butter. Or, for a more decadent treat, try brushing the bread with a mixture of melted butter and honey after baking. You could even create a sweet version by using cinnamon sugar instead of garlic butter and topping it with a cream cheese glaze. The only limit is your imagination! I truly believe that this Hasselback cheesy bread recipe is a winner. It’s easy to make, incredibly delicious, and endlessly customizable. It’s the perfect way to impress your friends and family, or simply treat yourself to a little bit of cheesy goodness. So, what are you waiting for? Grab a loaf of bread, some cheese, and get ready to create a culinary masterpiece! I’m confident that you’ll love this recipe as much as I do. And most importantly, I’d love to hear about your experience! Once you’ve tried this recipe, please come back and share your thoughts in the comments below. Did you make any variations? What did you serve it with? I’m always eager to learn from your experiences and see how you’ve made this recipe your own. Happy baking! Print
Hasselback Cheesy Bread: The Ultimate Guide to Deliciousness
- Total Time: 45 minutes
- Yield: 6–8 servings 1x
Description
Cheesy, garlicky Hasselback bread! Italian bread stuffed with garlic herb butter and mozzarella, provolone, and Parmesan cheeses, then baked to golden perfection.
Ingredients
- 1 loaf Italian bread, preferably day-old
- 1/2 cup (1 stick) unsalted butter, melted
- 4 cloves garlic, minced
- 1/4 cup fresh parsley, chopped
- 1/4 cup fresh chives, chopped
- 1 teaspoon dried oregano
- 1/2 teaspoon salt
- 1/4 teaspoon black pepper
- 8 ounces mozzarella cheese, shredded
- 4 ounces provolone cheese, shredded
- 2 ounces Parmesan cheese, grated
- Optional: Red pepper flakes, for a touch of heat
Instructions
- Preheat: Preheat oven to 375°F (190°C).
- Prepare Bread: Place bread on a cutting board. Use chopsticks or skewers as guides on either side of the bread.
- Make Hasselback Cuts: Using a serrated knife, make slices about 1 inch apart, cutting down until the knife hits the chopsticks. Leave the bottom crust intact. Repeat along the entire loaf.
- Check Cuts: Fan out the slices to ensure even spacing.
- Melt Butter: In a small saucepan or microwave-safe bowl, melt the butter completely.
- Add Garlic and Herbs: Stir in the minced garlic, chopped parsley, chopped chives, dried oregano, salt, and pepper to the melted butter. Add red pepper flakes, if using.
- Infuse Flavors: Let the garlic herb butter sit for a few minutes.
- Brush with Butter: Generously brush the garlic herb butter all over the top and sides of the bread, getting it into each slice.
- Combine Cheeses: In a bowl, combine the shredded mozzarella, provolone, and grated Parmesan cheese.
- Fill Slices: Carefully lift each slice and stuff it with the cheese mixture.
- Top with Cheese: Sprinkle any remaining cheese over the top of the bread.
- Prepare for Baking: Place the stuffed bread on a baking sheet lined with parchment paper.
- Bake: Bake in the preheated oven for 20-25 minutes, or until the cheese is melted, bubbly, and golden brown.
- Let it Rest: Remove from oven and let cool for a few minutes before slicing.
- Slice and Serve: Slice the bread between the slices you already made.
- Garnish (optional): Garnish with fresh parsley or chives.
- Serve immediately: Serve warm.
Notes
- Day-old bread is ideal for easier slicing. If your bread is very soft, freeze for 15-20 minutes to firm it up.
- Don’t cut all the way through the bread when making Hasselback cuts. The bottom crust should remain intact.
- Experiment with different cheeses, meats, or vegetables for variations.
- For a spicy kick, add red pepper flakes or hot sauce to the garlic herb butter.
- You can assemble the bread ahead of time and store it in the refrigerator until ready to bake. Add a few minutes to the baking time.
- If the cheese is browning too quickly, tent the bread with aluminum foil during the last few minutes of baking.
- Store leftovers in an airtight container in the refrigerator for up to 2 days. Reheat before serving.
- Prep Time: 20 minutes
- Cook Time: 25 minutes


Leave a Comment