
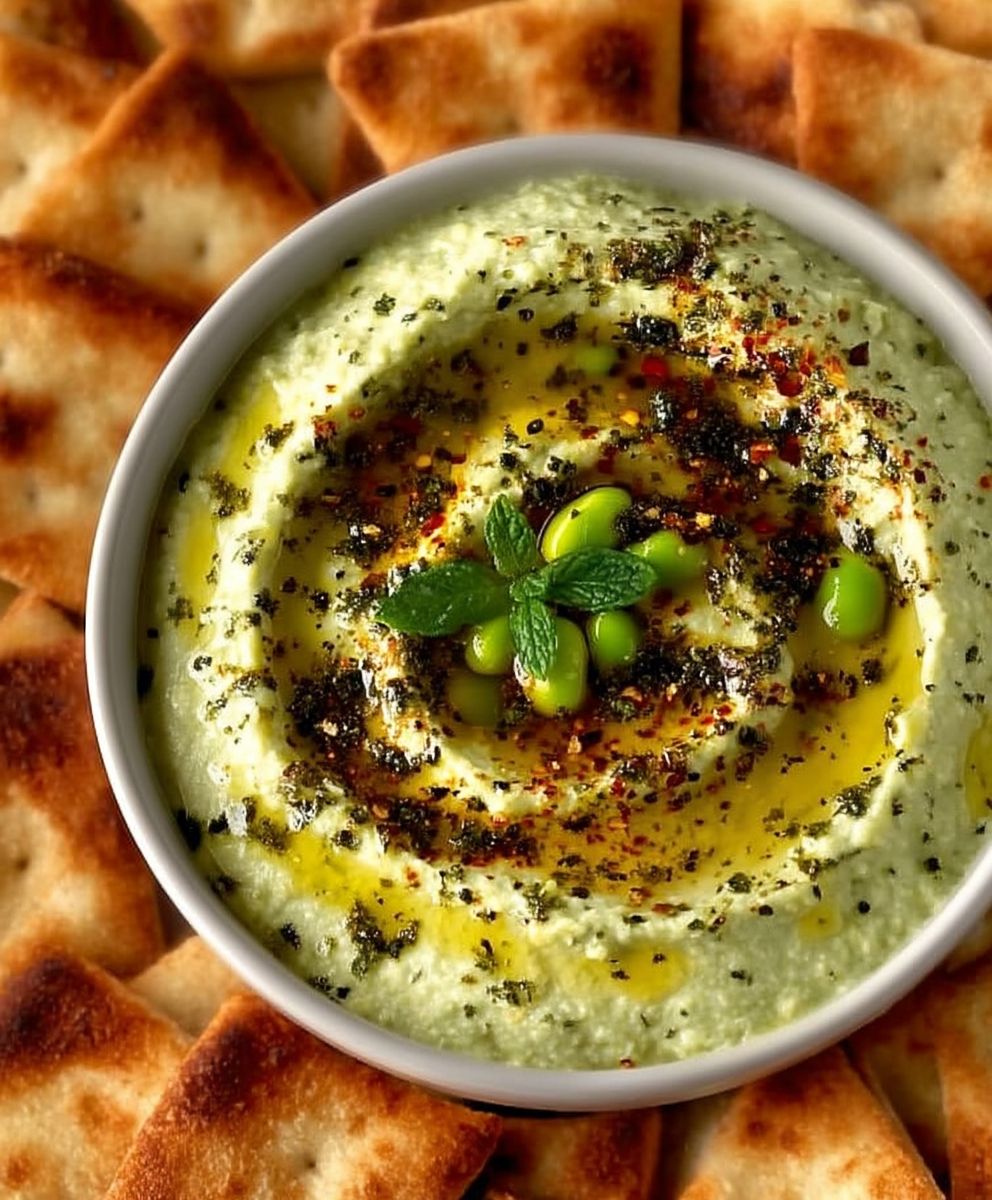
Garlic Edamame Hummus: Prepare to have your taste buds tantalized! Forget everything you thought you knew about hummus because this vibrant, green dip is about to revolutionize your snacking game. Imagine the creamy, earthy goodness of traditional hummus elevated with the bright, slightly sweet flavor of edamame and a generous kick of garlic. It’s a flavor explosion you won’t soon forget!
While hummus has ancient roots in the Middle East, tracing back centuries and holding significant cultural importance as a staple food, this particular twist is a modern innovation. It cleverly blends the familiar comfort of hummus with the nutritional powerhouse that is edamame. Edamame, young soybeans harvested before they harden, have been enjoyed in East Asia for centuries and are now celebrated globally for their health benefits and versatility.
So, why is everyone obsessed with this Garlic Edamame Hummus? Well, beyond its stunning color and addictive flavor, it’s incredibly easy to make. Its the perfect appetizer for parties, a healthy snack for kids (and adults!), or a delicious spread for sandwiches and wraps. The creamy texture, the savory garlic, and the subtle sweetness of the edamame create a symphony of flavors that will leave you craving more. Plus, its packed with protein and fiber, making it a guilt-free indulgence. Get ready to ditch the store-bought stuff because once you try this homemade version, you’ll never go back!

Ingredients:
- 1 (15-ounce) can chickpeas, drained and rinsed
- 1 cup shelled edamame, fresh or frozen (if frozen, thaw before using)
- 4 cloves garlic, minced
- 1/4 cup tahini
- 1/4 cup lemon juice, freshly squeezed
- 2 tablespoons olive oil, plus more for drizzling
- 1/4 cup water, plus more as needed
- 1/2 teaspoon ground cumin
- 1/4 teaspoon salt, or to taste
- 1/4 teaspoon black pepper, or to taste
- 1/4 cup chopped fresh cilantro or parsley, for garnish (optional)
- Sesame seeds, for garnish (optional)
- Pita bread, vegetables, or crackers, for serving
Preparing the Garlic Edamame Hummus
- Prepare the Edamame: If you’re using frozen edamame, make sure it’s completely thawed. You can thaw it in the refrigerator overnight or quickly by running it under warm water for a few minutes. Drain well. If you’re using fresh edamame, steam or boil it until tender, about 5-7 minutes. Let it cool slightly before using.
- Combine Ingredients in a Food Processor: In the bowl of a food processor, combine the drained and rinsed chickpeas, thawed edamame, minced garlic, tahini, lemon juice, olive oil, water, cumin, salt, and pepper.
- Process Until Smooth: Secure the lid of the food processor and process the mixture until it’s completely smooth and creamy. This may take a few minutes, and you might need to stop the processor occasionally to scrape down the sides of the bowl with a spatula. This ensures that all the ingredients are evenly incorporated.
- Adjust Consistency: If the hummus is too thick, add more water, one tablespoon at a time, while processing, until you reach your desired consistency. I personally like my hummus to be very smooth and easily spreadable, so I usually add a little extra water.
- Taste and Adjust Seasoning: Once the hummus is smooth, taste it and adjust the seasoning as needed. You might want to add more salt, pepper, lemon juice, or cumin to suit your personal preferences. Don’t be afraid to experiment!
- Chill (Optional): For the best flavor, I recommend chilling the hummus in the refrigerator for at least 30 minutes before serving. This allows the flavors to meld together and the hummus to thicken slightly. However, it’s also delicious served immediately if you’re short on time.
Serving the Garlic Edamame Hummus
- Transfer to a Serving Bowl: Once the hummus has chilled (or not!), transfer it to a serving bowl.
- Garnish: Drizzle a little olive oil over the top of the hummus. This adds a nice sheen and a touch of richness. Then, sprinkle with chopped fresh cilantro or parsley and sesame seeds, if desired. These garnishes add a pop of color and freshness.
- Serve: Serve the Garlic Edamame Hummus with pita bread, vegetables (such as carrots, celery, cucumbers, and bell peppers), or crackers for dipping. It’s also delicious spread on sandwiches or wraps.
Tips and Variations
- Roast the Garlic: For a milder, sweeter garlic flavor, try roasting the garlic before adding it to the hummus. To roast garlic, cut off the top of a head of garlic, drizzle with olive oil, wrap in foil, and bake at 400°F (200°C) for about 45 minutes, or until the cloves are soft and golden brown. Let cool slightly, then squeeze the roasted garlic cloves out of their skins and add them to the food processor.
- Add a Kick: If you like a little heat, add a pinch of red pepper flakes or a small amount of chopped jalapeño to the hummus.
- Use Different Herbs: Feel free to experiment with different herbs, such as dill, mint, or basil, instead of cilantro or parsley.
- Make it Spicy Edamame Hummus: Add a tablespoon of sriracha or your favorite hot sauce for a spicy kick.
- Add Sun-Dried Tomatoes: For a Mediterranean twist, add 1/4 cup of oil-packed sun-dried tomatoes (drained) to the food processor.
- Use Different Beans: While this recipe calls for chickpeas, you can also use other beans, such as white beans or cannellini beans, for a slightly different flavor and texture.
- Make it Oil-Free: To make this hummus oil-free, simply omit the olive oil. You may need to add a little more water to achieve the desired consistency.
- Storage: Store leftover hummus in an airtight container in the refrigerator for up to 5 days.
- Freezing: Hummus can be frozen for up to 2 months. Thaw it in the refrigerator overnight before serving. The texture may change slightly after freezing, but it will still be delicious.
- Tahini Substitute: If you don’t have tahini on hand, you can substitute it with sunflower seed butter or almond butter, although the flavor will be slightly different.
- Lemon Juice Alternative: While fresh lemon juice is best, you can use bottled lemon juice in a pinch.
- Garlic Tip: To easily peel garlic cloves, smash them lightly with the side of a knife. The skin should come right off.
- Edamame Preparation: If you’re using frozen edamame in pods, you’ll need to shell them after thawing or cooking. Simply squeeze the pods to release the beans.
- Serving Suggestions: This hummus is not only great as a dip, but also as a spread on sandwiches, wraps, and toast. It’s also a delicious addition to veggie burgers and salads.
- Make it a Meal: Top the hummus with roasted vegetables, such as bell peppers, zucchini, and eggplant, for a heartier and more satisfying meal.
- Presentation Matters: When serving, consider adding a swirl of olive oil and a sprinkle of paprika for a visually appealing presentation.
- Pairing Suggestions: This Garlic Edamame Hummus pairs well with a variety of flavors, including Middle Eastern, Mediterranean, and Asian cuisines.
- Nutritional Benefits: Hummus is a healthy and nutritious snack or meal, packed with protein, fiber, and vitamins.
- Make it Ahead: This hummus can be made ahead of time and stored in the refrigerator for several days, making it a convenient option for parties and gatherings.
- Experiment with Toppings: Get creative with your toppings! Try adding chopped olives, feta cheese, or roasted red peppers for added flavor and texture.
Conclusion:
This Garlic Edamame Hummus isn’t just another dip; it’s a flavor explosion waiting to happen! From the vibrant green color to the creamy texture and the irresistible blend of garlic and edamame, this recipe is a guaranteed crowd-pleaser. I truly believe it’s a must-try for anyone looking to elevate their snacking game or impress guests with a unique and delicious appetizer.
Why is it a must-try? Because it’s incredibly easy to make, requiring minimal ingredients and effort. You can whip up a batch in under 15 minutes, making it perfect for those last-minute gatherings or when you’re simply craving something healthy and satisfying. Plus, it’s packed with protein and fiber, making it a guilt-free indulgence. But more than that, it’s the taste! The subtle sweetness of the edamame perfectly complements the pungent garlic, creating a harmonious balance that will leave you wanting more.
Now, let’s talk serving suggestions! The possibilities are truly endless. Of course, it’s fantastic with pita bread, tortilla chips, or even fresh vegetables like carrots, celery, and cucumbers. But don’t stop there! Try spreading it on sandwiches or wraps for an extra layer of flavor and moisture. It’s also delicious as a topping for grilled chicken or fish, adding a creamy and flavorful element to your main course.
Looking for variations? I’ve got you covered! For a spicier kick, add a pinch of red pepper flakes or a drizzle of sriracha. If you’re a fan of lemon, a squeeze of fresh lemon juice will brighten up the flavors. You could also experiment with different herbs and spices, such as cilantro, parsley, or cumin, to create your own unique twist. Another great idea is to add a tablespoon of tahini for a nuttier and richer flavor. Feel free to get creative and experiment with different combinations until you find your perfect blend.
Serving Suggestions:
- With pita bread, tortilla chips, or vegetables.
- Spread on sandwiches or wraps.
- Topping for grilled chicken or fish.
Variations:
- Add red pepper flakes or sriracha for spice.
- Squeeze fresh lemon juice for brightness.
- Experiment with cilantro, parsley, or cumin.
- Add tahini for a nuttier flavor.
I’m so excited for you to try this Garlic Edamame Hummus recipe! I’m confident that you’ll love it as much as I do. It’s a simple, healthy, and incredibly delicious way to enjoy the flavors of edamame and garlic.
So, what are you waiting for? Head to your kitchen, gather your ingredients, and get ready to whip up a batch of this amazing hummus. And don’t forget to share your experience with me! I’d love to hear what you think and see your creations. Tag me in your photos on social media and let me know what variations you tried. I can’t wait to see what you come up with! Happy dipping!
Garlic Edamame Hummus: The Ultimate Guide to Making It
Creamy and flavorful Garlic Edamame Hummus, a healthy and delicious twist on traditional hummus. Perfect as a dip, spread, or snack!
Ingredients
- 1 (15-ounce) can chickpeas, drained and rinsed
- 1 cup shelled edamame, fresh or frozen (if frozen, thaw before using)
- 4 cloves garlic, minced
- 1/4 cup tahini
- 1/4 cup lemon juice, freshly squeezed
- 2 tablespoons olive oil, plus more for drizzling
- 1/4 cup water, plus more as needed
- 1/2 teaspoon ground cumin
- 1/4 teaspoon salt, or to taste
- 1/4 teaspoon black pepper, or to taste
- 1/4 cup chopped fresh cilantro or parsley, for garnish (optional)
- Sesame seeds, for garnish (optional)
- Pita bread, vegetables, or crackers, for serving
Instructions
- Prepare the Edamame: If using frozen edamame, thaw completely. If using fresh, steam or boil until tender (5-7 minutes). Let cool slightly.
- Combine Ingredients: In a food processor, combine chickpeas, edamame, garlic, tahini, lemon juice, olive oil, water, cumin, salt, and pepper.
- Process Until Smooth: Process until completely smooth and creamy, scraping down the sides as needed.
- Adjust Consistency: If too thick, add water, 1 tablespoon at a time, until desired consistency is reached.
- Taste and Adjust Seasoning: Taste and adjust salt, pepper, lemon juice, or cumin to your preference.
- Chill (Optional): Chill in the refrigerator for at least 30 minutes for best flavor.
- Transfer to a Serving Bowl: Transfer the hummus to a serving bowl.
- Garnish: Drizzle with olive oil and sprinkle with cilantro/parsley and sesame seeds (optional).
- Serve: Serve with pita bread, vegetables, or crackers.
Notes
- Roast the Garlic: For a milder flavor, roast the garlic before adding.
- Add a Kick: Add a pinch of red pepper flakes or chopped jalapeño for heat.
- Use Different Herbs: Experiment with dill, mint, or basil.
- Make it Spicy: Add sriracha or hot sauce.
- Add Sun-Dried Tomatoes: Add 1/4 cup drained oil-packed sun-dried tomatoes.
- Use Different Beans: Try white beans or cannellini beans.
- Make it Oil-Free: Omit olive oil and add more water.
- Storage: Store in an airtight container in the refrigerator for up to 5 days.
- Freezing: Freeze for up to 2 months; thaw in the refrigerator overnight.
- Tahini Substitute: Use sunflower seed butter or almond butter.
- Lemon Juice Alternative: Use bottled lemon juice.
- Garlic Tip: Smash garlic cloves to easily peel.
- Edamame Preparation: Shell edamame after thawing or cooking.
- Serving Suggestions: Spread on sandwiches, wraps, and toast.
- Make it a Meal: Top with roasted vegetables.
- Presentation Matters: Add a swirl of olive oil and paprika.
- Pairing Suggestions: Pairs well with Middle Eastern, Mediterranean, and Asian cuisines.
- Nutritional Benefits: Packed with protein, fiber, and vitamins.
- Make it Ahead: Can be made ahead and stored in the refrigerator.
- Experiment with Toppings: Try chopped olives, feta cheese, or roasted red peppers.


Leave a Comment