
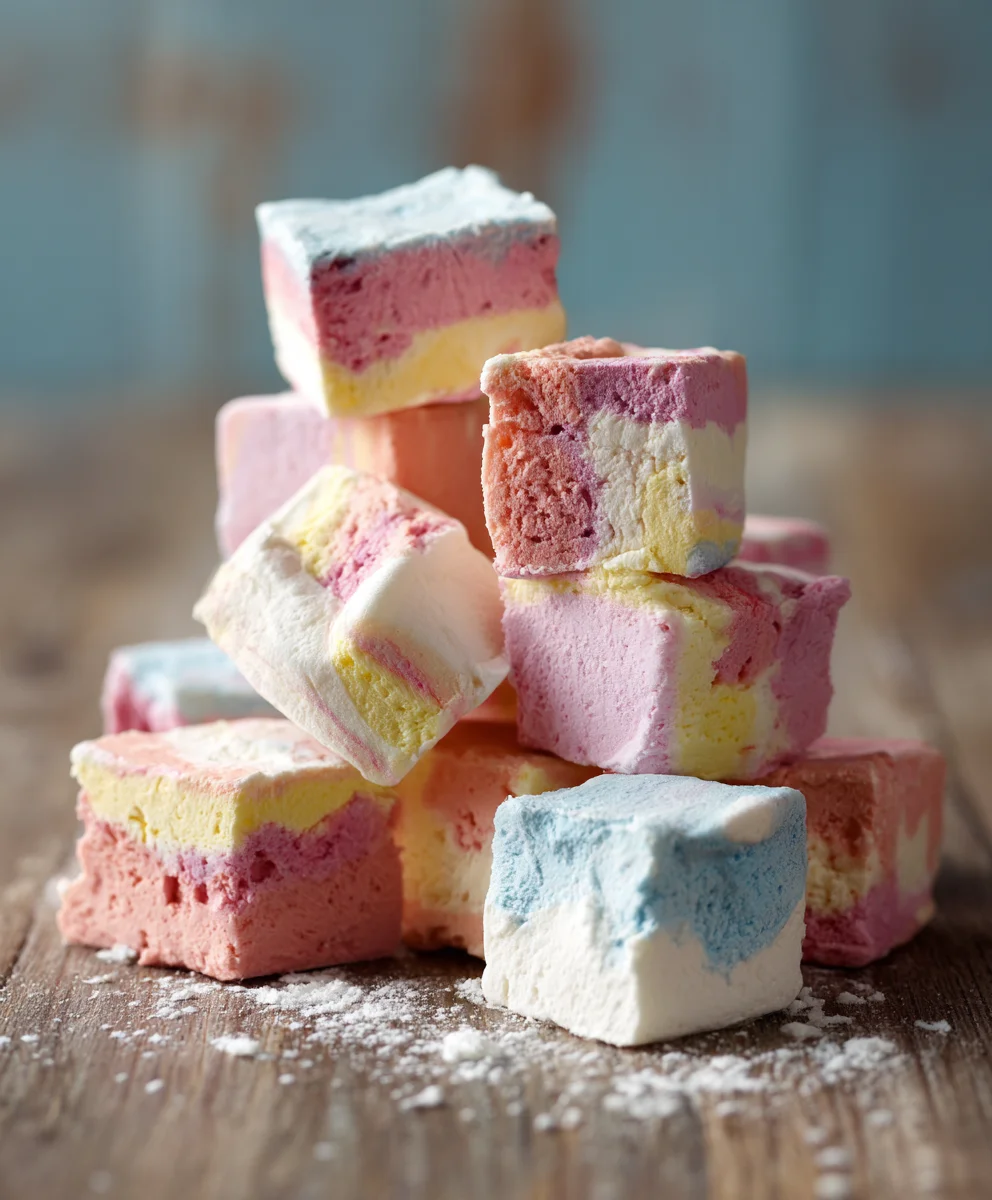
Easy Fruity Marshmallow Fudge Recipe – what a delightful combination that instantly brings a smile to my face! If you’ve ever dreamt of a treat that perfectly balances the creamy indulgence of classic fudge with a playful, vibrant burst of fruit and the whimsical chewiness of marshmallows, then you, my friend, are in for a truly spectacular experience. While traditional fudge boasts a rich history rooted in American kitchens since the late 19th century, evolving from a happy accident into a beloved confection, this particular rendition takes that time-honored delight and infuses it with a modern, joyful twist.
Why You’ll Adore This Sweet Creation
People simply adore this dish not just for its incredibly appealing taste—a harmonious blend of sweet, tangy, and utterly smooth textures—but also for its remarkable convenience. Forget complicated candy thermometers or endless stirring; this is a genuinely simple, no-fuss dessert that delivers maximum impact with minimal effort. It’s the kind of treat that brightens any gathering, makes a perfect homemade gift, or simply satisfies that craving for something uniquely delicious. My Easy Fruity Marshmallow Fudge Recipe is designed to be a foolproof success, promising a visually stunning and palate-pleasing confection that everyone will rave about. Get ready to embark on a sweet adventure that’s as easy to make as it is to devour!

Ingredients:
- 3 cups granulated sugar: The foundation for our sweet treat, providing the essential sweetness and structure for the fudge.
- ¾ cup (1.5 sticks) unsalted butter: We’ll need this to give our fudge its rich, creamy texture and to prevent it from sticking excessively during the cooking process. Using unsalted butter allows us to control the salt content precisely.
- 1 can (5 oz) evaporated milk: This is a crucial ingredient that contributes to the fudge’s silky smooth consistency and helps it set beautifully. Don’t confuse it with sweetened condensed milk!
- Pinch of salt: A tiny bit of salt is essential to balance the sweetness and enhance all the other flavors, making our fudge taste even more delicious and complex.
- 2 cups white chocolate chips (or 12 oz good quality white chocolate, finely chopped): This adds another layer of creaminess and a delightful, sweet vanilla flavor that complements the fruitiness perfectly. Chopping a bar of white chocolate yourself can sometimes yield a smoother melt.
- 1 teaspoon pure vanilla extract: A classic flavor enhancer that brings warmth and depth to almost any sweet dessert. Don’t skip it!
- 10 oz mini marshmallows: These are the magic ingredient that gives marshmallow fudge its signature soft, slightly chewy texture. We’ll divide these for mixing into the fudge and for an optional decorative top.
- 3 packages (3 oz each) fruit-flavored gelatin: For this Easy Fruity Marshmallow Fudge Recipe, I love using different flavors like strawberry, lime, and lemon to create vibrant colors and distinct fruity notes. You could also try cherry, orange, or raspberry for different combinations.
- Optional additions for extra fruitiness and texture:
- ½ cup finely chopped dried cranberries: These add a lovely tartness and a chewy texture that works wonderfully with the sweet fudge.
- ½ cup finely chopped dried apricots: Offering a slightly different tang and chew, apricots are a fantastic addition for a more complex fruit flavor.
- Zest of 1 lemon or orange: For an extra burst of fresh, bright citrus aroma and flavor that really cuts through the richness of the fudge.
Preparation Phase 1: Gathering and Initial Steps for Your Easy Fruity Marshmallow Fudge Recipe
- Prepare Your Baking Dish: First things first, we need to get our pan ready. For this delectable Easy Fruity Marshmallow Fudge Recipe, I highly recommend using a 9×13 inch baking dish. Begin by lightly greasing the entire inside surface of the dish with butter or a non-stick cooking spray. This initial greasing is vital for preventing the parchment paper from shifting around. Next, line the greased dish with parchment paper, ensuring that the paper extends over the edges of the pan on two opposite sides. These overhangs will act as convenient “handles” later, making it incredibly simple to lift the set fudge out of the dish. Once the parchment is in place, lightly grease the top surface of the parchment paper itself. This double layer of greasing and parchment guarantees that your beautiful fudge will slide right out without any fuss or sticky residue, giving you perfectly clean cuts.
- Measure and Organize Your Ingredients: Before we even think about turning on the stove, let’s take a moment to measure out all of our ingredients accurately. Baking, or in this case, fudge-making, is a science, and precise measurements are key to success. Have your granulated sugar, butter, evaporated milk, and salt all ready to go. Ensure your white chocolate chips and vanilla extract are measured and set aside. Open your mini marshmallow bag and have them accessible – we’ll be adding them in stages. And most importantly, open your packages of fruit-flavored gelatin. If you’re using any of the optional dried fruits or citrus zest, finely chop the fruits and zest your citrus now. Having everything mise en place, which means “everything in its place,” will make the cooking process smooth, enjoyable, and stress-free, especially since we’ll be working with hot sugar and needing to act quickly at certain points.
- Ready Your Marshmallows: For our Easy Fruity Marshmallow Fudge Recipe, the marshmallows play a dual role. You’ll want to set aside about 1 cup of the mini marshmallows for the very end, if you choose to press them onto the top of the fudge as a decorative, extra-chewy layer. The remaining 9 ounces will be incorporated directly into the hot fudge base. Having them pre-portioned and ready to be added at the precise moment is crucial for achieving that wonderfully smooth, melting consistency without overcooking the rest of the fudge.
- Prepare Optional Additions: If you’ve decided to elevate your fudge with additional textures and flavors, now is the time to prepare them. For dried cranberries or apricots, use a sharp knife to finely chop them into small, consistent pieces. This ensures they distribute evenly throughout the fudge and provide a pleasant bite without being overwhelmingly large. If you’re using lemon or orange zest, carefully zest the fruit using a microplane or a fine grater, making sure to only get the brightly colored outer layer and none of the bitter white pith. Keep these prepared additions separate, as we might incorporate them into different sections of the fudge for varied flavor profiles.
- Choose the Right Pot: Selecting the correct saucepan is more important than you might think for this Easy Fruity Marshmallow Fudge Recipe. You’ll need a heavy-bottomed, medium-to-large saucepan. A heavy bottom helps distribute heat evenly and prevents the sugar mixture from scorching on the bottom, which can ruin the flavor of your fudge. The pan should also be large enough to comfortably hold all the ingredients, especially once the mixture starts to boil and expand slightly. A good rule of thumb is to use a pan that holds at least 3-4 quarts to avoid any boil-overs.
Phase 2: Cooking the Fudge Base for Your Easy Fruity Marshmallow Fudge Recipe
- Combine Initial Ingredients: Into your chosen heavy-bottomed saucepan, measure out and combine the 3 cups of granulated sugar, ¾ cup of unsalted butter (cut into a few pieces to help it melt faster), the 5 oz can of evaporated milk, and that essential pinch of salt. Give these ingredients a good stir with a heat-resistant spatula or wooden spoon until they are well combined. The mixture will look a bit grainy at this stage, but don’t worry, the heat will work its magic to dissolve the sugar.
- Bring to a Rolling Boil: Place the saucepan over medium-high heat. You’ll need to stir the mixture continuously as it heats up. This constant stirring is absolutely critical to prevent the sugar from sticking and burning to the bottom of the pan, which can impart an unpleasant, burnt flavor to your entire batch of fudge. Continue stirring and heating until the mixture reaches a full, rolling boil. What does a rolling boil look like? It’s when the bubbles are erupting vigorously and continuously all over the surface of the mixture, even when you stir it. It won’t subside when stirred; it will keep bubbling energetically. This is a very important visual cue for the next step.
- Boil for Precisely 5 Minutes: Once your fudge base has reached that full, rolling boil, continue to boil it vigorously for exactly 5 minutes. Do not stop stirring during this entire 5-minute period! I cannot emphasize enough the importance of constant agitation here. The sugar is undergoing a crucial transformation, and stirring prevents crystallization and scorching. Set a timer as soon as the rolling boil is achieved. This precise boiling time ensures that the sugar reaches the correct temperature and concentration needed for the fudge to set properly, resulting in a firm yet creamy texture rather than a sticky or crumbly one.
- Remove from Heat and Add Immediate Flavorings: As soon as the 5 minutes of boiling are up, immediately remove the saucepan from the heat. Carefully transfer it to a heat-resistant surface or a cool burner. Do not delay this step. Now, quickly add the 2 cups of white chocolate chips (or finely chopped white chocolate) and the 1 teaspoon of pure vanilla extract into the hot mixture. The residual heat from the cooked sugar base will be sufficient to melt the white chocolate. Stir vigorously until the white chocolate chips are completely melted and smoothly incorporated into the mixture. You’re aiming for a perfectly uniform, glossy, and lump-free base at this point. This is the heart of your Easy Fruity Marshmallow Fudge Recipe.
Phase 3: Incorporating Marshmallows and Fruit for a Vibrant Fruity Marshmallow Fudge
- Melt in the Main Marshmallows: Once the white chocolate is fully melted and stirred in, it’s time for the star of our marshmallow fudge! Add the majority of your mini marshmallows (approximately 9 oz, reserving about 1 oz for later if desired) directly into the hot fudge base. Stir continuously and gently until all the marshmallows have completely melted and are fully incorporated. The mixture will become incredibly smooth, incredibly glossy, and beautifully thick. This process should happen fairly quickly due to the heat of the fudge base. The marshmallows provide that signature soft, slightly chewy texture that we all love in a good fudge.
- Divide the Fudge Base for Fruity Flavors: This is where the “fruity” aspect of our Easy Fruity Marshmallow Fudge Recipe truly comes to life! To achieve vibrant, distinct layers of flavor and color, carefully divide the smooth marshmallow fudge base into three separate, heat-resistant bowls. Try to divide them as evenly as possible. If you only want one fruity flavor, you can skip dividing and proceed with the next step in the main pot. However, for a truly impressive and multi-faceted fruity fudge, multiple flavors are key.
- Infuse with Gelatin Flavors: Working quickly while the fudge is still warm and pliable, add one package (3 oz) of a different fruit-flavored gelatin powder into each of your three bowls. For example, add strawberry gelatin to the first bowl, lime gelatin to the second, and lemon gelatin to the third. Using a clean spoon or spatula for each bowl, stir each mixture vigorously until the gelatin powder is completely dissolved and the color is uniform throughout. You’ll immediately notice the fudge transforming into beautiful, vibrant hues, and delightful fruity aromas will waft up, promising an exciting taste experience.
- Gently Fold in Optional Fruit Additions: If you’re using any of the optional chopped dried fruits or citrus zest, now is the time to carefully fold them into their respective colored fudge batches. For instance, you might fold chopped dried cranberries into the strawberry-flavored fudge, or dried apricots into the lemon-flavored batch, and perhaps a touch of orange zest into a lime or cherry batch for an extra kick. The key here is to fold gently; we want to distribute these textural elements without overworking the fudge. These additions not only enhance the fruitiness but also provide a wonderful chewiness and bursts of concentrated flavor.
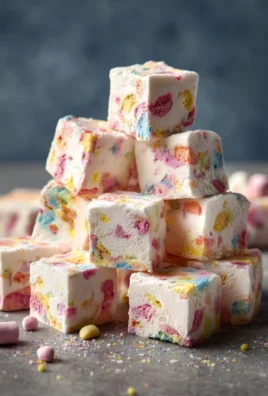
- Layer for a Marbled Masterpiece: Now comes the artistic part of creating your Easy Fruity Marshmallow Fudge! Take your prepared baking dish. Begin by spooning dollops of one color of fudge into the pan, scattering them somewhat randomly. Then, spoon dollops of the second color in between the first, followed by the third color. You don’t need to be perfectly neat here; the idea is to create an interesting visual. Once all the fudge is in the pan, take a butter knife or a skewer and gently swirl through the different colors just once or twice. Be careful not to over-swirl, as this can muddy the colors. The goal is a beautiful, distinct marbled effect that hints at the multiple fruity flavors within.
- Smooth the Top and Add Final Marshmallows (Optional): Once you’ve achieved your desired marbling, use an offset spatula or the back of a spoon (lightly greased if needed to prevent sticking) to gently spread the top surface of the fudge as evenly as possible. This creates a neat, professional finish. If you reserved that small portion (about 1 oz) of mini marshmallows earlier, now is the perfect time to gently press them onto the top surface of the fudge. They will adhere nicely and add an extra touch of visual appeal and delightful chewiness to your Easy Fruity Marshmallow Fudge Recipe.
Phase 4: Setting and Finishing Touches for Your Easy Fruity Marshmallow Fudge
- Chill and Set: This step requires patience, but it’s absolutely essential for your Easy Fruity Marshmallow Fudge to achieve its perfect texture. Once your fudge is beautifully layered in the pan, carefully transfer the entire baking dish to the refrigerator. Allow the fudge to chill undisturbed for a minimum of 3-4 hours. For the very best results and the cleanest cuts, I often recommend chilling it overnight. During this time, the ingredients will firm up, the flavors will meld, and the fudge will transform from a warm, gooey mixture into a solid, sliceable confection. Do not attempt to cut the fudge before it is completely firm and cold, as it will be too soft and sticky, leading to messy pieces.
- Remove from Pan: Once your fudge is thoroughly chilled and firm, it’s time to liberate it from the pan. Remember those parchment paper overhangs we created in the first step? Gently grasp these “handles” on opposite sides and carefully lift the entire slab of fudge straight up and out of the baking dish. Place the fudge, still on its parchment paper, onto a clean cutting board. This method is incredibly efficient and avoids any damage to the edges of your beautiful fudge, ensuring a pristine presentation.
- Achieving Perfect Cuts: To get beautifully neat and clean squares of your Easy Fruity Marshmallow Fudge, here’s a professional tip: use a large, sharp knife. For the absolute cleanest cuts, warm your knife under hot water for a few seconds, then wipe it completely dry. The warmth of the blade will help it glide smoothly through the fudge without dragging or sticking. Make your cuts in straight lines, cleaning the knife after every few cuts (re-warming and drying if necessary). You can cut it into 1-inch squares for bite-sized treats or larger pieces if you prefer. This meticulous approach ensures that each piece looks as good as it tastes.
- Storing Your Delicious Fudge: To keep your Easy Fruity Marshmallow Fudge fresh and delightful, proper storage is key. Once cut into squares, place the fudge pieces in an airtight container. You can layer them, placing a piece of parchment paper between layers to prevent them from sticking together. Store the container in the refrigerator. When stored correctly, this fudge will maintain its optimal freshness, flavor, and texture for up to 2 weeks. If you want to store it for a longer period, it can be frozen for up to 2-3 months. Just be sure to thaw it in the refrigerator before serving to bring it back to its ideal consistency.
Tips for the Perfect Easy Fruity Marshmallow Fudge Recipe Every Time
- Accurate Measurements are Paramount: Fudge making is a precise art, more akin to chemistry than free-form cooking. Every ingredient, from the sugar to the evaporated milk, needs to be measured accurately. I always recommend using proper measuring cups and spoons, leveling off dry ingredients, and ensuring liquid measurements are exact. Any deviation can significantly alter the final texture of your Easy Fruity Marshmallow Fudge, leading to fudge that’s either too soft and gooey or too hard and crumbly. Invest in good measuring tools, and always double-check your quantities before you begin.
- Don’t Skimp on the Stirring: During the boiling phase, constant stirring is non-negotiable. This isn’t just a suggestion; it’s a critical step to prevent the sugar from scorching on the bottom of the pan. Scorched sugar not only creates an unpleasant burnt taste but also introduces unwanted bitterness that will permeate the entire batch of your fruity marshmallow fudge. Use a sturdy, heat-resistant spatula that allows you to scrape the bottom and sides of the pan effectively throughout the entire 5-minute boil. Your arm might get a workout, but the delicious results will be worth it!
- Watch for the “Rolling Boil”: Achieving a full, rolling boil is a crucial indicator in this Easy Fruity Marshmallow Fudge Recipe. It means the sugar solution has reached a specific temperature and concentration. A rolling boil is when the mixture bubbles vigorously and continuously across the entire surface of the pot, even when you stir it. Don’t mistake a gentle simmer for a rolling boil. If your fudge doesn’t reach this stage and boil for the full 5 minutes, it may not set properly, resulting in a fudge that’s too soft or doesn’t hold its shape.
- Work Quickly but Carefully: Once the fudge base is off the heat and you’re adding the white chocolate, vanilla, and marshmallows, time is of the essence. The mixture will begin to cool and thicken quickly. You need to stir in these additions promptly and efficiently to ensure they melt and incorporate smoothly before the fudge sets too much. However, “quickly” doesn’t mean carelessly. Be mindful of the hot mixture and take care to scrape down the sides of the bowl to ensure uniform consistency.
- Embrace the Flavor Customization: The beauty of this Easy Fruity Marshmallow Fudge Recipe lies in its versatility. While I’ve suggested specific fruit gelatin flavors, feel free to experiment with your favorites! Cherry, orange, or even tropical fruit punch gelatin can create exciting new flavor combinations and color palettes. You can also mix and match your optional additions; chopped nuts like pecans or walnuts can add a delightful crunch, or a sprinkle of shredded coconut could transport your taste buds to a tropical paradise. Don’t be afraid to make this recipe uniquely yours!
- Chilling is Not Optional: I know, waiting for delicious treats to set can be agonizing, but proper chilling time is paramount for this Easy Fruity Marshmallow Fudge. Rushing this step will result in a sticky, gooey mess that’s impossible to cut neatly and won’t have that satisfying firm yet tender bite. At least 3-4 hours in the refrigerator is the minimum, but for optimal results and the cleanest slices, let it chill overnight. Patience truly is a virtue when it comes to perfect fudge.
-
Troubleshooting Common Fudge Issues:
- Fudge Too Soft/Doesn’t Set: This is often due to not boiling the mixture long enough or not reaching a full rolling boil. The sugar solution didn’t reach the correct concentration. Unfortunately, once it’s set, it’s hard to fix. Ensure precise boiling time and vigorous boil next time.
- Fudge Too Hard/Grainy: This can happen if the mixture was boiled for too long, at too high a heat, or if crystallization occurred. Constant stirring helps prevent crystallization. Make sure your heat is medium-high and not aggressively high, and stick to the 5-minute timer.
- Mottled/Uneven Color: If your fruit gelatin colors aren’t as vibrant or as distinct as you’d like, it might be due to over-swirling during the layering phase. A gentle, minimal swirl is best for a beautiful marbled effect. You can also ensure the gelatin powder is fully dissolved in each portion before layering.
By keeping these tips in mind, you’re well on your way to mastering the Easy Fruity Marshmallow Fudge Recipe and impressing everyone with your candy-making prowess!
Conclusion:
And there you have it! We’ve reached the sweet finale of our culinary journey, and I genuinely hope you’re feeling inspired, perhaps even a little excited, to dive into your kitchen and create something truly special. This isn’t just another recipe; it’s an invitation to experience pure, unadulterated joy in every bite. I’ve shared this delightful concoction with countless friends and family, and the consistent response is always one of delightful surprise at how something so incredibly simple can taste so astonishingly good. It’s genuinely one of the most straightforward and satisfying treats you’ll ever whip up in your kitchen, requiring minimal effort and delivering maximum delight. The vibrant colors, the soft, chewy texture that practically melts in your mouth, and that perfect balance of sweetness cut by a subtle tang from the fruit – it’s a symphony of sensations that makes this treat an absolute must-try.
What truly sets this particular recipe apart is its foolproof nature. Whether you’re a seasoned baker with a cupboard full of exotic ingredients or a kitchen novice who occasionally burns toast, you’ll find success with this one. The preparation is swift, the ingredients are common, and the waiting time for it to set is the hardest part, I promise! It’s the kind of recipe that makes you feel like a culinary wizard without breaking a sweat, perfect for those moments when you need a show-stopping dessert but are short on time. I’m talking about impromptu gatherings, last-minute bake sales, or simply a craving for something wonderfully indulgent on a Tuesday night. You’ll find yourself reaching for this recipe again and again because of its sheer reliability and crowd-pleasing appeal.
Elevate Your Easy Fruity Marshmallow Fudge Experience: Serving & Variations
Now, while the base recipe is fantastic on its own, I always encourage a little creative flair. Think of it as your canvas, ready for your personal touch. For serving, don’t just plop squares on a plate! This fudge looks beautiful arranged artfully on a dessert platter, perhaps nestled in colorful mini paper candy cups for an elegant touch at parties. It pairs wonderfully with a strong cup of coffee or a delicate herbal tea for an afternoon treat. For a truly decadent dessert, try warming a square ever so slightly and serving it with a scoop of vanilla bean ice cream, maybe even a drizzle of homemade fruit compote – pure bliss!
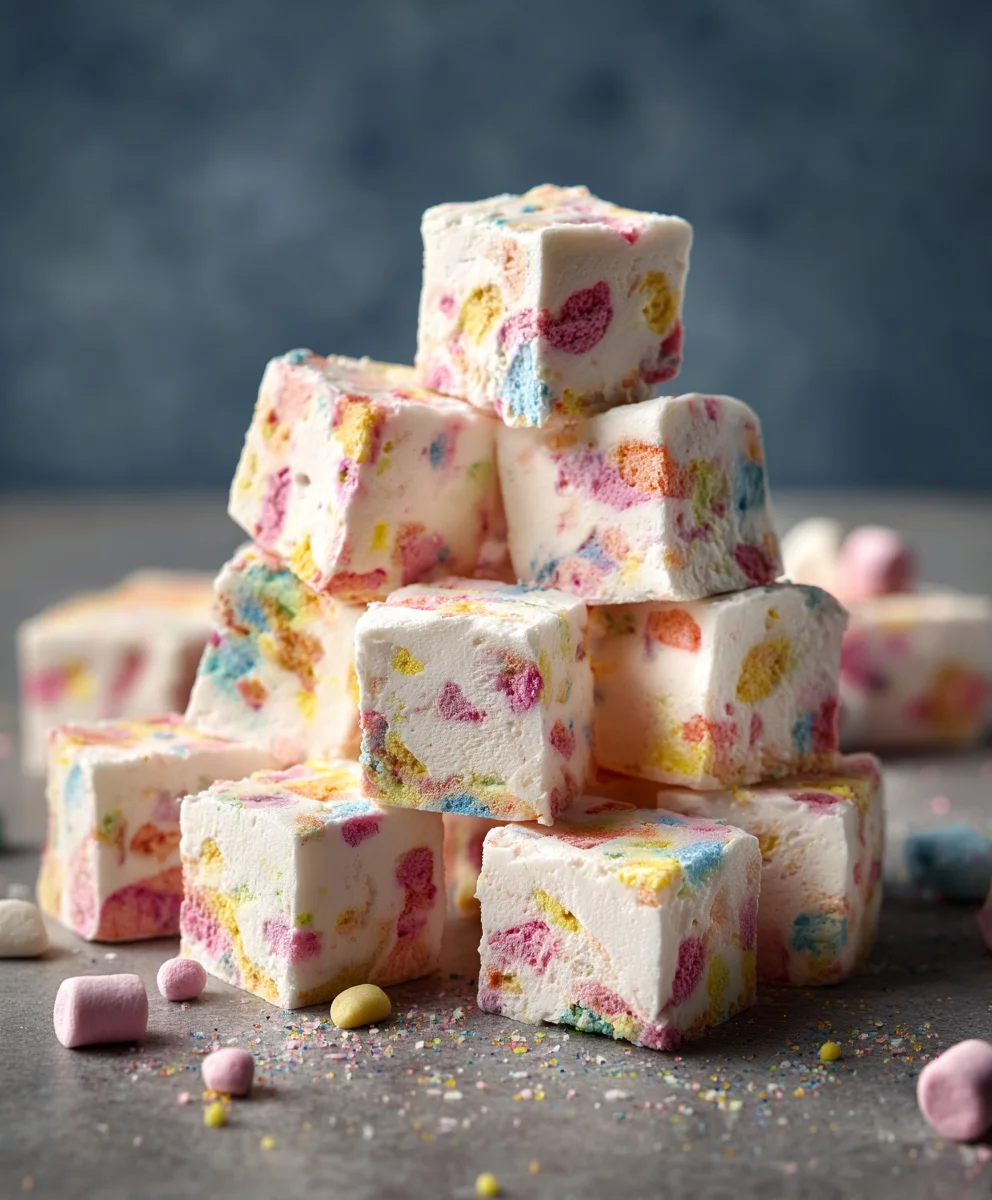
But the real fun begins with variations. This is where you can truly make the Easy Fruity Marshmallow Fudge Recipe your own. Consider swapping out the fruit in the original recipe. Dried cranberries or chopped dried apricots can lend a wonderful chewiness and a different kind of tang. Candied pineapple or even finely chopped candied ginger would introduce exotic, vibrant flavors. For a chocolate lover’s twist, try swirling in a handful of mini chocolate chips (white, milk, or dark) right before the fudge sets. A sprinkle of toasted, chopped nuts like pecans or walnuts would add a delightful crunch and a nutty depth that complements the sweetness beautifully. How about a tropical twist with a dash of coconut extract and some shredded coconut? Or a citrus burst with orange or lemon zest folded in? You could even divide the mixture and add different food colorings and flavors to create a stunning layered or swirled fudge masterpiece. Imagine a vibrant rainbow fudge for a child’s birthday party, each layer a different fruit essence!
For a festive touch, especially around holidays, you could use small cookie cutters to create fun shapes like stars, hearts, or seasonal figures once the fudge is firm. A light dusting of powdered sugar or a drizzle of contrasting melted candy melts on top would provide a professional finish. The possibilities are genuinely endless, and each variation you try opens up a new dimension of flavor and texture, ensuring that this recipe never gets boring.
Your Turn: Try It, Share It!
So, now it’s your turn. I truly, truly hope you decide to give this incredible recipe a try. You’ll be absolutely amazed at how effortlessly you can create such a spectacular treat. Don’t be shy about experimenting with the suggestions I’ve provided, or even better, come up with your own unique twists! That’s the beauty of home cooking – it’s a personal expression of creativity and love. Once you’ve whipped up your batch, I would absolutely love to hear about your experience. Did you stick to the original? Did you try a fun variation? How did your family and friends react? Please, share your stories, your photos, and your triumphs! Your feedback and creative ideas are what make this culinary community so vibrant and inspiring. Go forth, create, and enjoy every single delicious bite of your homemade Easy Fruity Marshmallow Fudge Recipe!
Easy Fruity Marshmallow Fudge
A delightful, easy-to-make fudge recipe combining creamy white chocolate and marshmallows with vibrant fruit gelatin flavors. This no-fuss dessert offers a perfect balance of sweet, tangy, and smooth textures, making it ideal for gifts or satisfying a sweet craving.
Ingredients
-
3 cups granulated sugar
-
¾ cup (1.5 sticks) unsalted butter
-
1 can (5 oz) evaporated milk
-
Pinch of salt
-
2 cups white chocolate chips (or 12 oz chopped white chocolate)
-
1 teaspoon pure vanilla extract
-
10 oz mini marshmallows (reserve 1 oz for topping)
-
3 packages (3 oz each) fruit-flavored gelatin (e.g., strawberry, lime, lemon)
-
Optional: ½ cup chopped dried cranberries
-
Optional: ½ cup chopped dried apricots
-
Optional: Zest of 1 lemon or orange
Instructions
-
Step 1
Grease a 9×13 inch baking dish, line with parchment paper (with overhangs), and grease the parchment. Measure all ingredients and set aside. Reserve 1 oz mini marshmallows for topping. Prepare optional additions (chop dried fruits, zest citrus) if using. Select a heavy-bottomed, 3-4 quart saucepan. -
Step 2
In the saucepan, combine sugar, butter, evaporated milk, and salt. Stir well. Heat over medium-high, stirring constantly, until it reaches a full, rolling boil. Boil vigorously for exactly 5 minutes, continuing to stir constantly. Remove from heat. -
Step 3
Immediately stir in white chocolate chips and vanilla extract until completely melted and smooth. -
Step 4
Add the remaining 9 oz mini marshmallows to the hot fudge base. Stir until completely melted and smooth. -
Step 5
Divide the smooth fudge base evenly into three heat-resistant bowls. Stir one 3 oz package of different fruit-flavored gelatin powder into each bowl until dissolved and colored. Gently fold any prepared optional fruit additions or zest into their respective colored fudge batches. -
Step 6
Spoon dollops of each color into the prepared dish. Gently swirl with a knife for a marbled effect (do not over-swirl). Smooth the top and press the reserved 1 oz mini marshmallows onto the surface if desired. -
Step 7
Refrigerate the fudge for at least 3-4 hours, or overnight, until completely firm. Lift the set fudge from the pan using the parchment overhangs and place on a cutting board. Warm a sharp knife under hot water, wipe dry, and cut the fudge into 1-inch squares. Clean the knife between cuts. -
Step 8
Store cut fudge in an airtight container in the refrigerator for up to 2 weeks, or freeze for 2-3 months.
Important Information
Nutrition Facts (Per Serving)
It is important to consider this information as approximate and not to use it as definitive health advice.
Allergy Information
Please check ingredients for potential allergens and consult a health professional if in doubt.
Leave a Comment