
Dulce de Leche Donuts: Prepare to embark on a culinary adventure that will redefine your definition of “donut.” Imagine sinking your teeth into a pillowy soft donut, its airy interior yielding to a luscious, creamy filling that tastes like caramelized dreams. That’s precisely what awaits you with this incredible recipe. These aren’t your average, run-of-the-mill donuts; they’re a decadent treat that elevates the humble donut to a gourmet experience.
Dulce de leche, the star of these donuts, boasts a rich history rooted in Latin American culture. Legend has it that this sweet confection was accidentally discovered in Argentina in the 19th century when a cook left milk and sugar simmering on the stove for too long. The result was a thick, caramel-like spread that quickly became a beloved staple. Its popularity spread throughout Latin America and beyond, finding its way into countless desserts and pastries.
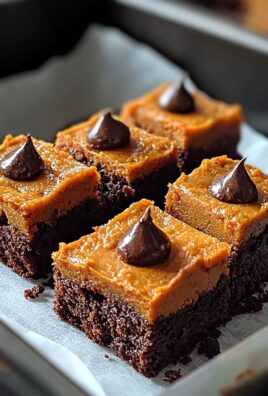
What makes dulce de leche donuts so irresistible? It’s the perfect marriage of textures and flavors. The soft, slightly chewy donut provides the ideal canvas for the intensely sweet and creamy dulce de leche filling. The combination is simply divine! People adore these donuts because they offer a comforting indulgence that’s both satisfying and sophisticated. Whether you’re enjoying them as a special breakfast treat, a delightful afternoon snack, or a show-stopping dessert, these donuts are guaranteed to bring a smile to your face. Plus, while they might seem fancy, they’re surprisingly easy to make at home with this step-by-step recipe!

Ingredients:
- For the Dough:
- 3 ½ cups (440g) all-purpose flour, plus more for dusting
- ¼ cup (50g) granulated sugar
- 2 ¼ teaspoons (7g) active dry yeast
- 1 teaspoon salt
- ¾ cup (180ml) lukewarm milk (about 105-115°F)
- ¼ cup (60ml) lukewarm water (about 105-115°F)
- 2 large eggs, lightly beaten
- 4 tablespoons (57g) unsalted butter, melted and slightly cooled
- 1 teaspoon vanilla extract
- For Frying:
- Vegetable oil, for frying (about 6-8 cups)
- For the Dulce de Leche Filling:
- 1 (13.4 ounce) can dulce de leche
- ¼ cup heavy cream
- 1 tablespoon unsalted butter, softened
- Pinch of salt
- For the Dulce de Leche Glaze:
- 1 cup (about 170g) powdered sugar
- 3-4 tablespoons milk, or more as needed
- 2 tablespoons dulce de leche
- Pinch of salt
- Optional Toppings:
- Chopped pecans or walnuts
- Sea salt flakes
Preparing the Dough
- Activate the Yeast: In a large bowl (or the bowl of your stand mixer), combine the lukewarm milk, lukewarm water, sugar, and active dry yeast. Give it a gentle stir and let it sit for 5-10 minutes, or until the yeast is foamy. This step is crucial to ensure your yeast is alive and kicking! If it doesn’t foam, your yeast is likely dead, and you’ll need to start over with fresh yeast.
- Combine Wet and Dry Ingredients: Once the yeast is foamy, add the beaten eggs, melted butter, and vanilla extract to the bowl. Whisk everything together until well combined. In a separate bowl, whisk together the flour and salt.
- Mix the Dough: Gradually add the dry ingredients to the wet ingredients, mixing on low speed with the dough hook attachment (if using a stand mixer) or with a wooden spoon (if mixing by hand). Mix until a shaggy dough forms.
- Knead the Dough: If using a stand mixer, knead the dough on medium speed for 6-8 minutes, or until it becomes smooth and elastic. If kneading by hand, turn the dough out onto a lightly floured surface and knead for 8-10 minutes, or until its smooth and elastic. The dough should be slightly sticky but not overly so. If it’s too sticky, add a tablespoon of flour at a time until it reaches the right consistency.
- First Rise: Place the dough in a lightly oiled bowl, turning to coat all sides. Cover the bowl with plastic wrap or a clean kitchen towel and let it rise in a warm place for 1-1.5 hours, or until doubled in size. This is where the magic happens! The dough needs time to develop its flavor and airy texture.
Shaping and Second Rise
- Punch Down the Dough: Once the dough has doubled, gently punch it down to release the air. Turn it out onto a lightly floured surface.
- Roll Out the Dough: Roll the dough out to about ½-inch thickness. Use a donut cutter (or two different sized round cookie cutters) to cut out the donuts. If you don’t have a donut cutter, you can use a large biscuit cutter and a smaller round cutter for the center hole.
- Second Rise: Place the cut-out donuts on a baking sheet lined with parchment paper. Cover them loosely with plastic wrap or a clean kitchen towel and let them rise again for 30-45 minutes, or until they are puffy and almost doubled in size. This second rise is crucial for achieving light and airy donuts.
Frying the Donuts
- Heat the Oil: While the donuts are rising for the second time, heat the vegetable oil in a large, heavy-bottomed pot or Dutch oven to 350°F (175°C). Use a deep-fry thermometer to monitor the temperature of the oil. Maintaining the correct temperature is essential for perfectly cooked donuts. If the oil is too hot, the donuts will brown too quickly on the outside and remain raw on the inside. If the oil is too cold, the donuts will absorb too much oil and become greasy.
- Fry the Donuts: Carefully place a few donuts at a time into the hot oil, being careful not to overcrowd the pot. Fry for 1-2 minutes per side, or until golden brown.
- Drain the Donuts: Use a slotted spoon or spider to remove the donuts from the oil and place them on a wire rack lined with paper towels to drain excess oil.
- Cool Slightly: Let the donuts cool slightly before filling and glazing.
Preparing the Dulce de Leche Filling
- Combine Ingredients: In a medium bowl, combine the dulce de leche, heavy cream, softened butter, and a pinch of salt.
- Mix Until Smooth: Beat with an electric mixer until smooth and creamy. If the filling is too thick, add a little more heavy cream, one teaspoon at a time, until it reaches your desired consistency.
- Transfer to Piping Bag: Transfer the dulce de leche filling to a piping bag fitted with a small round tip. If you don’t have a piping bag, you can use a zip-top bag and snip off a small corner.
Filling the Donuts
- Create a Hole: Use a small knife or a chopstick to create a small hole on the side of each donut.
- Fill the Donuts: Insert the tip of the piping bag into the hole and gently squeeze the bag to fill the donut with the dulce de leche filling. Be careful not to overfill the donuts, or the filling will ooze out.
Preparing the Dulce de Leche Glaze
- Combine Ingredients: In a medium bowl, whisk together the powdered sugar, milk, dulce de leche, and a pinch of salt until smooth.
- Adjust Consistency: Add more milk, one tablespoon at a time, until the glaze reaches your desired consistency. It should be thick enough to coat the donuts but thin enough to drizzle.
Glazing the Donuts
- Dip the Donuts: Dip the top of each filled donut into the dulce de leche glaze, allowing the excess glaze to drip off.
- Add Toppings (Optional): Immediately sprinkle the glazed donuts with chopped pecans or walnuts, sea salt flakes, or any other desired toppings.
- Let Set: Place the glazed donuts on a wire rack to allow the glaze to set completely. This usually takes about 15-20 minutes.
Tips for Success:
- Use a Thermometer: A deep-fry thermometer is essential for maintaining the correct oil temperature.
- Don’t Overcrowd the Pot: Frying too many donuts at once will lower the oil temperature and result in greasy donuts.
- Fresh Ingredients: Use fresh yeast and good quality ingredients for the best results.
- Patience is Key: Don’t rush the rising process. Give the dough enough time to develop its flavor and texture.
- Get Creative with Toppings: Feel free to experiment with different toppings to customize your donuts.
Storage Instructions:
These Dulce de Leche Donuts are best enjoyed fresh. However, you can store them in an airtight container at room temperature for up to 2 days. The glaze may become slightly sticky over time.
Enjoy!
I hope you enjoy making and eating these delicious Dulce de Leche Donuts! They are a perfect treat for any occasion.

Conclusion:
And there you have it! These Dulce de Leche Donuts are truly something special, and I genuinely believe they deserve a spot on your baking bucket list. Why? Because they perfectly balance the comforting familiarity of a classic donut with the rich, decadent sweetness of dulce de leche. It’s a flavor combination that’s simply irresistible, and the soft, fluffy texture of the donut itself just elevates the entire experience. Forget store-bought once you taste these homemade delights, you’ll never look back.
But the best part? They’re surprisingly easy to make! While the process does involve a bit of patience (especially with the dough rising), the steps are straightforward, and the reward is well worth the effort. Imagine biting into a warm, freshly made donut, its surface glistening with that luscious dulce de leche glaze. The aroma alone is enough to make your mouth water!
Beyond the sheer deliciousness, these donuts are incredibly versatile. Serve them warm with a scoop of vanilla ice cream for an extra indulgent dessert. Or, pair them with a strong cup of coffee for a delightful breakfast treat. Feeling adventurous? Try adding a sprinkle of sea salt to the dulce de leche glaze to enhance the sweetness and create a more complex flavor profile. You could also experiment with different toppings, such as chopped nuts, shredded coconut, or even a drizzle of dark chocolate. The possibilities are endless!
For a fun variation, consider filling the donuts with a dulce de leche cream. Simply whip together some heavy cream with a bit of dulce de leche until light and fluffy, then pipe it into the center of each donut. This adds an extra layer of creamy, caramel-y goodness that will take your donuts to the next level. Another idea is to use a different type of glaze altogether. A simple powdered sugar glaze or a chocolate ganache would also complement the flavor of the donuts beautifully.
I’m so excited for you to try this recipe and experience the magic of homemade Dulce de Leche Donuts for yourself. I truly believe that baking is a form of love, and sharing these donuts with your friends and family is a wonderful way to spread joy and create lasting memories.
So, what are you waiting for? Gather your ingredients, preheat your oven (or get your fryer ready!), and prepare to embark on a delicious baking adventure. Don’t be intimidated by the process I’ve provided detailed instructions and helpful tips to guide you every step of the way. And remember, even if your donuts aren’t perfect the first time around, they’ll still taste amazing!
Once you’ve made these donuts, I’d absolutely love to hear about your experience. Did you try any of the variations I suggested? Did you add your own creative twist? Share your photos and stories in the comments below! I can’t wait to see your creations and hear what you think. Happy baking! And most importantly, enjoy every single bite of these delectable Dulce de Leche Donuts. They’re a little bit of heaven in every bite, and I hope they bring as much joy to you as they have to me.
Dulce de Leche Donuts: The Ultimate Guide to Making & Enjoying Them
Fluffy, fried donuts filled with creamy dulce de leche and topped with a decadent dulce de leche glaze.
Ingredients
- 3 ½ cups (440g) all-purpose flour, plus more for dusting
- ¼ cup (50g) granulated sugar
- 2 ¼ teaspoons (7g) active dry yeast
- 1 teaspoon salt
- ¾ cup (180ml) lukewarm milk (about 105-115°F)
- ¼ cup (60ml) lukewarm water (about 105-115°F)
- 2 large eggs, lightly beaten
- 4 tablespoons (57g) unsalted butter, melted and slightly cooled
- 1 teaspoon vanilla extract
- Vegetable oil, for frying (about 6-8 cups)
- 1 (13.4 ounce) can dulce de leche
- ¼ cup heavy cream
- 1 tablespoon unsalted butter, softened
- Pinch of salt
- 1 cup (about 170g) powdered sugar
- 3-4 tablespoons milk, or more as needed
- 2 tablespoons dulce de leche
- Pinch of salt
- Chopped pecans or walnuts
- Sea salt flakes
Instructions
- Activate the Yeast: In a large bowl (or the bowl of your stand mixer), combine the lukewarm milk, lukewarm water, sugar, and active dry yeast. Give it a gentle stir and let it sit for 5-10 minutes, or until the yeast is foamy. If it doesn’t foam, your yeast is likely dead, and you’ll need to start over with fresh yeast.
- Combine Wet and Dry Ingredients: Once the yeast is foamy, add the beaten eggs, melted butter, and vanilla extract to the bowl. Whisk everything together until well combined. In a separate bowl, whisk together the flour and salt.
- Mix the Dough: Gradually add the dry ingredients to the wet ingredients, mixing on low speed with the dough hook attachment (if using a stand mixer) or with a wooden spoon (if mixing by hand). Mix until a shaggy dough forms.
- Knead the Dough: If using a stand mixer, knead the dough on medium speed for 6-8 minutes, or until it becomes smooth and elastic. If kneading by hand, turn the dough out onto a lightly floured surface and knead for 8-10 minutes, or until its smooth and elastic. The dough should be slightly sticky but not overly so. If it’s too sticky, add a tablespoon of flour at a time until it reaches the right consistency.
- First Rise: Place the dough in a lightly oiled bowl, turning to coat all sides. Cover the bowl with plastic wrap or a clean kitchen towel and let it rise in a warm place for 1-1.5 hours, or until doubled in size.
- Punch Down the Dough: Once the dough has doubled, gently punch it down to release the air. Turn it out onto a lightly floured surface.
- Roll Out the Dough: Roll the dough out to about ½-inch thickness. Use a donut cutter (or two different sized round cookie cutters) to cut out the donuts. If you don’t have a donut cutter, you can use a large biscuit cutter and a smaller round cutter for the center hole.
- Second Rise: Place the cut-out donuts on a baking sheet lined with parchment paper. Cover them loosely with plastic wrap or a clean kitchen towel and let them rise again for 30-45 minutes, or until they are puffy and almost doubled in size.
- Heat the Oil: While the donuts are rising for the second time, heat the vegetable oil in a large, heavy-bottomed pot or Dutch oven to 350°F (175°C). Use a deep-fry thermometer to monitor the temperature of the oil.
- Fry the Donuts: Carefully place a few donuts at a time into the hot oil, being careful not to overcrowd the pot. Fry for 1-2 minutes per side, or until golden brown.
- Drain the Donuts: Use a slotted spoon or spider to remove the donuts from the oil and place them on a wire rack lined with paper towels to drain excess oil.
- Cool Slightly: Let the donuts cool slightly before filling and glazing.
- Combine Filling Ingredients: In a medium bowl, combine the dulce de leche, heavy cream, softened butter, and a pinch of salt.
- Mix Until Smooth (Filling): Beat with an electric mixer until smooth and creamy. If the filling is too thick, add a little more heavy cream, one teaspoon at a time, until it reaches your desired consistency.
- Transfer to Piping Bag: Transfer the dulce de leche filling to a piping bag fitted with a small round tip. If you don’t have a piping bag, you can use a zip-top bag and snip off a small corner.
- Create a Hole: Use a small knife or a chopstick to create a small hole on the side of each donut.
- Fill the Donuts: Insert the tip of the piping bag into the hole and gently squeeze the bag to fill the donut with the dulce de leche filling. Be careful not to overfill the donuts, or the filling will ooze out.
- Combine Glaze Ingredients: In a medium bowl, whisk together the powdered sugar, milk, dulce de leche, and a pinch of salt until smooth.
- Adjust Consistency (Glaze): Add more milk, one tablespoon at a time, until the glaze reaches your desired consistency. It should be thick enough to coat the donuts but thin enough to drizzle.
- Dip the Donuts: Dip the top of each filled donut into the dulce de leche glaze, allowing the excess glaze to drip off.
- Add Toppings (Optional): Immediately sprinkle the glazed donuts with chopped pecans or walnuts, sea salt flakes, or any other desired toppings.
- Let Set: Place the glazed donuts on a wire rack to allow the glaze to set completely. This usually takes about 15-20 minutes.
Notes
- Use a deep-fry thermometer for maintaining the correct oil temperature.
- Don’t overcrowd the pot when frying.
- Use fresh yeast and good quality ingredients.
- Don’t rush the rising process.
- Experiment with different toppings.
- These Dulce de Leche Donuts are best enjoyed fresh. However, you can store them in an airtight container at room temperature for up to 2 days. The glaze may become slightly sticky over time.


Leave a Comment