
Homemade Chocolate Raspberry Sandwich Cookies are not just a dessert; they are an invitation to experience pure joy with every bite. I believe there’s something profoundly satisfying about crafting these exquisite treats from scratch, transforming simple ingredients into a symphony of flavors and textures. Imagine a rich, dark chocolate cookie, perfectly baked to a tender crispness, cradling a luscious, vibrant raspberry filling that bursts with fresh, tangy sweetness. This is more than a cookie; it’s a miniature masterpiece, promising a delightful escape.
Why We Adore This Classic Combination
While the concept of a sandwich cookie has graced our dessert tables for generations, delighting us with its simple elegance and satisfying structure, the pairing of chocolate and raspberry is a timeless classic for a reason. It’s a culinary romance where the subtle bitterness of cocoa harmonizes flawlessly with the bright, fruity notes of raspberry, creating a balanced and utterly irresistible flavor profile. Making Homemade Chocolate Raspberry Sandwich Cookies allows for a level of freshness and customization that store-bought varieties simply cannot replicate. People adore this dish not only for its incredible taste and the satisfying interplay of textures—from the slight chew of the cookie to the smooth creaminess of the filling—but also for the nostalgic comfort and shared happiness it brings. It’s a true labor of love that pays off in smiles and satisfied cravings.

Ingredients:
For me, the magic of baking often starts with gathering the finest ingredients. To create these incredible Homemade Chocolate Raspberry Sandwich Cookies, we’ll need two sets of components: one for the rich, chocolatey cookies, and another for the vibrant, fruity raspberry filling. Always remember, good quality ingredients make all the difference!
- For the Chocolate Cookies:
- 2 ½ cups (300g) all-purpose flour, spooned and leveled
- ¾ cup (75g) unsweetened Dutch-processed cocoa powder. I always find Dutch-processed gives that deep, rich chocolate color and flavor that is just perfect for these cookies.
- 1 teaspoon baking soda
- ½ teaspoon salt
- 1 cup (226g) unsalted butter, softened to room temperature. This is crucial for creaming properly!
- 1 ½ cups (300g) granulated sugar
- ½ cup (100g) packed light brown sugar. The brown sugar adds a lovely chewiness and depth of flavor.
- 2 large eggs, at room temperature
- 2 teaspoons pure vanilla extract. Don’t skimp on the vanilla; it truly enhances the chocolate.
- For the Raspberry Filling:
- 2 cups (about 250g) fresh raspberries. Frozen raspberries can work too, but I prefer fresh for the best texture and taste in our Homemade Chocolate Raspberry Sandwich Cookies.
- ½ cup (100g) granulated sugar. You might adjust this slightly based on the sweetness of your raspberries.
- 1 tablespoon fresh lemon juice. This brightens the flavor beautifully.
- 2 teaspoons cornstarch. This helps to thicken our luscious filling.
- 2 tablespoons cold water. To create a slurry with the cornstarch.
- Optional Garnish:
- Powdered sugar for dusting. A lovely finishing touch!
For the Chocolate Cookies: Crafting the Perfect Base for Your Homemade Chocolate Raspberry Sandwich Cookies
Alright, let’s get our hands a little floury and start on the chocolate cookie dough. This is where the foundation for our exquisite Homemade Chocolate Raspberry Sandwich Cookies truly begins. Patience and precision here will pay off with tender, flavorful cookies.
- First things first, I always preheat my oven to 350°F (175°C). While the oven is warming up, I like to line two or three large baking sheets with parchment paper or silicone baking mats. This ensures our beautiful cookies won’t stick and will bake evenly.
- In a medium bowl, I whisk together the all-purpose flour, Dutch-processed cocoa powder, baking soda, and the salt. Make sure these are thoroughly combined. Sometimes I even sift them to ensure there are absolutely no lumps, which is really important for a smooth cookie dough texture. Set this dry mixture aside for a moment.
- Now, in a large bowl, using an electric mixer (either a stand mixer with a paddle attachment or a hand mixer), I beat the softened unsalted butter on medium speed until it’s light and creamy, which usually takes about 1-2 minutes.
- Next, I add both the granulated sugar and the light brown sugar to the butter. Continue beating on medium-high speed for another 2-3 minutes, scraping down the sides of the bowl as needed. You want this mixture to be really light, fluffy, and almost pale in color. This creaming process incorporates air, which contributes to the cookies’ wonderful texture.
- With the mixer still on medium speed, I crack in one egg at a time, beating well after each addition until it’s fully incorporated. Then, I stir in the two teaspoons of pure vanilla extract. The mixture might look a little curdled at this point, but don’t worry, it will come together once the dry ingredients are added.
- Now it’s time to bring it all together! I gradually add the dry ingredient mixture to the wet ingredients, mixing on low speed until just combined. Be careful not to overmix here. Overmixing can develop too much gluten, leading to tougher cookies, and we’re aiming for soft, tender Homemade Chocolate Raspberry Sandwich Cookies! The dough will be thick and quite sticky.
- I usually divide the dough in half, flatten each half into a disc, wrap them tightly in plastic wrap, and then pop them into the refrigerator for at least 30 minutes. Chilling the dough is a really important step; it makes the dough much easier to handle, prevents the cookies from spreading too much during baking, and deepens their flavor. You can even chill it for a couple of hours or overnight for even better results!
- Once the dough is nicely chilled, I take one disc out of the refrigerator and place it on a lightly floured surface. I find it easiest to roll out the dough between two sheets of parchment paper, which prevents sticking and makes cleanup a breeze. Roll the dough to about ¼ inch thick.
- Using a 2-inch round cookie cutter (or your preferred shape for sandwich cookies), I cut out as many cookies as possible. Re-roll any scraps, chill briefly if they get too warm, and cut out more.
- Carefully transfer the cut-out cookies to your prepared baking sheets, leaving about an inch of space between each cookie.
- Bake for 9-11 minutes. The baking time can vary depending on your oven, so keep a close eye on them. The edges should be just set, and the centers will still look a little soft. Remember, they will firm up as they cool. Overbaking will make them hard, and we want a soft, chewy cookie for our Homemade Chocolate Raspberry Sandwich Cookies.
- Once baked, remove them from the oven and let them cool on the baking sheet for a good 5 minutes before carefully transferring them to a wire rack to cool completely. It’s essential that the cookies are completely cool before we even think about adding the filling, otherwise, our beautiful raspberry filling will melt and run. This cooling process prevents them from breaking and sets their final texture.
For the Raspberry Filling: Creating the Sweet and Tangy Heart of Your Homemade Chocolate Raspberry Sandwich Cookies
While our chocolate cookies are cooling, we can turn our attention to the vibrant, tangy, and utterly delicious raspberry filling. This bright pop of fruit is what truly makes these Homemade Chocolate Raspberry Sandwich Cookies sing! It’s surprisingly simple to make, but packed with flavor.
- In a small saucepan, I combine the fresh raspberries, granulated sugar, and fresh lemon juice. I like to bring this mixture to a gentle simmer over medium heat, stirring occasionally. As the raspberries cook, they will start to break down and release their juices.
- Once the mixture is simmering, I let it cook for about 5-7 minutes, stirring and gently mashing the raspberries with the back of a spoon, until they are soft and the mixture has thickened slightly. The goal here is to intensify the raspberry flavor and create a pulpy consistency.
- While the raspberries are cooking, I quickly prepare a cornstarch slurry. In a very small bowl, I whisk together the 2 teaspoons of cornstarch with 2 tablespoons of cold water until it’s completely smooth and there are no lumps. This is our thickening agent.
- Once the raspberry mixture has cooked down, I pour in the cornstarch slurry, whisking continuously to prevent lumps. Continue to cook for another 1-2 minutes, stirring constantly, until the filling thickens considerably and coats the back of a spoon. It should resemble a thick jam or jelly.
- At this point, I often choose to strain the raspberry filling through a fine-mesh sieve set over a clean bowl. This step is entirely optional, but I personally prefer it for a smoother, seedless filling. If you love the texture of seeds, feel free to skip this! If straining, use a spoon or spatula to push all the delicious fruit pulp through, leaving the seeds behind.
- Allow the raspberry filling to cool completely at room temperature, then transfer it to the refrigerator. It needs to be thoroughly chilled, ideally for at least an hour, but often longer, to reach the perfect spreadable consistency for our Homemade Chocolate Raspberry Sandwich Cookies. As it chills, it will thicken even further.
Assembly of Your Exquisite Homemade Chocolate Raspberry Sandwich Cookies: Bringing It All Together
Now for the most exciting part – bringing our two delicious components together to create the magnificent Homemade Chocolate Raspberry Sandwich Cookies! This is where all our hard work pays off, and the aroma of chocolate meets the sweet-tartness of raspberry. It’s truly a delight.
- Once both the chocolate cookies are completely cooled and the raspberry filling is thoroughly chilled and thickened, it’s time to assemble! I usually like to pair up similar-sized cookies to ensure a neat finish.
- Take one chocolate cookie and turn it flat side up. Using a small spoon, a butter knife, or even a piping bag fitted with a round tip (which gives the neatest look!), I place about a teaspoon to a tablespoon of the chilled raspberry filling onto the center of the flat side of the cookie. Be careful not to overfill, especially if you’re aiming for a clean edge.
- Gently top the filling with another chocolate cookie, pressing down very lightly until the filling spreads almost to the edges. You don’t want the filling oozing out excessively, but you want it to be visible around the perimeter, a beautiful contrast to the dark cookie.
- Repeat this process with all of your remaining cookies and raspberry filling until you have a tray full of stunning Homemade Chocolate Raspberry Sandwich Cookies.
- For an elegant touch: Before serving, I often like to lightly dust the tops of the assembled cookies with a little powdered sugar. It adds a lovely visual appeal and a delicate hint of sweetness. This step is completely optional but definitely elevates the presentation.
- These Homemade Chocolate Raspberry Sandwich Cookies are best enjoyed fresh, but they also store beautifully. I typically store them in an airtight container at room temperature for up to 3-4 days. If your kitchen is particularly warm, or if you want to extend their freshness, storing them in the refrigerator is also an option, though I find the cookies stay softer at room temperature. Just remember to let them come back to room temperature for about 15-20 minutes before serving for the best flavor and texture.
- Serving Suggestion: I love to serve these cookies with a cup of hot coffee or tea, or as a delightful dessert after a meal. Their rich chocolate flavor combined with the bright, fruity raspberry filling makes them incredibly satisfying and a definite crowd-pleaser. They are perfect for sharing at parties, holiday gatherings, or simply enjoying as a special treat for yourself.
- A note on texture: The cookies will be soft and slightly chewy, providing a wonderful contrast to the smooth and luscious raspberry filling. The combination of bittersweet chocolate and tangy raspberry is truly a match made in heaven, making these Homemade Chocolate Raspberry Sandwich Cookies an unforgettable treat.

Conclusion:
So, there you have it! We’ve journeyed through the delightful process of creating something truly special, a treat that elevates the simple cookie into an experience. I genuinely believe that these aren’t just any cookies; they are an invitation to savor the moment, to share joy, and to indulge in a harmony of flavors that is simply irresistible. The rich, deep cocoa cookie, perfectly crisp yet tender, forms the ideal embrace for that vibrant, tangy raspberry jam. It’s a match made in culinary heaven, a balanced symphony where neither flavor overpowers the other, but rather they dance together, creating a memorable taste sensation with every single bite. This recipe, my friends, is a testament to the fact that sometimes the simplest combinations yield the most profound deliciousness. The satisfaction of biting into a confection that you’ve lovingly made with your own hands is unparalleled, and these Homemade Chocolate Raspberry Sandwich Cookies deliver that feeling in spades.
I can tell you from personal experience, once you try these, they will undoubtedly become a staple in your baking repertoire. They are perfect for so many different occasions. Imagine serving them at your next brunch gathering, a delightful counterpoint to a strong cup of coffee or a delicate tea. They make for an elegant addition to any dessert platter at a dinner party, perhaps alongside a scoop of vanilla bean ice cream, where the warm cookie and cold ice cream create a lovely contrast. For a more casual setting, a tall glass of cold milk is their ultimate companion, bringing back those nostalgic childhood feelings but with a sophisticated twist. Don’t forget their potential as heartfelt gifts! Package them beautifully in a decorative tin or box, tie it with a ribbon, and you have a truly thoughtful present for birthdays, holidays, or just to brighten someone’s day. Trust me, a homemade gift like this speaks volumes about your care and affection. They’re also incredibly sturdy for mailing, making them an excellent choice for sending a little bit of your kitchen’s warmth to loved ones far away.
But the fun doesn’t stop there! One of the things I adore most about baking is the endless possibility for customization and creativity. While the classic chocolate and raspberry pairing is divine, feel free to experiment and make these cookies uniquely yours. How about swapping out the raspberry jam for a luscious strawberry or apricot preserve? Each fruit will lend its own unique sweetness and tartness, transforming the cookie into a completely different, yet equally enchanting, experience. For those who adore a nuttier crunch, finely chopped toasted pecans or walnuts could be folded into the cookie dough, adding another layer of texture and flavor that complements the chocolate beautifully. And if you’re feeling particularly adventurous, consider a subtle hint of orange zest in the chocolate cookie dough – the citrus brightens the chocolate beautifully, creating an unexpected but delightful aromatic profile that truly elevates the overall flavor. You could also experiment with the chocolate itself: a drizzle of melted white chocolate over the finished cookies adds a beautiful aesthetic touch and an extra layer of sweetness, or for a more intense cocoa hit, try using a darker chocolate with a higher cocoa percentage in your cookie recipe. The possibilities truly are as vast as your imagination, and I encourage you to play around with these ideas, making each batch a new adventure.
So, what are you waiting for?
I truly hope that reading about these delectable treats has inspired you to preheat your oven and gather your ingredients. There’s an immense sense of accomplishment that comes with baking something so delicious from scratch, and I promise you, the smiles these cookies will bring to your face, and the faces of those you share them with, are absolutely priceless. Take the plunge, make a batch (or two!), and let the aroma of baking chocolate and raspberry fill your home. Imagine the delight of serving these at your next gathering, or simply enjoying one with your afternoon tea. And when you do, please, please, please come back and share your experience with me! I would absolutely love to hear about your baking journey. Did you try any variations? What was your favorite part of the process? Did they disappear as quickly as they did in my house? Your feedback, your photos, and your stories are what make this community so vibrant and inspiring. Let’s celebrate the joy of baking together, one delicious cookie at a time. Happy baking, everyone!

Homemade Chocolate Raspberry Sandwich Cookies
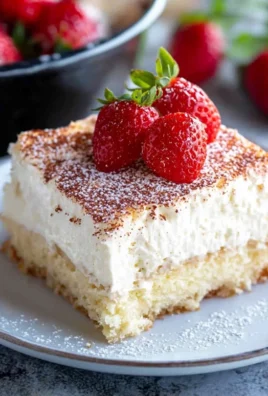
These exquisite Homemade Chocolate Raspberry Sandwich Cookies combine rich, dark chocolate cookies with a luscious, vibrant raspberry filling. A timeless classic, offering a delightful escape with every bite, made fresh from scratch.
Ingredients
-
2 ½ cups (300g) all-purpose flour
-
¾ cup (75g) unsweetened Dutch-processed cocoa powder
-
1 teaspoon baking soda
-
½ teaspoon salt
-
1 cup (226g) unsalted butter, softened
-
1 ½ cups (300g) granulated sugar
-
½ cup (100g) packed light brown sugar
-
2 large eggs, at room temperature
-
2 teaspoons pure vanilla extract
-
2 cups (approx. 250g) fresh raspberries
-
½ cup (100g) granulated sugar
-
1 tablespoon fresh lemon juice
-
2 teaspoons cornstarch
-
2 tablespoons cold water
-
Powdered sugar for dusting (optional)
Instructions
-
Step 1
Preheat oven to 350°F (175°C). Line baking sheets with parchment. Whisk together 2 ½ cups flour, ¾ cup cocoa powder, 1 tsp baking soda, and ½ tsp salt. Set aside. -
Step 2
In a large bowl, cream 1 cup softened butter until light. Beat in 1 ½ cups granulated sugar and ½ cup light brown sugar until fluffy. Add 2 large eggs one at a time, beating after each. Stir in 2 tsp vanilla extract. -
Step 3
Gradually add dry ingredients to wet, mixing on low speed until just combined. Divide dough, flatten into discs, wrap, and chill for at least 30 minutes. -
Step 4
On a lightly floured surface or between parchment paper, roll chilled dough to ¼ inch thick. Cut out 2-inch round cookies. Re-roll scraps and cut more. -
Step 5
Transfer cut-out cookies to prepared baking sheets. Bake for 9-11 minutes. Edges should be set, centers slightly soft. Cool on baking sheet for 5 minutes, then transfer to a wire rack to cool completely. -
Step 6
In a small saucepan, combine 2 cups fresh raspberries, ½ cup granulated sugar, and 1 tbsp lemon juice. Bring to a gentle simmer; cook 5-7 minutes, mashing, until slightly thickened. -
Step 7
Whisk 2 tsp cornstarch with 2 tbsp cold water to create a slurry. Stir slurry into raspberry mixture. Cook 1-2 minutes, stirring, until thickened like jam. (Optional: Strain for a smoother filling.) Cool completely, then chill in the refrigerator for at least 1 hour until very thick. -
Step 8
Once cookies are cooled and filling is chilled, pair similar-sized cookies. Place 1-1.5 tablespoons of raspberry filling onto the flat side of one cookie. Gently top with another cookie, pressing lightly until filling spreads to the edges. -
Step 9
(Optional) Lightly dust assembled cookies with powdered sugar before serving. Store in an airtight container at room temperature for 3-4 days or refrigerate for extended freshness. Allow to come to room temperature before serving for best flavor and texture.
Important Information
Nutrition Facts (Per Serving)
It is important to consider this information as approximate and not to use it as definitive health advice.
Allergy Information
Please check ingredients for potential allergens and consult a health professional if in doubt.


Leave a Comment