
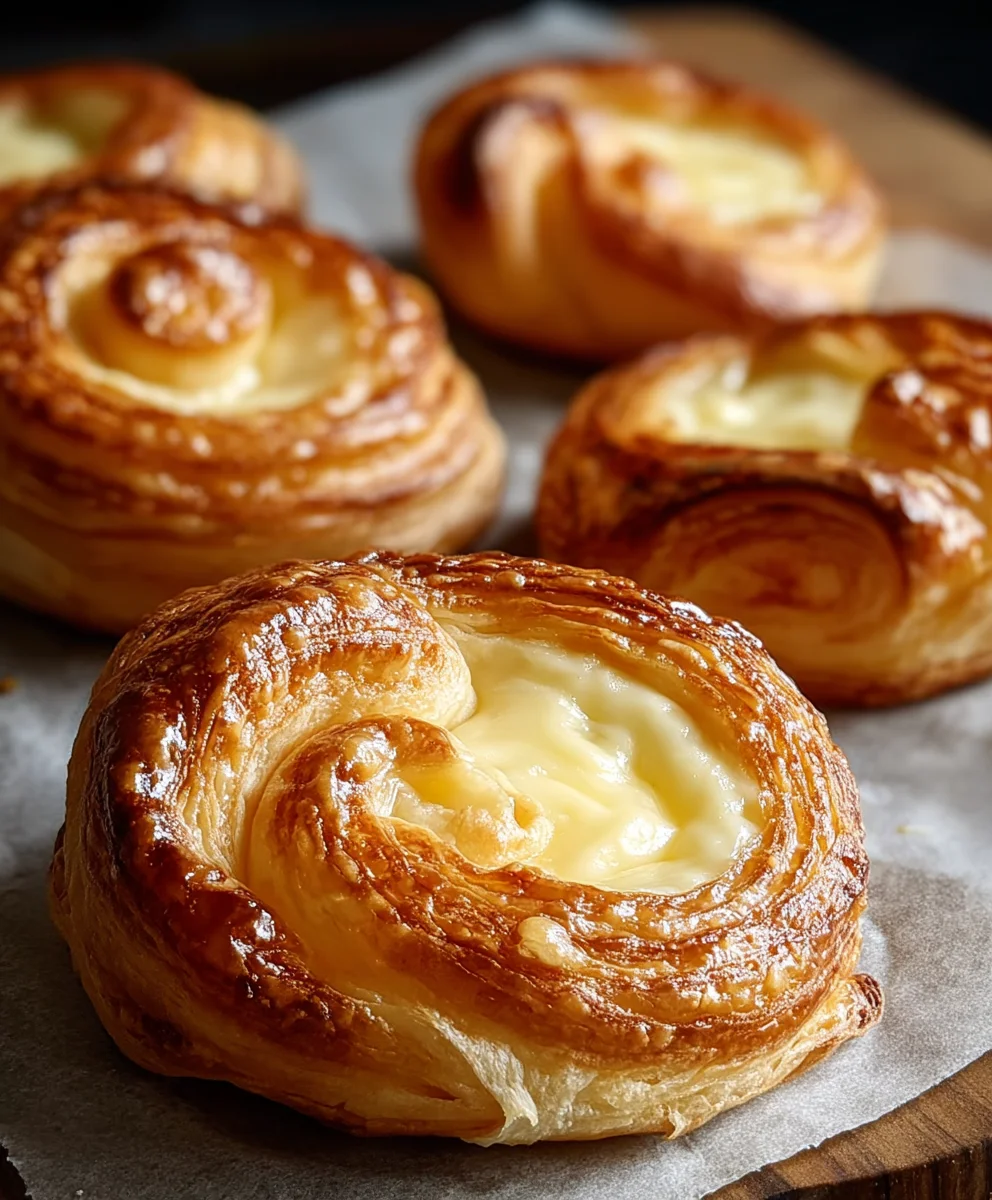
Cheese Danishes are not merely a breakfast pastry; they are a delightful invitation to savor a moment of pure culinary bliss. Imagine the perfect morning: a gentle aroma filling your kitchen, a crisp, golden-brown exterior giving way to an incredibly rich, sweet, and subtly tangy cheese filling. This iconic treat offers an unparalleled sensory experience, making it a beloved choice for countless enthusiasts worldwide.
The story of these delectable pastries traces back to Denmark, where they are affectionately known as ‘wienerbrød,’ or ‘Viennese bread.’ Their creation involves a fascinating blend of European baking traditions, often credited to Austrian bakers who introduced the sophisticated laminated dough technique during a bakers’ strike in the 19th century. This rich cultural history imbues each bite with a sense of tradition and expert craftsmanship, transforming a simple ingredient into something truly extraordinary.
People adore Cheese Danishes for their exquisite balance of textures and flavors. The buttery, flaky layers of the pastry provide a delicate crunch, beautifully contrasting with the smooth, creamy, and satisfyingly sweet cheese filling. Whether you’re seeking a sophisticated addition to your brunch spread, a comforting companion for your morning coffee, or a delightful afternoon pick-me-up, the irresistible charm of this pastry makes it an absolute favorite. I am genuinely excited to guide you through creating your own perfect version of this timeless classic.

Ingredients:
- For the Dough:
- 1 cup (240ml) warm milk (around 105-115°F / 40-46°C)
- 1/2 cup (100g) granulated sugar, divided
- 2 1/4 teaspoons (1 packet) active dry yeast
- 4 cups (480g) all-purpose flour, plus extra for dusting
- 1 teaspoon salt
- 2 large eggs, at room temperature
- 1/2 cup (113g) unsalted butter, softened, cut into small pieces
- 1/2 cup (113g) unsalted butter, very cold, for lamination
- For the Cheese Filling:
- 16 ounces (450g) full-fat cream cheese, softened
- 1/2 cup (100g) granulated sugar
- 1 large egg yolk
- 1 teaspoon vanilla extract
- 1 tablespoon lemon zest (optional, but highly recommended for brightness)
- For the Egg Wash:
- 1 large egg
- 1 tablespoon milk or water
- For the Glaze:
- 1 cup (120g) powdered sugar
- 2-3 tablespoons milk or water
- 1/2 teaspoon vanilla extract (optional)
Preparing the Dough for Your Delicious Cheese Danishes
Creating the perfect dough for these magnificent Cheese Danishes is truly the heart of the recipe. It involves a little patience, but I promise the results – those flaky, tender layers – are absolutely worth every minute of effort. We’re going for a dough that’s rich and buttery, reminiscent of a brioche or a simplified croissant dough, which will give our Danishes an incredible texture.
Activating the Yeast and Starting the Dough
- In a large mixing bowl or the bowl of your stand mixer, combine the warm milk with 2 tablespoons of the granulated sugar. Stir gently until the sugar dissolves.
- Sprinkle the active dry yeast over the milk mixture. Let it sit undisturbed for 5-10 minutes. You should see it become foamy and bubbly on the surface, which tells us your yeast is alive and ready to work its magic. This step is crucial for light and airy Danishes.
- Add the remaining granulated sugar, salt, and two large eggs to the yeast mixture. Whisk everything together until well combined.
- Gradually add the all-purpose flour, one cup at a time, mixing on low speed with a dough hook or by hand with a sturdy spoon until a shaggy dough forms.
- Once the flour is mostly incorporated, add the softened butter, piece by piece, mixing until it’s fully integrated.
- Increase the speed to medium-low and knead for about 8-10 minutes using a stand mixer, or 12-15 minutes by hand on a lightly floured surface. The dough should become smooth, elastic, and pull away from the sides of the bowl. It might be a bit sticky, but it shouldn’t be overly wet. If it’s too sticky, add a tiny bit more flour, but be careful not to add too much.
First Rise (Bulk Fermentation)
- Lightly grease a large bowl with a little oil or non-stick spray. Transfer the dough to the prepared bowl, turning it once to coat the entire surface.
- Cover the bowl tightly with plastic wrap or a clean kitchen towel.
- Place the dough in a warm, draft-free spot and let it rise for 1.5 to 2 hours, or until it has doubled in size. A warm environment is key for a successful rise.
- Once risen, gently punch down the dough to release the air. This makes it easier to handle for the next stage.
- Transfer the dough to a clean, lightly floured surface. Form it into a rough rectangle, then wrap it tightly in plastic wrap.
- Refrigerate the dough for at least 2-3 hours, or preferably overnight. Chilling the dough is absolutely essential for making our Cheese Danishes, as it makes the lamination process much easier and helps develop flavor.
The Lamination Process – Creating Those Beautiful Layers
This is where we build the glorious, buttery layers that make Danish pastries so special. Don’t be intimidated; it’s a repetitive process that yields incredible results.
- Take the very cold 1/2 cup (113g) unsalted butter for lamination. Place it between two sheets of parchment paper. Using a rolling pin, pound and roll the butter into an 8×8 inch (20×20 cm) square. Try to make it as even as possible. If it softens too much, pop it back in the fridge for a few minutes.
- Remove the chilled dough from the refrigerator. On a lightly floured surface, roll the dough into a 16×16 inch (40×40 cm) square.
- Place the butter square diagonally in the center of the dough square. Fold the four corners of the dough over the butter so they meet in the middle, completely enclosing the butter like an envelope. Pinch the seams firmly to seal the butter inside. It’s important that there are no gaps for the butter to escape.
- Lightly dust your work surface and the top of the dough. Gently roll the dough into a long rectangle, about 20×10 inches (50×25 cm). Always roll evenly, applying gentle, consistent pressure from the center outwards to avoid tearing the dough or squeezing out the butter.
- Perform your first “single fold”: Imagine dividing the dough rectangle into three equal sections. Fold one-third of the dough over the middle section, then fold the remaining one-third over that, like folding a business letter. This creates three layers of dough and two layers of butter.
- Rotate the dough 90 degrees (so the open seam is now to your right or left, not facing you). This ensures even layering.
- Wrap the folded dough tightly in plastic wrap and refrigerate for at least 30 minutes. This chilling period is critical; it allows the butter to firm up and the gluten in the dough to relax, preventing tearing during subsequent rolling.
- Repeat steps 16-19 two more times. That means, after the first chill, you’ll unwrap, roll it out again to 20×10 inches, perform another single fold, rotate, wrap, and chill. Then, you’ll do it one final time. In total, you’ll have completed three single folds with three chilling periods in between. Each fold adds to the beautiful flakiness of your future Cheese Danishes.
- After the final fold and chill, the dough is ready to be shaped. You can refrigerate it for up to 24 hours at this point if you’re not ready to proceed immediately.
Crafting the Creamy Cheese Filling for Your Cheese Danishes
While the dough is busy layering up in the fridge, we can quickly whip up the star of our Cheese Danishes: the sweet and tangy cream cheese filling. This simple yet incredibly flavorful mixture is what makes these pastries so utterly irresistible.
- In a medium-sized bowl, combine the softened full-fat cream cheese, granulated sugar, egg yolk, vanilla extract, and optional lemon zest.
- Using an electric mixer or a sturdy whisk, beat the ingredients together until the mixture is completely smooth, creamy, and free of any lumps. Scrape down the sides of the bowl as needed to ensure everything is incorporated.
- Give it a taste and adjust sweetness if desired. I find this balance to be perfect, but some prefer a little more or less sugar. The lemon zest adds a wonderful brightness that cuts through the richness of the cream cheese, so I highly recommend including it.
- Cover the cream cheese filling and place it in the refrigerator until you’re ready to assemble your Danishes. Keeping it chilled will make it easier to spoon and less likely to spread too much during baking.
Assembling Your Perfect Cheese Danishes
Now comes the fun part: turning that beautifully laminated dough into individual Cheese Danishes, ready for their grand debut in the oven. This stage allows for some creativity in shaping, but I’ll guide you through a classic approach.
Shaping the Dough
- Lightly flour your work surface. Remove the chilled, folded dough from the refrigerator.
- Roll out the dough into a large rectangle, approximately 18×12 inches (45×30 cm) and about 1/8 to 1/4 inch (3-6 mm) thick. Try to maintain even thickness throughout for consistent baking.
- Using a sharp knife or a pizza cutter, trim the edges to create a perfectly straight rectangle. This ensures neat, professional-looking Danishes.
- Cut the large rectangle into 12 equal squares. A good size is usually 3×3 inches or 4×4 inches, depending on how large you want your Cheese Danishes to be.
Filling and Folding
- Prepare two baking sheets by lining them with parchment paper.
- Take one dough square. Using your fingertips or the back of a spoon, gently press down on the center of the square, creating a slight indentation and forming a raised border around the perimeter. Be careful not to press all the way through the dough. This border will help hold the filling.
- Spoon about 1.5 to 2 tablespoons of the chilled cream cheese filling into the center of each dough square, right into the indentation you just made. Don’t overfill, or it might spill out during baking.
- You have a few options for shaping:
- Simple Square: Leave as is. The corners will slightly puff up, creating a rustic look for your Cheese Danishes.
- Folded Corners: Bring two opposite corners of the square towards the center, overlapping them slightly, and gently press them together to seal. This creates a slightly more enclosed shape.
- Pinwheel: Cut a small slit from each corner towards the center, stopping about 1/2 inch (1.2 cm) from the filling. Then, take one point from each corner (e.g., the top-right corner’s right point, the top-left corner’s left point, etc.) and fold it over the filling to meet in the center, pressing gently to seal.
For classic Cheese Danishes, I often prefer the simple square or the folded corner method.
- Carefully transfer the shaped Danishes to the prepared baking sheets, leaving at least 2 inches (5 cm) between them to allow for expansion.
Second Rise (Proofing)
- In a small bowl, whisk together the egg and milk or water for the egg wash.
- Gently brush the exposed dough parts of each Danish with the egg wash. This will give them a beautiful golden-brown color during baking. Avoid getting egg wash on the filling.
- Loosely cover the baking sheets with plastic wrap or a light kitchen towel.
- Let the Cheese Danishes proof in a warm, draft-free place for another 45-60 minutes, or until they look slightly puffy and have almost doubled in size. This final rise is critical for achieving a light and airy texture.
Baking Your Golden Cheese Danishes
The moment of truth is here! Baking these Danishes correctly ensures those beautiful layers expand and the filling sets perfectly.
- Preheat your oven to 400°F (200°C) about 15-20 minutes before the end of the second rise. Make sure the oven rack is in the middle position.
- Once proofed, uncover the Danishes. If you haven’t already, brush them again lightly with the egg wash.
- Carefully place the baking sheets into the preheated oven.
- Bake for 15-20 minutes, or until the edges of the Danishes are deeply golden brown and the filling is lightly set and perhaps slightly puffed. Keep an eye on them; ovens vary. If they’re browning too quickly, you can loosely tent them with foil for the last few minutes.
- Remove the baked Cheese Danishes from the oven.
- Transfer them to a wire rack to cool completely before glazing. While tempting to eat them warm, letting them cool allows the filling to fully set and the texture of the dough to stabilize.
Finishing Touch: The Sweet Glaze
A simple powdered sugar glaze adds a lovely touch of sweetness and a professional finish to your homemade Cheese Danishes.
- In a small bowl, whisk together the powdered sugar, 2 tablespoons of milk or water, and the optional vanilla extract until smooth and drizzleable. If the glaze is too thick, add more liquid a teaspoon at a time until you reach your desired consistency. If it’s too thin, add a little more powdered sugar.
- Once the Danishes have cooled completely, drizzle the glaze generously over the top of each one. You can use a spoon or transfer the glaze to a small piping bag or a ziplock bag with a corner snipped off for more precise lines.
- Allow the glaze to set for a few minutes before serving.
- These delightful Cheese Danishes are best enjoyed fresh, but they can be stored in an airtight container at room temperature for up to 2 days, or in the refrigerator for up to 5 days. For optimal freshness, a quick reheat in a toaster oven can bring them back to life.
Conclusion:
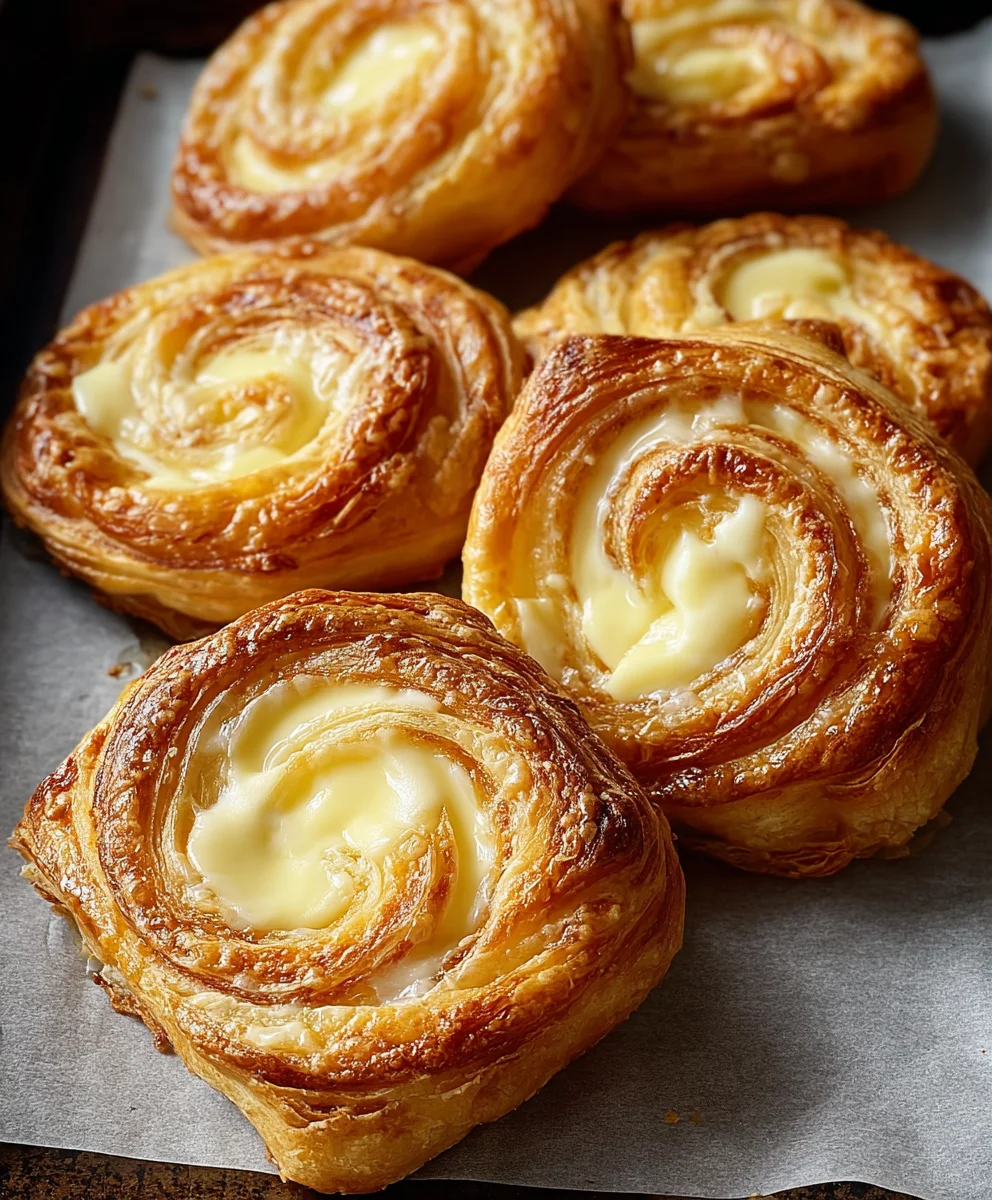
And there you have it, my friends! We’ve journeyed through the simple yet incredibly rewarding process of creating something truly special in your very own kitchen. I genuinely believe that this recipe for homemade Cheese Danishes isn’t just another pastry; it’s an experience, a little slice of bakery-quality heaven that you can effortlessly whip up whenever the craving strikes. There’s an unparalleled joy that comes from pulling a tray of these golden, flaky delights from the oven, their warm, sweet scent filling every corner of your home. It’s the kind of aroma that instantly evokes feelings of comfort, warmth, and pure indulgence. Trust me, once you taste the delicate flakiness of the pastry combined with the creamy, subtly sweet tang of the cheese filling, you’ll understand why I am so passionate about sharing this particular recipe. It’s not just a dish; it’s an invitation to elevate your everyday moments with a touch of homemade magic. You’ll be amazed at how achievable such a sophisticated treat can be!
What makes these so utterly irresistible, you ask? It’s the perfect harmony of textures and flavors. The golden-brown exterior, delicately crisp, gives way to a tender, airy interior, all cradling that luscious, velvety cheese filling. It’s sweet enough to feel like a dessert, yet light enough to be an ideal breakfast or brunch item. The subtle hint of lemon or vanilla in the filling cuts through the richness beautifully, creating a balanced and utterly addictive bite. Plus, the sheer pride of saying, “Yes, I made these myself!” is a reward in itself. This recipe is designed to demystify what might seem like a complex pastry, breaking it down into manageable, enjoyable steps that guarantee a stunning outcome every single time. Prepare for compliments – lots of them!
Now, how best to enjoy these culinary masterpieces? While they are undeniably divine straight out of the oven, perhaps with a dusting of powdered sugar, they also make for an absolutely exquisite addition to a leisurely weekend brunch spread. Imagine them alongside a fresh pot of coffee or a steaming cup of tea, perhaps a bowl of seasonal fruit, and some crispy bacon – pure bliss! They’re also perfect as a sophisticated afternoon snack, a delightful dessert after a light meal, or even packed for a delightful treat on a picnic. Honestly, their versatility is one of their most charming attributes. They store well, too, meaning you can enjoy their deliciousness for a few days, though I highly doubt they’ll last that long once your family and friends discover them!
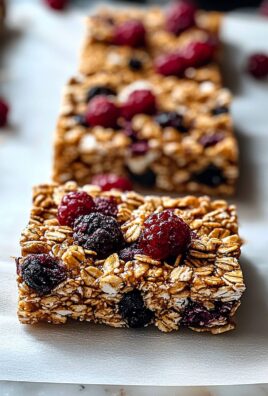
And let’s talk about variations – because the fun doesn’t have to stop with the classic cheese! This recipe serves as a fantastic base for all sorts of creative twists. For a fruity delight, try adding a spoonful of your favorite fruit preserve, like raspberry, cherry, or apricot, to the center of the cheese filling before baking. A sprinkle of mini chocolate chips can transform them into a delightful chocolate-cheese fusion. Or, if you’re feeling adventurous, consider a savory spin: omit the sugar from the cheese filling, add some finely chopped herbs like chives or dill, and maybe even a tiny pinch of red pepper flakes for a surprising kick. You could even fold in some crumbled cooked bacon or a few sun-dried tomato pieces for a more substantial savory pastry. The possibilities are truly endless, limited only by your imagination! Don’t be afraid to experiment; that’s where some of the most exciting culinary discoveries are made.
So, what are you waiting for? I wholeheartedly encourage you to roll up your sleeves, gather your ingredients, and give this recipe a try. You’ll find that the process is not only straightforward but genuinely enjoyable, and the reward is absolutely magnificent. There’s a special kind of satisfaction that comes from creating something so delicious and beautiful with your own hands. I am incredibly eager to hear about your experiences and see your wonderful creations. Please don’t hesitate to share your thoughts, your successes, and any fun variations you come up with in the comments below. Take a picture, tell us about your baking journey, and let’s inspire each other to bake more beautiful things. I truly can’t wait to see the delicious Cheese Danishes you bring to life! Happy baking!
Cheese Danishes
Flaky, buttery pastry with a rich, sweet, and subtly tangy cream cheese filling. This iconic treat, known as ‘wienerbrød’, offers an unparalleled sensory experience, making it a beloved choice for breakfast or a delightful treat.
Ingredients
-
1 cup (240ml) warm milk
-
1/2 cup (100g) granulated sugar, divided
-
2 1/4 teaspoons (1 packet) active dry yeast
-
4 cups (480g) all-purpose flour
-
1 teaspoon salt
-
2 large eggs, at room temperature
-
1/2 cup (113g) unsalted butter, softened
-
1/2 cup (113g) unsalted butter, very cold
-
16 ounces (450g) cream cheese, softened
-
1/2 cup (100g) granulated sugar
-
1 large egg yolk
-
1 teaspoon vanilla extract
-
1 tablespoon lemon zest (optional)
-
1 large egg
-
1 tablespoon milk or water
-
1 cup (120g) powdered sugar
-
2-3 tablespoons milk or water
-
1/2 teaspoon vanilla extract (optional)
Instructions
-
Step 1
In a large bowl, combine warm milk with 2 tablespoons granulated sugar and yeast. Let sit 5-10 minutes until foamy. Add remaining sugar, salt, and eggs. Whisk well. Gradually add flour, mixing until a shaggy dough forms. -
Step 2
Add softened butter, piece by piece, mixing until fully integrated. Knead with a stand mixer (8-10 min) or by hand (12-15 min) until smooth and elastic. Lightly grease a bowl, transfer dough, cover, and let rise in a warm, draft-free spot for 1.5-2 hours until doubled. Gently punch down, form into a rough rectangle, wrap, and refrigerate 2-3 hours or overnight. -
Step 3
Roll very cold 1/2 cup (113g) unsalted butter into an 8×8 inch (20×20 cm) square between parchment paper. -
Step 4
On a lightly floured surface, roll chilled dough into a 16×16 inch (40×40 cm) square. Place butter square diagonally in the center. Fold dough corners over to enclose butter, pinching seams firmly. Gently roll dough into a 20×10 inch (50×25 cm) rectangle. Perform a single fold (fold one-third over the middle, then the remaining third over that). Rotate 90 degrees. Wrap and refrigerate 30 minutes. -
Step 5
Repeat the rolling, single fold, rotation, wrapping, and chilling process (Step 4) two more times, for a total of three single folds with chilling periods in between. After the final fold, wrap and refrigerate the dough until ready to shape. -
Step 6
In a medium bowl, combine softened cream cheese, 1/2 cup (100g) granulated sugar, egg yolk, vanilla extract, and optional lemon zest. Beat until smooth and creamy. Cover and chill until ready to use. -
Step 7
Lightly flour work surface. Roll chilled dough into an 18×12 inch (45×30 cm) rectangle (1/8-1/4 inch thick). Trim edges, then cut into 12 equal squares. Line two baking sheets with parchment paper. Gently press down on the center of each dough square to create an indentation. -
Step 8
Spoon 1.5-2 tablespoons of chilled cream cheese filling into the center of each indentation. Shape as desired (simple square, folded corners, or pinwheel). Transfer shaped danishes to prepared baking sheets, leaving 2 inches (5 cm) between them. -
Step 9
Whisk 1 large egg with 1 tablespoon milk or water for egg wash. Gently brush exposed dough parts. Loosely cover baking sheets and let danishes proof in a warm, draft-free place for 45-60 minutes until slightly puffy. -
Step 10
Preheat oven to 400°F (200°C). Uncover danishes. Bake for 15-20 minutes, or until edges are deeply golden brown and filling is set. Transfer to a wire rack to cool completely. -
Step 11
In a small bowl, whisk powdered sugar, 2-3 tablespoons milk or water, and optional vanilla extract until smooth. Once danishes are completely cool, drizzle glaze generously over the top of each one. Allow glaze to set before serving. Store in an airtight container at room temperature for up to 2 days, or in the refrigerator for up to 5 days.
Important Information
Nutrition Facts (Per Serving)
It is important to consider this information as approximate and not to use it as definitive health advice.
Allergy Information
Please check ingredients for potential allergens and consult a health professional if in doubt.


Leave a Comment