
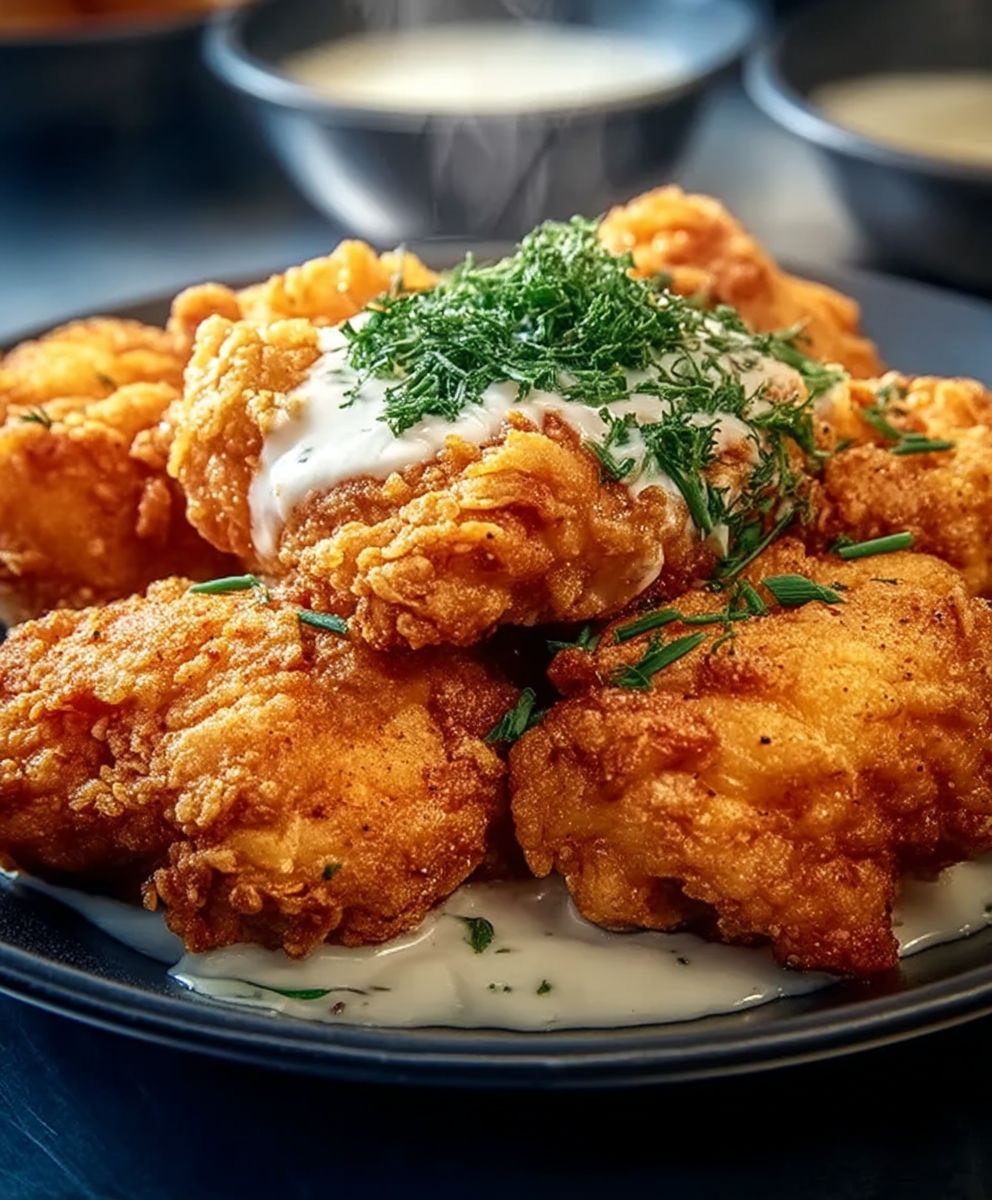
Crispy Fried Chicken: just the name conjures up images of golden-brown perfection, doesn’t it? Forget those soggy, bland imitations you might have encountered; we’re talking about the real deal chicken so crispy it practically sings with every bite, juicy and tender on the inside, and bursting with flavor from the first taste to the last.
Fried chicken, in its various forms, has a rich and fascinating history, tracing back centuries and evolving across cultures. While the exact origins are debated, many believe its roots lie in Scottish and West African culinary traditions. Scottish immigrants brought their frying techniques to the American South, where enslaved Africans, skilled in seasoning and frying, perfected the dish we know and love today. It quickly became a staple of Southern cuisine and a symbol of comfort food.
But what is it about crispy fried chicken that makes it so universally appealing? Is it the satisfying crunch that gives way to succulent meat? Perhaps it’s the nostalgic connection to family gatherings and summer picnics. Or maybe it’s simply the irresistible combination of savory spices and perfectly cooked poultry. Whatever the reason, fried chicken remains a beloved dish for its comforting taste, satisfying texture, and the sheer joy it brings to those who savor it. Get ready to learn how to make the best crispy fried chicken you’ve ever tasted!

Ingredients:
- For the Chicken:
- 3 lbs bone-in, skin-on chicken pieces (thighs, drumsticks, and wings work best)
- 2 cups buttermilk
- 2 tablespoons hot sauce (such as Frank’s RedHot)
- 1 tablespoon salt
- 1 teaspoon black pepper
- 1 teaspoon garlic powder
- 1 teaspoon onion powder
- 1 teaspoon paprika
- For the Breading:
- 3 cups all-purpose flour
- 1 cup cornstarch
- 2 tablespoons salt
- 2 tablespoons black pepper
- 2 tablespoons garlic powder
- 2 tablespoons onion powder
- 2 tablespoons paprika
- 1 tablespoon dried thyme
- 1 tablespoon dried oregano
- 1 teaspoon cayenne pepper (optional, for extra heat)
- 1 teaspoon baking powder
- For Frying:
- Vegetable oil or peanut oil (enough to fill a large, heavy-bottomed pot or deep fryer at least 3 inches deep)
Preparing the Chicken:
Okay, let’s get started! First things first, we need to prep our chicken. This is a crucial step for juicy, flavorful fried chicken.
- Marinate the Chicken: In a large bowl, combine the buttermilk, hot sauce, salt, pepper, garlic powder, onion powder, and paprika. Whisk it all together until it’s well combined. This buttermilk marinade is going to tenderize the chicken and infuse it with flavor.
- Submerge the Chicken: Add the chicken pieces to the buttermilk mixture, making sure they are fully submerged. If needed, you can use a plate or a zip-top bag to help keep the chicken submerged.
- Refrigerate: Cover the bowl (or seal the bag) and refrigerate for at least 4 hours, or preferably overnight. The longer it marinates, the more flavorful and tender the chicken will be. I usually aim for at least 8 hours. This is where the magic happens!
Preparing the Breading:
While the chicken is marinating, let’s get our breading ready. This is what gives our fried chicken that amazing crispy crust.
- Combine Dry Ingredients: In a large, shallow dish (like a baking dish or a large bowl), whisk together the flour, cornstarch, salt, pepper, garlic powder, onion powder, paprika, dried thyme, dried oregano, cayenne pepper (if using), and baking powder. Make sure everything is evenly distributed. The cornstarch helps create a lighter, crispier crust. The baking powder helps the breading puff up a bit, giving it that extra crunch.
- Whisk Thoroughly: Whisk the dry ingredients really well. You want to make sure there are no clumps and that all the spices are evenly distributed throughout the flour mixture. This ensures that every piece of chicken gets a consistent coating of flavor.
The Breading Process:
Now comes the fun part breading the chicken! This can get a little messy, but it’s totally worth it.
- Remove Chicken from Marinade: Take the chicken out of the refrigerator and let it sit at room temperature for about 20-30 minutes. This helps the chicken cook more evenly. Remove each piece of chicken from the buttermilk marinade, letting any excess drip off. You don’t want the chicken to be dripping wet, but you also don’t want to pat it completely dry. A little bit of moisture helps the breading adhere.
- Dredge in Flour Mixture: Place one piece of chicken at a time into the flour mixture. Use your hands to press the flour mixture firmly onto the chicken, making sure it’s completely coated on all sides. Really pack it on there!
- Double Dredge (Optional, but Recommended): For an extra crispy crust, you can double dredge the chicken. After the first coating of flour, dip the chicken back into the buttermilk marinade (just for a quick dip!), and then back into the flour mixture again. This creates a thicker, crispier coating.
- Place on a Wire Rack: As you bread each piece of chicken, place it on a wire rack set over a baking sheet. This allows air to circulate around the chicken, which helps the breading stay crispy.
- Rest the Breading: Let the breaded chicken rest on the wire rack for about 15-20 minutes before frying. This helps the breading adhere to the chicken and prevents it from falling off during frying. This is a crucial step for getting that perfect crispy crust!
Frying the Chicken:
Alright, time to fry! This is where we transform our breaded chicken into golden-brown, crispy perfection. Safety first be very careful when working with hot oil.
- Heat the Oil: Pour the vegetable oil or peanut oil into a large, heavy-bottomed pot or deep fryer. You want the oil to be at least 3 inches deep. Heat the oil over medium-high heat until it reaches a temperature of 325-350°F (160-175°C). Use a deep-fry thermometer to monitor the temperature. Maintaining the correct oil temperature is key to crispy, evenly cooked chicken. If the oil is too hot, the chicken will burn on the outside before it’s cooked through on the inside. If the oil is too cold, the chicken will be greasy.
- Fry in Batches: Carefully place the chicken pieces into the hot oil, making sure not to overcrowd the pot. Overcrowding will lower the oil temperature and result in greasy chicken. Fry in batches of 2-3 pieces at a time, depending on the size of your pot.
- Maintain Oil Temperature: Monitor the oil temperature closely and adjust the heat as needed to maintain a temperature of 325-350°F (160-175°C).
- Fry Until Golden Brown and Cooked Through: Fry the chicken for about 6-8 minutes per side, or until it’s golden brown and cooked through. The internal temperature of the chicken should reach 165°F (74°C). Use a meat thermometer to check the internal temperature. Insert the thermometer into the thickest part of the chicken, avoiding the bone.
- Remove and Drain: Once the chicken is cooked through, carefully remove it from the oil using tongs or a slotted spoon. Place the fried chicken on a clean wire rack set over a baking sheet to drain any excess oil. This helps the chicken stay crispy.
- Repeat: Repeat the frying process with the remaining chicken pieces.
Serving:
And there you have it perfectly crispy, juicy fried chicken! Now, let’s talk about serving.
- Let it Rest: Allow the fried chicken to rest for a few minutes on the wire rack before serving. This allows the juices to redistribute, resulting in even more flavorful chicken.
- Serve Hot: Serve the fried chicken hot and fresh. It’s best enjoyed right away, while the crust is still crispy.
- Pair with Sides: Fried chicken is amazing on its own, but it’s even better with some classic sides. Some of my favorites include:
- Mashed potatoes and gravy
- Coleslaw
- Corn on the cob
- Macaroni and cheese
- Biscuits
- Green beans
- Enjoy! Gather your friends and family, and enjoy your delicious homemade crispy fried chicken!
Conclusion:
So there you have it! This Crispy Fried Chicken recipe isn’t just another fried chicken recipe; it’s a guaranteed crowd-pleaser that delivers that perfect crispy exterior and juicy, flavorful interior every single time. I know, I know, there are a million fried chicken recipes out there, but trust me, this one is different. The combination of the buttermilk marinade, the perfectly seasoned flour mixture, and the precise frying technique all work together to create fried chicken perfection. It’s the kind of dish that will have your family and friends begging for more, and honestly, what’s better than that?
I truly believe this recipe is a must-try because it’s not overly complicated, even for beginner cooks. I’ve broken down each step to be as clear and concise as possible, so you can confidently tackle this recipe and achieve restaurant-quality results in your own kitchen. Plus, the flavor profile is incredibly versatile. You can easily adjust the spices in the flour mixture to suit your own taste preferences. Want a little more heat? Add a pinch of cayenne pepper or some smoked paprika. Prefer a more savory flavor? Increase the amount of garlic powder or onion powder. The possibilities are endless!
But the deliciousness doesn’t stop there! Think about all the amazing ways you can serve this Crispy Fried Chicken. Of course, it’s fantastic on its own, served with classic sides like creamy mashed potatoes, buttery corn on the cob, and tangy coleslaw. But don’t be afraid to get creative!
Serving Suggestions and Variations:
* Fried Chicken Sandwiches: Slap a crispy chicken breast between two toasted buns with some lettuce, tomato, and your favorite sauce (mayo, sriracha mayo, or even a honey mustard would be amazing!).
* Chicken and Waffles: A classic for a reason! The sweet and savory combination is simply irresistible. Drizzle with maple syrup and a sprinkle of powdered sugar for the ultimate indulgence.
* Fried Chicken Salad: Top a bed of mixed greens with sliced fried chicken, crumbled bacon, avocado, and a light vinaigrette for a satisfying and flavorful salad.
* Spicy Fried Chicken Tenders: Cut the chicken into strips before breading and frying, then toss them in your favorite hot sauce for a fiery kick. Serve with blue cheese or ranch dressing for dipping.
* Picnic Basket Staple: Cold fried chicken is a picnic classic! Pack it up with some potato salad, deviled eggs, and a refreshing beverage for a perfect outdoor meal.
* Chicken and Biscuits: Use the fried chicken to create a hearty and comforting chicken and biscuits dish. Top warm biscuits with the chicken and a creamy gravy.
I’m so excited for you to try this recipe and experience the joy of homemade Crispy Fried Chicken. It’s a dish that brings people together, creates lasting memories, and satisfies even the most discerning palates. So, gather your ingredients, put on some music, and get ready to fry up some deliciousness!
And most importantly, I want to hear about your experience! Did you make any modifications to the recipe? What were your favorite sides to serve with it? What did your family and friends think? Please, share your thoughts and photos in the comments below. I can’t wait to see your culinary creations and hear your feedback. Happy frying!
Crispy Fried Chicken: The Ultimate Guide to Perfect Crispy Chicken
Classic, crispy, and juicy fried chicken made from scratch. Buttermilk marinated and double-dredged for maximum flavor and crunch!
Ingredients
- 3 lbs bone-in, skin-on chicken pieces (thighs, drumsticks, and wings work best)
- 2 cups buttermilk
- 2 tablespoons hot sauce (such as Frank’s RedHot)
- 1 tablespoon salt
- 1 teaspoon black pepper
- 1 teaspoon garlic powder
- 1 teaspoon onion powder
- 1 teaspoon paprika
- 3 cups all-purpose flour
- 1 cup cornstarch
- 2 tablespoons salt
- 2 tablespoons black pepper
- 2 tablespoons garlic powder
- 2 tablespoons onion powder
- 2 tablespoons paprika
- 1 tablespoon dried thyme
- 1 tablespoon dried oregano
- 1 teaspoon cayenne pepper (optional, for extra heat)
- 1 teaspoon baking powder
- Vegetable oil or peanut oil (enough to fill a large, heavy-bottomed pot or deep fryer at least 3 inches deep)
Instructions
- Marinate the Chicken: In a large bowl, combine the buttermilk, hot sauce, salt, pepper, garlic powder, onion powder, and paprika. Whisk well.
- Submerge the Chicken: Add the chicken pieces to the buttermilk mixture, ensuring they are fully submerged. Refrigerate for at least 4 hours, or preferably overnight (8+ hours).
- Combine Dry Ingredients: In a large, shallow dish, whisk together the flour, cornstarch, salt, pepper, garlic powder, onion powder, paprika, dried thyme, dried oregano, cayenne pepper (if using), and baking powder.
- Remove Chicken from Marinade: Take the chicken out of the refrigerator and let it sit at room temperature for about 20-30 minutes. Remove each piece of chicken from the buttermilk marinade, letting any excess drip off.
- Dredge in Flour Mixture: Place one piece of chicken at a time into the flour mixture. Use your hands to press the flour mixture firmly onto the chicken, making sure it’s completely coated on all sides.
- Double Dredge (Optional): For an extra crispy crust, dip the chicken back into the buttermilk marinade (just for a quick dip!), and then back into the flour mixture again.
- Place on a Wire Rack: As you bread each piece of chicken, place it on a wire rack set over a baking sheet.
- Rest the Breading: Let the breaded chicken rest on the wire rack for about 15-20 minutes before frying.
- Heat the Oil: Pour the vegetable oil or peanut oil into a large, heavy-bottomed pot or deep fryer. You want the oil to be at least 3 inches deep. Heat the oil over medium-high heat until it reaches a temperature of 325-350°F (160-175°C). Use a deep-fry thermometer to monitor the temperature.
- Fry in Batches: Carefully place the chicken pieces into the hot oil, making sure not to overcrowd the pot. Fry in batches of 2-3 pieces at a time, depending on the size of your pot.
- Maintain Oil Temperature: Monitor the oil temperature closely and adjust the heat as needed to maintain a temperature of 325-350°F (160-175°C).
- Fry Until Golden Brown and Cooked Through: Fry the chicken for about 6-8 minutes per side, or until it’s golden brown and cooked through. The internal temperature of the chicken should reach 165°F (74°C). Use a meat thermometer to check the internal temperature. Insert the thermometer into the thickest part of the chicken, avoiding the bone.
- Remove and Drain: Once the chicken is cooked through, carefully remove it from the oil using tongs or a slotted spoon. Place the fried chicken on a clean wire rack set over a baking sheet to drain any excess oil.
- Repeat: Repeat the frying process with the remaining chicken pieces.
- Let it Rest: Allow the fried chicken to rest for a few minutes on the wire rack before serving.
- Serve Hot: Serve the fried chicken hot and fresh. It’s best enjoyed right away, while the crust is still crispy.
Notes
- Marinating the chicken overnight is highly recommended for the best flavor and tenderness.
- Double dredging creates a thicker, crispier crust.
- Resting the breaded chicken before frying helps the breading adhere.
- Maintain the correct oil temperature (325-350°F) for crispy, evenly cooked chicken.
- Use a meat thermometer to ensure the chicken is cooked through (165°F internal temperature).
- Serve with your favorite sides, such as mashed potatoes and gravy, coleslaw, corn on the cob, macaroni and cheese, biscuits, or green beans.
Leave a Comment