
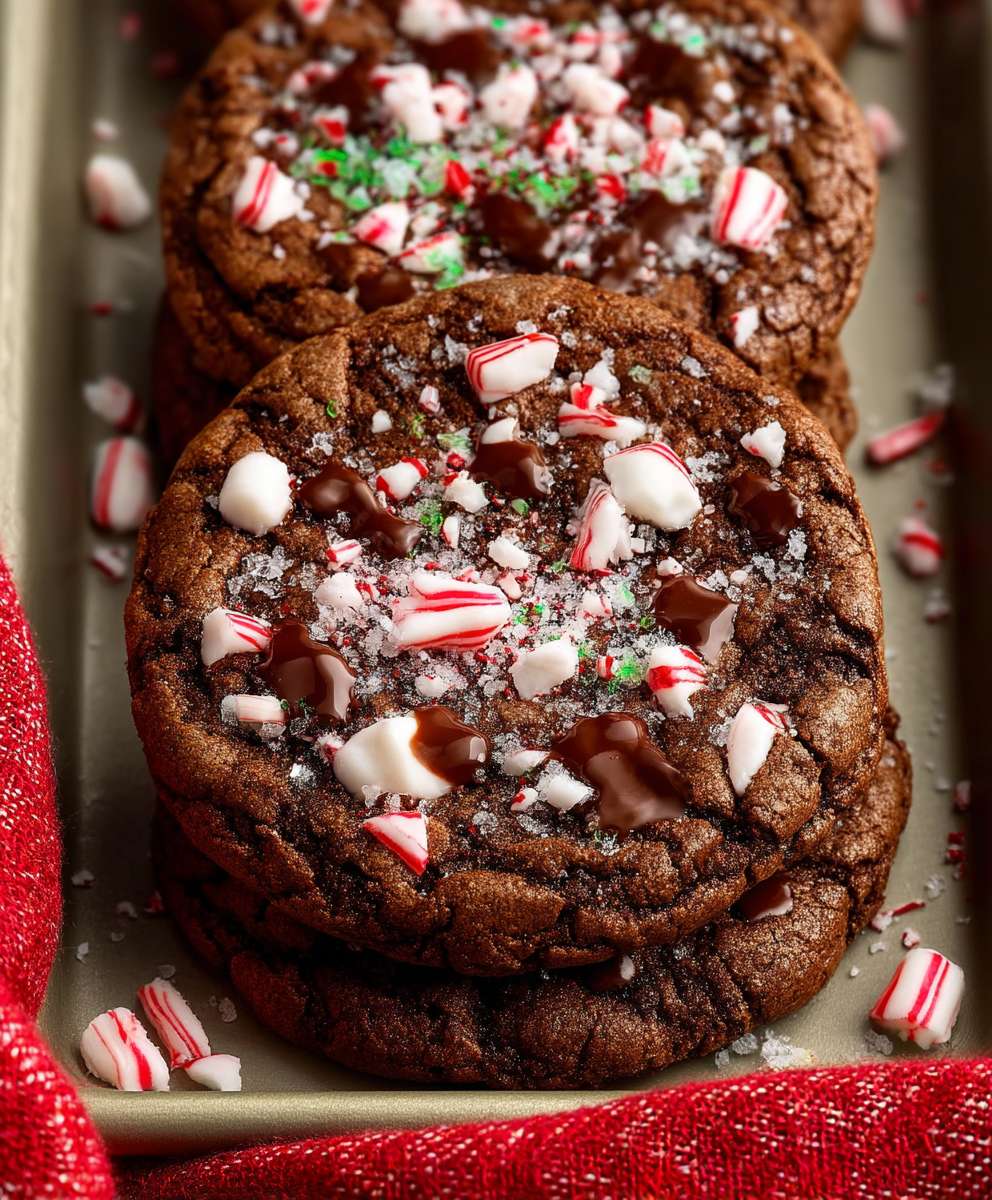
Chocolate Peppermint Cookies: the mere mention of them conjures up images of cozy fireplaces, twinkling lights, and the joyous spirit of the holiday season. But what if I told you that these delightful treats are more than just a festive indulgence? They’re a delicious slice of history, a testament to the enduring power of flavor combinations, and, dare I say, the perfect cookie?
The marriage of chocolate and peppermint is a classic for a reason. While the exact origins are debated, the pairing gained immense popularity in the early 20th century, coinciding with the rise of mass-produced candies and the increasing accessibility of both chocolate and peppermint flavoring. It’s a flavor profile that dances on the palate the rich, bittersweet depth of chocolate perfectly balanced by the cool, refreshing zing of peppermint. This combination isn’t just tasty; it’s an experience.
People adore Chocolate Peppermint Cookies for their delightful contrast in textures and tastes. The soft, chewy cookie base gives way to a burst of peppermint, creating a symphony of sensations with every bite. Plus, let’s be honest, they’re incredibly easy to make! Whether you’re a seasoned baker or a kitchen novice, you can whip up a batch of these festive cookies in no time. So, grab your apron, preheat your oven, and let’s embark on a journey to create the most irresistible Chocolate Peppermint Cookies you’ve ever tasted!

Ingredients:
- 1 cup (2 sticks) unsalted butter, softened
- 1 ½ cups granulated sugar
- ½ cup packed light brown sugar
- 2 large eggs
- 1 teaspoon vanilla extract
- ½ teaspoon peppermint extract
- 2 ¾ cups all-purpose flour
- ¾ cup unsweetened cocoa powder
- 1 teaspoon baking soda
- ½ teaspoon salt
- 1 cup semi-sweet chocolate chips
- ½ cup crushed peppermint candies (plus extra for topping)
Preparing the Dough:
- Cream the Butter and Sugars: In a large bowl, or the bowl of your stand mixer, cream together the softened butter, granulated sugar, and brown sugar until light and fluffy. This usually takes about 3-5 minutes. Make sure to scrape down the sides of the bowl occasionally to ensure everything is evenly mixed. We want a nice, smooth base for our cookies!
- Incorporate the Wet Ingredients: Beat in the eggs one at a time, mixing well after each addition. Then, stir in the vanilla extract and peppermint extract. Don’t overmix at this stage; just combine until everything is incorporated. The peppermint extract is potent, so be careful not to add too much, or your cookies will taste like toothpaste!
- Combine the Dry Ingredients: In a separate medium bowl, whisk together the all-purpose flour, cocoa powder, baking soda, and salt. Whisking ensures that the baking soda and salt are evenly distributed throughout the flour mixture, which is crucial for proper leavening and flavor.
- Gradually Add Dry Ingredients to Wet Ingredients: Gradually add the dry ingredients to the wet ingredients, mixing on low speed until just combined. Be careful not to overmix the dough, as this can lead to tough cookies. Overmixing develops the gluten in the flour, resulting in a less tender cookie.
- Fold in the Chocolate Chips and Peppermint Candies: Gently fold in the chocolate chips and crushed peppermint candies until they are evenly distributed throughout the dough. I like to use a rubber spatula for this step to avoid overmixing.
- Chill the Dough: Cover the bowl with plastic wrap and chill the dough in the refrigerator for at least 1 hour, or preferably 2-3 hours. Chilling the dough allows the gluten to relax, which results in a more tender cookie. It also prevents the cookies from spreading too much during baking. You can even chill it overnight if you want to bake them the next day!
Baking the Cookies:
- Preheat the Oven: Preheat your oven to 350°F (175°C). Line baking sheets with parchment paper or silicone baking mats. Parchment paper prevents the cookies from sticking and makes cleanup a breeze. Silicone mats provide even heat distribution, which helps prevent the cookies from burning on the bottom.
- Scoop the Dough: Use a cookie scoop or spoon to drop rounded tablespoons of dough onto the prepared baking sheets, leaving about 2 inches between each cookie. This spacing is important because the cookies will spread as they bake.
- Add Extra Peppermint Topping (Optional): If desired, sprinkle the tops of the cookies with extra crushed peppermint candies before baking. This adds a festive touch and enhances the peppermint flavor.
- Bake the Cookies: Bake for 9-11 minutes, or until the edges are set and the centers are slightly soft. The baking time may vary depending on your oven, so keep a close eye on the cookies. They should be slightly underbaked for the best texture.
- Cool the Cookies: Remove the baking sheets from the oven and let the cookies cool on the baking sheets for a few minutes before transferring them to a wire rack to cool completely. This allows the cookies to firm up slightly, making them easier to handle.
Tips and Variations:
- For a Chewier Cookie: Use melted butter instead of softened butter. This will result in a flatter, chewier cookie.
- For a More Intense Chocolate Flavor: Use dark cocoa powder instead of unsweetened cocoa powder.
- Add Espresso Powder: Add 1 teaspoon of espresso powder to the dry ingredients to enhance the chocolate flavor.
- Use Different Chocolate Chips: Experiment with different types of chocolate chips, such as milk chocolate, white chocolate, or even peppermint bark chips.
- Make Cookie Sandwiches: Sandwich vanilla ice cream or peppermint ice cream between two cookies for a delicious treat.
- Storage: Store the cookies in an airtight container at room temperature for up to 5 days. You can also freeze the cookies for up to 2 months.
- Peppermint Extract Alternative: If you don’t have peppermint extract, you can use peppermint oil, but use it sparingly as it’s much more concentrated. Start with just a drop or two and taste the dough before adding more.
- Crushed Candy Canes: Instead of pre-crushed peppermint candies, you can use candy canes. Just unwrap them and place them in a zip-top bag. Use a rolling pin or meat mallet to crush them into small pieces.
- Don’t Overbake: The key to soft and chewy cookies is to avoid overbaking them. They should still look slightly soft in the center when you take them out of the oven. They will continue to bake as they cool on the baking sheet.
- Room Temperature Ingredients: Using room temperature ingredients, especially the butter and eggs, is crucial for creating a smooth and well-emulsified dough. This helps to ensure that the cookies have a tender and even texture.
- Measuring Flour: Be careful when measuring the flour. Spoon the flour into the measuring cup and level it off with a knife. Avoid scooping the flour directly from the bag, as this can pack the flour and result in too much flour in the recipe.
- Baking Sheet Temperature: Make sure your baking sheets are cool before placing the cookie dough on them. If the baking sheets are still warm from a previous batch, the cookies may spread too much.
- High Altitude Adjustments: If you live at a high altitude, you may need to adjust the recipe slightly. Try reducing the sugar by 1-2 tablespoons and adding 1-2 tablespoons of extra flour. You may also need to increase the baking time slightly.
- Gluten-Free Option: To make these cookies gluten-free, substitute the all-purpose flour with a gluten-free all-purpose flour blend. Make sure the blend contains xanthan gum, which helps to bind the ingredients together.
Troubleshooting:
Cookies Spreading Too Much:
- Make sure the butter is not too soft. It should be softened but still slightly firm.
- Chill the dough for a longer period of time.
- Don’t grease the baking sheets. Use parchment paper or silicone baking mats instead.
- Make sure the oven temperature is accurate.
Cookies Too Dry:
- Don’t overbake the cookies.
- Make sure you are using the correct amount of flour.
- Add a tablespoon or two of milk to the dough.
Cookies Too Hard:
- Overmixing the dough can lead to tough cookies. Mix the dough until just combined.
- Make sure you are using the correct amount of sugar.
Cookies Not Spreading Enough:
- The butter may be too cold.
- The dough may be too dry. Add a tablespoon or two of milk to the dough.
Enjoy your delicious Chocolate Peppermint Cookies! They’re perfect for the holidays or any time you’re craving a festive treat.
Conclusion:
And there you have it! These Chocolate Peppermint Cookies are more than just a holiday treat; they’re a symphony of flavors and textures that will brighten any day. The rich, dark chocolate perfectly complements the cool, refreshing peppermint, creating a truly irresistible combination. I know, I know, there are a million cookie recipes out there, but trust me on this one these are special.
Why are they a must-try? Because they’re incredibly easy to make, even for novice bakers. The recipe is straightforward, using ingredients you probably already have in your pantry. Plus, the aroma that fills your kitchen while they’re baking is pure magic. But more than that, they’re just so darn delicious! The slightly chewy texture, the intense chocolate flavor, and that burst of peppermint freshness it’s a winning combination every single time.
Beyond the basic recipe, there’s plenty of room for experimentation. Feeling adventurous? Try adding a pinch of sea salt to the dough to enhance the chocolate flavor. Or, for an extra layer of peppermint intensity, drizzle melted white chocolate infused with peppermint extract over the cooled cookies. You could even crush some extra candy canes and sprinkle them on top while the white chocolate is still wet. The possibilities are endless!
As for serving suggestions, these cookies are perfect on their own with a glass of cold milk or a steaming mug of hot chocolate. They also make a fantastic addition to a holiday cookie platter or a thoughtful homemade gift. Imagine presenting a beautifully wrapped box of these Chocolate Peppermint Cookies to your friends, family, or neighbors they’ll be absolutely delighted! I personally love crumbling them over vanilla ice cream for a decadent dessert. Another fun idea is to use them as the base for mini ice cream sandwiches. Just scoop a small amount of peppermint ice cream between two cookies and freeze for a few hours. Talk about a festive treat!
Don’t be intimidated by the idea of baking. This recipe is designed to be foolproof, and I’m confident that you’ll be thrilled with the results. The key is to follow the instructions carefully and not overbake the cookies. They should be slightly soft in the center when you take them out of the oven, as they will continue to firm up as they cool.
I truly believe that these cookies will become a new holiday tradition in your household. They’re the perfect way to spread some cheer and create lasting memories with your loved ones. So, what are you waiting for? Preheat your oven, gather your ingredients, and get ready to bake some magic!
I’m so excited for you to try this recipe! And I’d absolutely love to hear about your experience. Did you make any variations? Did you serve them with anything special? Please, share your photos and stories in the comments below. Let’s create a community of cookie lovers and spread the joy of baking together! Happy baking, and I hope you enjoy every single bite of these delightful Chocolate Peppermint Cookies! I can’t wait to hear what you think!
Chocolate Peppermint Cookies: The Ultimate Holiday Recipe
Decadent chocolate cookies bursting with peppermint flavor! These festive treats are perfect for the holidays and are sure to be a crowd-pleaser.
Ingredients
- 1 cup (2 sticks) unsalted butter, softened
- 1 ½ cups granulated sugar
- ½ cup packed light brown sugar
- 2 large eggs
- 1 teaspoon vanilla extract
- ½ teaspoon peppermint extract
- 2 ¾ cups all-purpose flour
- ¾ cup unsweetened cocoa powder
- 1 teaspoon baking soda
- ½ teaspoon salt
- 1 cup semi-sweet chocolate chips
- ½ cup crushed peppermint candies (plus extra for topping)
Instructions
- Cream the Butter and Sugars: In a large bowl, or the bowl of your stand mixer, cream together the softened butter, granulated sugar, and brown sugar until light and fluffy (3-5 minutes). Scrape down the sides of the bowl occasionally.
- Incorporate the Wet Ingredients: Beat in the eggs one at a time, mixing well after each addition. Stir in the vanilla extract and peppermint extract. Combine until just incorporated.
- Combine the Dry Ingredients: In a separate medium bowl, whisk together the all-purpose flour, cocoa powder, baking soda, and salt.
- Gradually Add Dry Ingredients to Wet Ingredients: Gradually add the dry ingredients to the wet ingredients, mixing on low speed until just combined. Be careful not to overmix.
- Fold in the Chocolate Chips and Peppermint Candies: Gently fold in the chocolate chips and crushed peppermint candies until evenly distributed.
- Chill the Dough: Cover the bowl with plastic wrap and chill the dough in the refrigerator for at least 1 hour, or preferably 2-3 hours (or overnight).
- Preheat the Oven: Preheat your oven to 350°F (175°C). Line baking sheets with parchment paper or silicone baking mats.
- Scoop the Dough: Use a cookie scoop or spoon to drop rounded tablespoons of dough onto the prepared baking sheets, leaving about 2 inches between each cookie.
- Add Extra Peppermint Topping (Optional): If desired, sprinkle the tops of the cookies with extra crushed peppermint candies before baking.
- Bake the Cookies: Bake for 9-11 minutes, or until the edges are set and the centers are slightly soft.
- Cool the Cookies: Remove the baking sheets from the oven and let the cookies cool on the baking sheets for a few minutes before transferring them to a wire rack to cool completely.
Notes
- For a Chewier Cookie: Use melted butter instead of softened butter.
- For a More Intense Chocolate Flavor: Use dark cocoa powder instead of unsweetened cocoa powder.
- Add Espresso Powder: Add 1 teaspoon of espresso powder to the dry ingredients to enhance the chocolate flavor.
- Use Different Chocolate Chips: Experiment with different types of chocolate chips, such as milk chocolate, white chocolate, or even peppermint bark chips.
- Make Cookie Sandwiches: Sandwich vanilla ice cream or peppermint ice cream between two cookies for a delicious treat.
- Storage: Store the cookies in an airtight container at room temperature for up to 5 days. You can also freeze the cookies for up to 2 months.
- Peppermint Extract Alternative: If you don’t have peppermint extract, you can use peppermint oil, but use it sparingly as it’s much more concentrated. Start with just a drop or two and taste the dough before adding more.
- Crushed Candy Canes: Instead of pre-crushed peppermint candies, you can use candy canes. Just unwrap them and place them in a zip-top bag. Use a rolling pin or meat mallet to crush them into small pieces.
- Don’t Overbake: The key to soft and chewy cookies is to avoid overbaking them. They should still look slightly soft in the center when you take them out of the oven. They will continue to bake as they cool on the baking sheet.
- Room Temperature Ingredients: Using room temperature ingredients, especially the butter and eggs, is crucial for creating a smooth and well-emulsified dough. This helps to ensure that the cookies have a tender and even texture.
- Measuring Flour: Be careful when measuring the flour. Spoon the flour into the measuring cup and level it off with a knife. Avoid scooping the flour directly from the bag, as this can pack the flour and result in too much flour in the recipe.
- Baking Sheet Temperature: Make sure your baking sheets are cool before placing the cookie dough on them. If the baking sheets are still warm from a previous batch, the cookies may spread too much.
- High Altitude Adjustments: If you live at a high altitude, you may need to adjust the recipe slightly. Try reducing the sugar by 1-2 tablespoons and adding 1-2 tablespoons of extra flour. You may also need to increase the baking time slightly.
- Gluten-Free Option: To make these cookies gluten-free, substitute the all-purpose flour with a gluten-free all-purpose flour blend. Make sure the blend contains xanthan gum, which helps to bind the ingredients together.


Leave a Comment