
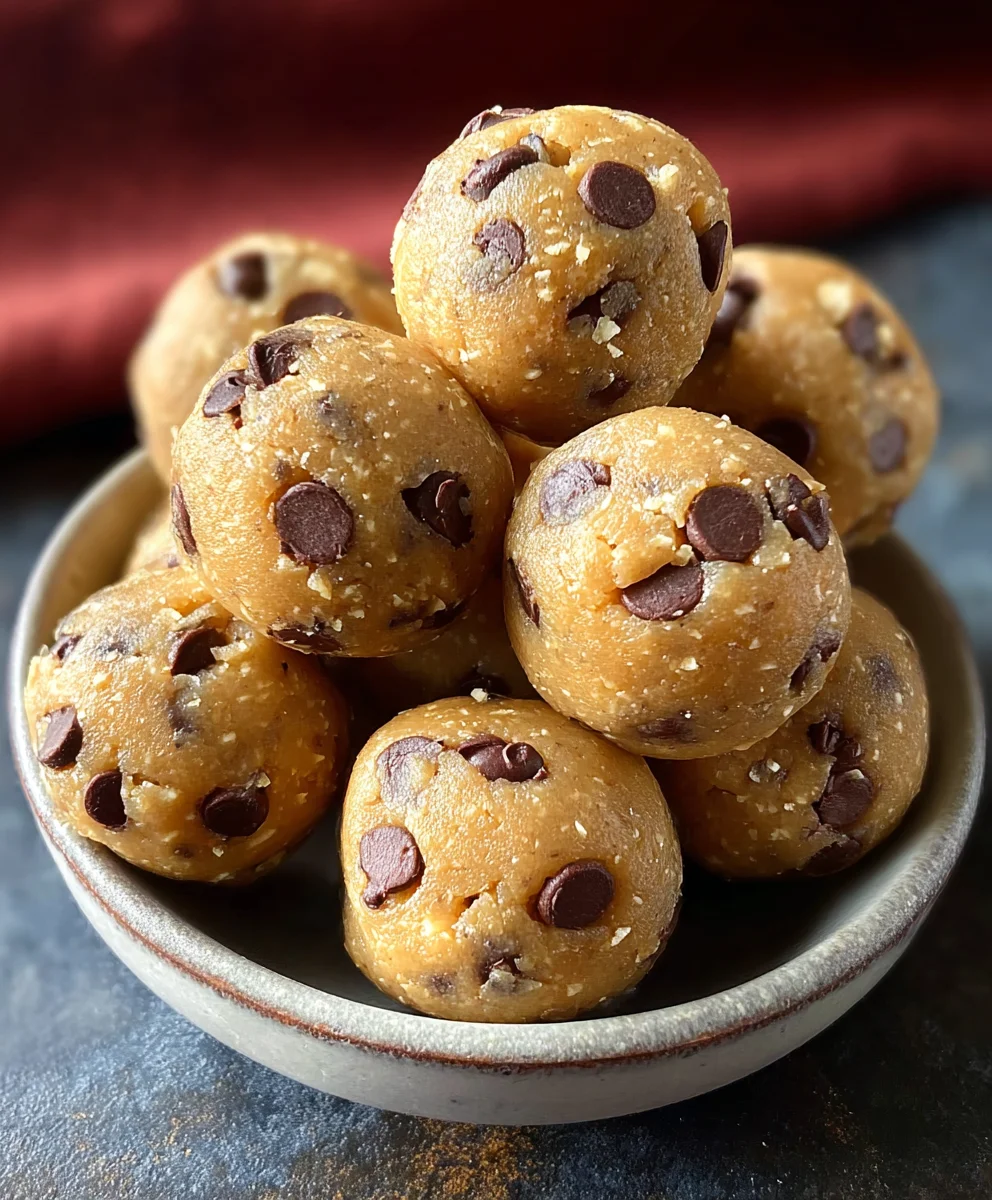
Chickpea Cookie Dough Balls – just the name itself promises a delightful paradox: the wholesome goodness of chickpeas transformed into an irresistibly decadent, yet remarkably healthy, treat. I remember the first time I discovered the magic of using legumes in desserts; it felt like unearthing a secret culinary hack. For anyone who craves the comforting taste of raw cookie dough but seeks a guilt-free indulgence, these no-bake wonders are an absolute revelation.
The Clever Transformation: From Savory to Sweet
Traditionally, chickpeas are celebrated in savory dishes like hummus or curries, but their neutral flavor and creamy texture make them an unexpected hero in the sweet world. This clever adaptation addresses our collective longing for a wholesome snack that doesn’t compromise on flavor or satisfaction. People adore these Chickpea Cookie Dough Balls not only for their incredibly delicious, sweet, and subtly nutty taste but also for their wonderfully soft, chewy texture that perfectly mimics traditional cookie dough. Furthermore, their convenience is unmatched; requiring no baking, they come together in minutes, making them the ultimate grab-and-go healthy snack or a quick dessert fix. They’re also a fantastic option for those adhering to vegan or gluten-free diets, proving that healthy eating can be utterly delightful and incredibly simple.

Ingredients:
- 1 (15-ounce) can chickpeas (garbanzo beans): Rinsed very, very well and thoroughly drained. This is crucial for achieving that authentic cookie dough flavor without any beany undertones.
- ½ cup creamy nut butter: I typically use unsalted, unsweetened peanut butter or almond butter. Cashew butter also works beautifully for a milder flavor. Make sure it’s the drippy, natural kind, not the stiff, hydrogenated variety, as this will affect the texture significantly.
- ⅓ cup maple syrup: Or agave nectar. You can adjust this to your personal sweetness preference. For a less sweet version, start with ¼ cup and taste before adding more. Honey can also be used, but it will impart a slightly different flavor profile.
- 1 teaspoon vanilla extract: High-quality vanilla makes a big difference here, really enhancing that classic cookie dough taste.
- ¼ teaspoon sea salt: Just a pinch to balance the sweetness and bring out the other flavors.
- Optional: 2-4 tablespoons oat flour or almond flour: This is my secret ingredient for a slightly firmer, more “doughy” texture, especially if your chickpeas are very moist or your nut butter is particularly runny. Start with 2 tablespoons and add more if needed.
- ½ cup chocolate chips: My absolute favorite is mini semi-sweet chocolate chips, but dark chocolate chunks, milk chocolate chips, or even white chocolate chips would be delicious. You could also use sugar-free chocolate chips for a healthier option.
- Optional mix-ins: Consider 2 tablespoons shredded unsweetened coconut, 1-2 tablespoons finely chopped nuts (like walnuts or pecans), or a sprinkle of sprinkles for a fun twist!
Preparing the Chickpeas for Optimal Texture
The first and arguably most important step in crafting truly exceptional Chickpea Cookie Dough Balls is the preparation of your chickpeas. I’ve learned over many batches that this is where success truly begins. First, you’ll want to take your canned chickpeas and pour them into a colander. Rinse them under cold running water for at least one full minute, or even two. I really emphasize rinsing them thoroughly because this washes away the aquafaba (the liquid they’re packed in) and any residual flavor that might remind you of, well, beans. Our goal here is pure, unadulterated cookie dough bliss, not a hint of hummus!
Once rinsed, let them drain for a few minutes. Then, for the absolute best results, I like to take an extra step: pat them super dry with a clean kitchen towel or paper towels. You can even roll them around in the towel to remove as much moisture as possible. Excess moisture can lead to a softer, less firm cookie dough ball, which isn’t what we’re aiming for. For an even smoother texture, some people (myself included, when I have the time!) like to gently rub the chickpeas between their fingers or with the towel to remove the thin skins. These skins are completely edible and won’t harm anything, but removing them can contribute to an even creamier, melt-in-your-mouth texture. It’s a little extra effort, but I promise you, it’s worth it for the ultimate Chickpea Cookie Dough Balls experience.
Don’t skip this drying step. I’ve had batches that turned out too soft because I rushed this part, and while they were still tasty, they weren’t quite the firm, delightful cookie dough balls I craved. So, take your time, get those chickpeas as dry as a desert, and you’ll be setting yourself up for success. This meticulous preparation is what transforms humble chickpeas into a decadent, protein-packed treat that truly satisfies any cookie dough craving.
Blending the Base Dough to Perfection
Now that our chickpeas are prepped and perfectly dry, it’s time to bring everything together to form the luscious base for our Chickpea Cookie Dough Balls. Grab your food processor – I find it works best for achieving that super smooth, creamy consistency we’re looking for. A high-speed blender can also work, but you might need to stop and scrape down the sides more frequently.
- Combine Wet Ingredients First: I always start by adding the creamy nut butter, maple syrup (or your chosen sweetener), and vanilla extract to the food processor. Process these together for about 30 seconds to a minute, until they’re thoroughly combined and smooth. This step ensures an even distribution of sweetness and flavor throughout the dough, and helps to warm the nut butter slightly, making it easier to blend with the chickpeas.
- Add the Chickpeas, Salt, and Optional Flour: Next, add your prepared, super-dry chickpeas, the sea salt, and if you’re using it, the oat or almond flour. I always recommend adding the flour if you want a slightly thicker, more robust dough that truly mimics traditional cookie dough texture.
- Process Until Completely Smooth: Here’s where the magic happens! Process the mixture continuously, scraping down the sides of the food processor bowl every 30-60 seconds. You’ll notice it transforming from chunky to a paste, and then eventually into a smooth, creamy dough. This can take anywhere from 2 to 5 minutes, depending on the power of your food processor and how dry your chickpeas were.
- Achieving the Ideal Consistency: What we’re looking for is a completely uniform, thick, and sticky dough. There should be no visible chickpea chunks. If your dough looks too dry and isn’t coming together, you can add a tiny splash of milk (dairy or non-dairy, about ½ to 1 tablespoon at a time) to help it blend, but be very careful not to add too much. Conversely, if it seems too wet or soft, which can happen if your chickpeas weren’t dry enough or your nut butter was very thin, you can add another tablespoon or two of oat or almond flour and process again until it thickens up to your liking. I find that the ideal consistency is similar to a very thick, somewhat sticky hummus – but don’t worry, the flavor will be pure cookie dough!
- Taste and Adjust: This is one of my favorite parts! Once your dough is smooth, stop the processor and take a small spoonful to taste. This is your chance to adjust the sweetness or add another tiny pinch of salt if you feel it needs it. Maybe you want a little more vanilla? Go for it! This is your kitchen, your rules, and your amazing Chickpea Cookie Dough Balls.
Getting this base dough right is fundamental. It lays the foundation for a truly delicious and satisfying treat. The smooth, creamy texture of this chickpea base is what surprises people most, as they can rarely guess the secret ingredient!
Integrating the Delicious Mix-ins
With our wonderfully smooth and flavorful base dough ready, it’s time to introduce the stars of the show – the mix-ins! This is where we truly elevate our Chickpea Cookie Dough Balls from a simple sweet treat to an irresistible, textural delight. The beauty of this recipe is its versatility, allowing you to customize it to your heart’s content.
- Transfer the Dough: Gently scrape your perfectly blended chickpea dough from the food processor bowl into a medium-sized mixing bowl. I always find it easier to fold in mix-ins by hand in a separate bowl rather than trying to do it in the food processor, which can over-process your beloved chocolate chips into tiny fragments.
- Add Your Primary Mix-ins: Now, carefully pour in your ½ cup of chocolate chips. As I mentioned before, I’m a huge fan of mini semi-sweet chips because they distribute so well and give you a bit of chocolate in every bite. However, feel free to use your preferred chocolate – dark, milk, white, or even a mix! If you’re adding other larger primary mix-ins, like chopped nuts or dried fruit, now is the time to add them too.
- Gentle Folding Technique: Using a spatula or a sturdy spoon, gently fold the chocolate chips and any other mix-ins into the dough. The key here is to fold, not stir vigorously. We want to incorporate them evenly without crushing the chips or overworking the dough. Continue folding until the mix-ins are distributed throughout the dough. It might seem a little thick and stubborn at first, but with a bit of patience, everything will come together beautifully.
- Consider Optional Enhancements:
Unleash Your Creativity with Extra Mix-ins!
This is where you can truly make these Chickpea Cookie Dough Balls your own. I love experimenting with different additions:
- Shredded Coconut: A couple of tablespoons of unsweetened shredded coconut adds a fantastic chewiness and a hint of tropical flavor.
- Chopped Nuts: Finely chopped walnuts, pecans, or even peanuts can add a lovely crunch and a nutty depth of flavor.
- Sprinkles: For a fun, festive look, especially if you’re making these for a party or a special occasion, a tablespoon or two of colorful sprinkles can be delightful. Just be aware that some sprinkles can bleed color if left in the dough for too long.
- Spices: A tiny pinch of cinnamon or nutmeg can add a wonderful warmth, especially if you’re thinking of a snickerdoodle-inspired flavor.
- Protein Powder: For an extra protein boost, some people like to fold in a scoop of vanilla or unflavored protein powder. If you do this, you might need to add a touch more liquid (milk) to maintain the desired consistency, as protein powder can absorb moisture.
Remember to fold any additional mix-ins in gently, just as you did with the chocolate chips, ensuring they are evenly distributed throughout the dough.
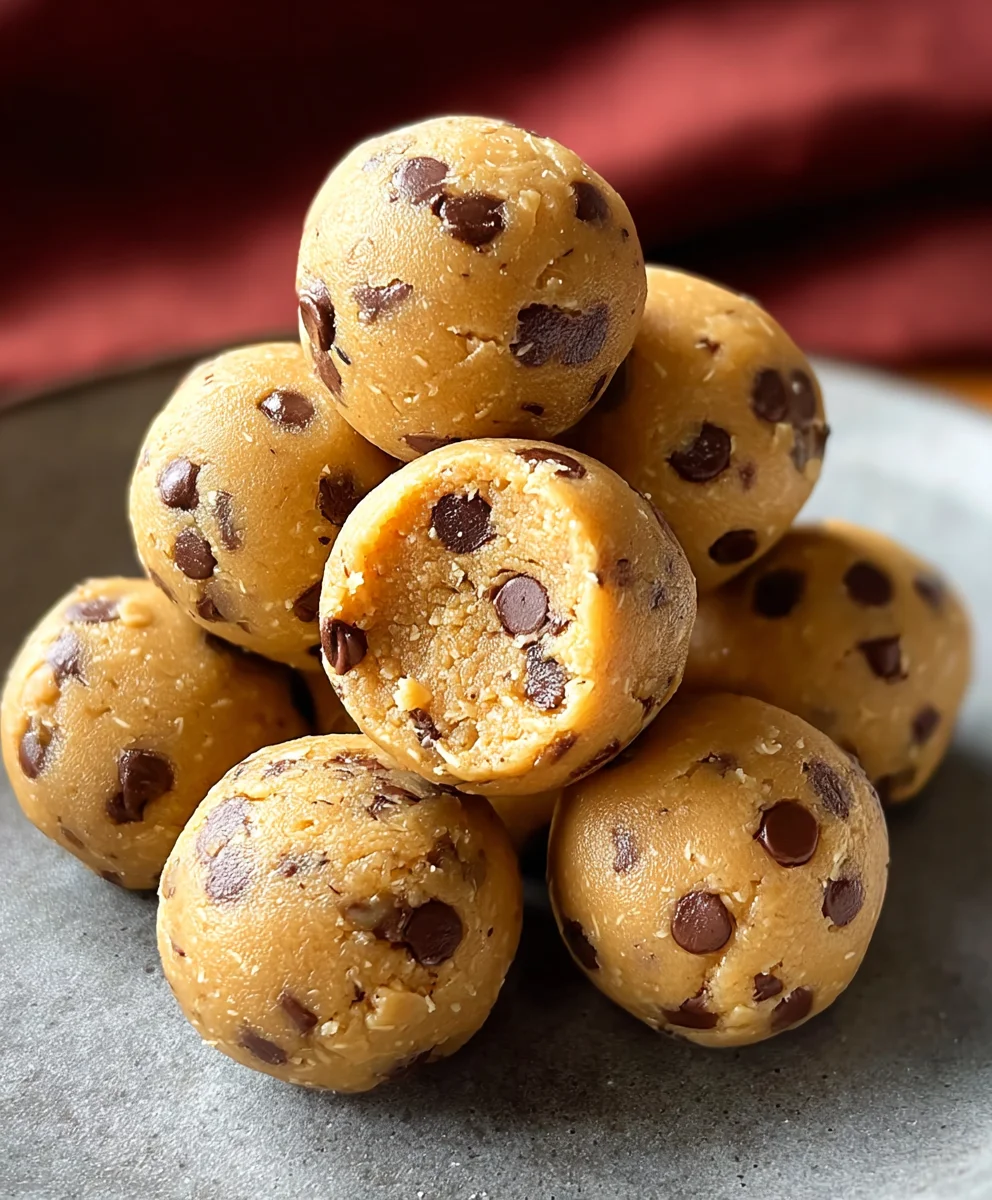
- Final Check: Give the dough one last visual check to ensure your mix-ins are well incorporated. The dough should be thick, studded with your chosen additions, and look utterly irresistible. This beautiful, versatile dough is now ready for its transformation into delicious Chickpea Cookie Dough Balls!
Shaping and Chilling Your Chickpea Cookie Dough Balls
We’re almost there! Your beautifully prepared, chocolate-chip-studded dough is now ready to be transformed into perfect, bite-sized Chickpea Cookie Dough Balls. This step is incredibly satisfying, as you start to see your efforts come to life.
- Prepare Your Surface: Line a baking sheet or a large plate with parchment paper or wax paper. This prevents the balls from sticking and makes them easy to remove once chilled.
- Scooping the Dough: I find that a small cookie scoop (about 1.5 tablespoons) works wonderfully for creating uniform balls. If you don’t have a scoop, you can use a regular tablespoon measure. Scoop out a portion of the dough. The size is entirely up to you – I usually aim for about a 1-inch to 1.5-inch diameter, which is a perfect two-bite treat.
- Rolling the Balls: Take the scooped dough and gently roll it between the palms of your hands to form a smooth, compact ball. The dough should be firm enough to hold its shape without being overly sticky. If your hands start to get a bit sticky, you can lightly dampen them with water or dust them with a tiny bit of powdered sugar or cocoa powder, although with the right dough consistency, this usually isn’t necessary. Place each rolled ball onto your prepared baking sheet or plate.
- Repeat Until All Dough is Used: Continue scooping and rolling until you’ve used up all the dough. You’ll likely get between 18-24 Chickpea Cookie Dough Balls, depending on their size.
- The Crucial Chilling Step: This is a non-negotiable step if you want firm, scoopable, and truly satisfying cookie dough balls. Once all your balls are rolled and placed on the parchment-lined tray, transfer the entire tray to the refrigerator.
- Chilling Time: Allow the Chickpea Cookie Dough Balls to chill for at least 30 minutes. An hour is even better, and if you can leave them longer, like 2-3 hours, they will firm up beautifully. Chilling not only helps them hold their shape better but also allows the flavors to meld and deepen. The texture becomes denser and more reminiscent of actual cookie dough as it cools.
- Alternate Shapes and Ideas:
Beyond Balls: Get Creative with Your Cookie Dough!
While rolling into balls is the classic approach, don’t feel limited! Here are a few other fun ways to enjoy your chickpea cookie dough:
- Cookie Dough Bark: Instead of rolling, press the entire batch of dough evenly into a small, parchment-lined square pan (like an 8×8 inch pan). Chill thoroughly, then slice into squares or irregular bark pieces. This is fantastic for serving at parties.
- Mini Cookie Dough Cups: Press small amounts of dough into mini muffin liners, then chill. This is a neat way to control portions and makes for elegant individual servings.
- Sandwich Fillings: Spread a thin layer of chilled dough between two graham crackers or even on apple slices for a unique snack.
- Crumble Topping: Roughly crumble some of the chilled dough over yogurt, oatmeal, or a smoothie bowl for a delightful texture and flavor boost.
No matter how you shape them, the chilling process is key to enjoying these healthy treats at their best. It makes them less sticky, firmer, and enhances their “cookie dough” appeal significantly.
Storage and Enjoyment of Your Healthy Treat
Congratulations! You’ve successfully created a batch of truly delicious and satisfying Chickpea Cookie Dough Balls. Now comes the equally important part: how to store them to maintain their freshness and how to best enjoy them.
- Refrigeration for Freshness: Once your Chickpea Cookie Dough Balls have thoroughly chilled and are nice and firm, transfer them from the baking sheet to an airtight container. They will keep beautifully in the refrigerator for up to one week. I personally find that their texture and flavor are at their absolute peak within the first 3-5 days. Beyond that, while still safe to eat, they might lose a little of their initial fresh appeal. Make sure the container is truly airtight to prevent them from drying out or absorbing any refrigerator odors.
- Freezing for Longer Storage: These cookie dough balls are excellent for meal prep and long-term storage! If you want to make a larger batch or simply have some on hand for whenever a craving strikes, freezing is the way to go.
How to Freeze Your Chickpea Cookie Dough Balls:
- After they’ve chilled on the baking sheet for at least an hour and are firm, transfer the entire sheet to the freezer for another 1-2 hours, or until the balls are completely solid. This is called “flash freezing” and prevents them from sticking together in the storage container.
- Once solid, transfer the frozen Chickpea Cookie Dough Balls to a freezer-safe zip-top bag or an airtight container. Label it with the date.
- They will keep well in the freezer for up to 2-3 months.
- To enjoy from frozen: You can either let them thaw in the refrigerator for a few hours or at room temperature for about 15-20 minutes. Some people even enjoy them straight from the freezer for a super-firm, icy treat!
- Serving Suggestions and Enjoyment:
These Chickpea Cookie Dough Balls are incredibly versatile! Here are some of my favorite ways to enjoy them:
- As a Quick Snack: Grab one or two straight from the fridge for a satisfying, protein-packed snack to beat the afternoon slump or curb a sweet craving.
- Dessert Enhancement: Crumble them over a scoop of your favorite ice cream, yogurt, or even a fruit salad for an extra layer of flavor and texture.
- Pre or Post-Workout Treat: Thanks to the chickpeas and nut butter, they offer a good balance of carbohydrates and protein, making them a great energy boost.
- Lunchbox Addition: They’re perfect for school or work lunchboxes, providing a healthy alternative to processed sweets.
- Coffee Companion: I often enjoy one with my morning coffee or as a little pick-me-up during a busy day.
I find that the texture is best when they are cold, straight from the refrigerator, where they maintain that dense, chewy cookie dough consistency. If they sit out at room temperature for too long, they will soften quite a bit, but will still be delicious. No matter how you choose to store or enjoy them, these Chickpea Cookie Dough Balls are a delightful, secretly healthy treat that will quickly become a staple in your kitchen!
Conclusion:
So, there you have it – my absolute favorite, unbelievably delicious, and ridiculously simple recipe that I truly believe everyone needs in their life. What makes these delightful morsels so incredibly special? Well, for starters, they manage to hit every single sweet spot you could possibly desire: they’re chewy, rich, satisfyingly sweet, and packed with that classic comforting cookie dough flavor we all adore. But here’s the real kicker, the game-changer that sets them apart from your average treat: they’re made with chickpeas! Yes, you heard me right. This unassuming legume transforms into the most delightful, guilt-free indulgence, offering a fantastic source of plant-based protein and fiber, ensuring you feel nourished and energized, not weighed down by a sugar crash. I’ve spent countless hours perfecting this balance, ensuring that the ‘chickpea’ element is utterly undetectable, leaving you with nothing but pure, unadulterated cookie dough bliss.
Forget the post-dessert slump; these
Chickpea Cookie Dough Balls are a game-changer
designed to fuel you, making them perfect for a mid-afternoon pick-me-up, a post-workout snack, or even a healthier late-night treat. They’re a testament to how creative and mindful cooking can be – turning humble, wholesome ingredients into something truly extraordinary that appeals to both your taste buds and your well-being. This recipe isn’t just about making a snack; it’s about discovering how delicious and enjoyable healthy eating can be, proving that you don’t have to sacrifice flavor for nutrition. It’s about surprising your taste buds and showing that sometimes, the most unexpected ingredients create the most magical results.
Now, while these delightful morsels are absolutely perfect enjoyed just as they are, straight from the fridge, I’ve discovered a few ways to elevate your experience or adapt them to your specific cravings. For a truly decadent experience, try gently warming a few in the microwave for just 10-15 seconds; the gooey, melty texture is out of this world! They also make an incredible topping for a bowl of Greek yogurt or a smoothie bowl, adding a textural crunch and a burst of flavor. You can crumble them over a scoop of vanilla ice cream for a healthier take on cookie dough ice cream, or even press the entire mixture into a small baking dish, chill it thoroughly, and then break it into ‘cookie dough bark’ pieces for a different serving style. The possibilities are truly endless, allowing you to tailor them perfectly to your taste and lifestyle.
Feeling adventurous? The beauty of this recipe lies in its incredible versatility. You can easily switch up the flavor profile to suit your mood or what you have on hand. Try adding a pinch of cinnamon or nutmeg for a warmer, spicier note, especially lovely during colder months, or a dash of almond extract alongside the vanilla for a sophisticated, nutty twist. For those who love a bit of crunch, fold in some chopped nuts like pecans or walnuts, or even some shredded coconut for a tropical vibe. If you’re a chocolate lover (and who isn’t?), consider dipping half of the finished balls in melted dark chocolate and letting them set on parchment paper – it adds an extra layer of indulgence and makes them look incredibly gourmet, almost like a confection from a high-end bakery. You can also roll them in different coatings – a dusting of cocoa powder, finely chopped pistachios, or even a sprinkle of flaky sea salt for that perfect sweet and salty combination that always hits the spot. Don’t be afraid to experiment; that’s part of the fun!
For those with dietary considerations, these balls are incredibly adaptable. Already naturally gluten-free (as long as your oats are certified GF), you can easily make them nut-free by substituting tahini or sunflower seed butter for peanut butter. For a lower-sugar option, use a sugar-free maple syrup or a natural sweetener blend like erythritol or stevia in place of regular maple syrup. This flexibility means almost everyone can enjoy these delicious treats without compromise. This recipe is truly a canvas for your culinary creativity and personal preferences.
I sincerely hope you’re feeling as excited as I am about these amazing treats! I absolutely cannot wait for you to whip up a batch in your own kitchen. Please, do yourself a favor and give this recipe a try this week. I promise, you won’t be disappointed. And when you do, I would absolutely love to hear all about your experience! Did you stick to the original recipe, or did you get creative with some of the variations I suggested? What was your favorite part? Did you manage to fool anyone into thinking they weren’t eating chickpeas, or were they pleasantly surprised by the healthy secret ingredient? Share your stories, your triumphs, and even your questions in the comments below. Your feedback means the world to me, and it helps our little community grow and learn from each other. Don’t forget to snap a picture and tag me on social media if you share your creations – I love seeing your culinary masterpieces come to life! Happy snacking, my friends, and prepare to fall in love with your new favorite guilt-free treat!
Chickpea Cookie Dough Balls: Healthy & Delicious No-Bake Treat!
Wholesome chickpeas transformed into an irresistibly decadent, yet remarkably healthy, no-bake treat. Perfect for guilt-free indulgence, these sweet, subtly nutty, and chewy cookie dough balls come together in minutes, ideal for healthy snacking or quick desserts. Vegan and gluten-free friendly.
Ingredients
-
1 (15-ounce) can chickpeas (garbanzo beans), rinsed & thoroughly drained
-
½ cup creamy nut butter (peanut, almond, or cashew), natural, drippy
-
⅓ cup maple syrup (or agave nectar/honey)
-
1 teaspoon vanilla extract
-
¼ teaspoon sea salt
-
Optional: 2-4 tablespoons oat flour or almond flour
-
½ cup chocolate chips (mini semi-sweet, dark, milk, white, or sugar-free)
-
Optional mix-ins: 2 tbsp shredded unsweetened coconut, 1-2 tbsp finely chopped nuts, or sprinkles
Instructions
-
Step 1
Rinse chickpeas thoroughly under cold water for 1-2 minutes. Drain well, then pat super dry with a clean towel. For a creamier texture, remove skins if desired. Thorough drying is crucial to avoid soft dough. -
Step 2
In a food processor, combine nut butter, maple syrup, and vanilla; process 30-60 seconds until smooth. Add dry chickpeas, sea salt, and optional flour. Process 2-5 minutes, scraping sides, until completely smooth, thick, and sticky with no chickpea chunks. If dough is too dry, add ½-1 tbsp milk; if too wet, add 1-2 tbsp flour. Taste and adjust sweetness/salt. -
Step 3
Transfer dough to a medium mixing bowl. Gently fold in ½ cup chocolate chips and any optional mix-ins (coconut, chopped nuts, sprinkles, etc.) until evenly distributed throughout the dough. -
Step 4
Line a baking sheet with parchment paper. Scoop 1-1.5 inch portions of dough and gently roll into smooth, compact balls. Place on the prepared sheet. Chill in the refrigerator for at least 30 minutes (preferably 1-3 hours) to firm up and allow flavors to meld. This chilling step is crucial for optimal cookie dough texture. -
Step 5
Store chilled balls in an airtight container in the refrigerator for up to 1 week. For longer storage, flash freeze solid on a tray for 1-2 hours, then transfer to a freezer-safe bag/container for up to 2-3 months. Thaw frozen balls in the fridge or at room temperature (15-20 min), or enjoy them straight from the freezer. Best enjoyed cold for that dense, chewy cookie dough consistency.
Important Information
Nutrition Facts (Per Serving)
It is important to consider this information as approximate and not to use it as definitive health advice.
Allergy Information
Please check ingredients for potential allergens and consult a health professional if in doubt.


Leave a Comment