
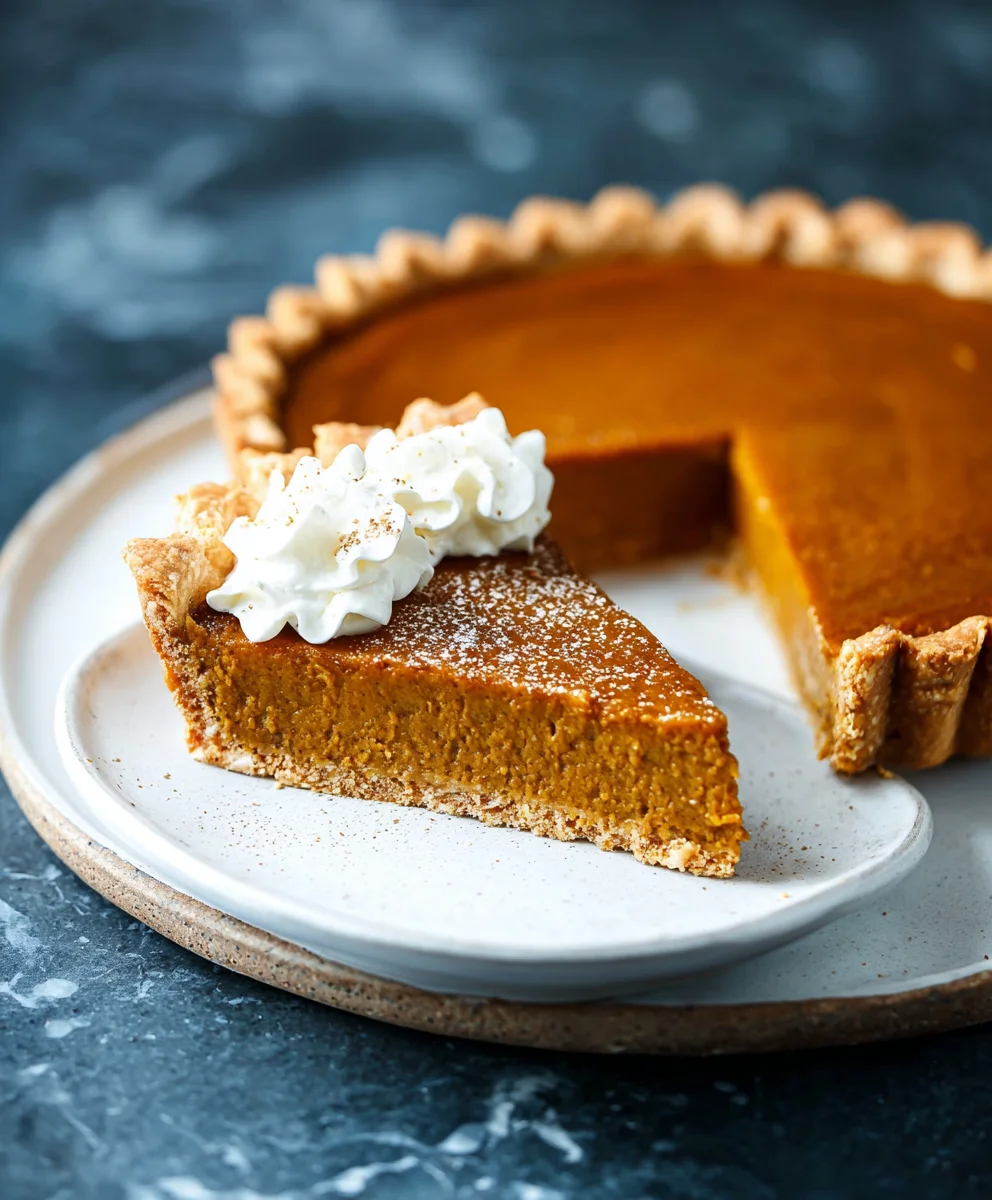
Best Dairy Free Oat Milk Pumpkin Pie is a phrase that promises both indulgence and inclusivity, and I am absolutely thrilled to share a recipe that delivers on every single note. Imagine the quintessential aroma of autumn spices – cinnamon, nutmeg, ginger, and cloves – filling your kitchen, culminating in a slice of pure, golden-orange comfort. For generations, pumpkin pie has been the beloved centerpiece of fall gatherings, from casual family dinners to grand Thanksgiving feasts. Its creamy texture and warm, inviting flavors are synonymous with the season of gratitude.
However, for many, traditional recipes pose a challenge due to dairy sensitivities or dietary preferences. That’s precisely why this particular recipe is such a game-changer. Using rich, full-bodied oat milk, we’ve managed to achieve an incredibly smooth, velvety filling that rivals any conventional pie, all while being completely dairy-free. This isn’t just a substitute; it’s an elevated experience. People adore this dish not only for its authentic, comforting taste but also for the peace of mind it offers, ensuring everyone at the table can enjoy a truly decadent dessert. I truly believe this is the Best Dairy Free Oat Milk Pumpkin Pie you’ll ever bake, offering all the classic charm without any compromise.

Ingredients:
- For the Dairy-Free Pie Crust (or use 1 pre-made, store-bought dairy-free crust):
- 2 ½ cups (300g) all-purpose flour, plus more for dusting
- 1 teaspoon granulated sugar
- ½ teaspoon fine sea salt
- 1 cup (226g) very cold dairy-free butter (or solid vegetable shortening), cut into ½-inch cubes
- ½ cup (120ml) ice water, plus 1-2 tablespoons more if needed
- For the Creamy Oat Milk Pumpkin Pie Filling:
- 1 (15-ounce / 425g) can pure pumpkin puree (make sure it’s 100% pumpkin, not pie filling)
- 1 cup (240ml) full-fat barista blend oat milk (I highly recommend a creamy, unsweetened variety like Oatly Full-Fat Barista or Minor Figures)
- ¾ cup (150g) packed light brown sugar
- ¼ cup (50g) granulated sugar
- 2 tablespoons cornstarch (or arrowroot powder)
- 1 ½ teaspoons ground cinnamon
- ½ teaspoon ground ginger
- ¼ teaspoon ground cloves
- ¼ teaspoon ground nutmeg
- ⅛ teaspoon ground allspice (optional, but I love the depth it adds!)
- ½ teaspoon fine sea salt
- 1 teaspoon pure vanilla extract
- Optional for Serving:
- Dairy-free whipped cream or coconut whipped cream
- A sprinkle of extra cinnamon or nutmeg
Preparing the Dairy-Free Pie Crust
Creating your own homemade dairy-free pie crust might seem like an extra step, but trust me, it’s so worth it for the flakiest, most delicious base for our Best Dairy Free Oat Milk Pumpkin Pie. If you’re short on time, a high-quality store-bought dairy-free pie crust works wonderfully too – just make sure to check the ingredients to ensure it’s truly plant-based. If you’re going the store-bought route, skip to step 5. Otherwise, let’s get our hands a little floury!
- Combine Dry Ingredients: In a large mixing bowl, or the bowl of a food processor, whisk together the all-purpose flour, granulated sugar, and fine sea salt until well combined. This ensures an even distribution of flavor and helps season our crust perfectly.
- Incorporate Cold Fat: If using a food processor, add the cold dairy-free butter cubes to the flour mixture. Pulse about 8-10 times, in 1-second bursts, until the mixture resembles coarse meal with some pea-sized pieces of butter remaining. If mixing by hand, cut the cold dairy-free butter into the flour using a pastry blender or your fingertips. Work quickly to prevent the butter from melting, aiming for that same coarse, crumbly texture. Those little pockets of butter are what create the amazing flakiness in our finished crust!
- Add Ice Water: Gradually add the ice water, 1 tablespoon at a time, pulsing in the food processor or mixing with a fork until the dough just starts to come together. Be careful not to overmix; you want it to be shaggy but cohesive enough to form a ball. I usually find that ½ cup is perfect, but sometimes a little extra water helps bind it if your flour is particularly dry. The key here is not to add too much water, as this can make your crust tough.
- Chill the Dough: Turn the dough out onto a lightly floured surface. Gently gather it into a disk, then wrap it tightly in plastic wrap. Refrigerate for at least 30 minutes, or up to 2 days. This chilling period is crucial; it allows the gluten to relax, making the dough easier to roll, and ensures the dairy-free butter stays cold, contributing to that desired flaky texture.
- Roll Out the Dough: On a lightly floured surface, roll out the chilled dough into a 12-inch circle, about ⅛-inch thick. If your dough cracks a bit, don’t worry, you can gently press it back together. Carefully transfer the rolled-out dough into a standard 9-inch pie plate. Trim the edges, leaving about a ½-inch overhang, then crimp or flute the edges as desired. This is where you can add your personal touch to the presentation of your dairy-free pumpkin pie!
- Blind Bake the Crust (Important for No Soggy Bottom!): Line the unbaked pie crust with parchment paper or aluminum foil, making sure it goes up the sides. Fill the lined crust with pie weights, dried beans, or even dry rice. This prevents the crust from shrinking and bubbling during baking. Bake in a preheated oven at 375°F (190°C) for 15 minutes. Carefully remove the parchment paper and weights, then continue baking for another 5-8 minutes, or until the crust is lightly golden brown. This step is a game-changer for preventing a soggy bottom on your Best Dairy Free Oat Milk Pumpkin Pie. A well blind-baked crust is truly the secret to pie perfection.
- Cool the Crust: Remove the blind-baked crust from the oven and let it cool completely on a wire rack while you prepare the filling. Cooling completely prevents condensation and keeps the crust nice and crisp.
Crafting the Creamy Oat Milk Pumpkin Pie Filling
Now for the star of the show: the incredibly rich and creamy dairy-free oat milk pumpkin pie filling! This is where all the magic happens, transforming simple ingredients into a luscious, spiced masterpiece. Using full-fat barista oat milk is key here – its natural creaminess and subtle sweetness really elevate the texture and flavor, making it indistinguishable from traditional pumpkin pie. You’ll be amazed at how decadent this plant-based version is.
- Prepare Your Oven for Baking: Reduce your oven temperature to 350°F (175°C). We’ll bake the pie at a slightly lower temperature to ensure even cooking and prevent cracks in the filling. If you plan to use a water bath (highly recommended for the creamiest, crack-free pie!), now is a good time to get a large roasting pan ready.
- Combine Dry Filling Ingredients: In a large mixing bowl, whisk together the light brown sugar, granulated sugar, cornstarch, ground cinnamon, ground ginger, ground cloves, ground nutmeg, optional allspice, and fine sea salt. Whisking these dry ingredients together thoroughly before adding the wet components ensures that all the spices and sugar are evenly distributed throughout the filling. This prevents any clumps of spice and guarantees every bite of your Best Dairy Free Oat Milk Pumpkin Pie is perfectly seasoned.
- Add Wet Ingredients: To the bowl with the dry ingredients, add the pure pumpkin puree, full-fat barista blend oat milk, and pure vanilla extract. I can’t stress enough the importance of using a good quality, full-fat oat milk here. It provides the richness and body that an egg-free pie needs. Thin, watery oat milk will result in a less luxurious pie, so splurge a little on a barista blend if you can!
- Whisk Until Smooth: Whisk all the filling ingredients together vigorously until the mixture is completely smooth and lump-free. For an extra-velvety texture, you can transfer the mixture to a blender and blend on high for 30-60 seconds. Alternatively, an immersion blender can be used directly in the bowl. Blending helps to fully dissolve the sugars and starches, creating an incredibly silky mouthfeel that is a hallmark of the Best Dairy Free Oat Milk Pumpkin Pie.
- Taste and Adjust: Take a small spoonful of the filling (it’s safe to taste since there are no raw eggs!). This is your opportunity to adjust the spice levels if you feel it needs more cinnamon, ginger, or any other spice to suit your preference. A little extra pinch can make all the difference!
Baking the Best Dairy Free Oat Milk Pumpkin Pie
We’re almost there! The aromas that will soon fill your kitchen are going to be absolutely heavenly. Baking this dairy-free oat milk pumpkin pie to perfection requires a little patience and attention to detail, but the reward is a beautifully set, creamy dessert that will impress everyone. Paying attention to the baking time and knowing how to tell when it’s done will ensure a perfectly baked pie every time.
- Pour Filling into Crust: Carefully pour the prepared pumpkin pie filling into your cooled, blind-baked pie crust. The filling should come almost to the top of the crust without overflowing.
- Optional Water Bath for Perfect Texture: For the ultimate crack-free, silky-smooth filling, I highly recommend using a water bath. Place the pie plate containing the filled crust into a larger roasting pan. Carefully pour hot water into the roasting pan until it comes about halfway up the sides of the pie plate. The water bath helps to regulate the temperature around the pie, ensuring it bakes gently and evenly, preventing the edges from over-baking and cracking the center. This technique is a secret weapon for achieving the perfect consistency for our Best Dairy Free Oat Milk Pumpkin Pie.
- Bake the Pie: Carefully transfer the roasting pan with the pie (and water, if using) to the preheated 350°F (175°C) oven. Bake for 50-65 minutes. The baking time can vary slightly depending on your oven and the depth of your pie dish.
- Check for Doneness: To determine if your dairy-free pumpkin pie is ready, gently jiggle the pie. The edges should appear set, but the very center (about a 1-inch circle) should still have a slight wobble, like soft-set gelatin. It will continue to set as it cools. If the crust edges start to brown too quickly before the filling is set, you can loosely cover the edges with aluminum foil. This prevents over-browning while allowing the filling to finish cooking.
- Remove from Oven and Water Bath: Once baked, carefully remove the pie from the oven. If you used a water bath, carefully lift the pie plate out of the roasting pan. This step requires a steady hand and oven mitts!
Cooling and Serving Your Best Dairy Free Oat Milk Pumpkin Pie
The hardest part of baking this delightful Best Dairy Free Oat Milk Pumpkin Pie is patiently waiting for it to cool. But trust me, proper cooling is absolutely essential for the filling to fully set and achieve that perfect sliceable texture. Rushing this step will lead to a gooey, unset pie, and nobody wants that after all your hard work!
- Cool Completely at Room Temperature: Place the baked dairy-free pumpkin pie on a wire rack and allow it to cool completely at room temperature for at least 3-4 hours. During this time, the residual heat will continue to cook the filling gently, and the starches will fully hydrate and set, transforming the wobbly center into a firm, creamy slice. Don’t be tempted to cut into it too soon!
- Refrigerate for Optimal Setting: Once cooled to room temperature, transfer the pie to the refrigerator. Chill for at least another 2 hours, or ideally, overnight. Refrigeration further solidifies the filling, making it perfectly firm and incredibly refreshing. This step is crucial for achieving the neat, clean slices you expect from a classic pumpkin pie.
- Slice and Serve: When you’re ready to serve, remove the pie from the refrigerator. For the cleanest slices, you can run a sharp knife under hot water and wipe it dry between each cut. This helps prevent the filling from sticking.
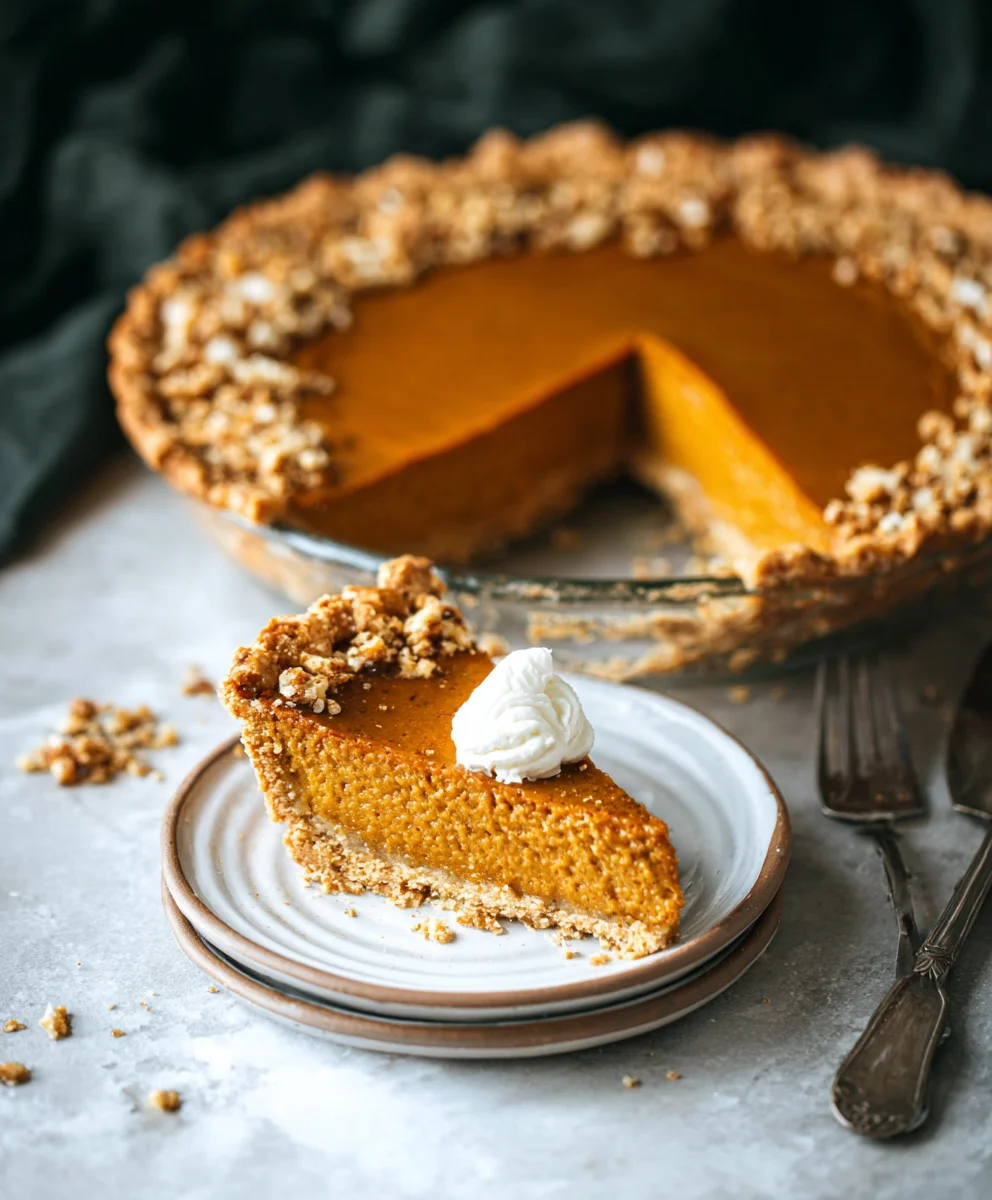
- Serving Suggestions: This Best Dairy Free Oat Milk Pumpkin Pie is absolutely delicious on its own, but it truly shines when paired with a dollop of dairy-free whipped cream or homemade coconut whipped cream. A light dusting of extra cinnamon or nutmeg over the top before serving adds a beautiful finish and an extra hint of autumnal spice. Imagine sinking your teeth into that creamy, perfectly spiced filling with a cloud of dairy-free whipped topping – pure bliss!
- Storage: Store any leftover pie, tightly covered with plastic wrap or aluminum foil, in the refrigerator for up to 3-4 days. While it tastes best within the first day or two, it will still be delightful for several days. I find the flavors often deepen and become even more harmonious after a day or two in the fridge.
Conclusion:
As we reach the sweet end of our journey through this recipe, I truly hope you’re feeling as inspired and excited as I am about what we’ve created together. This isn’t just another pie; it’s a statement, a delicious testament to the fact that plant-based baking can be every bit as decadent, comforting, and utterly unforgettable as its traditional counterparts. I’ve poured my heart into perfecting this recipe, ensuring that every single slice delivers that quintessential pumpkin pie magic without a drop of dairy, and with the incredible creaminess that only oat milk can provide.
Think back to those warm, inviting aromas that will soon fill your kitchen – the earthy sweetness of pumpkin, the vibrant kick of cinnamon, the gentle embrace of nutmeg, ginger, and cloves. This pie embodies all the cozy comforts of autumn and winter holidays, making it an absolute must-try for any festive gathering, or simply a quiet evening treat. The silky-smooth texture, the perfectly spiced filling, and the tender, flaky crust come together in a symphony of flavors that will delight even the most discerning palates. It’s rich, it’s creamy, and it carries all the nostalgic charm of your favorite holiday dessert, but with a wonderfully inclusive twist. You’re not just baking a pie; you’re crafting an experience, a memory-maker that everyone at your table can enjoy, regardless of dietary preferences.
Serving Suggestions & Delightful Variations:
Now, let’s talk about how to elevate this masterpiece even further! While this pie is spectacular on its own, a dollop of homemade coconut whipped cream or a store-bought dairy-free whipped topping is absolutely divine. The light, airy sweetness perfectly complements the rich pumpkin filling. For an extra touch of elegance, sprinkle a pinch of freshly grated nutmeg or a dusting of cinnamon over each serving. A swirl of maple syrup or a delicate drizzle of a dairy-free caramel sauce can also add a delightful extra layer of sweetness and visual appeal.
Consider pairing a slice with a warm, spiced apple cider for an ultimate autumn treat, or with a robust cup of coffee for a morning indulgence. A chai latte or a soothing herbal tea would also make a wonderful companion. If you’re feeling adventurous, try garnishing with candied pecans or toasted pepitas for a lovely crunch and nutty flavor. For a more sophisticated presentation, perhaps a sprig of fresh rosemary or a cinnamon stick placed artfully on the plate. Don’t be afraid to experiment with your favorite garnishes!
And if you want to switch things up a little, consider making mini versions of this pie in muffin tins for individual servings – perfect for parties or lunchboxes. You could also experiment with a different crust; a gingersnap crust would add a delightful spicy kick, or even a gluten-free almond flour crust for those with specific needs. You could also try adding a tablespoon of orange zest to the filling for a bright, citrusy note that truly awakens the pumpkin flavor. The possibilities are truly endless, and this base recipe is robust enough to handle your creative flourishes.
Your Culinary Adventure Awaits!
I truly believe that this is the Best Dairy Free Oat Milk Pumpkin Pie you will ever make, and I am so excited for you to discover its magic for yourself. Don’t hesitate, don’t overthink it – just gather your ingredients, follow the steps, and prepare to be amazed. Baking should be a joyful, rewarding experience, and I promise you, this recipe delivers on that promise. The satisfaction of pulling a perfectly golden, fragrant pie from your oven is unparalleled, especially when you know it’s a creation that caters to everyone at your table.
Once you’ve experienced the sheer delight of this incredible dessert, I would absolutely love to hear about it! Please, share your baking adventures with me and our community. What did you pair it with? Did you try any of the variations? What was the reaction from your family and friends? Your feedback and photos are always such a source of inspiration, and they help others feel confident to try the recipe too. So go forth, bake with passion, and prepare to impress! Happy baking, my friends. I can’t wait to hear all about your delicious success stories.
Best Dairy Free Oat Milk Pumpkin Pie
Indulge in the Best Dairy Free Oat Milk Pumpkin Pie, a delightful recipe that captures the quintessential aromas of autumn spices – cinnamon, nutmeg, ginger, and cloves. This game-changing pie uses rich, full-bodied oat milk to achieve an incredibly smooth, velvety filling, rivaling any conventional pie while being completely dairy-free. It offers an elevated experience, ensuring everyone can enjoy a truly decadent dessert with authentic, comforting taste and peace of mind.
Ingredients
-
For the Dairy-Free Pie Crust:
-
2 ½ cups all-purpose flour
-
1 tsp granulated sugar
-
½ tsp fine sea salt
-
1 cup (226g) very cold dairy-free butter or solid vegetable shortening, cubed
-
½ cup ice water (plus 1-2 tbsp more if needed)
-
For the Creamy Oat Milk Pumpkin Pie Filling:
-
15 oz can pure pumpkin puree (100% pumpkin)
-
1 ½ cups full-fat barista blend oat milk (e.g., Oatly Full-Fat Barista or Minor Figures)
-
¾ cup packed light brown sugar
-
¼ cup granulated sugar
-
2 tbsp cornstarch (or arrowroot powder)
-
1 ½ tsp ground cinnamon
-
½ tsp ground ginger
-
¼ tsp ground cloves
-
¼ tsp ground nutmeg
-
⅛ tsp ground allspice (optional)
-
½ tsp fine sea salt
-
1 tsp pure vanilla extract
-
Optional for Serving:
-
Dairy-free whipped cream or coconut whipped cream
-
A sprinkle of extra cinnamon or nutmeg
Instructions
-
Step 1
In a large mixing bowl or food processor, whisk together 2 ½ cups all-purpose flour, 1 teaspoon granulated sugar, and ½ teaspoon fine sea salt. -
Step 2
Cut in 1 cup (226g) very cold dairy-free butter or solid vegetable shortening (cubed) using a pastry blender, fingertips, or food processor (pulse 8-10 times) until the mixture resembles coarse meal with pea-sized pieces. Gradually add ½ cup ice water, 1 tablespoon at a time, mixing until the dough just starts to come together. Do not overmix. -
Step 3
Turn the dough out onto a lightly floured surface, gently gather into a disk, wrap tightly in plastic wrap, and refrigerate for at least 30 minutes (up to 2 days). On a lightly floured surface, roll out the chilled dough into a 12-inch circle (⅛-inch thick). Carefully transfer to a standard 9-inch pie plate. Trim edges, leaving a ½-inch overhang, then crimp or flute as desired. (If using store-bought crust, skip to step 5). -
Step 4
Line the unbaked pie crust with parchment paper or aluminum foil, making sure it goes up the sides. Fill with pie weights, dried beans, or dry rice. Bake in a preheated oven at 375°F (190°C) for 15 minutes. Carefully remove the parchment and weights, then continue baking for another 5-8 minutes, or until the crust is lightly golden brown. Remove and let cool completely on a wire rack. -
Step 5
Reduce your oven temperature to 350°F (175°C). In a large mixing bowl, whisk together ¾ cup packed light brown sugar, ¼ cup granulated sugar, 2 tablespoons cornstarch, 1 ½ teaspoons ground cinnamon, ½ teaspoon ground ginger, ¼ teaspoon ground cloves, ¼ teaspoon ground nutmeg, ⅛ teaspoon ground allspice (optional), and ½ teaspoon fine sea salt. -
Step 6
To the bowl with the dry ingredients, add 15 ounces pure pumpkin puree, 1 ½ cups full-fat barista blend oat milk, and 1 teaspoon pure vanilla extract. Whisk all filling ingredients together vigorously until the mixture is completely smooth and lump-free. For an extra-velvety texture, you can transfer to a blender and blend on high for 30-60 seconds. Taste and adjust spice levels if desired. -
Step 7
Carefully pour the prepared pumpkin pie filling into your cooled, blind-baked pie crust. For a crack-free, silky-smooth filling, place the pie plate into a larger roasting pan, then carefully pour hot water into the roasting pan until it comes about halfway up the sides of the pie plate (optional but highly recommended). -
Step 8
Carefully transfer the roasting pan with the pie (and water, if using) to the preheated 350°F (175°C) oven. Bake for 50-65 minutes. The pie is done when the edges appear set, but the very center (about a 1-inch circle) still has a slight wobble. If crust edges brown too quickly, loosely cover them with aluminum foil. -
Step 9
Once baked, carefully remove the pie from the oven (and water bath, if used). Place it on a wire rack and allow it to cool completely at room temperature for at least 3-4 hours. This allows the filling to fully set. -
Step 10
Once cooled to room temperature, transfer the pie to the refrigerator. Chill for at least another 2 hours, or ideally, overnight. This step is crucial for achieving neat, clean slices. -
Step 11
When ready to serve, remove the pie from the refrigerator. For the cleanest slices, run a sharp knife under hot water and wipe it dry between each cut. Serve on its own, or with a dollop of dairy-free whipped cream or homemade coconut whipped cream and a sprinkle of extra cinnamon or nutmeg. This cozy fall dessert pairs wonderfully with a hot cup of coffee, spiced chai tea, or even a mug of warm apple cider. For an extra special touch, try serving it alongside some candied pecans or a scoop of dairy-free vanilla ice cream. -
Step 12
Store any leftover pie, tightly covered with plastic wrap or aluminum foil, in the refrigerator for up to 3-4 days.
Important Information
Nutrition Facts (Per Serving)
It is important to consider this information as approximate and not to use it as definitive health advice.
Allergy Information
Please check ingredients for potential allergens and consult a health professional if in doubt.


Leave a Comment