
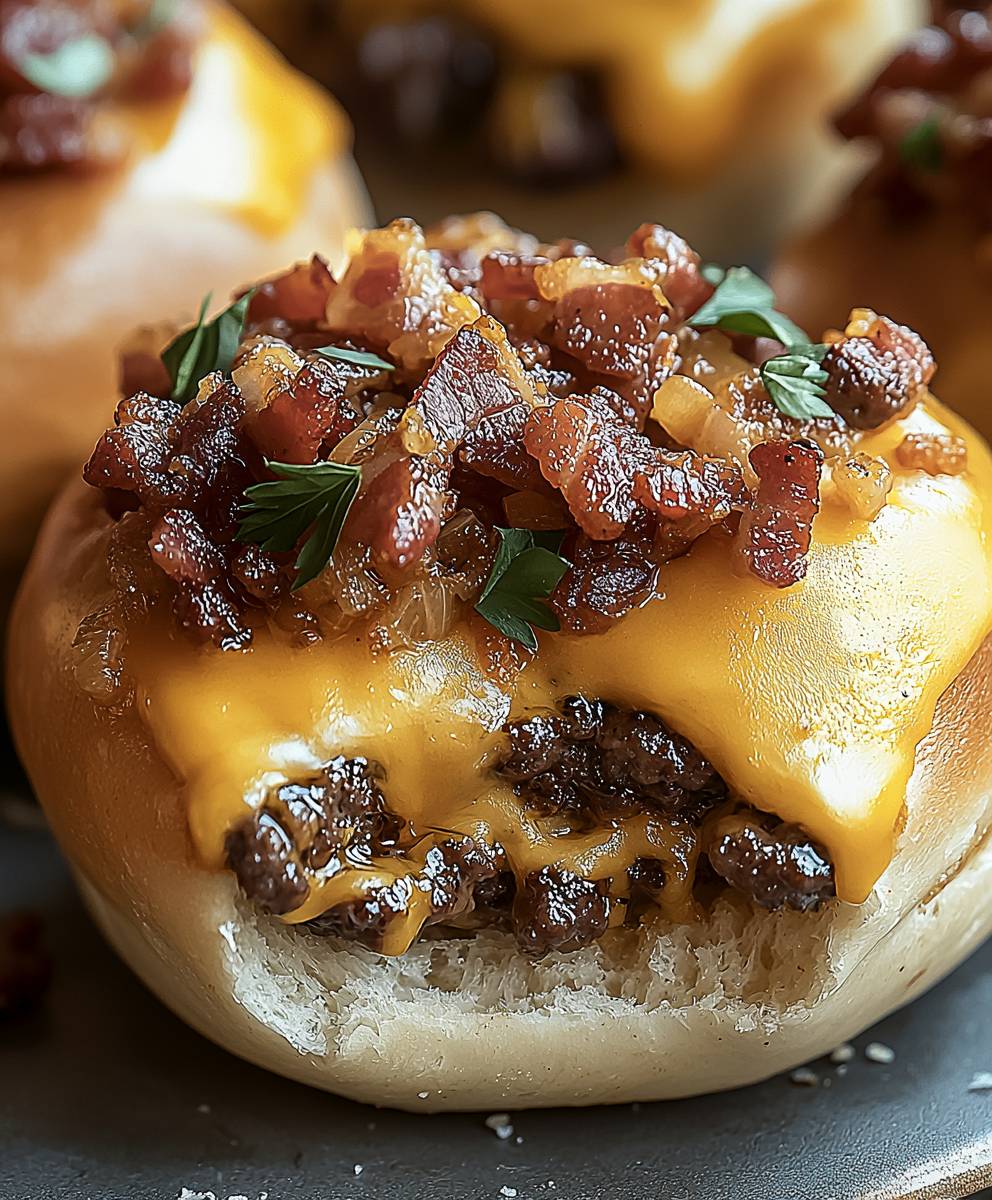
Bacon Cheeseburger Bombs: Get ready to explode with flavor! Imagine biting into a warm, golden-brown, perfectly portioned ball of pure comfort food. That’s exactly what you get with these delectable little bites. They’re not just a snack; they’re an experience, a mini-celebration of everything that makes a bacon cheeseburger so irresistible.
While the exact origins of Bacon Cheeseburger Bombs are shrouded in mystery (likely born from a late-night craving and a stroke of genius!), they represent a modern twist on classic comfort food. They take the iconic flavors of the American cheeseburger and condense them into a fun, portable, and utterly addictive package. Think of them as the ultimate party appetizer or a satisfying snack for game day!
So, why are these little bombs so universally loved? It’s simple: they deliver everything you crave in a cheeseburger, but with an added element of fun and surprise. The combination of savory bacon, juicy ground beef, melted cheese, and a soft, pillowy dough is simply irresistible. Plus, they’re incredibly convenient. No need for plates or cutlery just grab and go! Whether you’re a seasoned chef or a kitchen novice, these Bacon Cheeseburger Bombs are guaranteed to be a crowd-pleaser. Let’s get cooking!

Ingredients:
- 1 pound ground beef (80/20 blend recommended for flavor)
- 1 package (14.1 ounces) refrigerated pizza dough
- 8 slices bacon, cooked until crispy and crumbled
- 4 ounces cheddar cheese, shredded (about 1 cup)
- 2 ounces cream cheese, softened
- 1/4 cup mayonnaise
- 1 tablespoon yellow mustard
- 1 teaspoon garlic powder
- 1/2 teaspoon onion powder
- 1/4 teaspoon black pepper
- 1/4 teaspoon salt (or to taste)
- 1 tablespoon butter, melted
- 1 tablespoon sesame seeds (optional, for topping)
- Pickle slices, for serving (optional)
- Ketchup and mustard, for serving (optional)
Preparing the Filling:
Okay, let’s get started with the heart of these Bacon Cheeseburger Bombs the delicious filling! This is where all the cheeseburger flavor comes to life, so pay close attention.
- Brown the Ground Beef: In a large skillet over medium-high heat, crumble and cook the ground beef until it’s browned and no longer pink. Make sure to break it up into small pieces as it cooks. This will ensure even distribution of the beefy goodness in each bomb. Drain off any excess grease. Nobody wants greasy bombs!
- Add the Seasonings: Once the beef is browned and drained, reduce the heat to low. Add the garlic powder, onion powder, salt, and pepper. Stir well to combine the seasonings with the beef. This is where we build that classic cheeseburger flavor profile.
- Incorporate the Cheese: Now, add the shredded cheddar cheese and softened cream cheese to the skillet. Stir until the cheeses are melted and everything is well combined. The cream cheese adds a wonderful creaminess that really elevates the filling.
- Mix in the Bacon: Add the crumbled bacon to the mixture. Stir gently to distribute the bacon evenly throughout the cheesy beef mixture. The bacon adds a smoky, salty crunch that is just irresistible.
- Add the Wet Ingredients: Finally, stir in the mayonnaise and mustard. These add moisture and tanginess to the filling, bringing all the flavors together. Make sure everything is well combined and the filling is nice and creamy.
- Taste and Adjust: Give the filling a taste and adjust the seasonings as needed. You might want to add a little more salt, pepper, or garlic powder depending on your preference. Remember, this is your chance to customize the flavor to your liking! Once you’re happy with the taste, remove the skillet from the heat and set the filling aside to cool slightly. This will make it easier to work with when assembling the bombs.
Assembling the Bacon Cheeseburger Bombs:
Now for the fun part putting these bombs together! This step requires a little patience, but the end result is totally worth it.
- Prepare the Pizza Dough: Preheat your oven to 375°F (190°C). Lightly grease a baking sheet or line it with parchment paper. This will prevent the bombs from sticking. Unroll the pizza dough onto a lightly floured surface.
- Cut the Dough: Use a pizza cutter or a sharp knife to cut the dough into 16 equal squares. Try to make them as even as possible so the bombs bake uniformly.
- Fill the Dough Squares: Place a spoonful (about 2 tablespoons) of the cooled beef and cheese filling in the center of each dough square. Don’t overfill them, or they’ll be difficult to seal.
- Seal the Bombs: Bring the corners of each dough square up and pinch them together to seal the filling inside. Make sure the seams are tightly sealed to prevent the filling from leaking out during baking. You can also pinch the edges of the dough together to create a more secure seal.
- Shape the Bombs: Gently roll each sealed dough ball between your palms to form a smooth, round bomb shape. This will help them bake evenly and look more appealing.
- Place on Baking Sheet: Place the assembled bombs, seam-side down, onto the prepared baking sheet. Leave a little space between each bomb to allow for even baking.
Baking and Finishing Touches:
Almost there! Now it’s time to bake these babies until they’re golden brown and bubbly. The aroma that fills your kitchen will be absolutely irresistible!
- Brush with Butter: In a small bowl, melt the butter. Brush the tops of the bombs with the melted butter. This will give them a beautiful golden-brown color and a delicious buttery flavor.
- Sprinkle with Sesame Seeds (Optional): If desired, sprinkle the tops of the bombs with sesame seeds. This adds a nice visual appeal and a subtle nutty flavor.
- Bake the Bombs: Bake in the preheated oven for 15-20 minutes, or until the bombs are golden brown and the dough is cooked through. Keep an eye on them, as baking times may vary depending on your oven.
- Cool Slightly: Remove the baking sheet from the oven and let the bombs cool slightly on the baking sheet for a few minutes before transferring them to a wire rack to cool completely. This will prevent them from sticking to the baking sheet.
Serving Suggestions:
These Bacon Cheeseburger Bombs are best served warm. They’re perfect as an appetizer, snack, or even a fun meal! Here are a few serving suggestions to take them to the next level:
- Dipping Sauces: Serve the bombs with your favorite dipping sauces, such as ketchup, mustard, ranch dressing, or barbecue sauce.
- Pickle Slices: Offer pickle slices on the side for that classic cheeseburger flavor combination.
- Lettuce and Tomato: For a more complete cheeseburger experience, serve the bombs with shredded lettuce and diced tomatoes.
- As a Party Appetizer: Arrange the bombs on a platter and serve them as a party appetizer. They’re always a crowd-pleaser!
- With a Side Salad: Serve the bombs with a side salad for a light and refreshing meal.
Enjoy! These Bacon Cheeseburger Bombs are a guaranteed hit. Get ready for some serious cheeseburger satisfaction!
Conclusion:
Okay, friends, let’s be honest you’ve read this far because you’re intrigued, and rightfully so! These Bacon Cheeseburger Bombs are more than just a recipe; they’re a guaranteed crowd-pleaser, a fun weekend project, and a delicious way to elevate your burger game. I truly believe this is a must-try recipe for anyone who loves the classic combination of bacon, cheese, and juicy ground beef, all wrapped up in a perfectly golden, buttery crust. Think about it: every bite is an explosion of flavor, a symphony of textures, and a pure moment of comfort food bliss. Forget messy burger patties falling apart; these bombs are self-contained pockets of happiness, perfect for parties, game nights, or even a satisfying weeknight dinner. The best part? They’re surprisingly easy to make, and the wow factor is off the charts. But don’t just take my word for it! I urge you to give these Bacon Cheeseburger Bombs a try. I promise you won’t regret it. And the possibilities are endless!Serving Suggestions and Variations:
* Dipping Sauces: Elevate your experience with a variety of dipping sauces. Classic ketchup and mustard are always a hit, but why not try a tangy BBQ sauce, a creamy ranch dressing, or even a spicy sriracha mayo? For a truly decadent experience, consider a homemade cheese sauce. * Side Dishes: Serve these bombs alongside classic burger accompaniments like crispy french fries, sweet potato fries, onion rings, or a refreshing coleslaw. A simple green salad also provides a nice contrast to the richness of the bombs. * Ingredient Swaps: Feel free to get creative with the fillings! Swap out the ground beef for ground turkey or chicken for a lighter option. Add diced onions, peppers, or mushrooms to the beef mixture for extra flavor and texture. Experiment with different cheeses, such as cheddar, Monterey Jack, or pepper jack for a spicy kick. * Spice it Up: Add a pinch of red pepper flakes or a dash of hot sauce to the beef mixture for a fiery twist. You could also incorporate some chopped jalapeños for a more pronounced heat. * Breakfast Bombs: Transform these into breakfast bombs by filling them with scrambled eggs, sausage, bacon, and cheese. Perfect for a weekend brunch! * Air Fryer Option: While baking creates a beautiful golden crust, you can also cook these in an air fryer for a quicker and slightly crispier result. Just be sure to adjust the cooking time accordingly. I’m so excited for you to try this recipe and make it your own. Remember, cooking should be fun and experimental! Don’t be afraid to tweak the ingredients and techniques to suit your personal preferences. Once you’ve created your masterpiece, I would absolutely love to hear about your experience. Share your photos and stories on social media using #BaconCheeseburgerBombs or tag me in your posts. I can’t wait to see your creations and hear about your favorite variations. Let’s spread the burger bomb love! Happy cooking, and happy eating! I am confident that you will find this Bacon Cheeseburger Bombs recipe to be a new family favorite. Print
Bacon Cheeseburger Bombs: The Ultimate Recipe & Guide
- Total Time: 45 minutes
- Yield: 16 bombs 1x
Description
Savory bites filled with seasoned ground beef, crispy bacon, and melted cheese, all wrapped in soft pizza dough. Perfect for parties, snacks, or a fun family meal!
Ingredients
- 1 pound ground beef (80/20 blend recommended for flavor)
- 1 package (14.1 ounces) refrigerated pizza dough
- 8 slices bacon, cooked until crispy and crumbled
- 4 ounces cheddar cheese, shredded (about 1 cup)
- 2 ounces cream cheese, softened
- 1/4 cup mayonnaise
- 1 tablespoon yellow mustard
- 1 teaspoon garlic powder
- 1/2 teaspoon onion powder
- 1/4 teaspoon black pepper
- 1/4 teaspoon salt (or to taste)
- 1 tablespoon butter, melted
- 1 tablespoon sesame seeds (optional, for topping)
- Pickle slices, for serving (optional)
- Ketchup and mustard, for serving (optional)
Instructions
- In a large skillet over medium-high heat, crumble and cook the ground beef until it’s browned and no longer pink. Drain off any excess grease.
- Reduce the heat to low. Add the garlic powder, onion powder, salt, and pepper. Stir well to combine.
- Add the shredded cheddar cheese and softened cream cheese to the skillet. Stir until the cheeses are melted and everything is well combined.
- Add the crumbled bacon to the mixture. Stir gently to distribute the bacon evenly.
- Stir in the mayonnaise and mustard. Make sure everything is well combined and the filling is nice and creamy.
- Give the filling a taste and adjust the seasonings as needed. Remove the skillet from the heat and set the filling aside to cool slightly.
- Preheat your oven to 375°F (190°C). Lightly grease a baking sheet or line it with parchment paper. Unroll the pizza dough onto a lightly floured surface.
- Use a pizza cutter or a sharp knife to cut the dough into 16 equal squares.
- Place a spoonful (about 2 tablespoons) of the cooled beef and cheese filling in the center of each dough square.
- Bring the corners of each dough square up and pinch them together to seal the filling inside. Make sure the seams are tightly sealed.
- Gently roll each sealed dough ball between your palms to form a smooth, round bomb shape.
- Place the assembled bombs, seam-side down, onto the prepared baking sheet. Leave a little space between each bomb.
- In a small bowl, melt the butter. Brush the tops of the bombs with the melted butter.
- If desired, sprinkle the tops of the bombs with sesame seeds.
- Bake in the preheated oven for 15-20 minutes, or until the bombs are golden brown and the dough is cooked through.
- Remove the baking sheet from the oven and let the bombs cool slightly on the baking sheet for a few minutes before transferring them to a wire rack to cool completely.
Notes
- For best flavor, use an 80/20 ground beef blend.
- Make sure to drain excess grease from the ground beef after browning.
- Don’t overfill the dough squares, or they will be difficult to seal.
- Serve warm with your favorite dipping sauces, pickle slices, lettuce, and tomato.
- Prep Time: 25 minutes
- Cook Time: 20 minutes


Leave a Comment