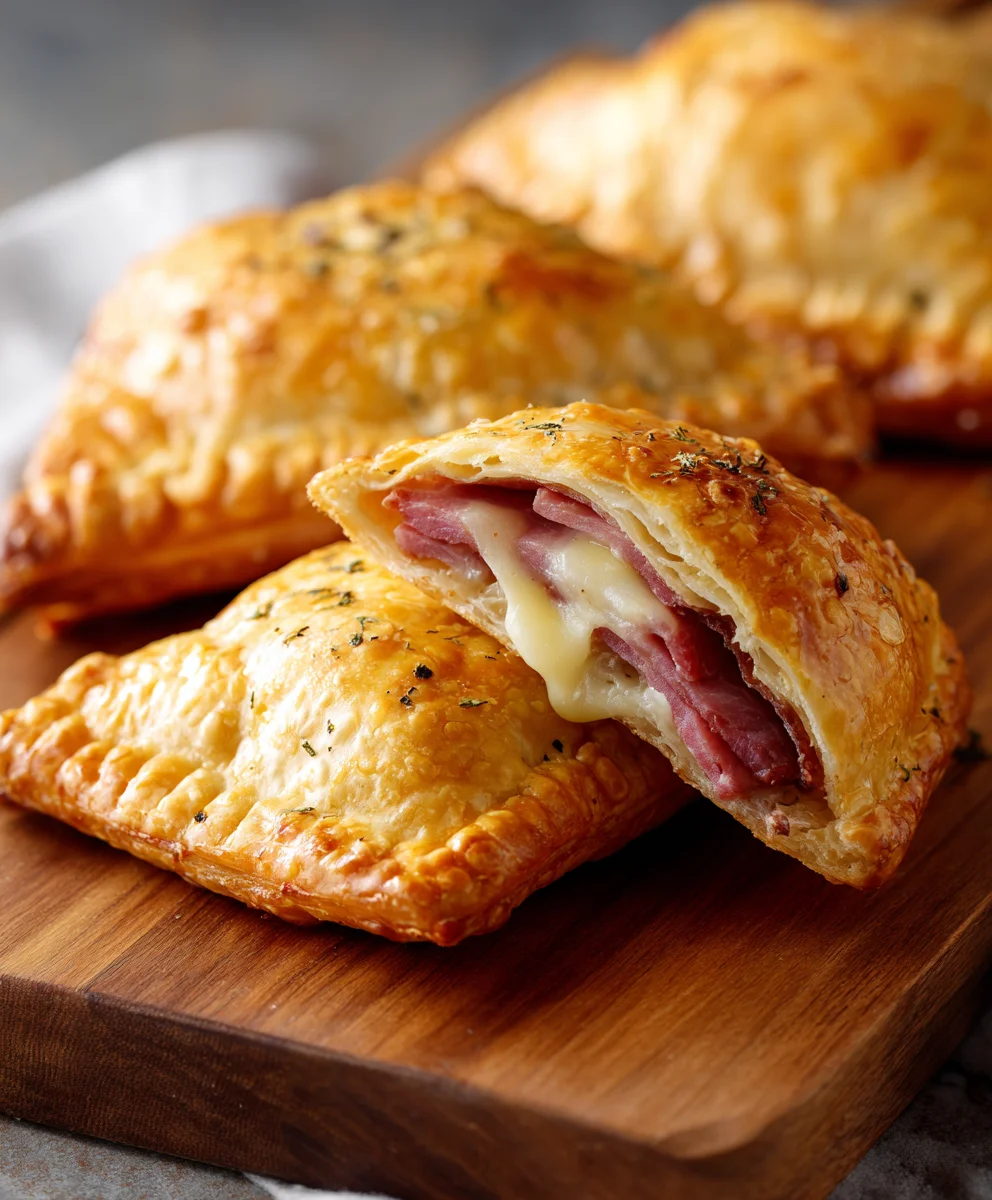
Air Fryer Beef Ham Cheese Pockets are here to revolutionize your snack and meal times, offering an irresistible combination of convenience and delectable flavor that I’m absolutely thrilled to share with you today. Imagine biting into a perfectly golden-brown, crispy exterior that gives way to a warm, savory explosion of seasoned ground beef, smoky diced ham, and a generous cascade of gooey, melted cheese. It’s a culinary dream for anyone seeking a quick, satisfying bite without compromising on taste or quality. This innovative approach to a classic comfort food concept is sure to become a staple in your kitchen.
The enduring appeal of savory filled pastries spans cultures and centuries, from Italian calzones to Latin American empanadas. Our modern take, embracing the marvel of the air fryer, brings this beloved comfort food into the twenty-first century. This method ensures a wonderfully crispy crust without the need for excessive oil, making it a smarter and faster option for busy individuals and families alike. People adore this dish not just for its incredible taste—the harmonious blend of rich beef, salty ham, and creamy cheese—but also for its delightful texture: a craveable crispness on the outside and a tender, flavorful filling within.
Why You’ll Love Crafting These Pockets
I find immense joy in how effortlessly these pockets come together, transforming simple ingredients into something truly special. Whether you’re preparing a speedy lunch, an after-school snack, or a fuss-free dinner, you’ll discover that crafting these delicious Air Fryer Beef Ham Cheese Pockets is not only simple but incredibly rewarding. Prepare to impress your taste buds and simplify your kitchen routine with this fantastic recipe!
Ingredients:
- For the Dough:
- 2 sheets (about 17.3 ounces or 490g total) store-bought puff pastry, thawed according to package directions
- 1 large egg, beaten (for egg wash)
- 1 tablespoon water (for egg wash)
- For the Filling:
- 1 pound (450g) lean ground beef
- 1 cup (about 150g) finely diced cooked ham (or deli ham, finely diced)
- 1.5 cups (about 170g) shredded sharp cheddar cheese
- 1.5 cups (about 170g) shredded mozzarella cheese
- ½ small onion, very finely minced (about ¼ cup)
- 2 cloves garlic, minced
- 1 teaspoon smoked paprika
- ½ teaspoon onion powder
- ¼ teaspoon garlic powder
- ¼ teaspoon black pepper
- ½ teaspoon salt (adjust to taste, especially if using salty ham)
- 1 tablespoon Worcestershire sauce (optional, but highly recommended for depth)
- 2 tablespoons olive oil (for cooking beef)
- Optional for Serving:
- Marinara sauce, for dipping
- Ranch dressing, for dipping
- Fresh chopped parsley, for garnish
Preparing the Flavorful Filling
Creating the perfect filling for our Air Fryer Beef Ham Cheese Pockets is where the magic truly begins. A harmonious blend of savory meats, gooey cheeses, and aromatic spices will ensure every bite is bursting with flavor. Let’s get started on this crucial step!
- First things first, we need to cook our ground beef. Heat 2 tablespoons of olive oil in a large skillet or frying pan over medium-high heat. Once the oil is shimmering, add your lean ground beef. Break it up with a spoon as it cooks. You’ll want to brown it thoroughly, making sure there are no pink bits left. This typically takes about 5-7 minutes.
- As the beef cooks, it will release some fat. It’s important to drain off any excess grease from the pan. This prevents our pockets from becoming overly oily and ensures a cleaner, more defined flavor. You can do this by tilting the pan and carefully spooning out the fat, or by transferring the beef to a colander lined with a paper towel.
- Once the beef is nicely browned and drained, return it to the skillet over medium heat. Now, we’re going to build layers of flavor. Add your very finely minced onion and minced garlic to the beef. Sauté them for about 2-3 minutes, stirring occasionally, until the onion becomes translucent and the garlic is fragrant. Be careful not to burn the garlic, as this can lead to a bitter taste. The aroma filling your kitchen right now should be absolutely delightful!
- Next, it’s time for our spices. Sprinkle in the smoked paprika, onion powder, garlic powder, black pepper, and salt. If you’re like me and love an extra layer of umami, now is the perfect time to stir in that tablespoon of Worcestershire sauce. Mix everything thoroughly, ensuring the spices are evenly distributed and coat the beef and vegetables. Let this cook for another minute, allowing the spices to bloom and their flavors to deepen.
- Remove the skillet from the heat. This is important before we add the cheeses to prevent them from melting prematurely in the pan. We want them to melt perfectly inside our pockets when they hit the air fryer!
- Now, fold in your finely diced cooked ham. The ham adds a wonderful salty, savory counterpoint to the beef. Then, add both the shredded sharp cheddar cheese and the shredded mozzarella cheese. Use a spoon or spatula to mix everything together until well combined. The residual heat from the beef will start to slightly soften the cheese, which helps in binding the filling together, but it shouldn’t be fully melted yet. Taste a small bit of the filling and adjust seasonings if necessary. You might find you need a touch more salt or pepper depending on your preference and the saltiness of your ham. Set this glorious filling aside to cool slightly while we prepare our puff pastry.
Preparing the Puff Pastry Dough
The foundation of our incredibly crispy Air Fryer Beef Ham Cheese Pockets relies heavily on the puff pastry. It’s a wonderfully versatile ingredient that, when air-fried, transforms into a golden, flaky delight. Handling it correctly is key to achieving that perfect texture.
- First, retrieve your thawed puff pastry sheets from the refrigerator. It’s crucial that they are properly thawed but still cold. If they are too warm, they will be difficult to work with and might stick, losing their beautiful layers. If they’re still frozen, they’ll crack when you try to unfold them.
- Gently unroll one sheet of puff pastry onto a lightly floured surface. A little flour prevents sticking, but don’t overdo it, as too much flour can make the pastry tough.
- Using a sharp knife or a pizza cutter, carefully trim the edges of the pastry to create a neat rectangle, if necessary. Then, cut the sheet into 6 equal squares or rectangles. For instance, if your pastry sheet is roughly 10×10 inches, you could cut it into six squares of about 3.3×5 inches each, or whatever dimensions allow for 6 even pieces. My goal here is typically a rectangle that is easy to fold and seal.
- Repeat this process with the second sheet of puff pastry, so you have a total of 12 pastry pieces ready for assembly.
- In a small bowl, prepare your egg wash. Whisk together the large egg and 1 tablespoon of water until well combined. This mixture will be brushed onto the pastry before air frying, giving our pockets that irresistible golden-brown color and a lovely sheen.
Assembling the Air Fryer Beef Ham Cheese Pockets
This is where everything comes together! Assembling our Air Fryer Beef Ham Cheese Pockets is a fun and relatively quick process. Precision in sealing is important to ensure all that delicious filling stays safely inside during air frying.
- Take one of your cut puff pastry squares or rectangles. Spoon a generous amount, about 2-3 tablespoons, of the cooled beef, ham, and cheese filling onto one half of the pastry, leaving a good border around the edges. Be mindful not to overfill, as this makes sealing difficult and can lead to leakage during cooking. We want enough filling to be satisfying, but not so much that it bursts.
- Carefully fold the other half of the pastry over the filling, aligning the edges to form a neat packet. Gently press down on the edges with your fingers to seal them.
- To ensure a really good seal and to add a beautiful decorative touch, use the tines of a fork to crimp all around the sealed edges. Press firmly enough to seal the pastry layers together, but not so hard that you cut through them. This crimping is a vital step; it helps prevent the filling from escaping as the cheese melts and the pastry puffs up in the air fryer.
- Using a small, sharp knife, make 2-3 small slits on the top of each pocket. These are steam vents. They allow steam to escape during cooking, which helps prevent the pockets from bursting and ensures a beautifully crisp crust.
- Now, take your prepared egg wash and, using a pastry brush, lightly brush the top and sides of each assembled pocket. This egg wash is our secret weapon for a truly golden, professional-looking finish and an extra crispy texture.
- Carefully transfer the assembled pockets to a parchment-lined baking sheet or directly to your air fryer basket if you are ready to cook immediately. If you need to work in batches, place the finished pockets on a baking sheet and cover lightly with plastic wrap. You can even refrigerate them for about 15-20 minutes before air frying; this can sometimes help the pastry hold its shape even better.
Air Frying the Perfect Pockets
The air fryer is a fantastic tool for making these Air Fryer Beef Ham Cheese Pockets incredibly crispy and golden with minimal fuss. Proper air fryer technique is key to achieving that perfect crunchy exterior and molten interior.
- Preheat your air fryer to 375°F (190°C). Preheating is a step I never skip, as it ensures an even cooking temperature from the moment your food goes in, leading to better and more consistent results. While it preheats, you can get your first batch of pockets ready.
- Once your air fryer is preheated, carefully place the assembled pockets into the air fryer basket in a single layer. It’s absolutely crucial not to overcrowd the basket. Overcrowding prevents the hot air from circulating properly, which means your pockets won’t get as crispy and may cook unevenly. Depending on the size of your air fryer, this usually means cooking 2-4 pockets at a time. I always recommend working in batches for the best outcome.
- Air fry the pockets for 8-10 minutes. At the halfway point (around 4-5 minutes), open the air fryer basket and carefully flip the pockets over using tongs or a spatula. This ensures both sides get equally golden and crisp. You’ll notice them starting to puff up beautifully, turning a light golden brown.
- Continue air frying for the remaining time, or until the pockets are deep golden brown, visibly puffed, and feel firm to the touch. The cheese inside should be gloriously melted and bubbling. Keep an eye on them, as air fryer models can vary in cooking time and intensity. Some might take a little less time, others a bit more. I always prioritize color and crispness over a strict timer.
- Once perfectly cooked, carefully remove the Air Fryer Beef Ham Cheese Pockets from the air fryer basket and transfer them to a wire rack to cool slightly. Allowing them to rest on a wire rack prevents the bottoms from becoming soggy. They will be piping hot, so be patient for a few minutes before indulging.
- Repeat the air frying process with any remaining batches of pockets until all of them are cooked to crispy perfection. Make sure to re-preheat your air fryer if there’s a significant delay between batches, to maintain consistent cooking temperature.
- These pockets are best enjoyed warm, fresh out of the air fryer. The flaky pastry, savory beef and ham, and molten cheese are an absolute delight. I love serving them with a side of warm marinara sauce for dipping, or even a tangy ranch dressing. A sprinkle of fresh chopped parsley can add a nice touch of color if you’re feeling fancy. They make a fantastic snack, a quick lunch, or even a fun appetizer for a gathering. Enjoy your delicious homemade creation!

<h2>Conclusion:</h2>
<p>Well, my friends, we’ve reached the delicious finale of our culinary journey with these incredible <strong>Air Fryer Beef Ham Cheese Pockets</strong>. I genuinely believe this recipe is an absolute game-changer for anyone seeking a quick, satisfying, and utterly scrumptious meal or snack. What makes them an undeniable must-try, you ask? It’s simple: they perfectly marry convenience with irresistible flavor. Imagine a golden-brown, crispy exterior that shatters gently to reveal a molten, gooey heart of savory beef, salty ham, and luscious melted cheese. All of this, achieved with minimal effort and in a fraction of the time it would take with traditional baking methods, thanks to the magic of the air fryer. </p>
<p>I’ve found myself turning to this recipe again and again because it consistently delivers on its promise: a comforting, cheesy, meaty bite that feels indulgent without being heavy or complicated. They’re ideal for busy weeknights when you need dinner on the table in a flash, a fantastic savory option for brunch, or even the star of your next casual gathering. The crispy dough provides that perfect textural contrast to the soft, warm filling, creating a symphony of flavors and textures in every single bite. <strong>They truly are a testament to how simple ingredients can come together to create something truly spectacular.</strong></p>
<h4>Serving Suggestions and Creative Variations:</h4>
<p>Now that you’ve mastered the basic pockets, let’s talk about how to elevate your experience even further. While they are absolutely divine on their own, a dipping sauce can take them to the next level. I highly recommend serving them alongside a warm bowl of classic marinara sauce – the tangy sweetness cuts through the richness beautifully. Ranch dressing is another fantastic option, offering a cool, creamy counterpoint, or if you’re feeling adventurous, a spicy sriracha mayo adds a lovely kick. For a full meal, pair them with a simple side salad dressed with a light vinaigrette, or a cup of your favorite tomato soup for the ultimate comfort food combination.</p>
<p>But don’t stop there! The beauty of these pockets lies in their versatility. Think of the beef, ham, and cheese as a delicious foundation, and feel free to experiment with your own flavor combinations. <strong>Here are some ideas to get your creative juices flowing:</strong></p>
<ul>
<li><strong>Cheese Swaps:</strong> Instead of mozzarella, try a blend of cheddar and Monterey Jack for a sharper flavor, or provolone for a meltier, milder profile. A touch of smoked gouda could add an incredible depth.</li>
<li><strong>Meat Adventures:</strong> While beef and ham are stellar, consider using cooked, shredded chicken for a lighter option, or pepperoni for a pizza-pocket vibe. Leftover pulled pork or even seasoned ground turkey would also be fantastic.</li>
<li><strong>Vegetable Boosts:</strong> Finely diced and sautéed mushrooms, onions, or bell peppers can be added to the filling for extra flavor and nutrients. A handful of fresh spinach or some finely chopped jalapeños (if you like a bit of heat!) would also be delicious.</li>
<li><strong>Herb & Spice Infusion:</strong> A sprinkle of Italian seasoning, garlic powder, or a pinch of red pepper flakes can completely transform the flavor profile.</li>
<li><strong>Dough Variations:</strong> If you’re feeling extra fancy, puff pastry can create an even flakier pocket, or crescent roll dough offers a slightly different texture and flavor.</li>
</ul>
<p>The possibilities are truly endless, and each variation opens up a new world of taste. I encourage you to make this recipe your own, adapting it to suit your family’s preferences and whatever delicious ingredients you have on hand.</p>
<h4>Your Turn!</h4>
<p>Now it’s your turn to experience the sheer joy of creating and devouring these perfect little parcels of deliciousness. <strong>I promise you, once you taste that crispy exterior and the warm, savory filling, you’ll understand exactly why I’m so enthusiastic about this recipe.</strong> Don’t hesitate to give these <strong>Air Fryer Beef Ham Cheese Pockets</strong> a try. They are surprisingly simple to put together, incredibly rewarding to eat, and an absolute triumph in the convenience cooking department. </p>
<p>And once you’ve made them – and I have a feeling you’ll be making them often – I would absolutely love to hear about your experience! Did you stick to the classic recipe, or did you venture into some exciting variations? What were your favorite dipping sauces? Please share your triumphs, your clever substitutions, and perhaps even some photos of your golden, glorious pockets. Your feedback and creativity inspire me and our entire cooking community. Happy air frying, my friends!</p>

Air Fryer Beef Ham Cheese Pockets: Crispy, Cheesy & Quick!
Revolutionize snack and meal times with these quick and easy Air Fryer Beef and Cheese Pockets. Using just four simple ingredients – beef (substituted for ham), cheese, tortillas, and butter – you’ll get amazing crispy pockets with molten cheese and savory beef. A go-to lunch or snack that’s a delicious, satisfying alternative to a boring sandwich, and tastes way better than anything store-bought.
Ingredients
-
Cooked Beef (substituted for ham, e.g., shredded or finely diced cooked beef)
-
Shredded Cheese (e.g., cheddar, mozzarella, or a blend)
-
Flour Tortillas (standard size, 8-10 inch)
-
Butter
Instructions
-
Step 1
Ensure your cooked beef is ready and shredded/diced as desired. Lay out your tortillas on a clean surface. Soften butter for easy spreading. -
Step 2
Spread a thin layer of butter on one side of each tortilla. On one half of the buttered side, place a generous layer of shredded cheese, pressing it firmly into the butter. Top the cheese with a layer of cooked beef. Fold the other half of the tortilla over the filling and press the edges firmly to seal, preventing cheese from escaping during cooking. -
Step 3
Preheat your air fryer to 375°F (190°C). Lightly brush the outside of the folded pockets with a little more butter for extra crispiness. Place pockets in the air fryer basket in a single layer, without overcrowding. Air fry for 8-10 minutes, flipping halfway through, until golden brown, crispy, and the cheese is molten and bubbling. -
Step 4
Carefully remove the hot pockets from the air fryer and let cool slightly on a wire rack before indulging. They are best enjoyed warm! For future enjoyment, assembled pockets can be individually wrapped and frozen for up to 3 months. Cook straight from frozen in the air fryer, adjusting cooking time as needed.
Important Information
Nutrition Facts (Per Serving)
It is important to consider this information as approximate and not to use it as definitive health advice.
Allergy Information
Please check ingredients for potential allergens and consult a health professional if in doubt.


Leave a Comment