
Crispy Chicken Thighs: Prepare to be amazed! Imagine sinking your teeth into succulent, juicy chicken, encased in a shatteringly crisp, golden-brown skin. That’s exactly what you’ll get with this incredibly easy and satisfying recipe. Forget dry, bland chicken dinners this method guarantees perfectly cooked chicken thighs every single time.
While chicken thighs have always been a staple in home cooking, celebrated for their rich flavor and affordability, the art of achieving truly crispy chicken thighs has often been elusive. Historically, various cultures have employed different techniques, from pan-frying to roasting, to coax out that coveted crispy skin. This recipe draws inspiration from these time-tested methods, combining them with a few modern tweaks for optimal results.
People adore this dish for so many reasons. The contrast between the crispy skin and the tender, flavorful meat is simply irresistible. Plus, chicken thighs are naturally more forgiving than chicken breasts, making them less prone to drying out. And let’s be honest, who can resist that satisfying crunch? This recipe is also incredibly convenient, requiring minimal prep time and using ingredients you likely already have in your pantry. Get ready to elevate your weeknight dinners with these unbelievably delicious crispy chicken thighs!

Ingredients:
- 4 boneless, skin-on chicken thighs (about 6-8 ounces each)
- 1 cup all-purpose flour
- 1/2 cup cornstarch
- 2 teaspoons paprika
- 1 teaspoon garlic powder
- 1 teaspoon onion powder
- 1 teaspoon dried thyme
- 1/2 teaspoon cayenne pepper (optional, for heat)
- 1 teaspoon salt
- 1/2 teaspoon black pepper
- 2 large eggs
- 1/4 cup milk
- 2 cups panko breadcrumbs
- 1/4 cup grated Parmesan cheese
- Vegetable oil, for frying (about 3-4 cups)
- Optional: Lemon wedges, for serving
Preparing the Chicken:
- First, let’s get our chicken ready. Pat the chicken thighs dry with paper towels. This is crucial for achieving that crispy skin we’re after. Excess moisture is the enemy of crispiness!
- Next, trim any excess fat from the thighs. While some fat is good for flavor, too much can prevent the skin from crisping up properly. Just use a sharp knife to carefully remove any large, dangling pieces.
- Now, we’re going to score the skin. This helps the fat render out and allows the seasoning to penetrate. Using a sharp knife, make shallow cuts across the skin in a crosshatch pattern. Be careful not to cut into the meat itself. The cuts should be about 1/2 inch apart.
- Season the chicken generously with salt and pepper on both sides. Don’t be shy! This is your chance to build flavor from the inside out.
Setting Up the Breading Station:
- Okay, time to get our breading station organized. This will make the whole process much smoother. You’ll need three shallow dishes or pie plates.
- In the first dish, combine the all-purpose flour, cornstarch, paprika, garlic powder, onion powder, dried thyme, cayenne pepper (if using), salt, and pepper. Whisk everything together until it’s evenly distributed. The cornstarch helps create a lighter, crispier coating.
- In the second dish, whisk together the eggs and milk until well combined. This is our egg wash, which will help the breadcrumbs adhere to the chicken.
- In the third dish, combine the panko breadcrumbs and grated Parmesan cheese. Mix well. The panko breadcrumbs provide a fantastic crunch, and the Parmesan adds a savory, cheesy flavor.
Breading the Chicken:
- Now for the fun part: breading the chicken! Take one chicken thigh and dredge it in the flour mixture, making sure to coat it completely on both sides. Shake off any excess flour.
- Next, dip the floured chicken into the egg wash, ensuring it’s fully coated. Let any excess egg wash drip off.
- Finally, transfer the chicken to the panko breadcrumb mixture. Press the breadcrumbs firmly onto the chicken, making sure to cover every inch of the surface. This is where you really want to pack those breadcrumbs on for maximum crispiness.
- Repeat the breading process with the remaining chicken thighs.
- Place the breaded chicken thighs on a wire rack lined with parchment paper. This allows air to circulate around the chicken, which helps the breading stay crisp. Let the chicken rest for about 15-20 minutes before frying. This allows the breading to adhere better and prevents it from falling off during frying.
Frying the Chicken:
- Pour the vegetable oil into a large, heavy-bottomed skillet or Dutch oven. You’ll need enough oil to come about halfway up the sides of the chicken thighs.
- Heat the oil over medium-high heat until it reaches a temperature of 325-350°F (160-175°C). Use a deep-fry thermometer to monitor the temperature. Maintaining the correct oil temperature is crucial for achieving crispy, evenly cooked chicken. If the oil is too hot, the chicken will burn on the outside before it’s cooked through. If the oil is too cold, the chicken will absorb too much oil and become greasy.
- Carefully place two chicken thighs into the hot oil, skin-side down. Don’t overcrowd the pan, as this will lower the oil temperature and result in soggy chicken.
- Fry the chicken for about 6-8 minutes per side, or until the skin is golden brown and crispy and the internal temperature reaches 165°F (74°C). Use a meat thermometer to check the internal temperature.
- If the chicken is browning too quickly, reduce the heat slightly. If it’s not browning enough, increase the heat slightly.
- Once the chicken is cooked through, carefully remove it from the oil with a slotted spoon or tongs and place it on a wire rack lined with paper towels to drain off any excess oil.
- Repeat the frying process with the remaining chicken thighs.
Resting and Serving:
- Let the fried chicken thighs rest for about 5-10 minutes before serving. This allows the juices to redistribute, resulting in more tender and flavorful chicken.
- Serve the crispy chicken thighs immediately while they’re still hot and crispy.
- Optional: Serve with lemon wedges for a burst of freshness. The acidity of the lemon cuts through the richness of the fried chicken.
Tips for Extra Crispy Chicken:
- Dry Brine: For even more flavorful and juicy chicken, try dry brining it. The night before, generously salt the chicken thighs and let them sit uncovered in the refrigerator. This helps the chicken retain moisture and enhances its natural flavor.
- Double Breading: For an extra thick and crispy coating, try double breading the chicken. After the first round of breading, dip the chicken back into the egg wash and then back into the breadcrumb mixture.
- Hot Oil: Make sure your oil is hot enough before adding the chicken. A temperature of 325-350°F (160-175°C) is ideal.
- Don’t Overcrowd: Fry the chicken in batches to avoid overcrowding the pan. Overcrowding lowers the oil temperature and results in soggy chicken.
- Wire Rack: Always drain the fried chicken on a wire rack to allow air to circulate and prevent it from becoming soggy.
Variations:
- Spicy Chicken: Add more cayenne pepper to the flour mixture for a spicier kick. You can also add other spices like chili powder or smoked paprika.
- Herb Chicken: Experiment with different herbs in the flour mixture. Rosemary, oregano, or basil would all be delicious additions.
- Buttermilk Chicken: Soak the chicken in buttermilk for at least 30 minutes before breading. This will tenderize the chicken and add a tangy flavor.
- Gluten-Free Chicken: Use gluten-free flour and gluten-free breadcrumbs for a gluten-free version of this recipe.
Serving Suggestions:
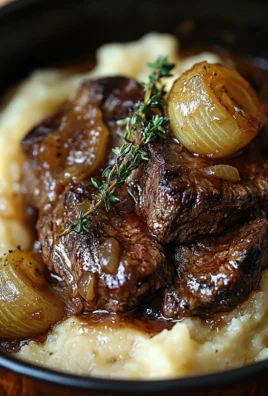
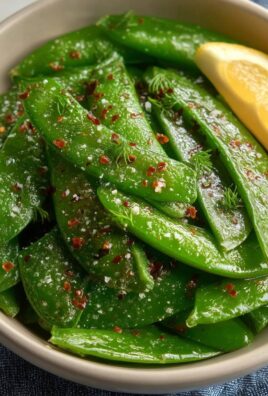
- Serve with your favorite sides, such as mashed potatoes, coleslaw, corn on the cob, or green beans.
- Use the crispy chicken thighs to make sandwiches or wraps.
- Add the chicken to salads for a protein-packed meal.
- Serve with a variety of dipping sauces, such as ranch dressing, honey mustard, or barbecue sauce.
Storage Instructions:
- Store leftover crispy chicken thighs in an airtight container in the refrigerator for up to 3 days.
- To reheat, bake the chicken in a preheated oven at 350°F (175°C) for about 10-15 minutes, or until heated through. You can also reheat the chicken in an air fryer for a crispier result.

Conclusion:
And there you have it! These Crispy Chicken Thighs are truly a game-changer. I know, I know, I might be biased, but trust me on this one. The combination of the perfectly seasoned, juicy chicken and that unbelievably crispy skin is just *chef’s kiss*. It’s a weeknight dinner hero, a crowd-pleasing party dish, and honestly, sometimes I just make a batch for myself because they’re that good.
But why is this recipe a must-try? It’s simple: it delivers maximum flavor and texture with minimal effort. Forget complicated techniques and hours in the kitchen. This recipe is all about efficiency without sacrificing deliciousness. The secret lies in the combination of the dry brine, which ensures the chicken stays incredibly moist, and the high heat, which renders the fat and creates that irresistible crispiness. Plus, the seasoning blend is versatile enough to appeal to a wide range of palates. It’s savory, slightly smoky, and just a touch spicy a winning combination, if I do say so myself.
Beyond the sheer deliciousness, these Crispy Chicken Thighs are incredibly versatile. Looking for serving suggestions? The possibilities are endless! For a classic comfort meal, serve them alongside creamy mashed potatoes and your favorite steamed vegetables. Or, for a lighter option, pair them with a vibrant salad and a lemon vinaigrette. They’re also fantastic in sandwiches, tacos, or even chopped up and added to a hearty grain bowl.
Feeling adventurous? Let’s talk variations! Want to kick up the heat? Add a pinch of cayenne pepper or a dash of your favorite hot sauce to the seasoning blend. Craving something sweeter? Try incorporating a touch of brown sugar or maple syrup. For a Mediterranean twist, add some dried oregano, rosemary, and thyme. And if you’re feeling really fancy, you can even experiment with different types of oil for frying avocado oil, peanut oil, or even clarified butter can all add unique flavors.
Serving Suggestions to Elevate Your Meal:
* Classic Comfort: Mashed potatoes, gravy, and green beans.
* Light and Fresh: Arugula salad with lemon vinaigrette and roasted asparagus.
* Spicy Kick: Serve with a side of kimchi fried rice and sriracha mayo.
* Mediterranean Feast: Greek salad, hummus, and pita bread.
* Taco Tuesday: Shred the chicken and use it as a filling for tacos with your favorite toppings.
I’m genuinely excited for you to try this recipe. I poured my heart and soul into perfecting it, and I truly believe it’s a winner. So, gather your ingredients, preheat your oven, and get ready to experience the joy of perfectly Crispy Chicken Thighs.
But the fun doesn’t stop there! Once you’ve made them, I’d absolutely love to hear about your experience. Did you make any variations? What did you serve them with? What did your family and friends think? Share your photos and stories in the comments below. Your feedback is invaluable, and it helps me continue to improve and create even more delicious recipes for you. So, go ahead, give these Crispy Chicken Thighs a try you won’t regret it! Happy cooking!
Crispy Chicken Thighs: The Ultimate Guide to Perfect Crispy Skin
Crispy, golden-brown fried chicken thighs with a flavorful, crunchy breading. Perfect for a satisfying meal!
Ingredients
- 4 boneless, skin-on chicken thighs (about 6-8 ounces each)
- 1 cup all-purpose flour
- 1/2 cup cornstarch
- 2 teaspoons paprika
- 1 teaspoon garlic powder
- 1 teaspoon onion powder
- 1 teaspoon dried thyme
- 1/2 teaspoon cayenne pepper (optional, for heat)
- 1 teaspoon salt
- 1/2 teaspoon black pepper
- 2 large eggs
- 1/4 cup milk
- 2 cups panko breadcrumbs
- 1/4 cup grated Parmesan cheese
- Vegetable oil, for frying (about 3-4 cups)
- Optional: Lemon wedges, for serving
Instructions
- Pat chicken thighs dry with paper towels. Trim excess fat. Score the skin in a crosshatch pattern. Season generously with salt and pepper on both sides.
- Dish 1: Combine flour, cornstarch, paprika, garlic powder, onion powder, thyme, cayenne pepper (if using), salt, and pepper. Whisk to combine.
- Dish 2: Whisk eggs and milk.
- Dish 3: Combine panko breadcrumbs and Parmesan cheese.
- Dredge each chicken thigh in the flour mixture, then dip in the egg wash, and finally coat thoroughly with the panko breadcrumb mixture, pressing firmly to adhere. Place breaded chicken on a wire rack lined with parchment paper and let rest for 15-20 minutes.
- Pour vegetable oil into a large, heavy-bottomed skillet or Dutch oven (about halfway up the sides of the chicken thighs). Heat oil to 325-350°F (160-175°C). Carefully place two chicken thighs into the hot oil, skin-side down. Fry for 6-8 minutes per side, or until golden brown and the internal temperature reaches 165°F (74°C). Remove and drain on a wire rack lined with paper towels. Repeat with remaining chicken.
- Let the fried chicken thighs rest for 5-10 minutes before serving. Serve immediately with lemon wedges (optional).
Notes
- Dry Brine (Optional): Salt chicken thighs generously the night before and refrigerate uncovered for extra flavor and juiciness.
- Double Breading (Optional): For a thicker coating, dip the chicken back into the egg wash and breadcrumbs after the first breading.
- Oil Temperature: Maintain oil temperature between 325-350°F (160-175°C) for even cooking and crispiness.
- Don’t Overcrowd: Fry chicken in batches to avoid lowering the oil temperature.
- Wire Rack: Always drain fried chicken on a wire rack to prevent sogginess.
- Variations: Add more cayenne pepper for spicy chicken, experiment with different herbs, soak in buttermilk before breading, or use gluten-free flour and breadcrumbs for a gluten-free version.
- Serving Suggestions: Serve with mashed potatoes, coleslaw, corn on the cob, green beans, sandwiches, wraps, salads, or dipping sauces.
- Storage Instructions: Store leftovers in an airtight container in the refrigerator for up to 3 days. Reheat in a preheated oven at 350°F (175°C) for 10-15 minutes or in an air fryer for a crispier result.

Leave a Comment