
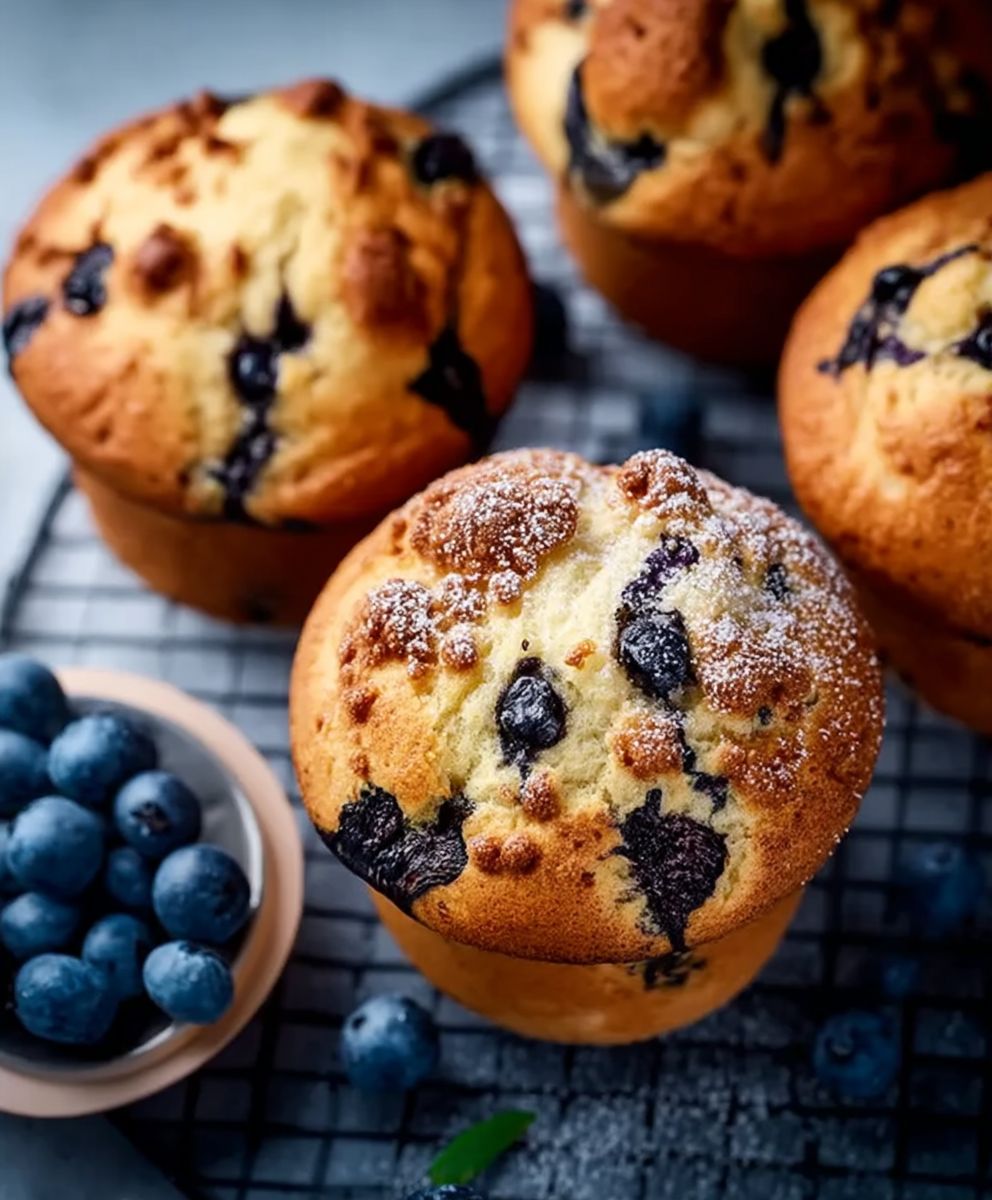
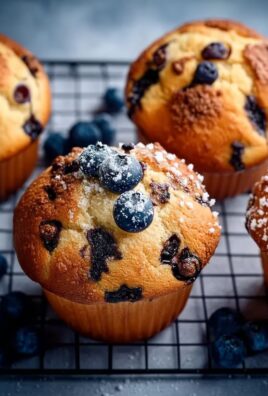
Blueberry Muffins: Is there anything more comforting than the aroma of freshly baked muffins wafting through your kitchen? I think not! These little domes of deliciousness are a timeless classic, perfect for a quick breakfast, a satisfying snack, or even a delightful dessert. But these aren’t just any muffins; we’re talking about the kind that are bursting with juicy blueberries, boasting a tender crumb, and topped with a delightful, subtly crunchy sugar crust.
The history of muffins is surprisingly rich, tracing back to early medieval Europe. However, the blueberry muffins we know and love are a distinctly American creation, gaining popularity in the 20th century as blueberries became more readily available. They quickly became a staple in bakeries and home kitchens alike, a testament to their simple yet irresistible appeal.
What makes these muffins so universally adored? It’s the perfect combination of textures and flavors. The soft, moist interior contrasts beautifully with the slightly crisp top, while the sweet-tart burst of blueberries adds a refreshing zing. Plus, they’re incredibly convenient! Whip up a batch on the weekend, and you’ll have a grab-and-go treat ready for busy mornings all week long. Get ready to experience muffin perfection!

Ingredients:
- 2 1/2 cups all-purpose flour
- 1 cup granulated sugar
- 1 tablespoon baking powder
- 1/2 teaspoon baking soda
- 1/4 teaspoon salt
- 1 cup milk
- 1/2 cup vegetable oil
- 2 large eggs
- 1 teaspoon vanilla extract
- 2 cups fresh or frozen blueberries (if using frozen, do not thaw)
- Optional: 2 tablespoons granulated sugar for topping
Preparing the Batter:
- Preheat your oven to 400°F (200°C). Line a 12-cup muffin tin with paper liners or grease it well with cooking spray. This is crucial to prevent the muffins from sticking!
- In a large bowl, whisk together the flour, sugar, baking powder, baking soda, and salt. Make sure everything is evenly distributed. This ensures a consistent rise and texture in your muffins. I like to whisk for at least 30 seconds to really get it mixed.
- In a separate bowl, whisk together the milk, vegetable oil, eggs, and vanilla extract. Combine these wet ingredients thoroughly. The oil adds moisture, the eggs provide structure, and the vanilla enhances the flavor.
- Pour the wet ingredients into the dry ingredients. Gently fold the mixture together with a spatula until just combined. Do not overmix! Overmixing develops the gluten in the flour, resulting in tough muffins. A few streaks of flour are okay.
- Gently fold in the blueberries. Be careful not to crush them, especially if they are fresh. Distribute them evenly throughout the batter. If using frozen blueberries, toss them with a tablespoon of flour before adding them to the batter. This helps prevent them from sinking to the bottom of the muffins.
- If desired, sprinkle the tops of the muffins with the optional 2 tablespoons of granulated sugar. This adds a nice sparkle and a slightly crunchy texture to the tops.
Baking the Muffins:
- Fill each muffin cup about 2/3 full with batter. Using an ice cream scoop can help ensure even distribution. This will give the muffins enough room to rise without overflowing.
- Bake for 18-20 minutes, or until a wooden skewer inserted into the center comes out clean or with a few moist crumbs attached. The baking time may vary depending on your oven, so keep an eye on them.
- Let the muffins cool in the muffin tin for a few minutes before transferring them to a wire rack to cool completely. This prevents them from becoming soggy.
Tips and Variations:
- For extra flavor, add a teaspoon of lemon zest to the batter. The lemon complements the blueberries beautifully.
- To make streusel topping, combine 1/4 cup all-purpose flour, 1/4 cup packed brown sugar, 2 tablespoons cold butter (cut into small pieces), and 1/4 teaspoon ground cinnamon. Crumble the mixture with your fingers until it resembles coarse crumbs. Sprinkle over the muffins before baking.
- If you don’t have vegetable oil, you can substitute melted butter or canola oil.
- For a healthier option, you can substitute half of the all-purpose flour with whole wheat flour. You can also reduce the amount of sugar slightly.
- To store the muffins, keep them in an airtight container at room temperature for up to 3 days. You can also freeze them for longer storage. Wrap them individually in plastic wrap and then place them in a freezer bag.
- Don’t have blueberries? You can substitute other berries like raspberries, blackberries, or strawberries. Just make sure to adjust the amount accordingly.
- High Altitude Adjustments: At high altitude, you may need to adjust the recipe slightly. Try reducing the baking powder by 1/4 teaspoon and increasing the liquid (milk) by 1-2 tablespoons. This helps prevent the muffins from rising too quickly and then collapsing.
- Preventing Sinking Blueberries: Besides tossing frozen blueberries with flour, you can also try layering the batter. Put a small amount of batter in each muffin cup, then add some blueberries, then more batter, and finally top with more blueberries. This helps distribute the blueberries more evenly and prevents them from all sinking to the bottom.
- Browning Issues: If your muffins are browning too quickly on top, you can tent them with aluminum foil during the last few minutes of baking. This will help prevent them from burning.
- Muffin Liners: While paper liners are convenient, you can also use silicone muffin liners. These are reusable and easy to clean. Just make sure to grease them well before filling them with batter.
- Gluten-Free Option: To make these muffins gluten-free, substitute the all-purpose flour with a gluten-free all-purpose flour blend. Make sure the blend contains xanthan gum, which helps bind the ingredients together.
Troubleshooting:
- Muffins are too dry: This could be due to overbaking or using too much flour. Make sure to measure the flour accurately and don’t overbake the muffins.
- Muffins are too dense: This could be due to overmixing the batter or using old baking powder. Make sure to use fresh baking powder and don’t overmix the batter.
- Muffins are not rising: This could be due to using old baking powder or not preheating the oven properly. Make sure to use fresh baking powder and preheat the oven to the correct temperature.
- Muffins are sticking to the pan: Make sure to grease the muffin tin well or use paper liners.
- Muffins are overflowing: This could be due to filling the muffin cups too full. Fill each cup about 2/3 full.
Enjoy your delicious homemade blueberry muffins!
Conclusion:
And there you have it! These aren’t just any muffins; they’re a burst of sunshine in every bite. The combination of the tender crumb, the juicy blueberries, and that hint of lemon zest creates a symphony of flavors that will have you reaching for seconds (and maybe thirds!). I truly believe this Blueberry Muffin recipe is a must-try for anyone who appreciates a good homemade treat. It’s simple enough for a weekday breakfast, yet impressive enough to serve to guests.
But why is this recipe so special? It’s all about the balance. We’ve carefully crafted the ingredients to ensure a moist, flavorful muffin that isn’t overly sweet. The blueberries practically melt in your mouth, releasing their sweet-tart juice with every chew. And that touch of lemon? It brightens everything up, adding a zesty note that complements the blueberries perfectly. Trust me, once you try these, you’ll never go back to store-bought muffins again!
Now, let’s talk about serving suggestions and variations because the possibilities are endless! For a simple yet elegant presentation, dust the tops of the muffins with powdered sugar before serving. Or, if you’re feeling a little more adventurous, try adding a streusel topping made with flour, butter, and brown sugar. The crunchy topping adds a delightful textural contrast to the soft muffins.
Looking for variations? You can easily adapt this recipe to suit your preferences. If you’re not a fan of lemon, you can omit the zest or substitute it with orange zest for a different citrusy flavor. You can also experiment with different types of berries. Raspberries, blackberries, or even a mixed berry blend would work beautifully. For a richer, more decadent muffin, try adding a handful of chopped walnuts or pecans to the batter. And if you’re feeling particularly indulgent, you could even add a drizzle of melted white chocolate over the cooled muffins.
Another great variation is to make mini muffins! Simply reduce the baking time by a few minutes and you’ll have adorable bite-sized treats that are perfect for parties or snacks. You could also add a cream cheese filling for an extra layer of richness and flavor. Just whisk together some cream cheese, sugar, and vanilla extract, and then swirl a spoonful into each muffin before baking.
I’m so excited for you to try this recipe and experience the joy of baking these delicious Blueberry Muffins for yourself. I truly believe that baking is a form of therapy, and there’s nothing quite like the aroma of freshly baked muffins filling your home.
So, what are you waiting for? Gather your ingredients, preheat your oven, and get ready to bake up a batch of these irresistible muffins. And most importantly, don’t forget to have fun! Baking should be a relaxing and enjoyable experience.
Once you’ve tried the recipe, I would absolutely love to hear about your experience! Did you make any variations? What did you think of the flavor? Share your photos and comments with me I’m always eager to see your creations and hear your feedback. Happy baking! I hope these muffins bring as much joy to your kitchen as they have to mine.
Blueberry Muffins: The Ultimate Guide to Baking Perfect Muffins
Fluffy and moist blueberry muffins bursting with fresh or frozen blueberries. A classic breakfast treat that's easy to make and perfect for any occasion.
Ingredients
- 2 1/2 cups all-purpose flour
- 1 cup granulated sugar
- 1 tablespoon baking powder
- 1/2 teaspoon baking soda
- 1/4 teaspoon salt
- 1 cup milk
- 1/2 cup vegetable oil
- 2 large eggs
- 1 teaspoon vanilla extract
- 2 cups fresh or frozen blueberries (if using frozen, do not thaw)
- Optional: 2 tablespoons granulated sugar for topping
Instructions
- Preheat your oven to 400°F (200°C). Line a 12-cup muffin tin with paper liners or grease it well with cooking spray.
- In a large bowl, whisk together the flour, sugar, baking powder, baking soda, and salt.
- In a separate bowl, whisk together the milk, vegetable oil, eggs, and vanilla extract.
- Pour the wet ingredients into the dry ingredients. Gently fold the mixture together with a spatula until just combined. Do not overmix!
- Gently fold in the blueberries. If using frozen blueberries, toss them with a tablespoon of flour before adding them to the batter.
- If desired, sprinkle the tops of the muffins with the optional 2 tablespoons of granulated sugar.
- Fill each muffin cup about 2/3 full with batter.
- Bake for 18-20 minutes, or until a wooden skewer inserted into the center comes out clean or with a few moist crumbs attached.
- Let the muffins cool in the muffin tin for a few minutes before transferring them to a wire rack to cool completely.
Notes
- For extra flavor: Add a teaspoon of lemon zest to the batter.
- Streusel Topping: Combine 1/4 cup all-purpose flour, 1/4 cup packed brown sugar, 2 tablespoons cold butter (cut into small pieces), and 1/4 teaspoon ground cinnamon. Crumble the mixture with your fingers until it resembles coarse crumbs. Sprinkle over the muffins before baking.
- Oil Substitutions: If you don’t have vegetable oil, you can substitute melted butter or canola oil.
- Healthier Option: Substitute half of the all-purpose flour with whole wheat flour. You can also reduce the amount of sugar slightly.
- Storage: Keep the muffins in an airtight container at room temperature for up to 3 days. You can also freeze them for longer storage. Wrap them individually in plastic wrap and then place them in a freezer bag.
- Berry Substitutions: You can substitute other berries like raspberries, blackberries, or strawberries. Just make sure to adjust the amount accordingly.
- High Altitude Adjustments: At high altitude, you may need to adjust the recipe slightly. Try reducing the baking powder by 1/4 teaspoon and increasing the liquid (milk) by 1-2 tablespoons.
- Preventing Sinking Blueberries: Besides tossing frozen blueberries with flour, you can also try layering the batter. Put a small amount of batter in each muffin cup, then add some blueberries, then more batter, and finally top with more blueberries.
- Browning Issues: If your muffins are browning too quickly on top, you can tent them with aluminum foil during the last few minutes of baking.
- Muffin Liners: While paper liners are convenient, you can also use silicone muffin liners. These are reusable and easy to clean. Just make sure to grease them well before filling them with batter.
- Gluten-Free Option: To make these muffins gluten-free, substitute the all-purpose flour with a gluten-free all-purpose flour blend. Make sure the blend contains xanthan gum, which helps bind the ingredients together.
- Muffins are too dry: This could be due to overbaking or using too much flour. Make sure to measure the flour accurately and don’t overbake the muffins.
- Muffins are too dense: This could be due to overmixing the batter or using old baking powder. Make sure to use fresh baking powder and don’t overmix the batter.
- Muffins are not rising: This could be due to using old baking powder or not preheating the oven properly. Make sure to use fresh baking powder and preheat the oven to the correct temperature.
- Muffins are sticking to the pan: Make sure to grease the muffin tin well or use paper liners.
- Muffins are overflowing: This could be due to filling the muffin cups too full. Fill each cup about 2/3 full.
Leave a Comment