
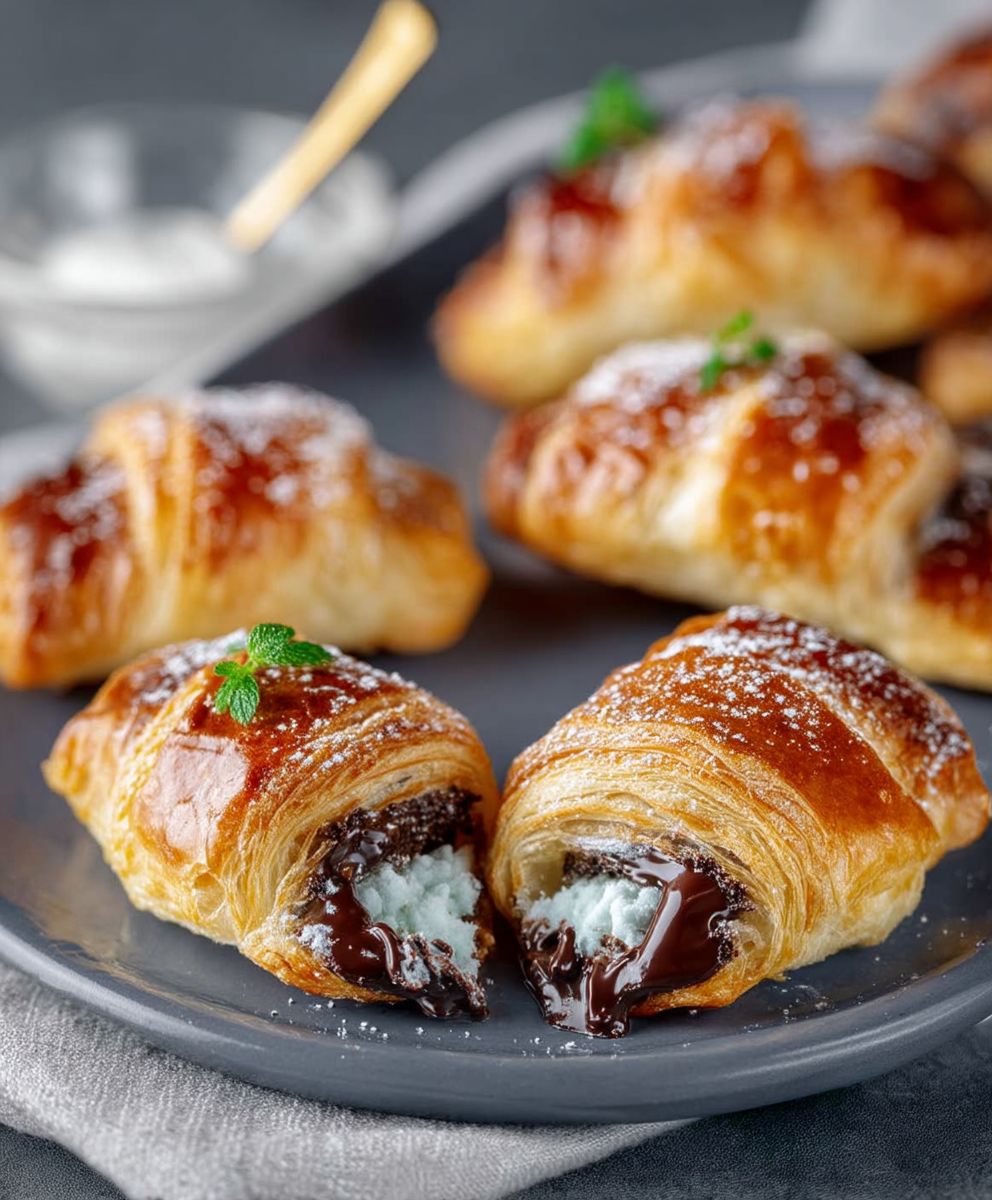
Chocolate Puff Pastry: the mere mention of it conjures images of flaky, golden layers giving way to a rich, decadent chocolate filling. Have you ever dreamt of creating a dessert that looks like it came straight from a Parisian patisserie, but is surprisingly simple to make at home? Well, dream no more! This recipe unlocks the secrets to achieving that very feat.
While the exact origins of puff pastry are debated, its sophisticated simplicity has been captivating bakers and dessert lovers for centuries. Some trace its roots back to ancient Greece, while others credit the French for perfecting the technique. Regardless of its precise history, the combination of buttery layers and a delicate crispness has made it a beloved base for countless sweet and savory creations worldwide. The addition of chocolate, of course, elevates it to an entirely new level of indulgence.
What makes chocolate puff pastry so irresistible? It’s the delightful contrast of textures the shattering crispness of the pastry against the smooth, melting chocolate. It’s the rich, satisfying flavor that isn’t overly sweet, making it perfect for breakfast, brunch, or a delightful afternoon treat. And perhaps most importantly, it’s the relative ease of preparation. While puff pastry might seem intimidating, this recipe breaks down the process into manageable steps, ensuring that even novice bakers can achieve impressive results. Get ready to impress your friends and family with this stunning and delicious dessert!

Ingredients:
- 2 sheets frozen puff pastry, thawed
- 1 cup (2 sticks) unsalted butter, softened
- 1 cup granulated sugar
- 1 cup packed light brown sugar
- 2 large eggs
- 1 teaspoon vanilla extract
- 1 cup all-purpose flour
- ½ cup unsweetened cocoa powder
- ¼ teaspoon salt
- 1 cup semi-sweet chocolate chips
- ½ cup chopped walnuts or pecans (optional)
- Powdered sugar, for dusting (optional)
- 1 large egg, beaten (for egg wash)
Preparing the Chocolate Filling:
Okay, let’s get started with the heart of our chocolate puff pastry the decadent chocolate filling! This is where the magic happens, transforming simple puff pastry into a chocolate lover’s dream. Trust me, the aroma alone is worth the effort!
- Cream the Butter and Sugars: In a large bowl, or the bowl of your stand mixer, cream together the softened butter, granulated sugar, and light brown sugar until light and fluffy. This usually takes about 3-5 minutes. Make sure your butter is truly softened; otherwise, you’ll end up with lumps. We want a smooth, creamy base for our chocolate filling. The light brown sugar adds a lovely molasses flavor that complements the chocolate beautifully.
- Incorporate the Eggs and Vanilla: Beat in the eggs one at a time, making sure each egg is fully incorporated before adding the next. Then, stir in the vanilla extract. The vanilla enhances the chocolate flavor and adds a touch of warmth to the filling. Don’t skip it!
- Combine Dry Ingredients: In a separate medium bowl, whisk together the flour, cocoa powder, and salt. Whisking ensures that the cocoa powder is evenly distributed and prevents any clumps in the filling. The salt balances the sweetness of the chocolate and other ingredients.
- Gradually Add Dry Ingredients to Wet Ingredients: Gradually add the dry ingredients to the wet ingredients, mixing on low speed until just combined. Be careful not to overmix! Overmixing can develop the gluten in the flour, resulting in a tough filling. We want a tender, melt-in-your-mouth texture.
- Stir in Chocolate Chips and Nuts (Optional): Gently fold in the chocolate chips and chopped nuts (if using). I love the extra burst of chocolate from the chocolate chips, and the nuts add a nice crunch and nutty flavor. Feel free to experiment with different types of chocolate chips or nuts to customize the filling to your liking.
Assembling the Puff Pastry:
Now for the fun part assembling our chocolate puff pastry! This is where we transform the puff pastry sheets and chocolate filling into a beautiful and delicious treat. Don’t worry if it looks a little messy; the end result will be worth it!
- Prepare the First Puff Pastry Sheet: On a lightly floured surface, unfold one sheet of puff pastry. Gently roll it out to a slightly larger rectangle, about 12×16 inches. This will make it easier to spread the filling evenly.
- Spread the Chocolate Filling: Spread the chocolate filling evenly over the puff pastry sheet, leaving a ½-inch border around the edges. This border will help seal the pastry together and prevent the filling from leaking out during baking.
- Top with the Second Puff Pastry Sheet: Carefully place the second sheet of puff pastry over the filling, aligning the edges as closely as possible.
- Seal the Edges: Press the edges of the puff pastry together to seal. You can use a fork to crimp the edges for a decorative touch and to ensure a tight seal. This is important to prevent the filling from oozing out while baking.
- Egg Wash (Optional): Brush the top of the puff pastry with the beaten egg. This will give the pastry a beautiful golden-brown color and a slightly glossy finish.
- Score the Top (Optional): Using a sharp knife or pizza cutter, score the top of the puff pastry in a decorative pattern. This will allow steam to escape during baking and prevent the pastry from puffing up too much. Be careful not to cut all the way through the pastry.
Baking the Chocolate Puff Pastry:
Time to bake our masterpiece! The baking process is crucial for achieving that perfect golden-brown color and flaky texture. Keep a close eye on the pastry while it’s baking to prevent it from burning.
- Preheat Oven: Preheat your oven to 375°F (190°C). Make sure your oven is properly preheated before placing the pastry inside. This will ensure even baking and prevent the pastry from becoming soggy.
- Bake: Place the assembled puff pastry on a baking sheet lined with parchment paper. Bake for 25-30 minutes, or until the pastry is golden brown and puffed up. The baking time may vary depending on your oven, so keep a close eye on it.
- Cool: Remove the puff pastry from the oven and let it cool on the baking sheet for a few minutes before transferring it to a wire rack to cool completely. This will prevent the pastry from becoming soggy.
Serving and Storage:
Finally, the moment we’ve all been waiting for serving and enjoying our delicious chocolate puff pastry! This pastry is best served warm or at room temperature. It’s perfect for breakfast, brunch, dessert, or any time you’re craving a chocolatey treat.
- Dust with Powdered Sugar (Optional): Dust the cooled puff pastry with powdered sugar for a decorative touch. This adds a touch of sweetness and makes the pastry look even more appealing.
- Cut and Serve: Cut the puff pastry into squares or rectangles and serve. Enjoy!
- Storage: Store any leftover puff pastry in an airtight container at room temperature for up to 2 days. You can also freeze the puff pastry for longer storage. Wrap it tightly in plastic wrap and then in aluminum foil. It can be stored in the freezer for up to 2 months. To thaw, simply place it in the refrigerator overnight.
Tips and Variations:
Here are a few tips and variations to help you customize this recipe to your liking:
- Different Chocolate: Experiment with different types of chocolate chips, such as dark chocolate, milk chocolate, or white chocolate.
- Add Spices: Add a pinch of cinnamon or nutmeg to the chocolate filling for a warm, spicy flavor.
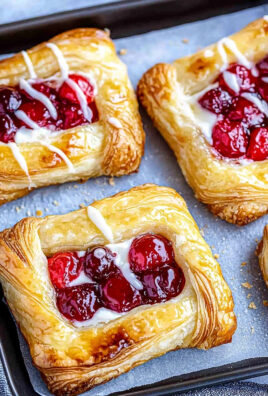
- Fruit Filling: Replace some of the chocolate filling with a layer of fruit preserves, such as raspberry or apricot.
- Nutella: Spread a layer of Nutella over the puff pastry before adding the chocolate filling for an extra decadent treat.
- Espresso Powder: Add a teaspoon of espresso powder to the dry ingredients for a richer, more intense chocolate flavor.
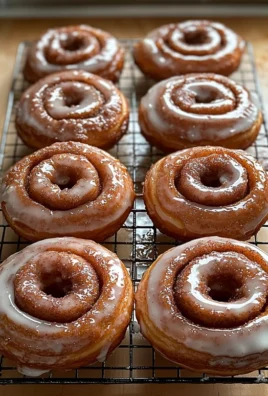
- Glaze: Drizzle a simple glaze over the cooled puff pastry for added sweetness and shine. To make a glaze, whisk together powdered sugar and milk until smooth.
- Savory Version: For a savory version, omit the sugar and cocoa powder from the filling and replace them with grated cheese, herbs, and spices.
Enjoy your homemade Chocolate Puff Pastry!
Conclusion:
This Chocolate Puff Pastry recipe is truly a must-try, and I’m not just saying that! It’s the perfect combination of flaky, buttery pastry and rich, decadent chocolate, creating a symphony of textures and flavors that will leave you wanting more. The simplicity of the recipe belies its impressive results you’ll be amazed at how easily you can create a bakery-worthy treat in your own kitchen. Forget complicated desserts that require hours of preparation; this recipe delivers maximum impact with minimal effort. It’s the ideal solution for satisfying your sweet tooth, impressing guests, or simply enjoying a moment of pure indulgence.
But the best part? It’s incredibly versatile! While the recipe as written is divine, feel free to experiment and make it your own. For a truly decadent experience, try adding a layer of Nutella before topping with the chocolate. The hazelnut flavor complements the chocolate beautifully and adds an extra layer of richness. If you’re a fan of fruit, consider incorporating some fresh berries, like raspberries or strawberries, for a burst of freshness and a touch of tartness. A sprinkle of chopped nuts, such as almonds or pecans, can also add a delightful crunch.
Serving suggestions are endless! This Chocolate Puff Pastry is fantastic on its own, warm from the oven, with a scoop of vanilla ice cream. Imagine the warm pastry melting the ice cream pure bliss! It also pairs perfectly with a cup of coffee or tea, making it an ideal afternoon treat. For a more elegant presentation, dust the pastry with powdered sugar or drizzle it with melted white chocolate. You could even cut it into smaller squares and serve it as part of a dessert platter.
And don’t limit yourself to just one type of chocolate! Experiment with different varieties, such as dark chocolate, milk chocolate, or even white chocolate, to create unique flavor combinations. You could also try adding a pinch of sea salt to the chocolate for a sweet and salty twist. The possibilities are truly endless, so let your creativity run wild and create a Chocolate Puff Pastry that’s perfectly tailored to your taste.
I truly believe that this recipe will become a staple in your baking repertoire. It’s quick, easy, and incredibly delicious what more could you ask for? So, gather your ingredients, preheat your oven, and get ready to experience the magic of homemade Chocolate Puff Pastry.
I’m so excited for you to try this recipe! Once you’ve had a chance to bake it, please come back and share your experience in the comments below. I’d love to hear about your variations, serving suggestions, and any tips or tricks you discovered along the way. Let’s create a community of Chocolate Puff Pastry enthusiasts and inspire each other with our culinary creations! Happy baking!
Chocolate Puff Pastry: A Delicious & Easy Dessert Recipe
Flaky puff pastry filled with a rich, homemade chocolate filling. Easy to make and perfect for breakfast, brunch, or dessert!
Ingredients
- 2 sheets frozen puff pastry, thawed
- 1 cup (2 sticks) unsalted butter, softened
- 1 cup granulated sugar
- 1 cup packed light brown sugar
- 2 large eggs
- 1 teaspoon vanilla extract
- 1 cup all-purpose flour
- ½ cup unsweetened cocoa powder
- ¼ teaspoon salt
- 1 cup semi-sweet chocolate chips
- ½ cup chopped walnuts or pecans (optional)
- Powdered sugar, for dusting (optional)
- 1 large egg, beaten (for egg wash)
Instructions
- Prepare the Chocolate Filling: In a large bowl, cream together the softened butter, granulated sugar, and light brown sugar until light and fluffy (3-5 minutes). Beat in the eggs one at a time, then stir in the vanilla extract.
- In a separate medium bowl, whisk together the flour, cocoa powder, and salt.
- Gradually add the dry ingredients to the wet ingredients, mixing on low speed until just combined. Be careful not to overmix!
- Gently fold in the chocolate chips and chopped nuts (if using).
- Assemble the Puff Pastry: On a lightly floured surface, unfold one sheet of puff pastry. Gently roll it out to a slightly larger rectangle, about 12×16 inches.
- Spread the chocolate filling evenly over the puff pastry sheet, leaving a ½-inch border around the edges.
- Carefully place the second sheet of puff pastry over the filling, aligning the edges as closely as possible.
- Press the edges of the puff pastry together to seal. You can use a fork to crimp the edges for a decorative touch and to ensure a tight seal.
- Brush the top of the puff pastry with the beaten egg. This will give the pastry a beautiful golden-brown color and a slightly glossy finish.
- Using a sharp knife or pizza cutter, score the top of the puff pastry in a decorative pattern. This will allow steam to escape during baking and prevent the pastry from puffing up too much. Be careful not to cut all the way through the pastry.
- Bake: Preheat your oven to 375°F (190°C). Place the assembled puff pastry on a baking sheet lined with parchment paper. Bake for 25-30 minutes, or until the pastry is golden brown and puffed up.
- Cool: Remove the puff pastry from the oven and let it cool on the baking sheet for a few minutes before transferring it to a wire rack to cool completely.
- Serve: Dust the cooled puff pastry with powdered sugar (optional). Cut into squares or rectangles and serve warm or at room temperature.
Notes
- Make sure your butter is truly softened for the filling.
- Don’t overmix the filling after adding the dry ingredients.
- Seal the edges of the puff pastry well to prevent filling from leaking.
- Scoring the top allows steam to escape and prevents excessive puffing.
- Experiment with different chocolate chips, nuts, or spices in the filling.
- Store leftovers in an airtight container at room temperature for up to 2 days or freeze for up to 2 months.

Leave a Comment