
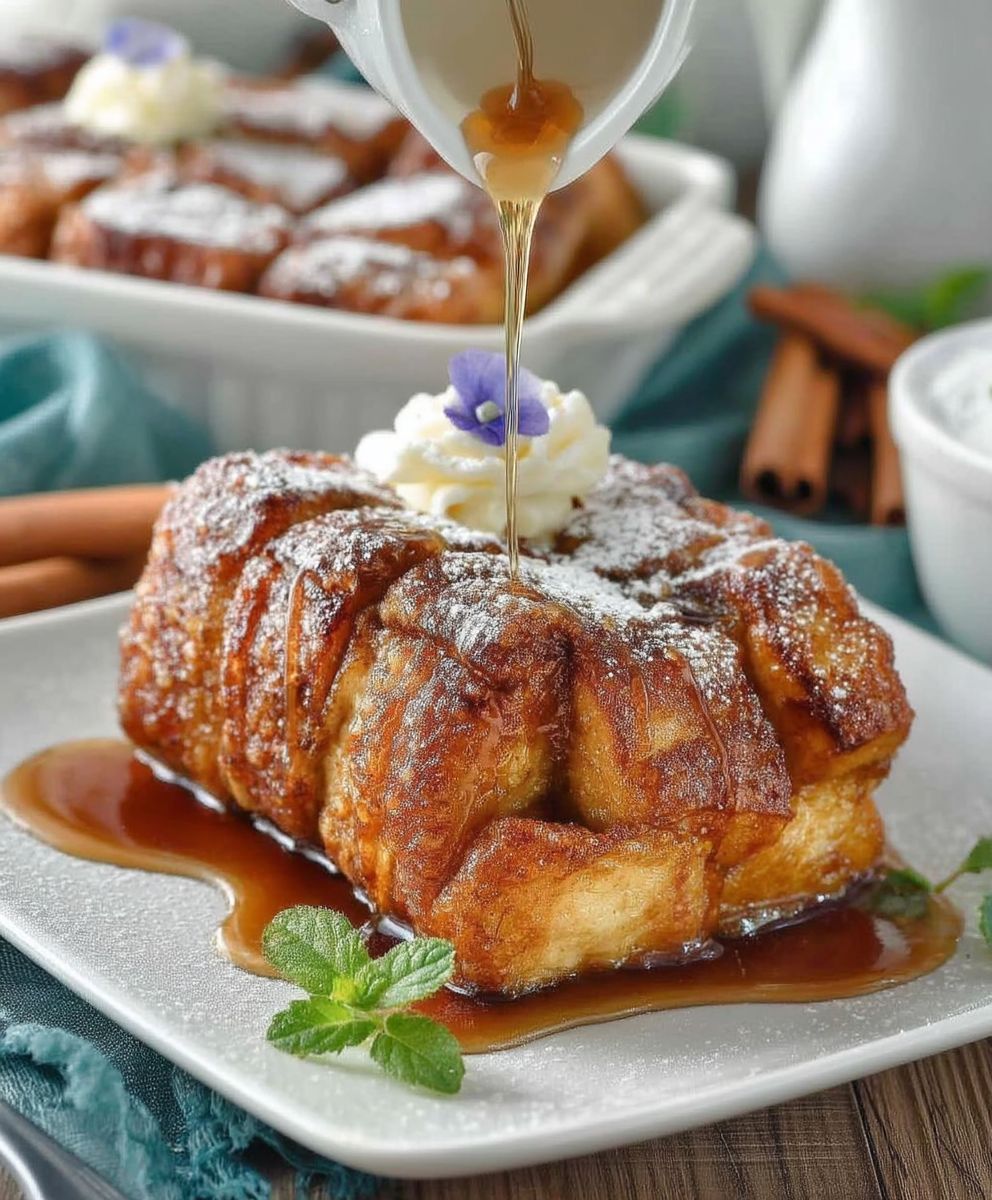
Hasselback French Toast: Prepare to elevate your breakfast game with this stunning and surprisingly simple twist on a classic! Imagine the comforting flavors of French toast, but with a delightful textural upgrade crispy edges and a soft, custardy interior, all in one bite. This isn’t just breakfast; it’s a breakfast experience.
While the exact origins of Hasselback potatoes are well-documented (created in 1953 at the Hasselbacken restaurant in Stockholm, Sweden), the application of the “Hasselback” technique to other dishes is a more modern innovation. It’s a testament to the ingenuity of home cooks and chefs alike, always seeking new ways to enhance familiar flavors and presentations. This particular adaptation, Hasselback French Toast, takes the beloved French toast and transforms it into something truly special.
So, why is this dish so irresistible? Beyond its visual appeal, it’s the perfect combination of textures that makes it a winner. The shallow cuts allow the custard to penetrate deeply, creating a melt-in-your-mouth center, while the exposed edges become beautifully golden and crisp in the oven or pan. Plus, it’s incredibly versatile! You can customize it with your favorite toppings, from fresh berries and whipped cream to a drizzle of maple syrup or a dusting of powdered sugar. Whether you’re looking for a show-stopping brunch centerpiece or a special weekend treat, this recipe is guaranteed to impress. Let’s get started!

Ingredients:
- 1 loaf challah bread, unsliced (about 12-16 inches long)
- 6 large eggs
- 1 1/2 cups whole milk
- 1/2 cup heavy cream
- 1/4 cup granulated sugar
- 2 tablespoons vanilla extract
- 1 teaspoon ground cinnamon
- 1/4 teaspoon ground nutmeg
- Pinch of salt
- 6 tablespoons unsalted butter, melted
- 1/2 cup maple syrup, for serving
- Fresh berries, for serving (strawberries, blueberries, raspberries)
- Powdered sugar, for dusting (optional)
Preparing the Hasselback Bread:
Okay, let’s get started! The key to amazing Hasselback French Toast is the bread. We need to create those beautiful slices without cutting all the way through. This allows the custard to soak in perfectly.
- Prepare Your Bread: Place the challah loaf on a cutting board. To prevent cutting all the way through, place chopsticks or wooden skewers on either side of the loaf, running lengthwise. These will act as guides for your knife.
- Make the Slices: Using a sharp serrated knife, make slices about 1/2 inch apart along the entire length of the loaf. The knife should stop when it hits the chopsticks or skewers. Aim for even slices for consistent cooking.
- Gently Fan the Slices: Once you’ve sliced the entire loaf, gently fan the slices apart. This will help the custard penetrate and create those crispy edges we all love. Don’t worry if a few slices stick together; they’ll separate during cooking.
Making the Custard:
Now for the custard! This is where the magic happens. A rich and flavorful custard is essential for truly decadent French toast.
- Whisk the Eggs: In a large bowl, whisk together the eggs until they are light and frothy. This will help create a smooth and even custard.
- Add the Dairy: Pour in the whole milk and heavy cream. The heavy cream adds richness and helps create a custardy texture. Whisk until well combined.
- Sweeten and Spice: Add the granulated sugar, vanilla extract, ground cinnamon, ground nutmeg, and salt. Whisk until the sugar is dissolved and the spices are evenly distributed. Taste the custard and adjust the sweetness or spices to your liking. I sometimes add a touch of orange zest for a brighter flavor!
Soaking the Bread:
This is a crucial step! We want the bread to be thoroughly soaked in the custard, but not so soggy that it falls apart. Patience is key here.
- Pour the Custard: Place the sliced challah loaf in a baking dish that is just large enough to hold it snugly. Slowly pour the custard over the loaf, making sure to get it into all the slices.
- Soak Thoroughly: Let the bread soak in the custard for at least 30 minutes, or up to an hour, flipping it halfway through. This ensures that both sides of the bread are evenly saturated. You can gently press down on the loaf to help the custard penetrate. If you’re short on time, 30 minutes will do, but the longer it soaks, the richer and more flavorful the French toast will be.
Cooking the Hasselback French Toast:
Time to cook! We’re going to bake this French toast to golden perfection. Baking ensures even cooking and prevents the bread from burning.
- Preheat the Oven: Preheat your oven to 350°F (175°C).
- Prepare the Baking Dish: Grease a baking dish with some of the melted butter. This will prevent the French toast from sticking.
- Pour Remaining Butter: Drizzle the remaining melted butter over the soaked challah loaf. This will help it brown beautifully in the oven.
- Bake: Bake for 35-45 minutes, or until the French toast is golden brown and the custard is set. A toothpick inserted into the center should come out clean. The cooking time may vary depending on your oven, so keep an eye on it.
- Check for Doneness: If the top is browning too quickly, you can tent it with foil for the last 10-15 minutes of baking.
Serving and Enjoying:
The best part! Let’s get this delicious French toast on the table.
- Let it Cool Slightly: Remove the French toast from the oven and let it cool for a few minutes before serving. This will make it easier to slice and serve.
- Slice and Serve: Carefully slice the Hasselback French toast into individual portions.
- Add Toppings: Drizzle generously with maple syrup. I love using pure maple syrup for the best flavor.
- Garnish: Top with fresh berries, such as strawberries, blueberries, and raspberries. A dusting of powdered sugar adds a touch of elegance.
- Enjoy! Serve immediately and enjoy your delicious Hasselback French toast! This is perfect for a special breakfast, brunch, or even dessert.
Tips and Variations:
Want to customize your Hasselback French Toast? Here are a few ideas:
- Different Breads: While challah is my favorite, you can also use brioche, sourdough, or even a sturdy white bread. Just make sure it’s unsliced.
- Flavor Variations: Experiment with different extracts, such as almond or lemon. You can also add a splash of bourbon or rum to the custard for a boozy twist.
- Nutty Goodness: Sprinkle chopped nuts, such as pecans or walnuts, over the French toast before baking.
- Chocolate Chips: Add chocolate chips to the custard for a chocolatey treat.
- Savory Option: For a savory version, omit the sugar and vanilla extract from the custard. Add herbs, such as thyme or rosemary, and top with grated cheese before baking.
- Stuffed French Toast: Before baking, you can stuff the slices with cream cheese, Nutella, or fruit preserves.
Make Ahead Tips:
Want to get a head start? Here’s how:
- Soak the Bread Overnight: You can soak the bread in the custard overnight in the refrigerator. This will allow the flavors to meld even more. Just be sure to cover the baking dish tightly with plastic wrap.
- Assemble Ahead: You can slice the bread and prepare the custard the night before. Store them separately in the refrigerator and assemble the French toast in the morning.
Storage Instructions:
Got leftovers? Here’s how to store them:
- Refrigerate: Store leftover French toast in an airtight container in the refrigerator for up to 3 days.
- Reheat: Reheat in the oven at 350°F (175°C) for 10-15 minutes, or until warmed through. You can also reheat it in the microwave, but it may not be as crispy.
- Freeze: For longer storage, you can freeze the French toast. Wrap individual slices in plastic wrap and then place them in a freezer bag. Freeze for up to 2 months. Thaw overnight in the refrigerator before reheating.
Conclusion:
This Hasselback French Toast recipe isn’t just breakfast; it’s a weekend celebration waiting to happen! The combination of the crispy, caramelized edges and the soft, custardy interior is simply irresistible. Trust me, once you take that first bite, you’ll understand why I’m so enthusiastic about it. It’s a dish that looks impressive but is surprisingly easy to pull off, making it perfect for impressing brunch guests or simply treating yourself to something special.
But the best part? It’s incredibly versatile! While I’ve shared my go-to method, feel free to experiment with different toppings and flavors to make it your own signature dish.
Serving Suggestions and Variations:
* Berry Bliss: Top your Hasselback French Toast with a generous helping of fresh berries strawberries, blueberries, raspberries and a dollop of whipped cream. A drizzle of maple syrup or a dusting of powdered sugar adds the perfect finishing touch.
* Nutty Delight: Sprinkle chopped pecans, walnuts, or almonds over the French toast before baking for a delightful crunch. A drizzle of honey or a sprinkle of cinnamon adds warmth and sweetness.
* Savory Twist: For a savory option, try adding a sprinkle of shredded cheese (cheddar, Gruyere, or Parmesan) between the slices before baking. Serve with a side of crispy bacon or sausage for a complete breakfast.
* Chocolate Indulgence: Who can resist chocolate? Add chocolate chips or chunks between the slices before baking for a decadent treat. A drizzle of chocolate sauce or a dusting of cocoa powder takes it to the next level.
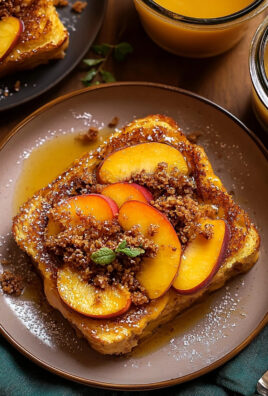
* Seasonal Sensations: Adapt the recipe to the seasons! In the fall, add pumpkin spice to the custard and top with apple slices and a caramel drizzle. In the winter, add cranberries and orange zest for a festive flavor. In the spring, use rhubarb compote as a topping.
Don’t be afraid to get creative and experiment with different flavors and toppings. The possibilities are endless! You could even try using different types of bread, such as brioche or challah, for a richer flavor.
I truly believe that this Hasselback French Toast recipe is a must-try for anyone who loves breakfast or brunch. It’s a guaranteed crowd-pleaser that will impress your friends and family. It’s also a fantastic way to elevate your everyday breakfast routine.
So, what are you waiting for? Gather your ingredients, preheat your oven, and get ready to experience the magic of Hasselback French Toast. I’m confident that you’ll love it as much as I do!
And most importantly, I want to hear about your experience! Did you try the recipe? What variations did you make? What did your family and friends think? Share your photos and stories in the comments below. I can’t wait to see your creations and hear about your culinary adventures. Happy cooking! Let me know if you have any questions, I’m always happy to help. Enjoy your delicious and beautiful Hasselback French Toast!
Hasselback French Toast: The Ultimate Guide to Deliciousness
Decadent Hasselback French Toast made with challah bread, soaked in a rich custard, and baked to golden perfection. A show-stopping breakfast or brunch!
Ingredients
- 1 loaf challah bread, unsliced (about 12-16 inches long)
- 6 large eggs
- 1 1/2 cups whole milk
- 1/2 cup heavy cream
- 1/4 cup granulated sugar
- 2 tablespoons vanilla extract
- 1 teaspoon ground cinnamon
- 1/4 teaspoon ground nutmeg
- Pinch of salt
- 6 tablespoons unsalted butter, melted
- 1/2 cup maple syrup, for serving
- Fresh berries, for serving (strawberries, blueberries, raspberries)
- Powdered sugar, for dusting (optional)
Instructions
- Prepare Your Bread: Place the challah loaf on a cutting board. To prevent cutting all the way through, place chopsticks or wooden skewers on either side of the loaf, running lengthwise. These will act as guides for your knife.
- Make the Slices: Using a sharp serrated knife, make slices about 1/2 inch apart along the entire length of the loaf. The knife should stop when it hits the chopsticks or skewers. Aim for even slices for consistent cooking.
- Gently Fan the Slices: Once you’ve sliced the entire loaf, gently fan the slices apart. This will help the custard penetrate and create those crispy edges we all love. Don’t worry if a few slices stick together; they’ll separate during cooking.
- Whisk the Eggs: In a large bowl, whisk together the eggs until they are light and frothy. This will help create a smooth and even custard.
- Add the Dairy: Pour in the whole milk and heavy cream. The heavy cream adds richness and helps create a custardy texture. Whisk until well combined.
- Sweeten and Spice: Add the granulated sugar, vanilla extract, ground cinnamon, ground nutmeg, and salt. Whisk until the sugar is dissolved and the spices are evenly distributed. Taste the custard and adjust the sweetness or spices to your liking. I sometimes add a touch of orange zest for a brighter flavor!
- Pour the Custard: Place the sliced challah loaf in a baking dish that is just large enough to hold it snugly. Slowly pour the custard over the loaf, making sure to get it into all the slices.
- Soak Thoroughly: Let the bread soak in the custard for at least 30 minutes, or up to an hour, flipping it halfway through. This ensures that both sides of the bread are evenly saturated. You can gently press down on the loaf to help the custard penetrate. If you’re short on time, 30 minutes will do, but the longer it soaks, the richer and more flavorful the French toast will be.
- Preheat the Oven: Preheat your oven to 350°F (175°C).
- Prepare the Baking Dish: Grease a baking dish with some of the melted butter. This will prevent the French toast from sticking.
- Pour Remaining Butter: Drizzle the remaining melted butter over the soaked challah loaf. This will help it brown beautifully in the oven.
- Bake: Bake for 35-45 minutes, or until the French toast is golden brown and the custard is set. A toothpick inserted into the center should come out clean. The cooking time may vary depending on your oven, so keep an eye on it.
- Check for Doneness: If the top is browning too quickly, you can tent it with foil for the last 10-15 minutes of baking.
- Let it Cool Slightly: Remove the French toast from the oven and let it cool for a few minutes before serving. This will make it easier to slice and serve.
- Slice and Serve: Carefully slice the Hasselback French toast into individual portions.
- Add Toppings: Drizzle generously with maple syrup. I love using pure maple syrup for the best flavor.
- Garnish: Top with fresh berries, such as strawberries, blueberries, and raspberries. A dusting of powdered sugar adds a touch of elegance.
- Enjoy! Serve immediately and enjoy your delicious Hasselback French toast! This is perfect for a special breakfast, brunch, or even dessert.
Notes
- While challah is my favorite, you can also use brioche, sourdough, or even a sturdy white bread. Just make sure it’s unsliced.
- Experiment with different extracts, such as almond or lemon. You can also add a splash of bourbon or rum to the custard for a boozy twist.
- Sprinkle chopped nuts, such as pecans or walnuts, over the French toast before baking.
- Add chocolate chips to the custard for a chocolatey treat.
- For a savory version, omit the sugar and vanilla extract from the custard. Add herbs, such as thyme or rosemary, and top with grated cheese before baking.
- Before baking, you can stuff the slices with cream cheese, Nutella, or fruit preserves.
- You can soak the bread in the custard overnight in the refrigerator. This will allow the flavors to meld even more. Just be sure to cover the baking dish tightly with plastic wrap.
- You can slice the bread and prepare the custard the night before. Store them separately in the refrigerator and assemble the French toast in the morning.
- Store leftover French toast in an airtight container in the refrigerator for up to 3 days.
- Reheat in the oven at 350°F (175°C) for 10-15 minutes, or until warmed through. You can also reheat it in the microwave, but it may not be as crispy.
- For longer storage, you can freeze the French toast. Wrap individual slices in plastic wrap and then place them in a freezer bag. Freeze for up to 2 months. Thaw overnight in the refrigerator before reheating.


Leave a Comment