
Wholemeal wheat bread, a staple in households around the world, is more than just a source of carbohydrates; it’s a symbol of nourishment, tradition, and homemade goodness. Have you ever experienced the simple joy of slicing into a freshly baked loaf, the aroma of warm wheat filling your kitchen? It’s a sensory experience that evokes feelings of comfort and satisfaction, and it’s precisely what we’re going to explore today.
The history of wholemeal wheat bread stretches back centuries, with early forms of unleavened bread serving as a dietary cornerstone for ancient civilizations. As milling techniques evolved, so did our ability to harness the full nutritional power of the wheat grain. Unlike refined white bread, wholemeal wheat bread retains the bran and germ, packing a powerful punch of fiber, vitamins, and minerals. This makes it a healthier and more satisfying choice for those seeking a balanced diet.
But beyond its nutritional benefits, people adore wholemeal wheat bread for its robust flavor and satisfying texture. The slightly nutty taste pairs perfectly with everything from savory sandwiches to sweet jams. Its hearty crumb provides a delightful chewiness that elevates any meal. Plus, the convenience of baking your own loaf means you can control the ingredients and enjoy a truly wholesome product, free from artificial additives and preservatives. So, let’s embark on this baking adventure together and create a loaf of wholemeal wheat bread that will nourish your body and delight your senses!

Ingredients:
- 500g Wholemeal Wheat Flour, plus extra for dusting
- 10g (2 tsp) Dried Active Yeast
- 10g (2 tsp) Salt
- 350ml Warm Water (around 105-115°F or 40-46°C)
- 2 tbsp Olive Oil, plus extra for greasing
- 1 tbsp Honey or Maple Syrup (optional, for a touch of sweetness and yeast activation)
- 2 tbsp Wheat Bran (optional, for added texture and fiber)
- 1 tbsp Flax Seeds (optional, for added nutrients and flavor)
Preparing the Dough:
- Activate the Yeast: In a large mixing bowl, combine the warm water and honey (if using). Sprinkle the dried active yeast over the water. Let it sit for 5-10 minutes, or until the yeast becomes foamy. This indicates that the yeast is alive and active. If the yeast doesn’t foam, it might be old or the water might be too hot or cold, and you’ll need to start again with fresh yeast and properly tempered water.
- Combine Dry Ingredients: In a separate large bowl, whisk together the wholemeal wheat flour, salt, wheat bran (if using), and flax seeds (if using). This ensures that the salt is evenly distributed throughout the flour, which is important for proper gluten development and yeast activity.
- Combine Wet and Dry Ingredients: Pour the yeast mixture into the bowl with the dry ingredients. Add the olive oil. Use a wooden spoon or your hands to mix the ingredients together until a shaggy dough forms. The dough will be quite sticky at this stage, and that’s perfectly normal for wholemeal bread.
- Knead the Dough: Turn the dough out onto a lightly floured surface. Knead the dough for 8-10 minutes, or until it becomes smooth and elastic. Kneading is crucial for developing the gluten in the flour, which gives the bread its structure and chewiness. To knead, push the dough away from you with the heel of your hand, then fold it back over itself. Rotate the dough a quarter turn and repeat. If the dough is too sticky, add a little more flour, one tablespoon at a time, until it becomes manageable. Be careful not to add too much flour, as this can make the bread dry.
- First Rise (Bulk Fermentation): Lightly grease a large bowl with olive oil. Place the kneaded dough in the bowl, turning it to coat all sides with oil. This will prevent the dough from drying out during the rising process. Cover the bowl with plastic wrap or a clean kitchen towel. Let the dough rise in a warm place for 1-1.5 hours, or until it has doubled in size. The rising time will depend on the temperature of your environment. A warm place will encourage the yeast to work faster.
Shaping and Second Rise:
- Punch Down the Dough: After the first rise, gently punch down the dough to release the air. This helps to redistribute the yeast and create a more even texture in the final bread.
- Shape the Dough: Turn the dough out onto a lightly floured surface. Gently shape the dough into a loaf. You can either shape it into a round boule or an oblong loaf, depending on your preference and the type of baking pan you’re using. For an oblong loaf, flatten the dough into a rectangle, then roll it up tightly from one end to the other. Pinch the seam to seal it.
- Prepare the Baking Pan: Grease a loaf pan (approximately 9×5 inches) with olive oil or line it with parchment paper. This will prevent the bread from sticking to the pan.
- Place Dough in Pan: Carefully place the shaped dough into the prepared loaf pan, seam-side down.
- Second Rise (Proofing): Cover the loaf pan with plastic wrap or a clean kitchen towel. Let the dough rise in a warm place for 30-45 minutes, or until it has almost doubled in size. This second rise, called proofing, is essential for creating a light and airy bread.
Baking the Bread:
- Preheat the Oven: Preheat your oven to 375°F (190°C). Make sure your oven rack is in the middle position.
- Score the Loaf (Optional): Just before baking, use a sharp knife or a lame (a special bread-scoring tool) to score the top of the loaf. Scoring allows the bread to expand evenly during baking and prevents it from cracking in unpredictable places. A simple slash down the center of the loaf is sufficient.
- Bake the Bread: Place the loaf pan in the preheated oven. Bake for 30-40 minutes, or until the bread is golden brown and sounds hollow when tapped on the bottom. The internal temperature of the bread should reach 200-210°F (93-99°C).
- Cool the Bread: Remove the loaf pan from the oven and let the bread cool in the pan for 5-10 minutes. Then, carefully remove the bread from the pan and place it on a wire rack to cool completely before slicing. Cooling the bread completely is important because it allows the crumb to set properly. Slicing the bread while it’s still warm can result in a gummy texture.
Tips and Variations:
- Adjusting Hydration: Wholemeal flour absorbs more water than white flour, so you might need to adjust the amount of water depending on the humidity of your environment. If the dough seems too dry, add a little more water, one tablespoon at a time. If it’s too sticky, add a little more flour, one tablespoon at a time.
- Adding Seeds and Nuts: Feel free to add other seeds and nuts to the dough for added flavor and texture. Sunflower seeds, pumpkin seeds, walnuts, and pecans are all great options. Add about 1/4 to 1/2 cup of seeds or nuts to the dough along with the flour.
- Using a Dutch Oven: For a crustier loaf, you can bake the bread in a Dutch oven. Preheat the Dutch oven in the oven along with the oven itself. Carefully place the shaped dough into the hot Dutch oven (be very careful, as the Dutch oven will be extremely hot). Cover the Dutch oven and bake for 20 minutes, then remove the lid and bake for another 10-15 minutes, or until the bread is golden brown.
- Storing the Bread: Store the cooled bread in an airtight container at room temperature for up to 3 days. For longer storage, you can freeze the bread. Slice the bread before freezing for easier thawing.
- Enhancing Flavor: Consider adding a teaspoon of molasses or brown sugar for a richer, more complex flavor. You can also experiment with different herbs and spices, such as rosemary, thyme, or caraway seeds.
- Kneading Alternatives: If you don’t want to knead by hand, you can use a stand mixer with a dough hook attachment. Knead the dough on low speed for 8-10 minutes. You can also try a no-knead method, which involves mixing the ingredients together and letting the dough rise for a longer period of time (12-18 hours).
- Checking for Doneness: If you’re unsure whether the bread is done, insert a wooden skewer into the center of the loaf. If the skewer comes out clean, the bread is done. You can also use a digital thermometer to check the internal temperature.
- Troubleshooting: If your bread is dense and doesn’t rise properly, it could be due to several factors, such as old yeast, not enough kneading, or not enough rising time. Make sure your yeast is fresh, knead the dough thoroughly, and allow it to rise in a warm place.
Conclusion:
And there you have it! This wholemeal wheat bread recipe isn’t just another bread recipe; it’s an invitation to experience the simple joy of baking and the unparalleled satisfaction of creating something wholesome and delicious from scratch. From the nutty aroma that fills your kitchen as it bakes to the hearty, satisfying taste of each slice, this bread is a true testament to the power of simple ingredients and a little bit of patience.
But why is this recipe a must-try, you ask? Well, beyond the obvious benefits of knowing exactly what goes into your food (no mysterious additives here!), this bread offers a depth of flavor and texture that you simply can’t find in store-bought loaves. The wholemeal flour lends a subtle sweetness and a delightful chewiness, while the careful proofing process ensures a light and airy crumb. It’s the perfect balance of rustic charm and refined taste.
Imagine waking up to the smell of freshly baked bread, the warmth radiating through your home. Picture yourself slicing into a loaf still slightly warm from the oven, the crust crackling under the knife. This isn’t just breakfast; it’s an experience. And it’s an experience that’s easily within your reach.
Now, let’s talk serving suggestions. This wholemeal wheat bread is incredibly versatile. It’s fantastic toasted with a smear of butter and a drizzle of honey for a simple yet satisfying breakfast. It makes incredible sandwiches, providing a sturdy and flavorful base for your favorite fillings. Think turkey and avocado, grilled cheese with tomato, or even a classic peanut butter and jelly.
But don’t stop there! Get creative with your serving ideas. Try using it to make croutons for your favorite soup or salad. Cube it and toast it with herbs and garlic for a delicious appetizer. Or, for a truly decadent treat, use it to make French toast or bread pudding. The possibilities are endless!
And speaking of getting creative, feel free to experiment with variations of this recipe. Add a handful of sunflower seeds or pumpkin seeds to the dough for extra texture and flavor. Incorporate a tablespoon of molasses or maple syrup for a touch of sweetness. Or, try using a different type of whole grain flour, such as spelt or rye, to create a unique flavor profile.
If you’re feeling adventurous, you could even try adding dried fruits and nuts to the dough for a festive holiday bread. Imagine a loaf studded with cranberries, walnuts, and a hint of orange zest perfect for sharing with friends and family during the holiday season.
The beauty of this recipe is that it’s easily adaptable to your own personal preferences. Don’t be afraid to experiment and make it your own. After all, the best recipes are the ones that are tailored to your individual tastes.
So, what are you waiting for? Preheat your oven, gather your ingredients, and get ready to embark on a baking adventure. I promise you, the effort is well worth the reward. This wholemeal wheat bread will quickly become a staple in your kitchen, a go-to recipe for any occasion.
I’m so excited for you to try this recipe and experience the joy of baking your own bread. Once you do, I’d love to hear about your experience! Share your photos, your tips, and your variations in the comments below. Let’s create a community of bread-baking enthusiasts and inspire each other to create delicious and wholesome food. Happy baking!
Wholemeal Wheat Bread: The Ultimate Guide to Baking and Benefits
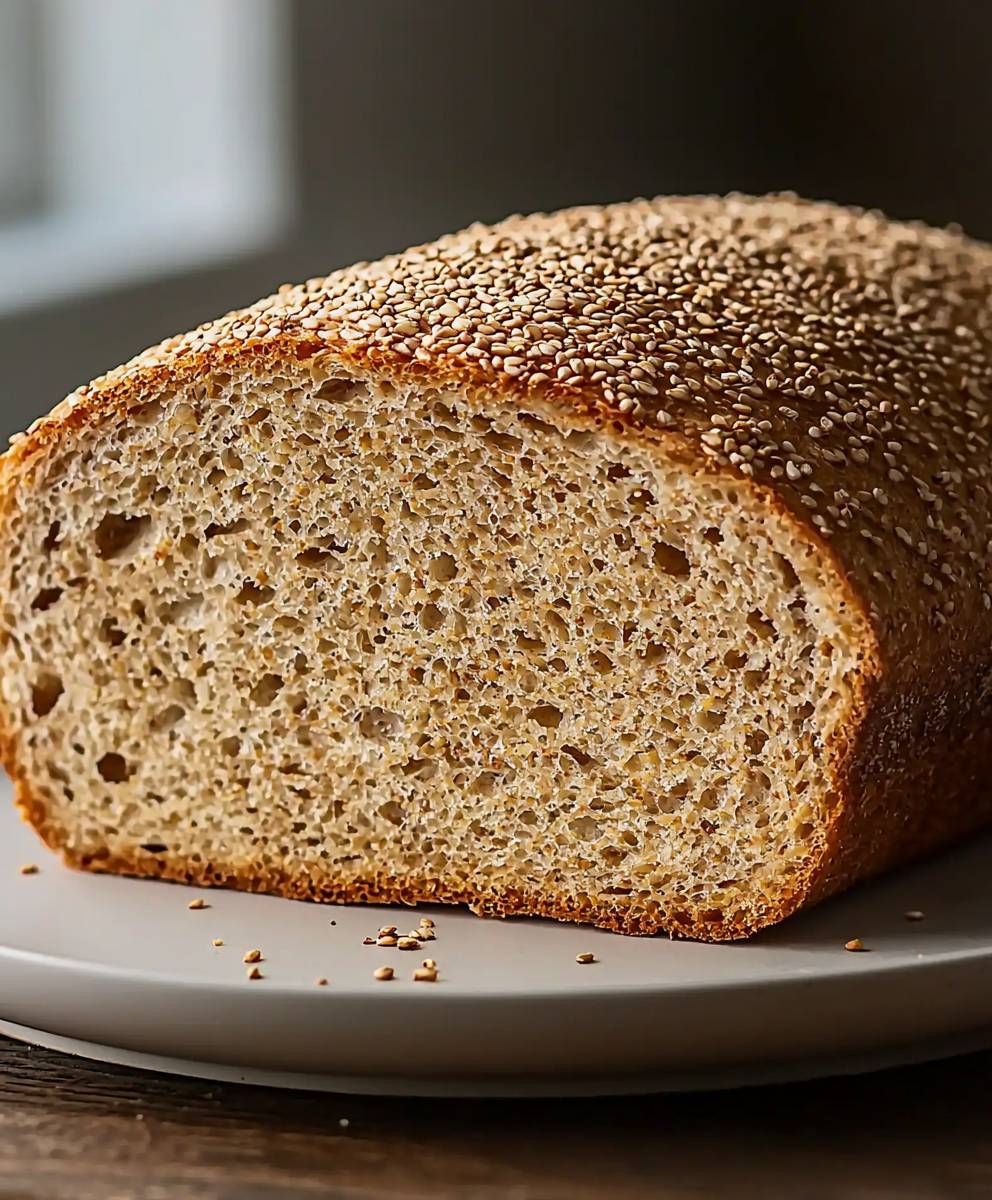
Hearty, flavorful homemade wholemeal wheat bread, perfect for sandwiches or enjoying with your favorite spread. Easy to follow and yields a delicious, wholesome loaf.
Ingredients
- 500g Wholemeal Wheat Flour, plus extra for dusting
- 10g (2 tsp) Dried Active Yeast
- 10g (2 tsp) Salt
- 350ml Warm Water (around 105-115°F or 40-46°C)
- 2 tbsp Olive Oil, plus extra for greasing
- 1 tbsp Honey or Maple Syrup (optional, for a touch of sweetness and yeast activation)
- 2 tbsp Wheat Bran (optional, for added texture and fiber)
- 1 tbsp Flax Seeds (optional, for added nutrients and flavor)
Instructions
- Activate the Yeast: In a large mixing bowl, combine the warm water and honey (if using). Sprinkle the dried active yeast over the water. Let it sit for 5-10 minutes, or until the yeast becomes foamy. This indicates that the yeast is alive and active. If the yeast doesn’t foam, it might be old or the water might be too hot or cold, and you’ll need to start again with fresh yeast and properly tempered water.
- Combine Dry Ingredients: In a separate large bowl, whisk together the wholemeal wheat flour, salt, wheat bran (if using), and flax seeds (if using). This ensures that the salt is evenly distributed throughout the flour, which is important for proper gluten development and yeast activity.
- Combine Wet and Dry Ingredients: Pour the yeast mixture into the bowl with the dry ingredients. Add the olive oil. Use a wooden spoon or your hands to mix the ingredients together until a shaggy dough forms. The dough will be quite sticky at this stage, and that’s perfectly normal for wholemeal bread.
- Knead the Dough: Turn the dough out onto a lightly floured surface. Knead the dough for 8-10 minutes, or until it becomes smooth and elastic. Kneading is crucial for developing the gluten in the flour, which gives the bread its structure and chewiness. To knead, push the dough away from you with the heel of your hand, then fold it back over itself. Rotate the dough a quarter turn and repeat. If the dough is too sticky, add a little more flour, one tablespoon at a time, until it becomes manageable. Be careful not to add too much flour, as this can make the bread dry.
- First Rise (Bulk Fermentation): Lightly grease a large bowl with olive oil. Place the kneaded dough in the bowl, turning it to coat all sides with oil. This will prevent the dough from drying out during the rising process. Cover the bowl with plastic wrap or a clean kitchen towel. Let the dough rise in a warm place for 1-1.5 hours, or until it has doubled in size. The rising time will depend on the temperature of your environment. A warm place will encourage the yeast to work faster.
- Punch Down the Dough: After the first rise, gently punch down the dough to release the air. This helps to redistribute the yeast and create a more even texture in the final bread.
- Shape the Dough: Turn the dough out onto a lightly floured surface. Gently shape the dough into a loaf. You can either shape it into a round boule or an oblong loaf, depending on your preference and the type of baking pan you’re using. For an oblong loaf, flatten the dough into a rectangle, then roll it up tightly from one end to the other. Pinch the seam to seal it.
- Prepare the Baking Pan: Grease a loaf pan (approximately 9×5 inches) with olive oil or line it with parchment paper. This will prevent the bread from sticking to the pan.
- Place Dough in Pan: Carefully place the shaped dough into the prepared loaf pan, seam-side down.
- Second Rise (Proofing): Cover the loaf pan with plastic wrap or a clean kitchen towel. Let the dough rise in a warm place for 30-45 minutes, or until it has almost doubled in size. This second rise, called proofing, is essential for creating a light and airy bread.
- Preheat the Oven: Preheat your oven to 375°F (190°C). Make sure your oven rack is in the middle position.
- Score the Loaf (Optional): Just before baking, use a sharp knife or a lame (a special bread-scoring tool) to score the top of the loaf. Scoring allows the bread to expand evenly during baking and prevents it from cracking in unpredictable places. A simple slash down the center of the loaf is sufficient.
- Bake the Bread: Place the loaf pan in the preheated oven. Bake for 30-40 minutes, or until the bread is golden brown and sounds hollow when tapped on the bottom. The internal temperature of the bread should reach 200-210°F (93-99°C).
- Cool the Bread: Remove the loaf pan from the oven and let the bread cool in the pan for 5-10 minutes. Then, carefully remove the bread from the pan and place it on a wire rack to cool completely before slicing. Cooling the bread completely is important because it allows the crumb to set properly. Slicing the bread while it’s still warm can result in a gummy texture.
Notes
- Adjusting Hydration: Wholemeal flour absorbs more water than white flour, so you might need to adjust the amount of water depending on the humidity of your environment. If the dough seems too dry, add a little more water, one tablespoon at a time. If it’s too sticky, add a little more flour, one tablespoon at a time.
- Adding Seeds and Nuts: Feel free to add other seeds and nuts to the dough for added flavor and texture. Sunflower seeds, pumpkin seeds, walnuts, and pecans are all great options. Add about 1/4 to 1/2 cup of seeds or nuts to the dough along with the flour.
- Using a Dutch Oven: For a crustier loaf, you can bake the bread in a Dutch oven. Preheat the Dutch oven in the oven along with the oven itself. Carefully place the shaped dough into the hot Dutch oven (be very careful, as the Dutch oven will be extremely hot). Cover the Dutch oven and bake for 20 minutes, then remove the lid and bake for another 10-15 minutes, or until the bread is golden brown.
- Storing the Bread: Store the cooled bread in an airtight container at room temperature for up to 3 days. For longer storage, you can freeze the bread. Slice the bread before freezing for easier thawing.
- Enhancing Flavor: Consider adding a teaspoon of molasses or brown sugar for a richer, more complex flavor. You can also experiment with different herbs and spices, such as rosemary, thyme, or caraway seeds.
- Kneading Alternatives: If you don’t want to knead by hand, you can use a stand mixer with a dough hook attachment. Knead the dough on low speed for 8-10 minutes. You can also try a no-knead method, which involves mixing the ingredients together and letting the dough rise for a longer period of time (12-18 hours).
- Checking for Doneness: If you’re unsure whether the bread is done, insert a wooden skewer into the center of the loaf. If the skewer comes out clean, the bread is done. You can also use a digital thermometer to check the internal temperature.
- Troubleshooting: If your bread is dense and doesn’t rise properly, it could be due to several factors, such as old yeast, not enough kneading, or not enough rising time. Make sure your yeast is fresh, knead the dough thoroughly, and allow it to rise in a warm place.


Leave a Comment