
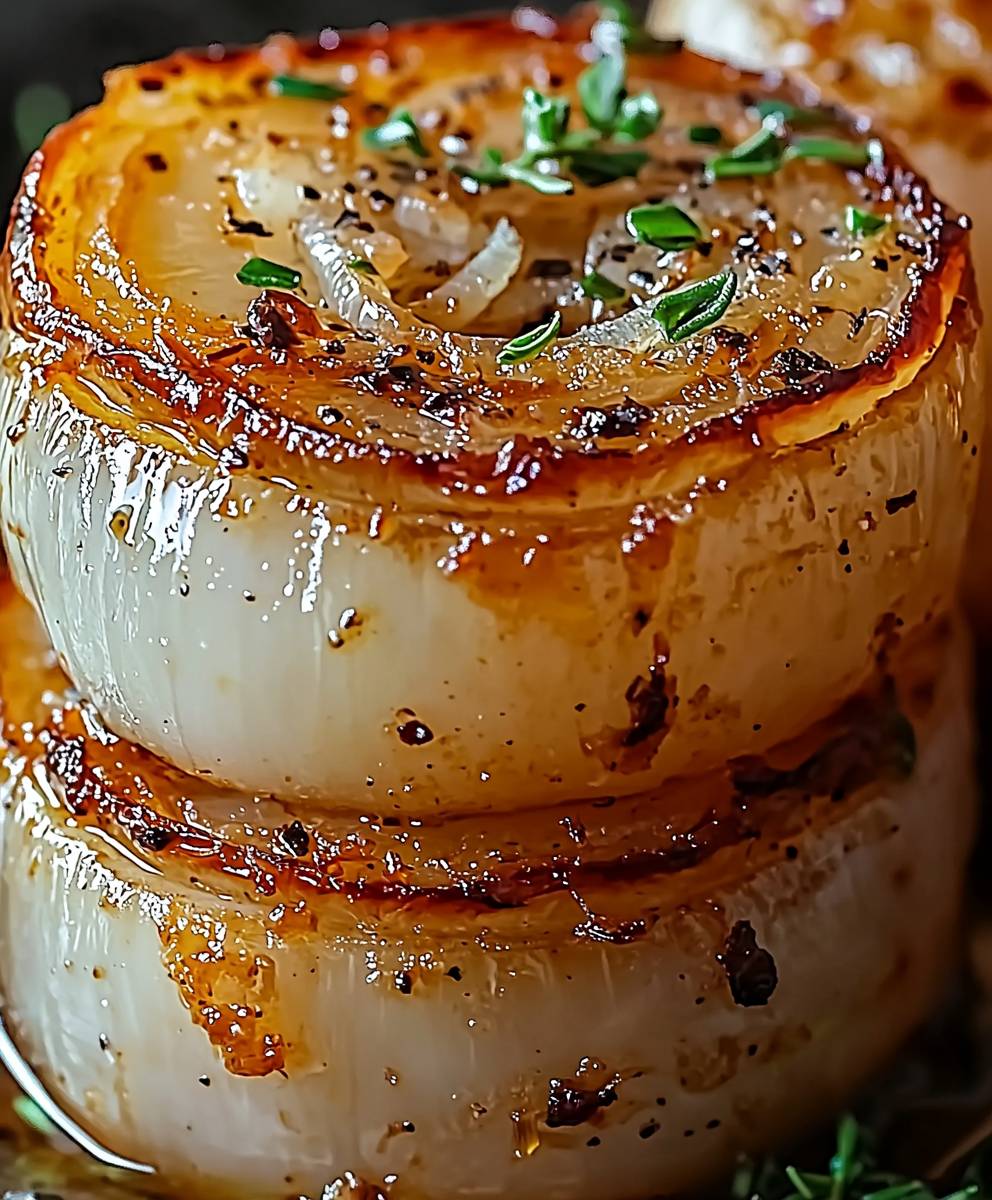
Tennessee Onions, a Southern delicacy, might just become your new favorite side dish! Forget everything you think you know about boring onions because this recipe transforms humble alliums into a sweet, tangy, and utterly irresistible treat. Imagine tender, caramelized onions, bathed in a rich, buttery sauce with just a hint of vinegar to cut through the sweetness. Are you drooling yet?
While the exact origins of Tennessee Onions are shrouded in a bit of mystery, their roots are firmly planted in Southern comfort food. They likely evolved from simple, resourceful cooking, where cooks maximized flavor from readily available ingredients. Onions, being a staple in Southern gardens, were often transformed into various dishes, and this particular preparation likely gained popularity for its unique balance of sweet and savory notes.
People adore this dish for several reasons. First, the taste is simply divine the sweetness of the caramelized onions is perfectly balanced by the tangy vinegar and rich butter. Second, the texture is incredibly satisfying, offering a delightful contrast between the soft, yielding onions and the slightly thickened sauce. Finally, it’s surprisingly easy to make, requiring minimal effort for maximum flavor impact. Whether you’re serving them alongside grilled meats, topping a juicy burger, or simply enjoying them as a side, these Tennessee Onions are guaranteed to be a crowd-pleaser!

Ingredients:
- 3 large Vidalia onions (about 3 pounds total), peeled and sliced ¼ inch thick
- 1 cup all-purpose flour
- 2 teaspoons salt
- 1 teaspoon black pepper
- 1 teaspoon garlic powder
- 1 teaspoon paprika
- ½ teaspoon cayenne pepper (optional, for a little kick!)
- 2 large eggs
- 1 cup milk
- 2 cups panko breadcrumbs
- Vegetable oil, for frying (about 6-8 cups)
- Your favorite dipping sauce (ranch, blue cheese, comeback sauce, etc.)
Preparing the Onions:
Okay, let’s get started! The key to amazing Tennessee Onions is getting the onions prepped just right. We want them sliced evenly so they cook uniformly and don’t end up with some pieces burnt and others undercooked.
- Slice the Onions: Peel your Vidalia onions and slice them into ¼ inch thick rounds. Try to keep the slices consistent in thickness. If you have a mandoline slicer, this is a great time to use it! If not, just take your time and use a sharp knife.
- Separate the Rings: Gently separate the onion slices into individual rings. This can be a little tedious, but it’s important so each ring gets coated in the breading and fries up crispy. Discard any very small or broken pieces.
- Soak the Onions (Optional): This step is optional, but I highly recommend it! Soaking the onion rings in ice water for about 30 minutes helps to remove some of their sharpness and makes them a little sweeter. It also helps the breading adhere better. If you choose to soak them, drain them well and pat them dry with paper towels before moving on to the next step.
Setting Up the Breading Station:
Now, let’s get our breading station ready. This is crucial for a smooth and efficient breading process. Having everything organized will make your life so much easier!
- Prepare the Flour Mixture: In a shallow dish or pie plate, combine the flour, salt, pepper, garlic powder, paprika, and cayenne pepper (if using). Whisk everything together until it’s well combined. This seasoned flour will be the first layer of our breading, helping the egg wash stick and adding flavor.
- Prepare the Egg Wash: In another shallow dish or pie plate, whisk together the eggs and milk until they are well combined and slightly frothy. This egg wash will act as the “glue” that holds the breadcrumbs to the onion rings.
- Prepare the Panko Breadcrumbs: In a third shallow dish or pie plate, place the panko breadcrumbs. Panko breadcrumbs are larger and flakier than regular breadcrumbs, which gives our Tennessee Onions that extra crispy texture we’re looking for.
Breading the Onion Rings:
This is where the magic happens! We’re going to coat each onion ring in our breading mixture, ensuring a crispy and flavorful crust.
- Dredge in Flour: Take a handful of onion rings and dredge them in the seasoned flour mixture, making sure they are completely coated. Shake off any excess flour. This step is important because the flour helps the egg wash adhere to the onion rings.
- Dip in Egg Wash: Next, dip the floured onion rings into the egg wash, making sure they are fully submerged. Let any excess egg wash drip off.
- Coat in Panko Breadcrumbs: Finally, dredge the onion rings in the panko breadcrumbs, pressing gently to make sure the breadcrumbs adhere to the egg wash. Make sure the onion rings are completely coated in breadcrumbs.
- Repeat: Repeat the breading process with the remaining onion rings. You can bread all the onion rings at once, or you can bread them in batches as you fry them.
- Chill (Optional): For even crispier results, place the breaded onion rings on a baking sheet lined with parchment paper and chill them in the refrigerator for at least 30 minutes. This helps the breading set and prevents it from falling off during frying.
Frying the Onion Rings:
Now for the fun part frying! This is where our breaded onion rings transform into golden-brown, crispy perfection.
- Heat the Oil: Pour the vegetable oil into a large, heavy-bottomed pot or Dutch oven. You want the oil to be at least 3 inches deep. Heat the oil over medium-high heat until it reaches 350°F (175°C). Use a deep-fry thermometer to monitor the temperature of the oil. If you don’t have a thermometer, you can test the oil by dropping a small piece of bread into it. If the bread turns golden brown in about 30 seconds, the oil is ready.
- Fry in Batches: Carefully add the breaded onion rings to the hot oil in batches, making sure not to overcrowd the pot. Overcrowding the pot will lower the temperature of the oil and result in soggy onion rings.
- Fry Until Golden Brown: Fry the onion rings for 2-3 minutes per side, or until they are golden brown and crispy. Use a slotted spoon or spider to carefully remove the onion rings from the oil and place them on a wire rack lined with paper towels to drain.
- Maintain Oil Temperature: Between batches, make sure to maintain the oil temperature at 350°F (175°C). If the oil temperature drops too low, the onion rings will absorb too much oil and become greasy.
Serving and Enjoying:
The moment we’ve been waiting for! Time to serve up these delicious Tennessee Onions and enjoy their crispy, savory goodness.
- Season with Salt: While the onion rings are still hot, sprinkle them with a little extra salt. This will enhance their flavor and make them even more irresistible.
- Serve Immediately: Serve the Tennessee Onions immediately while they are still hot and crispy. They are best enjoyed fresh out of the fryer.
- Dipping Sauces: Serve the onion rings with your favorite dipping sauce. Ranch dressing, blue cheese dressing, comeback sauce, and honey mustard are all great options.
- Enjoy! Gather your friends and family, and enjoy these delicious Tennessee Onions! They are the perfect appetizer or side dish for any occasion.
Tips for Extra Crispy Onion Rings:
- Use Cold Ingredients: Using cold eggs and milk can help the breading adhere better and result in crispier onion rings.
- Don’t Overcrowd the Pot: Frying the onion rings in batches is crucial for maintaining the oil temperature and preventing them from becoming soggy.
- Use a Wire Rack: Placing the fried onion rings on a wire rack allows excess oil to drain, resulting in crispier onion rings.
- Double Breading: For an extra crispy crust, you can double bread the onion rings. Simply repeat the breading process (flour, egg wash, breadcrumbs) twice.
Variations:
- Spicy Tennessee Onions: Add more cayenne pepper to the flour mixture for a spicier kick. You can also add a pinch of chili powder or some hot sauce to the egg wash.
- Sweet Tennessee Onions: Add a tablespoon of sugar to the flour mixture for a slightly sweeter flavor.
- Garlic Parmesan Tennessee Onions: Add a tablespoon of grated Parmesan cheese and a teaspoon of garlic powder to the panko breadcrumbs.
- Beer-Battered Tennessee Onions: Substitute the milk in the egg wash with beer for a lighter, crispier batter.
Storage:
While Tennessee Onions are best enjoyed fresh, you can store leftovers in an airtight container in the refrigerator for up to 2 days. To reheat, bake them in a preheated oven at 350°F (175°C) for 5-10 minutes, or until they are heated through and crispy.
Conclusion:
So, there you have it! My take on Tennessee Onions, a dish that’s far more than just a side it’s a flavor explosion waiting to happen. I truly believe this recipe is a must-try, and here’s why: it’s incredibly simple, uses readily available ingredients, and delivers a taste that’s both comforting and surprisingly sophisticated. The sweetness of the onions, balanced by the tangy vinegar and savory seasonings, creates a symphony of flavors that will have you coming back for more. It’s the kind of dish that elevates any meal, transforming the ordinary into something special.
But don’t just take my word for it! The real magic happens when you try it yourself. And the best part? This recipe is incredibly versatile. While I love serving these Tennessee Onions warm alongside grilled chicken or pork chops, they’re equally delicious cold as a topping for burgers or sandwiches. Imagine piling them high on a juicy pulled pork sandwich the sweet and tangy onions cutting through the richness of the pork. Or, try them as a vibrant addition to a charcuterie board, offering a delightful contrast to the salty meats and cheeses.
Looking for variations? Get creative! For a spicier kick, add a pinch of red pepper flakes to the simmering onions. If you prefer a sweeter flavor profile, a drizzle of honey or maple syrup can work wonders. You could even experiment with different types of vinegar apple cider vinegar adds a fruity note, while balsamic vinegar lends a deeper, more complex flavor. And for those who love a bit of smokiness, try grilling the onions before slicing and simmering them. The possibilities are endless!
Serving Suggestions:
- As a side dish with grilled meats (chicken, pork, steak)
- Topping for burgers and sandwiches (pulled pork, BBQ chicken)
- Addition to charcuterie boards
- Mixed into salads
- Served with cornbread
Variations:
- Add red pepper flakes for a spicy kick
- Drizzle with honey or maple syrup for extra sweetness
- Use different types of vinegar (apple cider, balsamic)
- Grill the onions before slicing for a smoky flavor
- Add a splash of Worcestershire sauce for depth
I’m so excited for you to try this recipe and experience the deliciousness of Tennessee Onions for yourself. I’ve poured my heart into perfecting this recipe, and I truly believe it’s a winner. Once you’ve given it a go, I’d absolutely love to hear about your experience. Did you make any variations? What did you serve it with? What did your family and friends think? Share your photos and stories in the comments below! Your feedback is invaluable, and it helps me continue to create and share recipes that you’ll love. So go ahead, get in the kitchen, and let’s make some amazing Tennessee Onions together! Happy cooking!
Don’t forget to rate the recipe and share it with your friends and family. Let’s spread the love for these incredible onions far and wide!
Tennessee Onions: A Complete Guide to Growing and Harvesting
Crispy, golden-brown Tennessee Onion Rings made with sweet Vidalia onions and a flavorful panko breadcrumb coating. Perfect as an appetizer or side dish!
Ingredients
- 3 large Vidalia onions (about 3 pounds total), peeled and sliced ¼ inch thick
- 1 cup all-purpose flour
- 2 teaspoons salt
- 1 teaspoon black pepper
- 1 teaspoon garlic powder
- 1 teaspoon paprika
- ½ teaspoon cayenne pepper (optional, for a little kick!)
- 2 large eggs
- 1 cup milk
- 2 cups panko breadcrumbs
- Vegetable oil, for frying (about 6-8 cups)
- Your favorite dipping sauce (ranch, blue cheese, comeback sauce, etc.)
Instructions
- Slice the Onions: Peel Vidalia onions and slice into ¼ inch thick rounds. Separate the slices into individual rings.
- Soak (Optional): Soak onion rings in ice water for 30 minutes to reduce sharpness. Drain well and pat dry.
- Prepare Flour Mixture: In a shallow dish, combine flour, salt, pepper, garlic powder, paprika, and cayenne pepper (if using). Whisk well.
- Prepare Egg Wash: In another shallow dish, whisk together eggs and milk until frothy.
- Prepare Panko Breadcrumbs: Place panko breadcrumbs in a third shallow dish.
- Dredge in Flour: Dredge onion rings in the seasoned flour, shaking off excess.
- Dip in Egg Wash: Dip floured onion rings in the egg wash, letting excess drip off.
- Coat in Panko: Dredge in panko breadcrumbs, pressing gently to adhere.
- Repeat: Repeat breading process with remaining onion rings.
- Chill (Optional): Chill breaded onion rings on a parchment-lined baking sheet for at least 30 minutes for crispier results.
- Heat Oil: Pour vegetable oil into a large, heavy-bottomed pot to a depth of at least 3 inches. Heat over medium-high heat to 350°F (175°C).
- Fry in Batches: Carefully add breaded onion rings to the hot oil in batches, avoiding overcrowding.
- Fry Until Golden Brown: Fry for 2-3 minutes per side, or until golden brown and crispy. Remove with a slotted spoon and place on a wire rack lined with paper towels to drain.
- Maintain Oil Temperature: Maintain oil temperature at 350°F (175°C) between batches.
- Season with Salt: Sprinkle hot onion rings with a little extra salt.
- Serve Immediately: Serve immediately with your favorite dipping sauce.
Notes
- For extra crispy onion rings, use cold ingredients, don’t overcrowd the pot, use a wire rack to drain, or double bread the onion rings.


Leave a Comment