
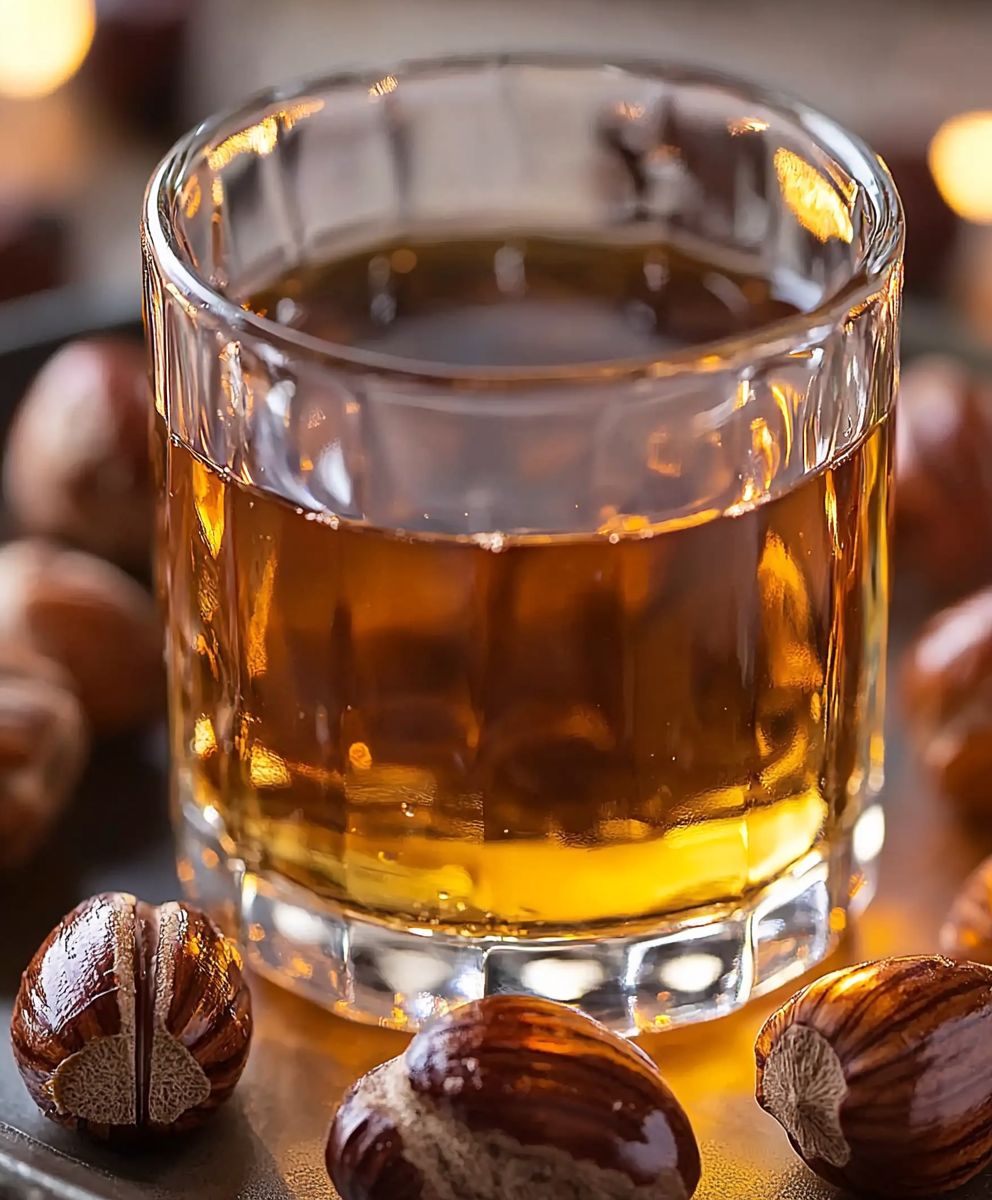
Hazelnut Syrup: the secret ingredient that will elevate your coffee, cocktails, and desserts from ordinary to extraordinary! Have you ever wondered how coffee shops achieve that rich, nutty flavor in their lattes? Or how bartenders craft those irresistibly smooth and complex cocktails? The answer often lies in a well-made hazelnut syrup.
While the exact origins of flavored syrups are difficult to pinpoint, the practice of infusing sweeteners with herbs, spices, and nuts dates back centuries. In Italy, hazelnuts, known as “nocciole,” have been cultivated for generations, becoming a staple ingredient in regional sweets and beverages. This rich culinary heritage likely contributed to the development of hazelnut-infused syrups, eventually spreading globally.
People adore hazelnut syrup for its versatility and the delightful depth it adds to a wide range of culinary creations. Its sweet, nutty flavor profile complements coffee beautifully, transforming a simple cup of joe into a luxurious treat. Beyond coffee, it’s a fantastic addition to cocktails, lending a sophisticated sweetness that balances other flavors. And let’s not forget desserts! Drizzled over pancakes, waffles, or ice cream, or incorporated into cakes and pastries, hazelnut syrup adds a touch of elegance and irresistible flavor. Plus, making your own homemade version is surprisingly easy and allows you to control the sweetness and intensity of the hazelnut flavor. So, are you ready to unlock the magic of hazelnut syrup and transform your kitchen creations?

Ingredients:
- 1 cup granulated sugar
- 1 cup water
- 1 cup hazelnuts, toasted and skinned
- 1 teaspoon vanilla extract
- 1/4 teaspoon salt
Preparing the Hazelnuts:
Okay, before we dive into the syrup-making process, let’s talk hazelnuts. The key to a really delicious hazelnut syrup is using properly toasted and skinned hazelnuts. Trust me, this step is worth the effort. The toasting brings out their nutty flavor, and removing the skins prevents the syrup from becoming bitter.
- Toasting the Hazelnuts: Preheat your oven to 350°F (175°C). Spread the hazelnuts in a single layer on a baking sheet. Toast them for about 10-15 minutes, or until they are fragrant and the skins start to crack and blister. Keep a close eye on them, as they can burn easily. I usually give the pan a shake halfway through to ensure even toasting.
- Skinning the Hazelnuts: Once the hazelnuts are toasted, remove them from the oven and let them cool slightly. While they are still warm, but cool enough to handle, place them in a clean kitchen towel. Rub the hazelnuts vigorously within the towel. The skins should come off fairly easily. Don’t worry if you can’t get every single bit of skin off; a little bit is fine. If you’re having trouble, you can try blanching them in boiling water for a minute or two before rubbing them in the towel. Just make sure to dry them thoroughly afterward.
- Chopping the Hazelnuts: After skinning, roughly chop the hazelnuts. This will help them release their flavor into the syrup more effectively. You don’t need to chop them too finely; just a rough chop will do.
Making the Simple Syrup:
Now that our hazelnuts are prepped, we can move on to making the simple syrup. Simple syrup is just equal parts sugar and water, cooked until the sugar dissolves. It’s the base for our hazelnut infusion.
- Combine Sugar and Water: In a medium saucepan, combine the granulated sugar and water.
- Heat and Dissolve: Place the saucepan over medium heat. Stir constantly until the sugar is completely dissolved. You should no longer see any sugar granules at the bottom of the pan. The mixture should be clear.
- Bring to a Simmer: Once the sugar is dissolved, bring the mixture to a gentle simmer. Reduce the heat slightly if necessary to prevent it from boiling over.
Infusing the Hazelnut Flavor:
This is where the magic happens! We’re going to infuse the simple syrup with the toasted hazelnut flavor. This process takes a little time, but the result is a rich, nutty syrup that’s perfect for coffee, cocktails, or desserts.
- Add Hazelnuts: Add the chopped, toasted hazelnuts to the simmering simple syrup.
- Simmer and Infuse: Reduce the heat to low and let the mixture simmer gently for about 30-45 minutes. The longer you simmer it, the stronger the hazelnut flavor will be. I usually aim for about 40 minutes. Stir occasionally to prevent the hazelnuts from sticking to the bottom of the pan. The syrup will start to turn a light amber color.
- Remove from Heat: After simmering, remove the saucepan from the heat and let the mixture cool slightly. This will allow the hazelnut flavor to continue to infuse into the syrup as it cools.
Straining and Finishing the Syrup:
Now we need to strain out the hazelnuts and add the finishing touches to our syrup. This will give us a smooth, clear syrup with a concentrated hazelnut flavor.
- Strain the Syrup: Place a fine-mesh sieve lined with cheesecloth (or a nut milk bag) over a heat-proof bowl or jar. Carefully pour the hazelnut syrup through the sieve, allowing the syrup to drip through. Be patient and let it strain naturally; don’t press on the hazelnuts, as this can make the syrup cloudy.
- Discard Hazelnuts: Once all the syrup has been strained, discard the hazelnuts. They’ve done their job!
- Add Vanilla Extract and Salt: Stir in the vanilla extract and salt. The vanilla extract enhances the hazelnut flavor, and the salt balances the sweetness.
- Cool Completely: Let the syrup cool completely before storing it.
Storing the Hazelnut Syrup:
Proper storage is essential to keep your hazelnut syrup fresh and delicious. Here’s how to do it:
- Pour into a Clean Container: Pour the cooled hazelnut syrup into a clean, airtight container. A glass jar or bottle is ideal.
- Refrigerate: Store the syrup in the refrigerator. It will keep for about 2-3 weeks.
- Check for Spoilage: Before using, check the syrup for any signs of spoilage, such as mold or an off odor. If you notice anything unusual, discard it.
Tips and Variations:
Want to customize your hazelnut syrup? Here are a few ideas:
- Dark Brown Sugar: Substitute some of the granulated sugar with dark brown sugar for a richer, more caramel-like flavor.
- Spices: Add a pinch of cinnamon, nutmeg, or cardamom to the syrup while it’s simmering for a warm, spiced flavor.
- Espresso Powder: Add a teaspoon of espresso powder to the syrup for a mocha-inspired twist.
- Boozy Hazelnut Syrup: Add a tablespoon or two of hazelnut liqueur (like Frangelico) to the cooled syrup for an extra kick.
- Vegan Hazelnut Syrup: Make sure your sugar is vegan-friendly (some granulated sugar is processed with bone char).
Serving Suggestions:
Now that you have this amazing hazelnut syrup, what can you do with it? The possibilities are endless!
- Coffee: Add a spoonful or two to your coffee or latte for a delicious hazelnut flavor.
- Cocktails: Use it in cocktails like Old Fashioneds, Manhattans, or even a simple hazelnut-flavored vodka soda.
- Pancakes and Waffles: Drizzle it over pancakes, waffles, or French toast for a decadent breakfast.
- Ice Cream: Pour it over ice cream for a simple yet satisfying dessert.
- Baked Goods: Use it to flavor cakes, cookies, or muffins.
- Oatmeal: Stir it into your morning oatmeal for a flavorful start to the day.
- Italian Soda: Mix it with sparkling water and a splash of cream for a refreshing Italian soda.
Troubleshooting:
Sometimes things don’t go exactly as planned. Here are a few common issues and how to fix them:
- Syrup is too thick: If your syrup is too thick, add a little water and stir until it reaches the desired consistency.
- Syrup is too thin: If your syrup is too thin, simmer it for a few more minutes to reduce the liquid.
- Syrup is cloudy: If your syrup is cloudy, it could be due to pressing on the hazelnuts while straining. Next time, let it strain naturally. You can also try straining it again through a finer sieve or cheesecloth.
- Syrup is bitter: If your syrup is bitter, it could be due to not removing enough of the hazelnut skins. Be sure to toast and skin the hazelnuts thoroughly before using them.
Why This Recipe Works:
This recipe is designed to be easy to follow and produce a consistently delicious hazelnut syrup. The key is in the details: toasting the hazelnuts properly, simmering the syrup gently, and straining it carefully. By following these steps, you’ll be rewarded with a rich, nutty syrup that you can use in countless ways. The addition of vanilla extract and salt enhances the hazelnut flavor and balances the sweetness, creating a truly irresistible syrup.
Nutritional Information (Approximate):
Please note that this is an approximate estimate, and the actual nutritional content may vary depending on the specific ingredients used and portion sizes.
- Calories: Approximately 50 calories per tablespoon
- Sugar: Approximately 12 grams per tablespoon
- Fat: Trace amounts from the hazelnuts
Enjoy your homemade hazelnut syrup! I hope you find it as versatile and delicious as I do.
Conclusion:
So, there you have it! This hazelnut syrup recipe is more than just a simple sweetener; it’s a gateway to a world of delicious possibilities. I truly believe it’s a must-try for anyone who loves to experiment in the kitchen and elevate their everyday treats. The rich, nutty aroma alone is enough to make you want to whip up a batch immediately, and the taste? Oh, the taste is simply divine!
What makes this recipe so special, you ask? Well, beyond its incredible flavor, it’s surprisingly easy to make. You don’t need any fancy equipment or hard-to-find ingredients. Just a few pantry staples, some beautiful hazelnuts, and a little bit of patience are all it takes to create a syrup that rivals anything you’d find in a gourmet coffee shop. Plus, making it yourself means you control the ingredients, ensuring a pure, natural flavor without any artificial additives or preservatives. That’s a win-win in my book!
But the real magic lies in its versatility. Think beyond just coffee! Drizzle it over pancakes or waffles for a decadent breakfast. Swirl it into your morning oatmeal for a nutty boost. Use it to sweeten iced tea or lemonade on a hot summer day. Get creative and add a splash to your cocktails for a sophisticated twist. The possibilities are truly endless.
Here are a few of my favorite serving suggestions to get you started:
- Hazelnut Latte: Of course, we can’t forget the classic! Add a tablespoon or two to your favorite latte for a truly indulgent treat.
- Hazelnut Ice Cream Sundae: Drizzle generously over vanilla ice cream and top with chopped hazelnuts for a simple yet elegant dessert.
- Hazelnut French Toast: Soak your bread in a mixture of eggs, milk, and a splash of hazelnut syrup for a breakfast that’s sure to impress.
- Hazelnut Glazed Carrots: Toss roasted carrots with a bit of hazelnut syrup for a sweet and savory side dish.
- Hazelnut Vinaigrette: Whisk together hazelnut syrup, olive oil, balsamic vinegar, and Dijon mustard for a unique and flavorful salad dressing.
And if you’re feeling adventurous, why not try these variations?
- Spiced Hazelnut Syrup: Add a cinnamon stick, a star anise, or a few cloves to the syrup while it’s simmering for a warm and comforting flavor.
- Chocolate Hazelnut Syrup: Stir in a tablespoon or two of cocoa powder for a decadent chocolatey twist.
- Salted Hazelnut Syrup: Add a pinch of sea salt to enhance the sweetness and bring out the nutty flavor.
I’m so excited for you to try this recipe and discover the magic of homemade hazelnut syrup for yourself. I have no doubt that it will become a staple in your kitchen, just as it has in mine. It’s the perfect way to add a touch of luxury to your everyday life, and it’s sure to impress your friends and family.
So, what are you waiting for? Gather your ingredients, put on some music, and get ready to create something truly special. And once you’ve made your own batch of this delicious syrup, I’d love to hear about it! Share your creations, your serving suggestions, and your variations in the comments below. Let’s inspire each other and spread the hazelnut love! Happy syrup-making!
Hazelnut Syrup: The Ultimate Guide to Flavor, Uses, and Recipes
Homemade hazelnut syrup, perfect for coffee, cocktails, desserts, and more! Made with toasted hazelnuts, sugar, water, vanilla, and a pinch of salt.
Ingredients
- 1 cup granulated sugar
- 1 cup water
- 1 cup hazelnuts, toasted and skinned
- 1 teaspoon vanilla extract
- 1/4 teaspoon salt
Instructions
- Toast Hazelnuts: Preheat oven to 350°F (175°C). Spread hazelnuts on a baking sheet in a single layer. Toast for 10-15 minutes, until fragrant and skins start to crack. Shake pan halfway through.
- Skin Hazelnuts: Let toasted hazelnuts cool slightly. Place in a clean kitchen towel and rub vigorously to remove skins. Don’t worry if some skin remains. Roughly chop the hazelnuts.
- Make Simple Syrup: In a medium saucepan, combine sugar and water.
- Heat and Dissolve: Place the saucepan over medium heat. Stir constantly until the sugar is completely dissolved. You should no longer see any sugar granules at the bottom of the pan. The mixture should be clear.
- Bring to a Simmer: Once the sugar is dissolved, bring the mixture to a gentle simmer. Reduce the heat slightly if necessary to prevent it from boiling over.
- Infuse Hazelnut Flavor: Add chopped hazelnuts to the simmering syrup.
- Simmer and Infuse: Reduce heat to low and simmer gently for 30-45 minutes, stirring occasionally. Syrup will turn light amber.
- Remove from Heat: Remove from heat and let cool slightly.
- Strain Syrup: Place a fine-mesh sieve lined with cheesecloth over a bowl or jar. Pour syrup through the sieve. Let it strain naturally. Discard hazelnuts.
- Add Vanilla and Salt: Stir in vanilla extract and salt.
- Cool Completely: Let the syrup cool completely before storing it.
- Store: Pour cooled syrup into a clean, airtight container. Refrigerate for 2-3 weeks. Check for spoilage before using.
Notes
- Toasting and skinning the hazelnuts is crucial for the best flavor.
- Simmering time affects the intensity of the hazelnut flavor.
- Don’t press on the hazelnuts while straining to avoid cloudy syrup.
- Substitute some of the granulated sugar with dark brown sugar for a richer, more caramel-like flavor.
- Add a pinch of cinnamon, nutmeg, or cardamom to the syrup while it’s simmering for a warm, spiced flavor.
- Add a teaspoon of espresso powder to the syrup for a mocha-inspired twist.
- Add a tablespoon or two of hazelnut liqueur (like Frangelico) to the cooled syrup for an extra kick.
- Make sure your sugar is vegan-friendly (some granulated sugar is processed with bone char).

Leave a Comment