
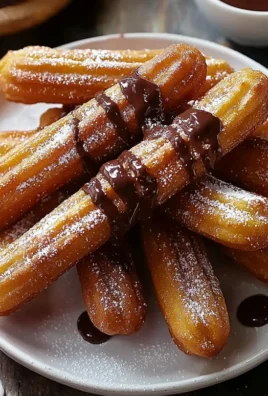
Raspberry Bars: Prepare to be captivated by a symphony of sweet and tart flavors nestled within a buttery, crumbly embrace! These aren’t just dessert; they’re a nostalgic journey back to sun-drenched summer days and the comforting aroma of homemade goodness. I remember my grandmother always baking these for our family picnics, and the memory of that first bite is forever etched in my mind.
While the exact origins of raspberry bars are a bit hazy, similar fruit-filled bars have been a staple in European baking traditions for centuries. Think of the Linzer torte, a classic Austrian pastry with a lattice crust and a vibrant fruit filling. Our raspberry bars share that same spirit of simple elegance and satisfying flavor.
But what is it about these bars that makes them so irresistible? It’s the perfect balance of textures, the crumbly shortbread base providing a delightful contrast to the smooth, jammy raspberry filling. The sweetness of the raspberry is perfectly offset by a hint of tartness, making each bite a truly delightful experience. Plus, they’re incredibly easy to make, making them a perfect treat for both seasoned bakers and kitchen novices alike. Whether you’re looking for a crowd-pleasing dessert for a potluck or a simple indulgence for yourself, these raspberry bars are guaranteed to hit the spot!

Ingredients:
- For the Crust:
- 2 cups all-purpose flour
- ¾ cup (1 ½ sticks) cold unsalted butter, cut into cubes
- ½ cup granulated sugar
- ¼ teaspoon salt
- 1 large egg yolk
- 3-4 tablespoons ice water
- For the Raspberry Filling:
- 1 (12-ounce) package frozen raspberries, thawed
- ½ cup granulated sugar
- 2 tablespoons cornstarch
- 1 tablespoon lemon juice
- ¼ teaspoon almond extract (optional, but highly recommended!)
- For the Crumble Topping (Optional, but adds a lovely texture!):
- ½ cup all-purpose flour
- ¼ cup packed light brown sugar
- ¼ cup rolled oats (old-fashioned or quick-cooking)
- ¼ teaspoon ground cinnamon
- ¼ cup (½ stick) cold unsalted butter, cut into cubes
- Equipment:
- 9×13 inch baking pan
- Parchment paper
- Mixing bowls
- Food processor or pastry blender (for the crust)
Preparing the Crust:
- Combine Dry Ingredients: In a large bowl, whisk together the 2 cups of all-purpose flour, ½ cup of granulated sugar, and ¼ teaspoon of salt. This ensures the salt is evenly distributed, which is crucial for flavor.
- Cut in the Butter: Add the ¾ cup (1 ½ sticks) of cold, cubed unsalted butter to the flour mixture. This is where you have a choice: you can use a food processor or a pastry blender.
- Food Processor Method: Pulse the mixture until it resembles coarse crumbs. Be careful not to over-process, or the butter will melt, and your crust will be tough. Aim for pea-sized pieces of butter.
- Pastry Blender Method: Use the pastry blender to cut the butter into the flour mixture until it resembles coarse crumbs. This method takes a little more elbow grease, but it gives you more control over the size of the butter pieces.
The key here is to keep the butter cold. Cold butter creates flaky layers in the crust. If you notice the butter getting too soft, pop the bowl into the freezer for 5-10 minutes before continuing.
- Add the Egg Yolk and Ice Water: In a small bowl, whisk together the 1 large egg yolk and 3 tablespoons of ice water. Pour this mixture over the flour and butter mixture.
- Mix Until Just Combined: Gently mix the ingredients together until a dough just begins to form. Add an additional tablespoon of ice water if needed, but be careful not to add too much. You want the dough to hold together when pressed, but it shouldn’t be sticky. Overmixing will develop the gluten in the flour, resulting in a tough crust.
- Form the Dough into a Disc: Turn the dough out onto a lightly floured surface and gently form it into a disc. Wrap the disc tightly in plastic wrap and refrigerate for at least 30 minutes. This allows the gluten to relax, making the crust easier to roll out and less likely to shrink during baking. Chilling the dough also helps the butter solidify, which contributes to a flakier crust.
Preparing the Raspberry Filling:
- Thaw the Raspberries: If using frozen raspberries (which I highly recommend, as they’re readily available and often more affordable), thaw them completely. Place them in a colander set over a bowl to catch the juices.
- Combine Filling Ingredients: In a medium saucepan, combine the ½ cup of granulated sugar and 2 tablespoons of cornstarch. Whisk them together to ensure the cornstarch is evenly distributed. This prevents lumps from forming in the filling.
- Add Raspberries and Lemon Juice: Add the thawed raspberries and 1 tablespoon of lemon juice to the saucepan. The lemon juice brightens the flavor of the raspberries and helps to balance the sweetness.
- Cook the Filling: Cook the mixture over medium heat, stirring constantly, until the raspberries break down and the filling thickens. This usually takes about 5-7 minutes. The filling should be glossy and able to coat the back of a spoon.
- Stir in Almond Extract (Optional): Remove the saucepan from the heat and stir in the ¼ teaspoon of almond extract (if using). Almond extract complements the raspberry flavor beautifully, adding a subtle nutty note.
- Cool Slightly: Allow the filling to cool slightly while you prepare the crust. This prevents the filling from melting the butter in the crust.
Preparing the Crumble Topping (Optional):
- Combine Dry Ingredients: In a small bowl, combine the ½ cup of all-purpose flour, ¼ cup of packed light brown sugar, ¼ cup of rolled oats, and ¼ teaspoon of ground cinnamon. The brown sugar adds a caramel-like flavor, the oats provide a chewy texture, and the cinnamon adds warmth.
- Cut in the Butter: Add the ¼ cup (½ stick) of cold, cubed unsalted butter to the flour mixture. Use a pastry blender or your fingers to cut the butter into the flour mixture until it resembles coarse crumbs. Again, keep the butter cold for the best results.
- Set Aside: Set the crumble topping aside while you assemble the bars.
Assembling and Baking the Raspberry Bars:
- Preheat Oven and Prepare Pan: Preheat your oven to 375°F (190°C). Line a 9×13 inch baking pan with parchment paper, leaving an overhang on the sides. This makes it easy to lift the bars out of the pan after baking.
- Divide the Dough: Remove the chilled dough from the refrigerator. Divide the dough in half.
- Roll Out the First Half: On a lightly floured surface, roll out one half of the dough into a rectangle slightly larger than the bottom of the baking pan.
- Transfer to Pan: Carefully transfer the rolled-out dough to the prepared baking pan. Press the dough evenly into the bottom of the pan and up the sides, creating a slight lip.
- Spread the Raspberry Filling: Spread the cooled raspberry filling evenly over the crust.
- Roll Out the Second Half (or Crumble):
- If Using a Second Crust Layer: Roll out the remaining dough into a rectangle slightly smaller than the baking pan. Carefully place the dough over the raspberry filling. You can either leave it as a solid sheet or cut slits in the dough to allow steam to escape.
- If Using Crumble Topping: Sprinkle the crumble topping evenly over the raspberry filling.
- Bake: Bake in the preheated oven for 30-35 minutes, or until the crust is golden brown and the filling is bubbly. If you’re using the crumble topping, it should also be golden brown. Keep an eye on the bars during baking, and if the crust starts to brown too quickly, tent the pan with aluminum foil.
- Cool Completely: Remove the bars from the oven and let them cool completely in the pan before cutting. This is crucial! If you try to cut them while they’re still warm, the filling will be too soft, and the bars will fall apart. Cooling allows the filling to set properly.
- Cut and Serve: Once the bars are completely cool, use the parchment paper overhang to lift them out of the pan. Cut them into squares or rectangles and serve.
Tips for Success:
- Use Cold Ingredients: Cold butter is essential for a flaky crust. Make sure your butter is well-chilled before you start.
- Don’t Overmix the Dough: Overmixing develops the gluten in the flour, resulting in a tough crust. Mix the dough until just combined.
- Chill the Dough: Chilling the dough allows the gluten to relax and the butter to solidify, resulting in a tender and flaky crust.
- Cool Completely Before Cutting: This is the most important step! Cooling allows the filling to set properly, so the bars don’t fall apart.
- Variations: Feel free to experiment with different fruits in the filling. Blueberries, blackberries, or a combination of berries would all be delicious. You can also add nuts to the crumble topping for extra flavor and texture.
Storage Instructions:
Store the raspberry bars in an airtight container at room temperature for up to 3 days, or in the refrigerator for up to 5 days. They can also be frozen for up to

Conclusion:
And there you have it! These raspberry bars are so much more than just a dessert; they’re a burst of sunshine on a cloudy day, a comforting treat after a long week, and a guaranteed crowd-pleaser at any gathering. I truly believe this recipe is a must-try for anyone who loves the sweet-tart combination of raspberries and the satisfying crunch of a buttery crust.
What makes these bars so special? It’s the perfect balance of flavors and textures. The shortbread crust is wonderfully crumbly and melts in your mouth, providing a solid foundation for the vibrant raspberry filling. The filling itself is a delightful mix of fresh (or frozen!) raspberries, a touch of sugar, and a hint of lemon zest, which brightens the whole experience. It’s not overly sweet, allowing the natural raspberry flavor to really shine through. Plus, the ease of preparation makes it a winner in my book. No complicated steps, no fancy equipment just simple ingredients and straightforward instructions that even a novice baker can master.
But the best part? The versatility! While these raspberry bars are delicious as is, there are so many ways to customize them to your liking. For a richer flavor, try using brown butter in the crust. Simply melt the butter in a saucepan and cook it until it turns a nutty brown color, then let it cool slightly before adding it to the other ingredients. This adds a depth of flavor that’s simply irresistible.
Looking for serving suggestions? These bars are fantastic on their own, but they’re also wonderful served with a scoop of vanilla ice cream or a dollop of whipped cream. A sprinkle of powdered sugar adds a touch of elegance, and a few fresh raspberries on top make them even more visually appealing. For a more decadent treat, try drizzling them with melted white chocolate.
If you’re feeling adventurous, you can also experiment with different fruit combinations. Try substituting blueberries, blackberries, or even a mix of berries for the raspberries. You could also add a layer of almond paste under the raspberry filling for a marzipan-like flavor. Another fun variation is to add a streusel topping made with oats, flour, butter, and sugar for extra crunch.
I’m confident that you’ll love these raspberry bars as much as I do. They’re the perfect treat for any occasion, from a casual afternoon snack to a special celebration. They are also perfect for bake sales, potlucks, or even as a thoughtful homemade gift.
So, what are you waiting for? Preheat your oven, gather your ingredients, and get ready to bake up a batch of these irresistible bars. I promise you won’t be disappointed. And once you’ve tried them, I’d love to hear about your experience! Did you make any variations? What did you think of the flavor and texture? Share your photos and comments with me I can’t wait to see your creations! Happy baking! Let me know what you think of this raspberry bars recipe!
Raspberry Bars: The Ultimate Guide to Baking Delicious Treats
Buttery, flaky raspberry bars with a sweet and tart raspberry filling, topped with an optional (but recommended!) crumble. Perfect for dessert or a sweet snack.
Ingredients
- 2 cups all-purpose flour
- ¾ cup (1 ½ sticks) cold unsalted butter, cut into cubes
- ½ cup granulated sugar
- ¼ teaspoon salt
- 1 large egg yolk
- 3-4 tablespoons ice water
- 1 (12-ounce) package frozen raspberries, thawed
- ½ cup granulated sugar
- 2 tablespoons cornstarch
- 1 tablespoon lemon juice
- ¼ teaspoon almond extract (optional)
- ½ cup all-purpose flour
- ¼ cup packed light brown sugar
- ¼ cup rolled oats (old-fashioned or quick-cooking)
- ¼ teaspoon ground cinnamon
- ¼ cup (½ stick) cold unsalted butter, cut into cubes
Instructions
- In a large bowl, whisk together the 2 cups of all-purpose flour, ½ cup of granulated sugar, and ¼ teaspoon of salt.
- Add the ¾ cup (1 ½ sticks) of cold, cubed unsalted butter to the flour mixture. Use a food processor (pulse until coarse crumbs) or a pastry blender (cut in until coarse crumbs). Keep butter cold!
- In a small bowl, whisk together the 1 large egg yolk and 3 tablespoons of ice water. Pour this mixture over the flour and butter mixture.
- Gently mix the ingredients together until a dough just begins to form. Add an additional tablespoon of ice water if needed, but be careful not to add too much.
- Turn the dough out onto a lightly floured surface and gently form it into a disc. Wrap the disc tightly in plastic wrap and refrigerate for at least 30 minutes.
- If using frozen raspberries, thaw them completely. Place them in a colander set over a bowl to catch the juices.
- In a medium saucepan, combine the ½ cup of granulated sugar and 2 tablespoons of cornstarch.
- Add the thawed raspberries and 1 tablespoon of lemon juice to the saucepan.
- Cook the mixture over medium heat, stirring constantly, until the raspberries break down and the filling thickens (5-7 minutes).
- Remove the saucepan from the heat and stir in the ¼ teaspoon of almond extract (if using).
- Allow the filling to cool slightly while you prepare the crust.
- In a small bowl, combine the ½ cup of all-purpose flour, ¼ cup of packed light brown sugar, ¼ cup of rolled oats, and ¼ teaspoon of ground cinnamon.
- Add the ¼ cup (½ stick) of cold, cubed unsalted butter to the flour mixture. Use a pastry blender or your fingers to cut the butter into the flour mixture until it resembles coarse crumbs.
- Set the crumble topping aside while you assemble the bars.
- Preheat your oven to 375°F (190°C). Line a 9×13 inch baking pan with parchment paper, leaving an overhang on the sides.
- Remove the chilled dough from the refrigerator. Divide the dough in half.
- On a lightly floured surface, roll out one half of the dough into a rectangle slightly larger than the bottom of the baking pan.
- Carefully transfer the rolled-out dough to the prepared baking pan. Press the dough evenly into the bottom of the pan and up the sides, creating a slight lip.
- Spread the cooled raspberry filling evenly over the crust.
- Bake in the preheated oven for 30-35 minutes, or until the crust is golden brown and the filling is bubbly.
- Remove the bars from the oven and let them cool completely in the pan before cutting.
- Once the bars are completely cool, use the parchment paper overhang to lift them out of the pan. Cut them into squares or rectangles and serve.
Notes
- Use cold ingredients for the crust.
- Don’t overmix the dough.
- Chill the dough before rolling.
- Cool completely before cutting.
- Variations: Try different fruits or add nuts to the crumble.
- Storage: Store in an airtight container at room temperature for up to 3 days, or in the refrigerator for up to 5 days. They can also be frozen for up to 2 months.

Leave a Comment