
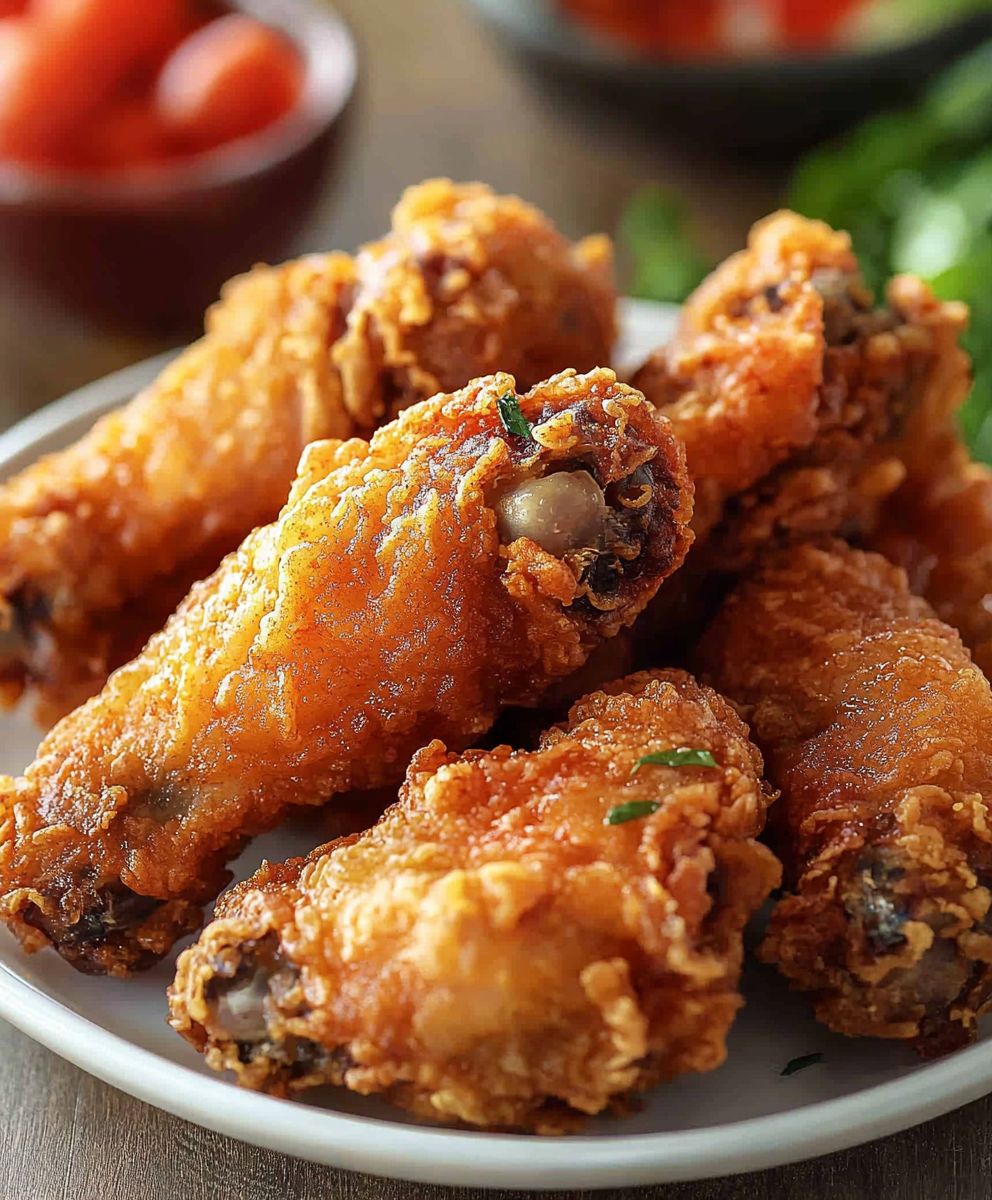
Air Fryer Fried Chicken: Craving that crispy, juicy, golden-brown goodness of fried chicken but without the guilt and mess of deep-frying? You’ve come to the right place! I’m about to share my secret to achieving perfectly “fried” chicken using the magic of the air fryer. Get ready for a game-changer!
Fried chicken, a beloved comfort food staple, has a rich history rooted in various cultures. While its exact origins are debated, many believe it evolved from Scottish frying techniques brought to the American South, where enslaved Africans further refined the recipe with their own spices and culinary expertise. It quickly became a symbol of Southern hospitality and a celebratory dish enjoyed by families for generations.
But let’s be honest, traditional fried chicken can be a bit of a project. All that oil, the splattering, and the cleanup…it’s enough to deter even the most dedicated home cook. That’s where the air fryer swoops in to save the day! This Air Fryer Fried Chicken recipe delivers all the satisfying crunch and flavor you crave, but with significantly less oil and a fraction of the effort.
People adore fried chicken for its irresistible combination of textures: the crispy, seasoned skin giving way to tender, juicy meat. It’s a symphony of savory flavors that’s simply hard to resist. And now, with this air fryer method, you can enjoy this classic dish more often, guilt-free and hassle-free. So, grab your air fryer and let’s get cooking!

Ingredients:
- Chicken: 2 lbs bone-in, skin-on chicken pieces (thighs, drumsticks, and wings work best)
- Buttermilk Marinade:
- 2 cups buttermilk
- 2 tablespoons hot sauce (I like Frank’s RedHot)
- 1 tablespoon salt
- 1 teaspoon black pepper
- 1 teaspoon garlic powder
- 1/2 teaspoon paprika
- Dry Coating:
- 3 cups all-purpose flour
- 1/4 cup cornstarch
- 2 tablespoons paprika
- 2 tablespoons garlic powder
- 2 tablespoons onion powder
- 1 tablespoon dried thyme
- 1 tablespoon dried oregano
- 1 tablespoon salt
- 1 tablespoon black pepper
- 1 teaspoon cayenne pepper (optional, for extra heat)
- Cooking Spray: Olive oil or avocado oil cooking spray
Preparing the Chicken and Marinade
- Prepare the Chicken: Rinse the chicken pieces under cold water and pat them dry with paper towels. This helps the coating adhere better.
- Make the Buttermilk Marinade: In a large bowl, whisk together the buttermilk, hot sauce, salt, pepper, garlic powder, and paprika. Make sure everything is well combined.
- Marinate the Chicken: Place the chicken pieces in the buttermilk marinade, ensuring they are fully submerged. Cover the bowl with plastic wrap or a lid and refrigerate for at least 4 hours, or preferably overnight. The longer the chicken marinates, the more tender and flavorful it will be. I usually aim for at least 8 hours.
- Prepare the Dry Coating: While the chicken is marinating, prepare the dry coating. In a large, shallow dish (like a baking dish or a large pie plate), whisk together the flour, cornstarch, paprika, garlic powder, onion powder, thyme, oregano, salt, pepper, and cayenne pepper (if using). Make sure all the ingredients are evenly distributed. The cornstarch helps create a crispier coating.
Coating the Chicken
- Set up your Dredging Station: Remove the chicken from the refrigerator. Have the bowl of marinated chicken and the dish of dry coating ready. I like to use tongs for this process to keep my hands clean.
- Dredge the Chicken: One piece at a time, remove a chicken piece from the buttermilk marinade, letting any excess drip off. Place it in the dry coating mixture and press the flour mixture firmly onto the chicken, ensuring it is completely coated on all sides.
- Double Dredge (Optional, but Recommended): For an extra crispy coating, you can double dredge the chicken. After the first coating, dip the chicken back into the buttermilk marinade (briefly) and then back into the dry coating. Again, press the flour mixture firmly onto the chicken. This creates a thicker, crispier crust.
- Place Coated Chicken on a Rack: Place the coated chicken pieces on a wire rack. This allows air to circulate around the chicken, helping the coating to dry out slightly, which will result in a crispier final product.
Air Frying the Chicken
- Preheat the Air Fryer: Preheat your air fryer to 375°F (190°C). Preheating is crucial for even cooking and crispy results.
- Prepare the Air Fryer Basket: Lightly spray the air fryer basket with cooking spray. This prevents the chicken from sticking.
- Arrange the Chicken in the Air Fryer: Place the coated chicken pieces in the air fryer basket in a single layer, making sure they are not overcrowded. Overcrowding will steam the chicken instead of frying it, resulting in a soggy crust. You may need to cook the chicken in batches.
- Spray the Chicken with Oil: Generously spray the chicken pieces with cooking spray. This helps the chicken to brown and crisp up. Don’t be shy with the spray!
- Air Fry the Chicken: Air fry the chicken for 12-15 minutes, then flip the pieces over and spray the other side with cooking spray. Continue air frying for another 12-15 minutes, or until the chicken is cooked through and the internal temperature reaches 165°F (74°C). Use a meat thermometer to ensure the chicken is fully cooked. The exact cooking time will depend on the size and thickness of the chicken pieces and your specific air fryer.
- Check for Doneness: To check for doneness, insert a meat thermometer into the thickest part of the chicken (without touching the bone). If the internal temperature is 165°F (74°C), the chicken is cooked through. You can also cut into the chicken to check that the juices run clear.
- Repeat with Remaining Chicken: Repeat the process with the remaining chicken pieces, ensuring the air fryer basket is not overcrowded.
Tips for Extra Crispy Air Fryer Fried Chicken
- Don’t Overcrowd the Air Fryer: This is the most important tip! Overcrowding will steam the chicken instead of frying it. Cook in batches if necessary.
- Use a Wire Rack: Placing the coated chicken on a wire rack before air frying allows air to circulate around the chicken, helping the coating to dry out and crisp up.
- Spray Generously with Oil: Don’t be afraid to use cooking spray! The oil helps the chicken to brown and crisp up.
- Double Dredge: For an extra crispy coating, double dredge the chicken.
- Pat the Chicken Dry: Before marinating, pat the chicken dry with paper towels. This helps the marinade adhere better.
- Marinate for at Least 4 Hours: The longer the chicken marinates, the more tender and flavorful it will be.
- Use a Meat Thermometer: Ensure the chicken is fully cooked by using a meat thermometer. The internal temperature should reach 165°F (74°C).
- Adjust Cooking Time as Needed: The exact cooking time will depend on your specific air fryer and the size of the chicken pieces. Adjust the cooking time as needed.
- Let the Chicken Rest: After air frying, let the chicken rest for a few minutes before serving. This allows the juices to redistribute, resulting in more tender and flavorful chicken.
Serving Suggestions
Air fryer fried chicken is delicious on its own, but it’s even better with some classic sides. Here are a few of my favorite serving suggestions:
- Mashed Potatoes and Gravy: A classic combination that’s always a crowd-pleaser.
- Coleslaw: A creamy and tangy coleslaw is the perfect complement to fried chicken.
- Corn on the Cob: Sweet and juicy corn on the cob is a summertime favorite.
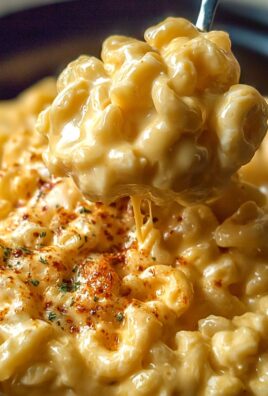
- Mac and Cheese: Creamy and cheesy mac and cheese is a comforting side dish.
- Biscuits: Flaky and buttery biscuits are perfect for soaking up the juices from the chicken.
- Green Beans: A simple side of green beans adds a touch of freshness to the meal.
Storing Leftovers
Leftover air fryer fried chicken can be stored in an airtight container in the refrigerator for up to 3-4 days. To reheat, you can use the air fryer (for the crispiest results), the oven, or the microwave. If using the air fryer, reheat at 350°F (175°C) for 5-7 minutes, or until heated through. If using the oven, reheat at 350°F (175°C) for 10-15 minutes. If using the microwave, reheat in 30-second intervals until heated through, but be aware that the chicken may not be as crispy.
Variations and Substitutions
This recipe is a great starting point, but feel free to experiment with different variations and substitutions to suit your taste. Here are a few ideas:
- Spice Level: Adjust the amount of cayenne pepper in the dry coating to control the spice level. You can also add other spices like chili powder or smoked paprika.
- Herbs: Experiment with different herbs in the dry coating, such as rosemary, sage, or marjoram.
- Flour: You can use gluten-free flour blend instead of all-purpose flour for a gluten-free version.
- Buttermilk Substitute: If you don’t have buttermilk, you can make a substitute by adding 1 tablespoon of lemon juice or white vinegar to
Conclusion:
This Air Fryer Fried Chicken recipe isn’t just another way to cook chicken; it’s a game-changer. It delivers that satisfyingly crispy, juicy fried chicken experience we all crave, but without the guilt and mess of deep-frying. Seriously, who wouldn’t want that? From the perfectly seasoned coating to the tender, flavorful meat, every bite is a testament to how amazing air frying can be. I know, I know, you might be skeptical. Fried chicken without the frying? But trust me on this one. The air fryer works its magic, circulating hot air to create a crispy exterior that rivals traditional methods, all while keeping the chicken incredibly moist inside.
Why This Recipe Is a Must-Try
This recipe is a must-try because it’s quick, easy, and healthier than traditional fried chicken. You’ll save time on cleanup, reduce your oil consumption, and still enjoy that classic fried chicken flavor. Plus, it’s incredibly versatile!
Serving Suggestions and Variations
Now, let’s talk about serving suggestions. Of course, classic sides like creamy mashed potatoes, coleslaw, and corn on the cob are always a winning combination. But don’t be afraid to get creative! Try pairing your Air Fryer Fried Chicken with a refreshing watermelon salad, some spicy mac and cheese, or even a simple green salad with a tangy vinaigrette.
And if you’re feeling adventurous, why not experiment with different variations? For a spicier kick, add a pinch of cayenne pepper or a dash of hot sauce to the breading mixture. Or, for a sweeter flavor profile, try incorporating a touch of brown sugar or maple syrup into the marinade. You could even try using different herbs and spices to create your own signature blend. Think rosemary and thyme for a more savory flavor, or paprika and garlic powder for a classic fried chicken taste.
Another fun variation is to use different cuts of chicken. While this recipe works perfectly with bone-in, skin-on chicken pieces, you can also use boneless, skinless chicken breasts or thighs for a quicker and easier meal. Just be sure to adjust the cooking time accordingly. And if you’re looking for a fun appetizer, try cutting the chicken into bite-sized pieces and serving them with your favorite dipping sauces. Honey mustard, barbecue sauce, and ranch dressing are always crowd-pleasers.
Your Turn to Fry! (Air Fry, That Is!)
I’m so excited for you to try this recipe and experience the magic of Air Fryer Fried Chicken for yourself. It’s a guaranteed crowd-pleaser that’s perfect for weeknight dinners, weekend gatherings, or any time you’re craving that classic fried chicken flavor without the fuss.
So, what are you waiting for? Gather your ingredients, preheat your air fryer, and get ready to enjoy the best fried chicken you’ve ever made. And don’t forget to share your experience! I’d love to hear what you think of the recipe, what variations you tried, and what sides you paired it with. Share your photos and comments on social media using [Your Hashtag Here], and let’s spread the word about this amazing air fryer recipe! Happy cooking!
Air Fryer Fried Chicken: The Crispiest Recipe You'll Ever Make
Crispy and juicy air fryer fried chicken with a flavorful buttermilk marinade and perfectly seasoned coating. A healthier, easier take on classic comfort food!
Ingredients
- 2 lbs bone-in, skin-on chicken pieces (thighs, drumsticks, and wings work best)
- 2 cups buttermilk
- 2 tablespoons hot sauce (I like Frank’s RedHot)
- 1 tablespoon salt
- 1 teaspoon black pepper
- 1 teaspoon garlic powder
- 1/2 teaspoon paprika
- 3 cups all-purpose flour
- 1/4 cup cornstarch
- 2 tablespoons paprika
- 2 tablespoons garlic powder
- 2 tablespoons onion powder
- 1 tablespoon dried thyme
- 1 tablespoon dried oregano
- 1 tablespoon salt
- 1 tablespoon black pepper
- 1 teaspoon cayenne pepper (optional, for extra heat)
- Olive oil or avocado oil cooking spray
Instructions
- Rinse the chicken pieces under cold water and pat them dry with paper towels.
- In a large bowl, whisk together the buttermilk, hot sauce, salt, pepper, garlic powder, and paprika.
- Place the chicken pieces in the buttermilk marinade, ensuring they are fully submerged. Cover and refrigerate for at least 4 hours, or preferably overnight.
- In a large, shallow dish, whisk together the flour, cornstarch, paprika, garlic powder, onion powder, thyme, oregano, salt, pepper, and cayenne pepper (if using).
- Remove the chicken from the refrigerator. Have the bowl of marinated chicken and the dish of dry coating ready.
- One piece at a time, remove a chicken piece from the buttermilk marinade, letting any excess drip off. Place it in the dry coating mixture and press the flour mixture firmly onto the chicken, ensuring it is completely coated on all sides.
- For an extra crispy coating, dip the chicken back into the buttermilk marinade (briefly) and then back into the dry coating. Press the flour mixture firmly onto the chicken.
- Place the coated chicken pieces on a wire rack.
- Preheat your air fryer to 375°F (190°C).
- Lightly spray the air fryer basket with cooking spray.
- Place the coated chicken pieces in the air fryer basket in a single layer, making sure they are not overcrowded. You may need to cook the chicken in batches.
- Generously spray the chicken pieces with cooking spray.
- Air fry the chicken for 12-15 minutes, then flip the pieces over and spray the other side with cooking spray. Continue air frying for another 12-15 minutes, or until the chicken is cooked through and the internal temperature reaches 165°F (74°C).
- Insert a meat thermometer into the thickest part of the chicken (without touching the bone). If the internal temperature is 165°F (74°C), the chicken is cooked through.
- Repeat the process with the remaining chicken pieces, ensuring the air fryer basket is not overcrowded.
- After air frying, let the chicken rest for a few minutes before serving.
Notes
- Don’t overcrowd the air fryer. Cook in batches if necessary.
- Placing the coated chicken on a wire rack before air frying allows air to circulate around the chicken, helping the coating to dry out and crisp up.
- Don’t be afraid to use cooking spray! The oil helps the chicken to brown and crisp up.
- For an extra crispy coating, double dredge the chicken.
- Pat the chicken dry before marinating.
- Marinate for at least 4 hours.
- Use a meat thermometer to ensure the chicken is fully cooked.
- Adjust cooking time as needed.
Leave a Comment