
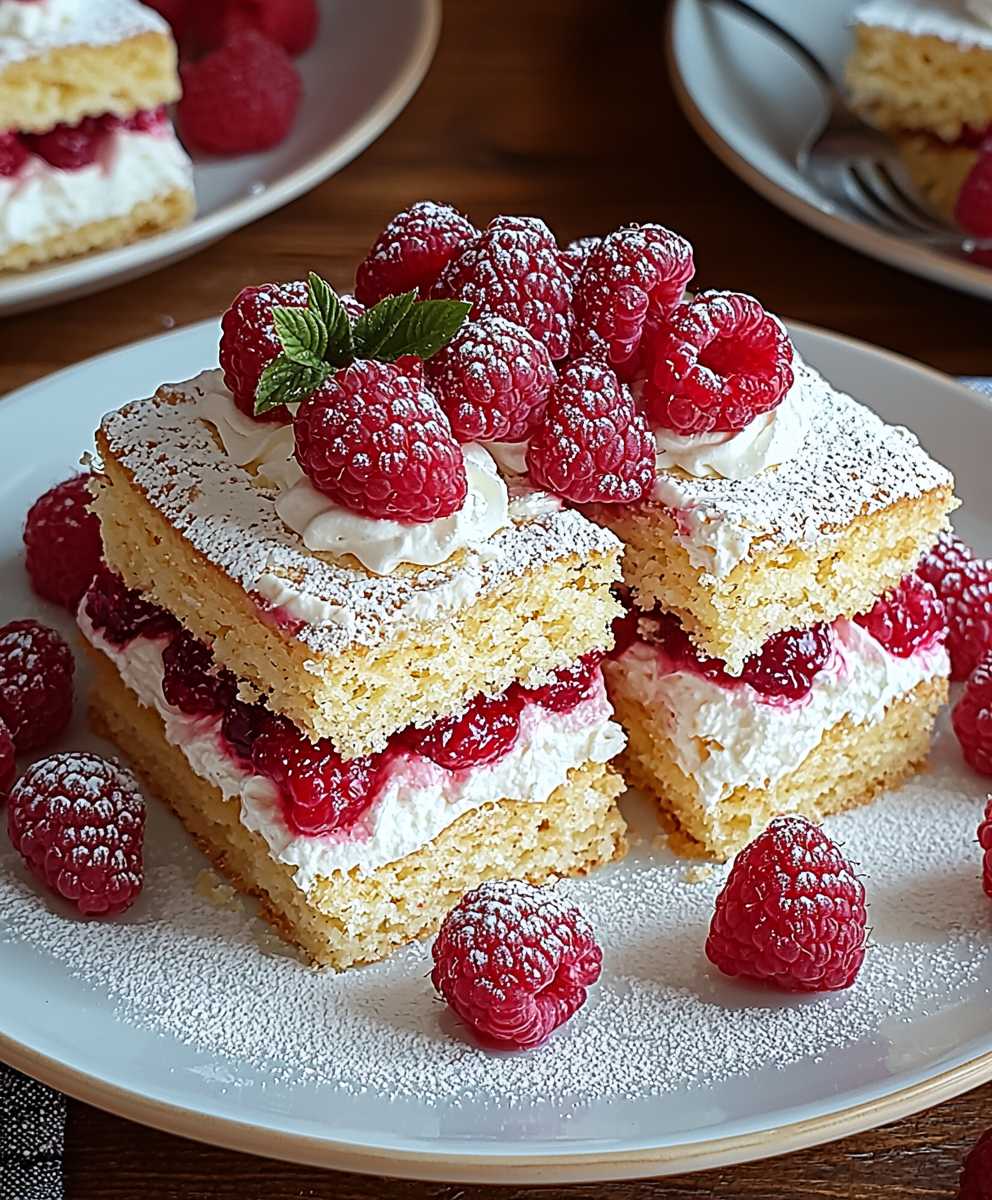
Raspberry pudding biscuit cake: just the name conjures up images of delightful, layered goodness, doesn’t it? Imagine sinking your fork into a symphony of textures the slight crispness of buttery biscuits, the creamy coolness of vanilla pudding, and the burst of sweet-tart raspberries dancing on your tongue. This isn’t just a dessert; it’s a nostalgic trip back to simpler times, a celebration of easy elegance, and a guaranteed crowd-pleaser.
While the exact origins of this no-bake wonder are a bit hazy, similar layered desserts have been gracing tables for generations. They represent a resourceful approach to baking, often utilizing readily available ingredients and requiring minimal effort. Think of it as the ultimate “potluck princess” dessert impressive in presentation, yet incredibly simple to assemble. Its a testament to the fact that you don’t need fancy equipment or years of culinary training to create something truly special.
People adore raspberry pudding biscuit cake for its sheer simplicity and satisfying flavor profile. The combination of textures is irresistible, and the raspberry adds a vibrant freshness that cuts through the richness of the pudding and biscuits. It’s also incredibly customizable! You can swap out the raspberries for other berries, use different flavored puddings, or even add a layer of whipped cream for extra indulgence. But trust me, once you try this classic combination, you’ll understand why it’s a timeless favorite. So, are you ready to create a dessert that’s both beautiful and unbelievably easy? Let’s get started!

Ingredients:
- For the Biscuit Base:
- 300g Digestive Biscuits (or Graham Crackers)
- 150g Unsalted Butter, melted
- 50g Granulated Sugar
- 1/4 teaspoon Salt
- For the Raspberry Pudding:
- 750ml Whole Milk
- 150g Granulated Sugar
- 60g Cornstarch
- 1/4 teaspoon Salt
- 2 Large Egg Yolks
- 1 teaspoon Vanilla Extract
- 300g Fresh Raspberries, divided (reserve some for garnish)
- For the Whipped Cream Topping:
- 300ml Heavy Cream, cold
- 30g Powdered Sugar
- 1/2 teaspoon Vanilla Extract
- Optional Garnish:
- Fresh Raspberries
- Mint Leaves
- Chocolate Shavings
Preparing the Biscuit Base:
- Crush the Biscuits: In a large zip-top bag, place the digestive biscuits. Seal the bag and use a rolling pin to crush the biscuits into fine crumbs. You can also use a food processor for this step, pulsing until you achieve a sandy texture.
- Combine with Butter and Sugar: In a medium bowl, combine the crushed biscuit crumbs, melted butter, granulated sugar, and salt. Mix well until all the crumbs are evenly moistened. The mixture should resemble wet sand.
- Press into the Pan: Press the biscuit mixture firmly into the bottom of a 9-inch springform pan or a similar sized baking dish. Use the bottom of a measuring cup or your fingers to create an even and compact base. This is crucial for a sturdy cake!
- Chill the Base: Place the pan with the biscuit base in the refrigerator for at least 30 minutes. This will help the base to firm up and prevent it from crumbling when you add the pudding. You can also bake the base at 350°F (175°C) for 8-10 minutes for a firmer crust, but chilling works just fine!
Making the Raspberry Pudding:
- Prepare the Milk Mixture: In a medium saucepan, whisk together the milk, granulated sugar, cornstarch, and salt until the cornstarch is fully dissolved. This is important to prevent lumps in your pudding.
- Add Egg Yolks: In a separate small bowl, whisk the egg yolks lightly. Temper the egg yolks by slowly drizzling about 1/4 cup of the warm milk mixture into the egg yolks while whisking constantly. This prevents the eggs from scrambling when added to the hot milk.
- Combine and Cook: Pour the tempered egg yolk mixture into the saucepan with the remaining milk mixture. Place the saucepan over medium heat and cook, stirring constantly with a whisk, until the mixture thickens and comes to a simmer. This usually takes about 5-7 minutes. Continue to cook for another minute, stirring constantly, to ensure the cornstarch is fully cooked and the pudding is thick and smooth.
- Remove from Heat and Add Vanilla: Remove the saucepan from the heat and stir in the vanilla extract.
- Incorporate Raspberries: Gently fold in about two-thirds (200g) of the fresh raspberries into the warm pudding. Be careful not to overmix, as you want to keep some of the raspberries intact.
- Cool Slightly: Let the pudding cool slightly for about 5-10 minutes before pouring it over the biscuit base. This will prevent the base from becoming soggy.
Assembling the Cake:
- Pour Pudding over Base: Carefully pour the warm raspberry pudding over the chilled biscuit base, spreading it evenly with a spatula.
- Chill the Cake: Cover the cake with plastic wrap, pressing it gently onto the surface of the pudding to prevent a skin from forming. Refrigerate the cake for at least 4 hours, or preferably overnight, to allow the pudding to set completely.
Preparing the Whipped Cream Topping:
- Chill Bowl and Whisk: Place the mixing bowl and whisk attachment (or beaters) in the freezer for about 15-20 minutes before making the whipped cream. This helps the cream whip up faster and hold its shape better.
- Whip the Cream: Pour the cold heavy cream into the chilled bowl. Beat on medium speed until soft peaks begin to form.
- Add Sugar and Vanilla: Gradually add the powdered sugar and vanilla extract to the cream. Continue to beat on medium-high speed until stiff peaks form. Be careful not to overwhip, as this can turn the cream into butter.
Final Touches and Serving:
- Remove from Pan: Once the cake is fully chilled and the pudding is set, carefully remove it from the springform pan. If using a baking dish, you can serve it directly from the dish.
- Add Whipped Cream: Spread the whipped cream evenly over the top of the raspberry pudding cake. You can use a spatula or a piping bag for a more decorative finish.
- Garnish (Optional): Garnish the cake with the remaining fresh raspberries, mint leaves, and chocolate shavings, if desired. Get creative and make it look beautiful!
- Serve and Enjoy: Slice the cake and serve chilled. This raspberry pudding biscuit cake is best enjoyed within a few days of making it.
Tips for Success:
- Use High-Quality Ingredients: The better the ingredients, the better the final product. Especially for the raspberries and heavy cream.
- Don’t Overmix the Pudding: Overmixing after adding the raspberries can cause them to break down and make the pudding look muddy.
- Chill Thoroughly: Chilling the cake completely is essential for the pudding to set properly and for the flavors to meld together.
- Adjust Sweetness to Taste: If you prefer a less sweet cake, you can reduce the amount of sugar in the pudding or whipped cream.
- Make Ahead: The biscuit base and raspberry pudding can be made a day in advance. Store them separately in the refrigerator until ready to assemble.
Variations:
- Different Berries: You can substitute the raspberries with other berries, such as blueberries, strawberries, or blackberries.
- Chocolate Biscuit Base: Use chocolate digestive biscuits for a chocolatey twist.
- Lemon Pudding: Replace the raspberries with lemon zest and juice for a refreshing lemon pudding cake.
- Add a Layer of Jam: Spread a thin layer of raspberry jam over the biscuit base before adding the pudding for an extra burst of raspberry flavor.
- Individual Servings: Make individual cakes by using small ramekins or glasses.
Troubleshooting:
- Pudding is too thin: If the pudding doesn’t thicken enough, you may need to add a bit more cornstarch. Mix a tablespoon of cornstarch with a tablespoon of cold water and whisk it into the pudding while it’s simmering.
- Biscuit base is too crumbly: If the biscuit base is too crumbly, you may need to add a bit more melted butter.
- Whipped cream is too runny: Make sure your heavy cream and bowl are very cold. You can also add a stabilizer, such as cream of tartar, to help the whipped cream hold its shape.
Conclusion:
And there you have it! This Raspberry Pudding Biscuit Cake is truly a must-try dessert. It’s the perfect balance of creamy, fruity, and subtly sweet, all nestled between layers of delightfully crisp biscuits. The simplicity of the recipe belies the incredible flavor and texture you’ll experience. Forget spending hours in the kitchen; this dessert comes together quickly, making it ideal for weeknight cravings or last-minute gatherings. Why is it a must-try? Because it’s ridiculously easy, incredibly delicious, and guaranteed to impress. The combination of the creamy raspberry pudding, the slightly softened biscuits, and the optional toppings creates a symphony of flavors and textures that will have everyone asking for seconds. It’s a crowd-pleaser, a comfort food, and a showstopper all rolled into one delightful package. Plus, who can resist the vibrant pink hue of the raspberry pudding? It’s visually appealing and tastes even better than it looks! But the best part? This recipe is incredibly versatile! Feel free to experiment with different variations to suit your taste. For a richer flavor, try using chocolate biscuits instead of plain ones. Or, if you’re feeling adventurous, add a layer of fresh raspberries between the biscuit layers for an extra burst of fruity goodness.Serving Suggestions and Variations:
* Classic Serving: Serve chilled, straight from the refrigerator. A dollop of whipped cream or a scoop of vanilla ice cream adds a touch of elegance. * Chocolate Lover’s Dream: Use chocolate biscuits and drizzle with melted dark chocolate. * Berry Bonanza: Add a mix of fresh berries (strawberries, blueberries, blackberries) for a more complex flavor profile. * Tropical Twist: Use coconut biscuits and add a layer of shredded coconut between the biscuit layers. * Coffee Infusion: Dip the biscuits in coffee before layering for a mocha-inspired treat. * Adult Version: Add a splash of raspberry liqueur to the pudding for an extra kick. Don’t be afraid to get creative and personalize this raspberry pudding biscuit cake to your liking. The possibilities are endless! I truly believe that this recipe will become a staple in your dessert repertoire. It’s the kind of recipe that you’ll turn to time and time again, whether you’re looking for a quick and easy treat or a show-stopping dessert for a special occasion. It’s a guaranteed crowd-pleaser, and I can’t wait for you to experience the joy of making and sharing it. So, what are you waiting for? Gather your ingredients, preheat your oven (just kidding, no baking required!), and get ready to create a dessert masterpiece. I’m confident that you’ll love this Raspberry Pudding Biscuit Cake as much as I do. And now, for the most important part: I want to hear about your experience! Did you try the recipe? Did you make any variations? What did your family and friends think? Share your photos, comments, and suggestions in the comments section below. I’m eager to see your creations and learn from your experiences. Let’s build a community of Raspberry Pudding Biscuit Cake enthusiasts! Happy baking (or rather, assembling)! I hope you enjoy this delightful treat as much as I do! Print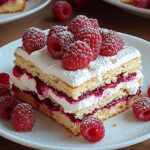
Raspberry Pudding Biscuit Cake: The Ultimate Dessert Recipe
- Total Time: 285 minutes
- Yield: 8–10 servings 1x
Description
Buttery biscuit base topped with creamy raspberry pudding and light whipped cream. A refreshing and delightful dessert!
Ingredients
- 300g Digestive Biscuits (or Graham Crackers)
- 150g Unsalted Butter, melted
- 50g Granulated Sugar
- 1/4 teaspoon Salt
- 750ml Whole Milk
- 150g Granulated Sugar
- 60g Cornstarch
- 1/4 teaspoon Salt
- 2 Large Egg Yolks
- 1 teaspoon Vanilla Extract
- 300g Fresh Raspberries, divided (reserve some for garnish)
- 300ml Heavy Cream, cold
- 30g Powdered Sugar
- 1/2 teaspoon Vanilla Extract
- Fresh Raspberries
- Mint Leaves
- Chocolate Shavings
Instructions
- Place the digestive biscuits in a large zip-top bag. Seal the bag and use a rolling pin to crush the biscuits into fine crumbs. Alternatively, use a food processor, pulsing until you achieve a sandy texture.
- In a medium bowl, combine the crushed biscuit crumbs, melted butter, granulated sugar, and salt. Mix well until all the crumbs are evenly moistened. The mixture should resemble wet sand.
- Press the biscuit mixture firmly into the bottom of a 9-inch springform pan or a similar sized baking dish. Use the bottom of a measuring cup or your fingers to create an even and compact base.
- Place the pan with the biscuit base in the refrigerator for at least 30 minutes. You can also bake the base at 350°F (175°C) for 8-10 minutes for a firmer crust, but chilling works just fine!
- In a medium saucepan, whisk together the milk, granulated sugar, cornstarch, and salt until the cornstarch is fully dissolved.
- In a separate small bowl, whisk the egg yolks lightly. Temper the egg yolks by slowly drizzling about 1/4 cup of the warm milk mixture into the egg yolks while whisking constantly.
- Pour the tempered egg yolk mixture into the saucepan with the remaining milk mixture. Place the saucepan over medium heat and cook, stirring constantly with a whisk, until the mixture thickens and comes to a simmer (about 5-7 minutes). Continue to cook for another minute, stirring constantly, to ensure the cornstarch is fully cooked and the pudding is thick and smooth.
- Remove the saucepan from the heat and stir in the vanilla extract.
- Gently fold in about two-thirds (200g) of the fresh raspberries into the warm pudding. Be careful not to overmix.
- Let the pudding cool slightly for about 5-10 minutes before pouring it over the biscuit base.
- Carefully pour the warm raspberry pudding over the chilled biscuit base, spreading it evenly with a spatula.
- Cover the cake with plastic wrap, pressing it gently onto the surface of the pudding to prevent a skin from forming. Refrigerate the cake for at least 4 hours, or preferably overnight, to allow the pudding to set completely.
- Place the mixing bowl and whisk attachment (or beaters) in the freezer for about 15-20 minutes before making the whipped cream.
- Pour the cold heavy cream into the chilled bowl. Beat on medium speed until soft peaks begin to form.
- Gradually add the powdered sugar and vanilla extract to the cream. Continue to beat on medium-high speed until stiff peaks form. Be careful not to overwhip.
- Once the cake is fully chilled and the pudding is set, carefully remove it from the springform pan.
- Spread the whipped cream evenly over the top of the raspberry pudding cake.
- Garnish the cake with the remaining fresh raspberries, mint leaves, and chocolate shavings, if desired.
- Slice the cake and serve chilled.
Notes
- Use high-quality ingredients for the best flavor.
- Don’t overmix the pudding after adding the raspberries.
- Chill the cake thoroughly for the pudding to set properly.
- Adjust sweetness to taste.
- The biscuit base and raspberry pudding can be made a day in advance. Store them separately in the refrigerator until ready to assemble.
- Prep Time: 30 minutes
- Cook Time: 15 minutes
Leave a Comment