
Nutella brownies dessert is a delightful treat that combines the rich, creamy goodness of Nutella with the fudgy texture of brownies, creating a dessert that is simply irresistible. As a chocolate lover, I can confidently say that these brownies are a game-changer in the world of sweets. Originating from the classic brownie recipe, the addition of Nutella elevates this dessert to new heights, making it a favorite among both kids and adults alike.
People adore Nutella brownies dessert not only for their decadent taste but also for their convenience. With just a few simple ingredients, you can whip up a batch in no time, making them perfect for last-minute gatherings or a cozy night in. The combination of gooey chocolate and the unique hazelnut flavor of Nutella creates a symphony of taste and texture that leaves everyone craving more. Trust me, once you try these Nutella brownies, they will quickly become a staple in your dessert repertoire!

Ingredients:
- 1 cup (240g) Nutella
- 2 large eggs
- 1/2 cup (65g) all-purpose flour
- 1/4 teaspoon salt
- 1/4 teaspoon baking powder
- 1/2 teaspoon vanilla extract
- 1/2 cup (90g) chocolate chips (optional)
- Powdered sugar for dusting (optional)
Preparing the Batter
1. **Preheat the Oven**: Start by preheating your oven to 350°F (175°C). This ensures that your brownies will bake evenly and come out perfectly gooey. 2. **Prepare the Baking Dish**: Grease an 8×8 inch (20×20 cm) square baking dish with butter or non-stick spray. You can also line it with parchment paper for easier removal later. If you choose to use parchment paper, leave some overhang on the sides to make lifting the brownies out easier. 3. **Mix the Nutella and Eggs**: In a large mixing bowl, combine 1 cup of Nutella and 2 large eggs. Using a whisk or an electric mixer, beat the mixture until its smooth and well combined. This should take about 1-2 minutes. The Nutella will become a bit lighter in color and fluffier. 4. **Add the Dry Ingredients**: Next, sift in 1/2 cup of all-purpose flour, 1/4 teaspoon of salt, and 1/4 teaspoon of baking powder. Gently fold the dry ingredients into the Nutella mixture using a spatula or wooden spoon. Be careful not to overmix; you want to combine everything just until there are no dry streaks left. 5. **Incorporate Vanilla**: Add 1/2 teaspoon of vanilla extract to the batter and fold it in gently. This will enhance the flavor of your brownies and give them a lovely aroma. 6. **Optional Chocolate Chips**: If youre a chocolate lover like me, now is the time to fold in 1/2 cup of chocolate chips. This step is optional, but it adds an extra layer of chocolatey goodness to your brownies.Cooking Process
7. **Pour the Batter**: Once your batter is ready, pour it into the prepared baking dish. Use a spatula to spread it evenly across the dish, making sure it reaches the corners. 8. **Bake the Brownies**: Place the baking dish in the preheated oven and bake for 20-25 minutes. Keep an eye on them; you want the edges to be set while the center remains slightly gooey. A toothpick inserted into the center should come out with a few moist crumbs, not completely clean. 9. **Cool the Brownies**: After baking, remove the brownies from the oven and let them cool in the baking dish for about 10-15 minutes. This cooling period is crucial as it allows the brownies to set up a bit more. 10. **Transfer to a Wire Rack**: If you used parchment paper, carefully lift the brownies out of the dish using the overhang. If not, you can simply let them cool in the dish. Place them on a wire rack to cool completely. This will help prevent them from becoming soggy on the bottom.Assembling and Serving
11. **Cut the Brownies**: Once the brownies are completely cool, its time to cut them into squares. I usually cut them into 16 squares, but you can make them larger or smaller depending on your preference. Use a sharp knife for clean cuts, and wipe the knife with a damp cloth between cuts to keep the edges neat. 12. **Dust with Powdered Sugar**: For a touch of elegance, you can dust the tops of the brownies with powdered sugar. This step is optional, but it adds a nice visual contrast and a hint of sweetness. 13. **Serve and Enjoy**: Now that your Nutella brownies are ready, its time to dig in! Theyre delicious on their own, but you can also serve them with a scoop of vanilla ice cream or a dollop of whipped cream for an extra indulgent treat.Storage Tips
14. **Storing Leftovers**: If you have any brownies left (which is rare in my house!), store them in an airtight container at room temperature for up to 3 days. You can also refrigerate them for up to a week, but I recommend letting them come to room temperature before serving for the best texture. 15. **Freezing Brownies**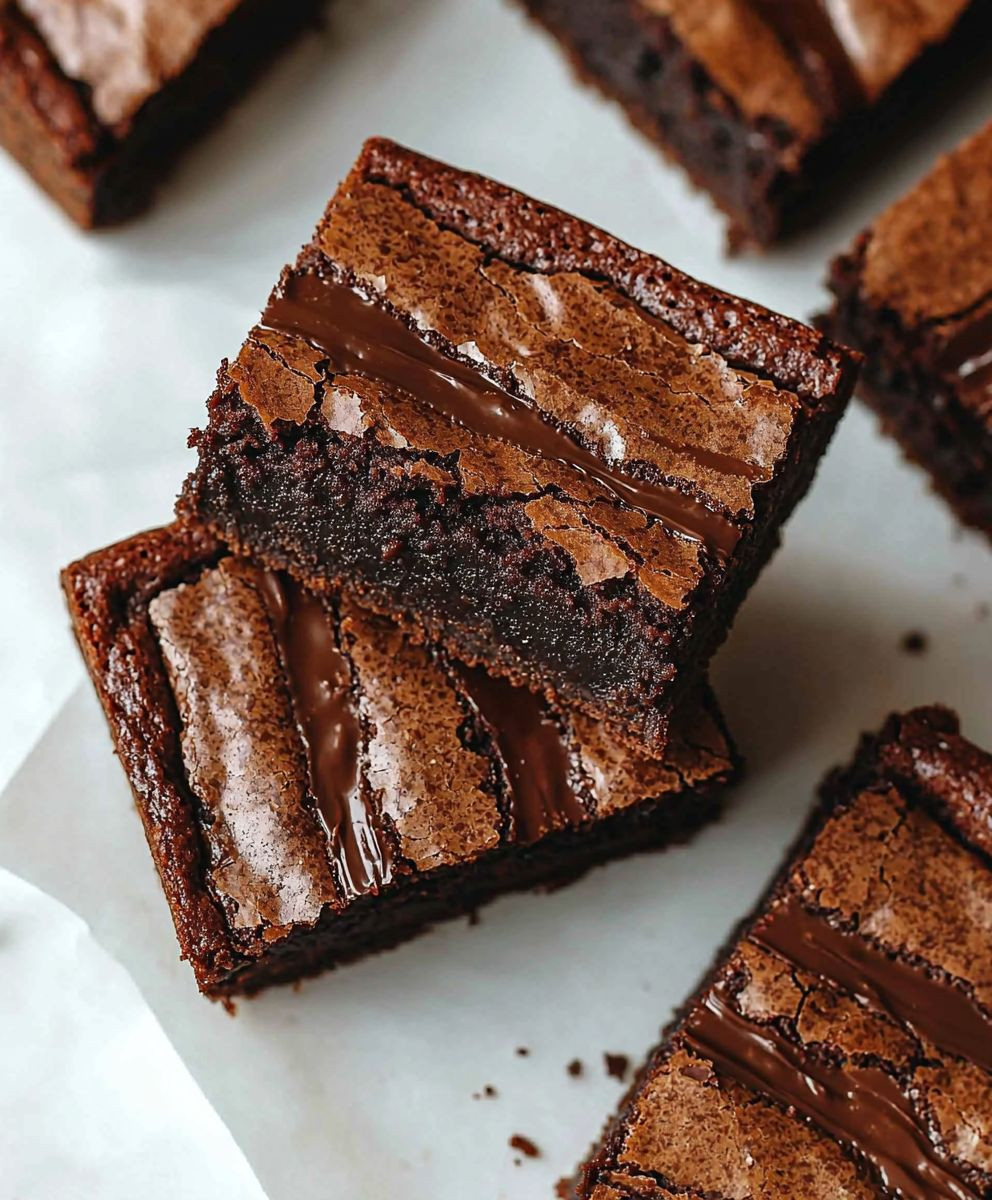
Conclusion:
In summary, these Nutella brownies are an absolute must-try for anyone who loves a rich, chocolatey dessert thats incredibly easy to whip up. The combination of gooey Nutella and fudgy brownie texture creates a heavenly treat that will have your taste buds dancing with joy. Whether youre serving them warm with a scoop of vanilla ice cream, dusting them with powdered sugar for a touch of elegance, or even adding a sprinkle of sea salt for that perfect sweet-salty balance, these brownies are versatile enough to suit any occasion. Feel free to get creative with variations too! You can mix in some chopped nuts for added crunch, swirl in some peanut butter for a delightful twist, or even throw in some chocolate chips for an extra chocolatey experience. The possibilities are endless, and I encourage you to make this recipe your own. I cant wait for you to try these Nutella brownies! Once you do, Id love to hear about your experience. Share your thoughts, any variations you tried, or even a picture of your delicious creation. Lets spread the joy of baking together! Happy baking! Print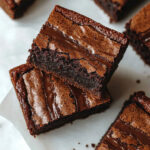
Nutella Brownies Dessert: The Ultimate Indulgence for Chocolate Lovers
- Total Time: 35 minutes
- Yield: 16 brownies 1x
Description
These rich and fudgy Nutella brownies are a quick and easy treat made with just a few simple ingredients. Perfect for any occasion, they offer a delightful chocolate flavor and can be customized with chocolate chips or nuts. Enjoy them warm with ice cream or whipped cream for an extra special dessert!
Ingredients
- 1 cup (240g) Nutella
- 2 large eggs
- 1/2 cup (65g) all-purpose flour
- 1/4 teaspoon salt
- 1/4 teaspoon baking powder
- 1/2 cup (90g) chocolate chips (optional)
- 1/4 cup (60ml) vegetable oil (optional, for extra fudginess)
- Powdered sugar for dusting (optional)
Instructions
- Preheat your oven to 350°F (175°C).
- In a medium mixing bowl, scoop out 1 cup of Nutella. If desired, soften it in the microwave for easier mixing.
- If using, add 1/4 cup of vegetable oil for extra fudginess.
- Crack in 2 large eggs (preferably at room temperature) and mix with a whisk or hand mixer until smooth.
- In a separate bowl, combine 1/2 cup of all-purpose flour, 1/4 teaspoon of salt, and 1/4 teaspoon of baking powder.
- Gradually add the dry ingredients to the wet mixture, stirring gently until just combined. Avoid overmixing.
- If desired, fold in 1/2 cup of chocolate chips for added richness.
- Line an 8×8 inch (20×20 cm) square baking pan with parchment paper or grease it with butter or cooking spray.
- Pour the brownie batter into the prepared pan, spreading it evenly.
- Bake in the preheated oven for 20-25 minutes, or until the edges are set and a toothpick inserted in the center comes out with a few moist crumbs.
- Allow the brownies to cool in the pan for about 10-15 minutes.
- Carefully lift the brownies out of the pan using the parchment paper. If not using parchment, run a knife around the edges and flip them out onto a cutting board.
- Cut into squares (about 2 inches each) with a sharp knife.
- Optionally, dust the tops with powdered sugar for a decorative touch.
- Serve warm with a scoop of vanilla ice cream or a dollop of whipped cream for a delightful treat!
- If there are any leftovers, store them in an airtight container at room temperature for up to 3 days or refrigerate for up to a week.
Notes
- For a richer flavor, consider using high-quality chocolate chips.
- These brownies can be customized with nuts or other mix-ins if desired.
- Prep Time: 10 minutes
- Cook Time: 25 minutes
Leave a Comment